TUTORIAL: Add an SSL certificate in PBXware

Use a Let's Encrypt certificate
This step is the most frequently used, notably for its ease of execution. Let's Encrypt is a free, automated, and open certificate authority, used to configure an HTTPS server and have it automatically obtain a trusted certificate, without any human intervention (for more information: https://letsencrypt.org/). This means that you will only need to install the certificate once, and it will be automatically renewed when it is about to expire. When the SSL certificate is about to expire, PBXware and the Let's encrypt service will automatically renew the certificate every 90 days without any action needed. You must mandatorilyconnect to the administration interface (:81) with the domain name connected to your PBXware, not to a public IP address, for example.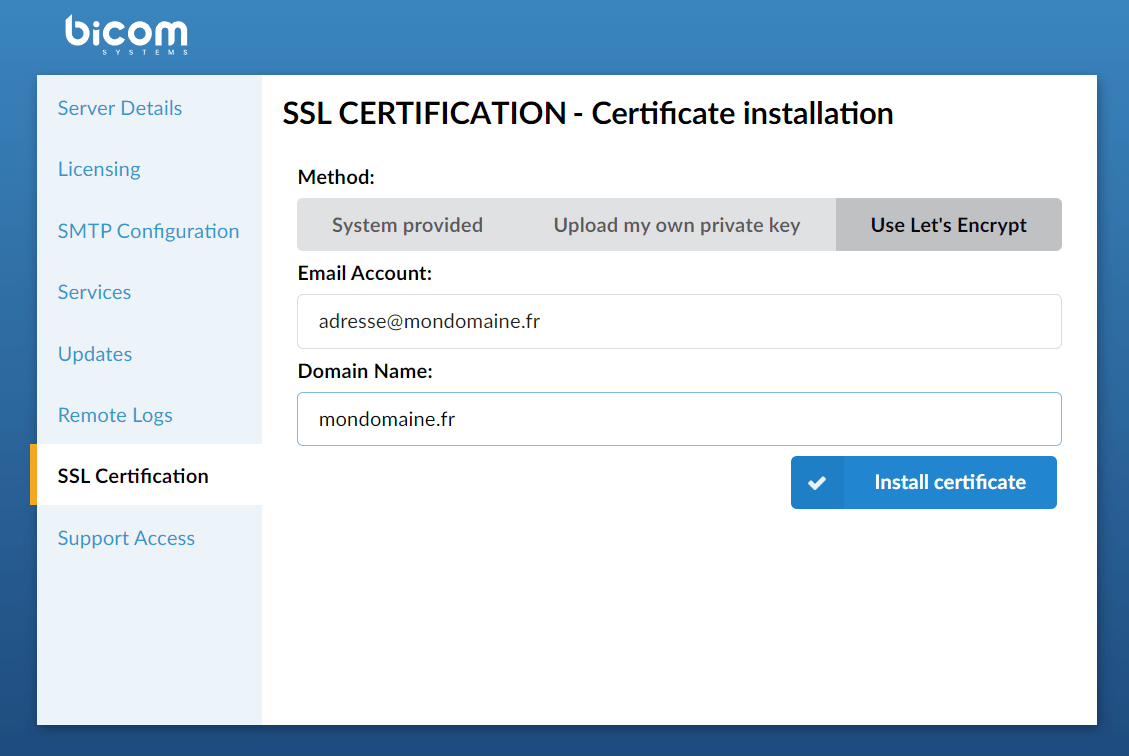
Import your own SSL certificate
It is possible to create and import your own certificate, or to use Let's Encrypt, a free certificate authority.
Access your configuration wizard [IP_ADDRESS]:81 or mypbx.com:81
Example: http://212.86.114.12:81
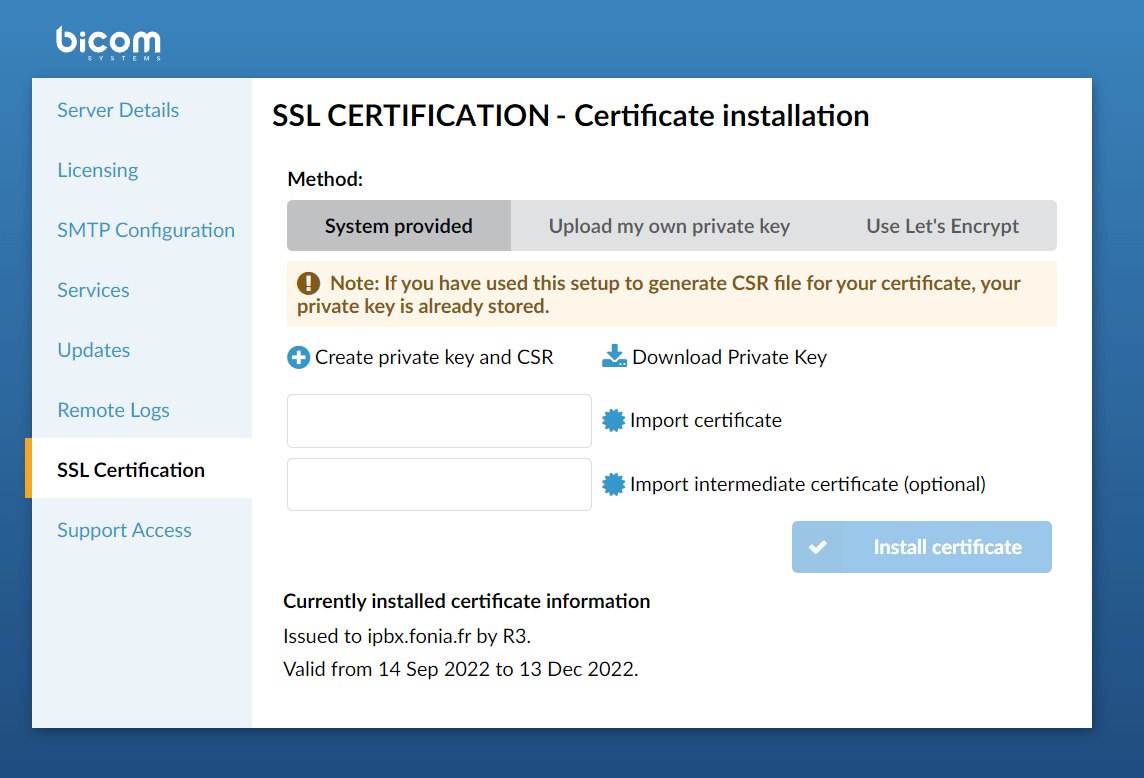
- Navigate to the SSL certification step in the configuration wizard.
- Choose the installation method:
- select System provided in order to create or download the CSR file to use to obtain an SSL certificate (see Generate the private key and the CSR).
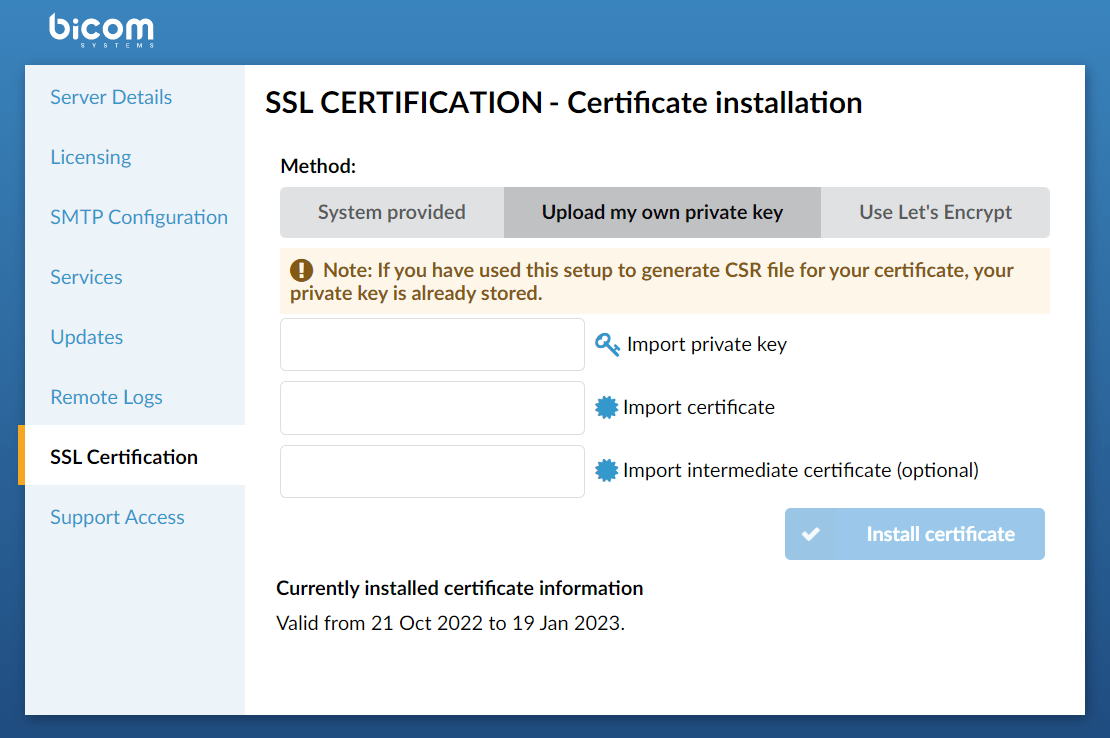
- select Upload my own private key to use a private key generated elsewhere.
- Import the private key (if it was not created by the installation wizard) and the certificate files.
- Import the intermediate certificate file (optional) if it is provided by the CA. If uploaded, it will be appended to the certificate file and used as a single certificate.
- All files must be < 50kB; an alert should appear if they are too large.
The private key and the certificates must match. - Begin the certificate installation.
Generate the private key and the CSR
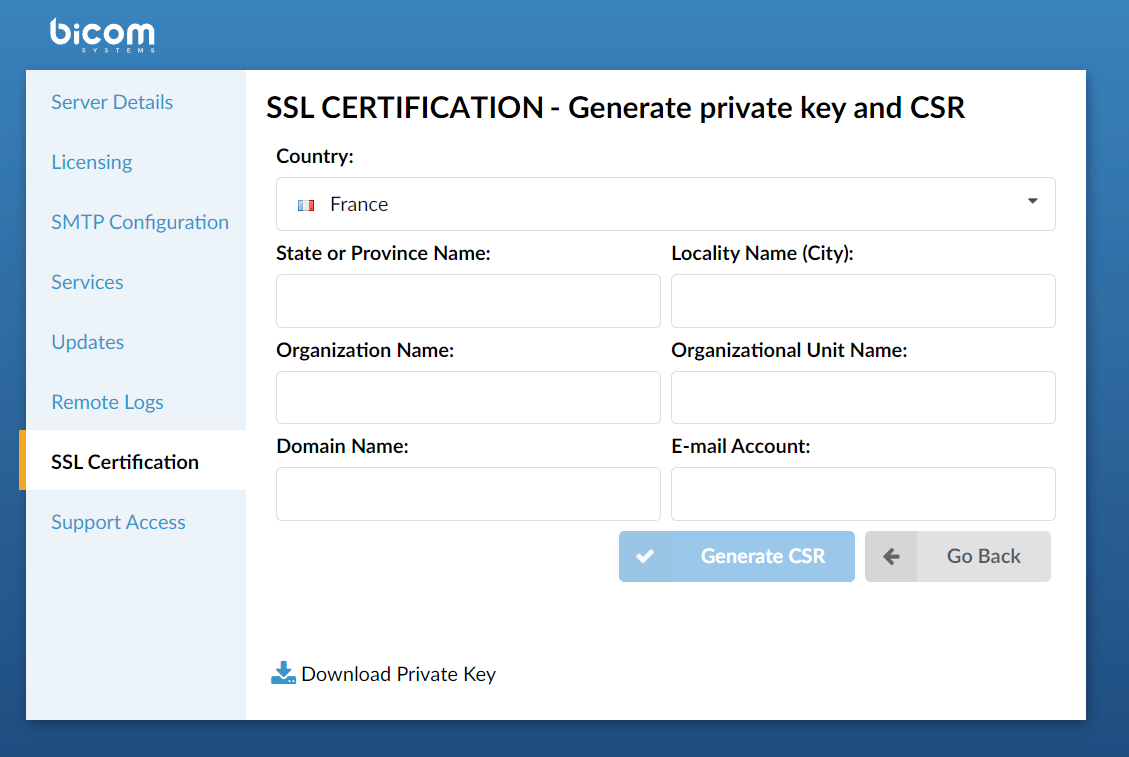
- Go to the page Generate private key and CSR by choosing the method System provided on the first page and by following the link “Create a private key and a CSR”.
- Provide the information about the party for which the certificate will be issued:
- All the fields are required
- The button Generate CSR must remain disabled until all fields are filled in.
- The country will be pre-filled based on the user’s time zone, if it is set in the /etc/localtime file.
- Submit your information by clicking the button Generate CSR – note that if a CSR file already exists, it will be overwritten, as will the stored private key.
- Check whether the private key and CSR files are created in /opt/httpd/etc/ssl_temp/ (ssl_cert.csr, ssl_cert.key).
- Copy the CSR output or download a CSR file.
- Use the created CSR to generate and sign the SSL certificate.
- Return to the first page to install your certificate.
I already have a private key
If you already have a private key, you can import it in the "Upload my own private key" section, then you can import your certificate in .csr or .crt format.