



TUTORIAL: Configure an SMTP on PBXware

Configuring an SMTP allows sending emails from PBXware. These essential emails can include extension access details, missed voicemail emails, meeting invitations, and more.
In version 7 of PBXware, the Oauth option was added for Google and Microsoft 365 mail servers, and the SMTP configuration page was updated accordingly.
Although users can still use the basic SMTP configuration to manually configure the SMTP connection of Gmail or Microsoft, the Oauth option has been added for Google and Microsoft mail servers.
The first step is to select one of the three available authentication types:
– Basic for a custom SMTP configuration
– Google for use with Google OAuth
– Microsoft for use with Office365 OAuth
NOTE:
If STARTTLS is selected, the server port must be set to 587.
Alternatively, use port number 465.
If one of the OAuth authorization options is selected, the address of the corresponding server will be automatically filled in (smtp.gmail.com, smtp.office365.com).
To proceed with the configuration, you will need to enter a valid email account.
Prerequisites
Go to the PBXware configuration wizard
In your web browser, go to your PBXware URL on port 81, for example:
https://monpbx.bicom.fr:81 (replace mypbx.bicom.fr with your domain or the IP address of your system, for example https://212.59.62.15:81).
Enter the password root in order to log in.
NOTE:
To benefit from the SMTP OAuth feature, your PBXware must be version 7.0 or higher.
Classic authentication
Classic SMTP authentication allows you to enter the information
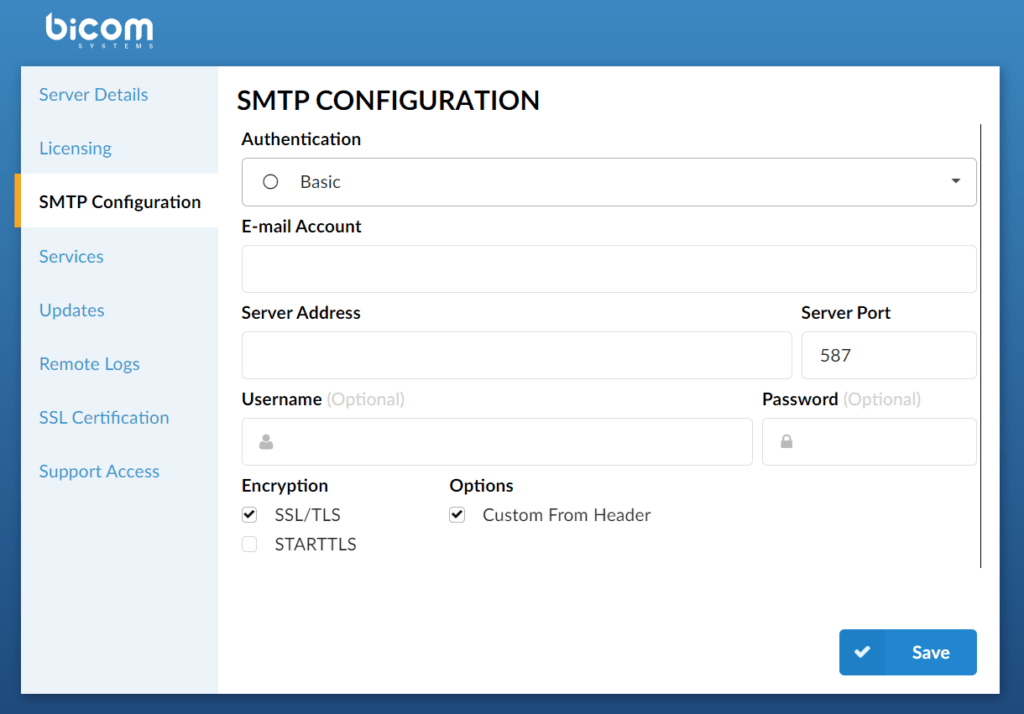
- Email account:
Address to which the email will be sent if no recipient is defined
(For example user@domain.com)
- Server address:
SMTP server address (domain or public IP)
(For example mail.domaine.fr)
- Server port:
SMTP port used to send emails.
(For example, the default port is 25)
- Username:
Username used for SMTP authentication
(For example, username, login email)
- Password:
Password used for SMTP authentication.
Encryption
- SSL/TLS:
Specifies the SSL/TLS encryption protocols to communicate with the SMTP server
- STARTTLS:
Specifies whether SMTP performs an EHLO/STARTTLS before starting the SSL negotiation
- Options
Customized from the header
When this option is enabled, the « From » email address that will be used is the one defined in the « Email account » section of the SMTP configuration. If this option is not checked, the email account from which emails will be sent will be presented as root@email.com
Google 
The first step is to obtain the authorization code; to obtain it, you must click on the button Get code.
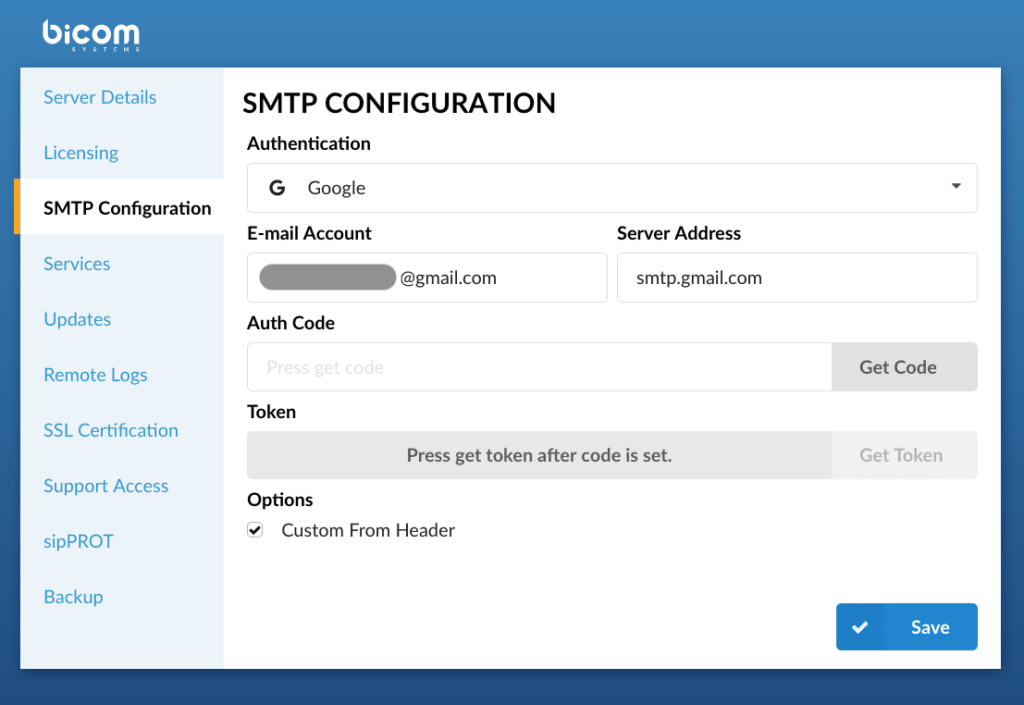
You will then be prompted to log in to your Google account and accept the required permissions.
Once the authorization code is acquired, paste it into the field Auth code and click the button Get Token.
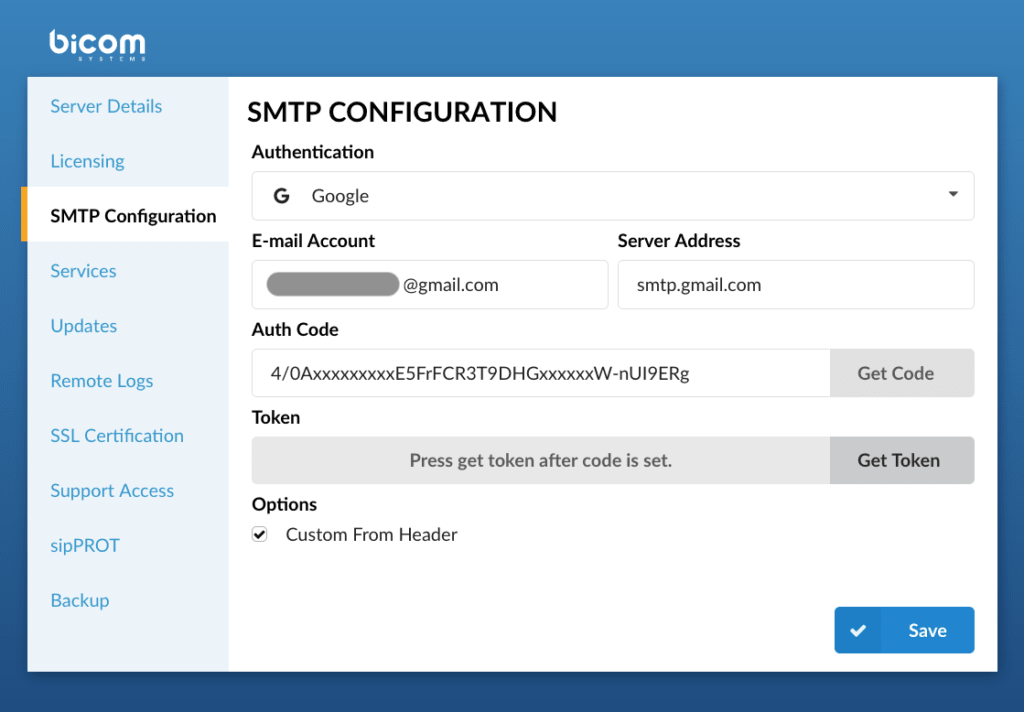
If all fields are filled in correctly, a notification indicating that the token has been generated will be displayed.
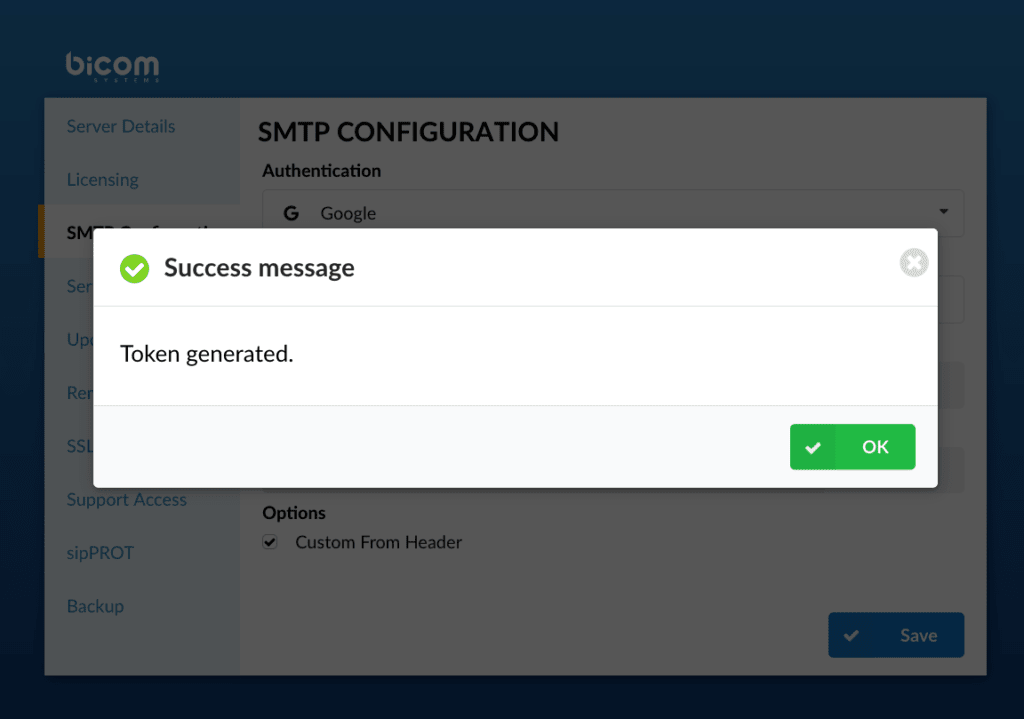
Click on OK, then click on Save to keep the configuration.
Microsoft 
The first step is to obtain the authorization code; to obtain it, you must click on the button Get code.
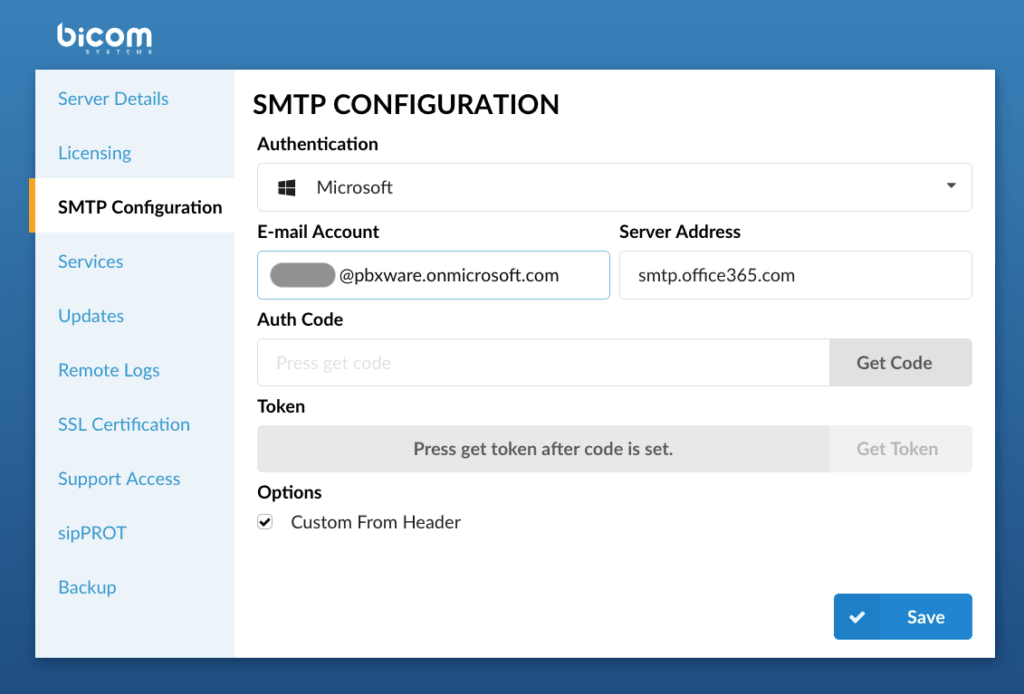
You will then be prompted to log in to your Microsoft account and accept the required permissions.
Once the authorization code is acquired, paste it into the field Auth code and click the button Get Token.
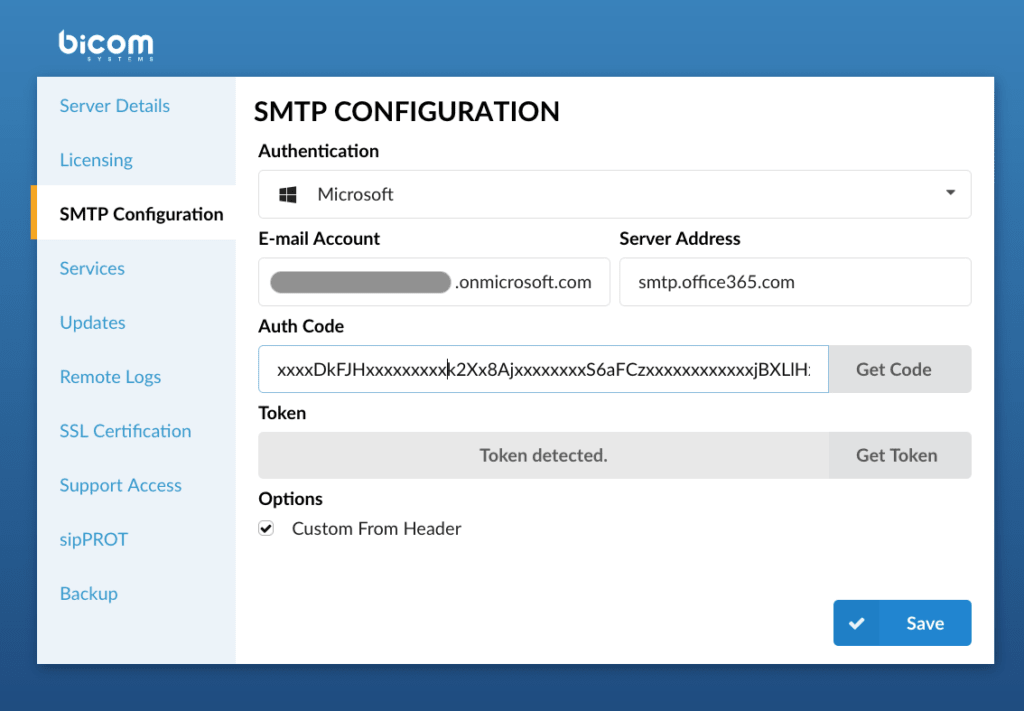
If all fields are filled in correctly, a notification indicating that the token has been generated will be displayed.
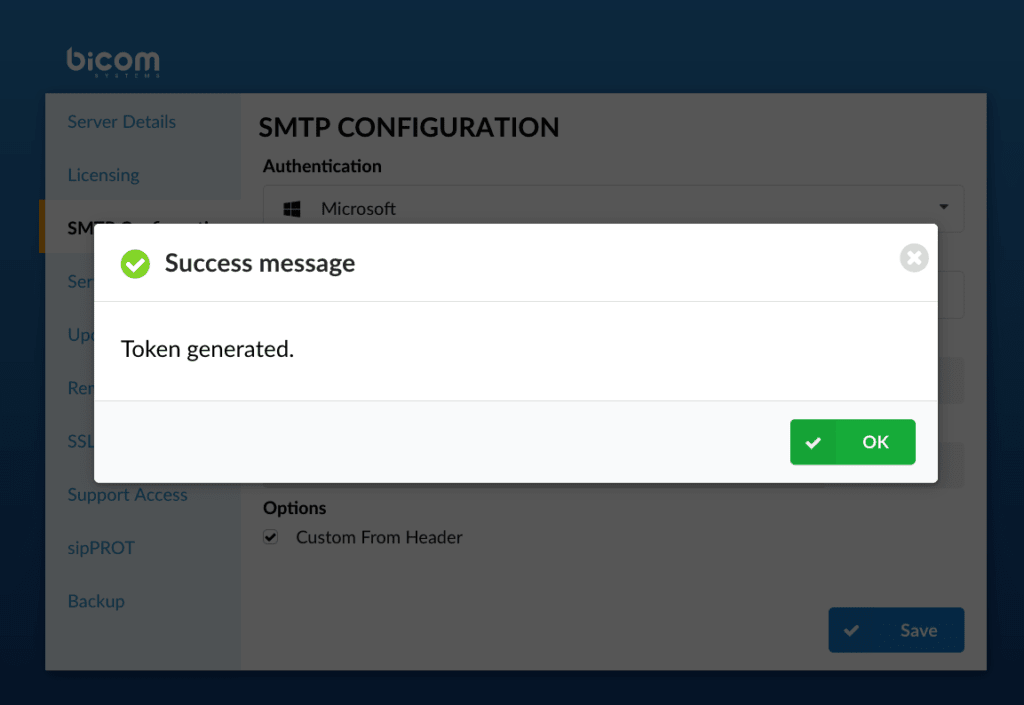
Click on OK, then click on Save to keep the configuration.
Once everything is in place, your PBXware should be ready to use the configured SMTP server and send email notifications.
