



Snom auto-provisioning
The Snom phone models supported for auto-provisioning on PBXware are as follows:
- D120, D315, D335, D345, D385
- D713, D715, D717, D735, D785
- D862, D865
- M300, M500, M900
Process
- Set a dedicated username/password pair for provisioning on the PBXware.
- Enable the phone UAD on PBXware & create an extension
- Enter the phone's MAC address in the extension
- Enter the server URL, the login and provisioning password in the phone
Retrieve the provisioning login/password
Phone provisioning will be carried out using a provisioning URL linked to your phone system, along with a provisioning username and password to authenticate the requests.
This password is configured in the server settings for the PBXware Business/Contact Center editions and in the tenant settings for the Multi-Tenant editions.
- On Business/CC editions, click Settings > Server > Click your server > Auto provisioning
- On the Multi-tenant edition, position yourself on the Master-tenant & click on Settings > Tenants > Click your tenant > Auto provisioning

Enable the UAD
On PBXware, when you want to provision a phone, the server will need to send a configuration file specific to the phone.
This is why you will need to enable a UAD matching your phone model. When you create a new extension, choose this model.
To enable your first UAD, go to Settings > UAD (place yourself in your tenant if you are on a Multi-Tenant system).
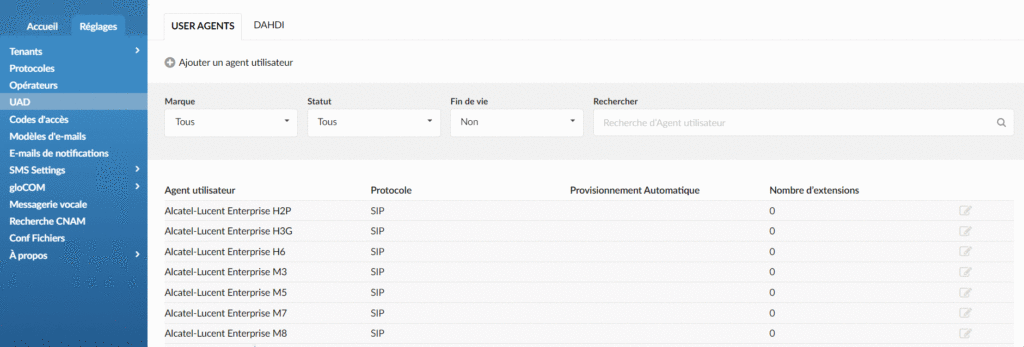
Click the UAD you want to enable then change the field Status of Inactive to Active:
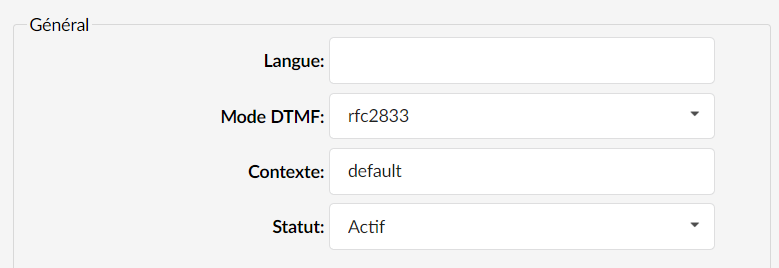
Set the field Auto provisioning on Yes and DHCP on Yes:

Configure the extension
You are now ready to create a new extension.
To create your first extension, click the tab Home >Extensions.
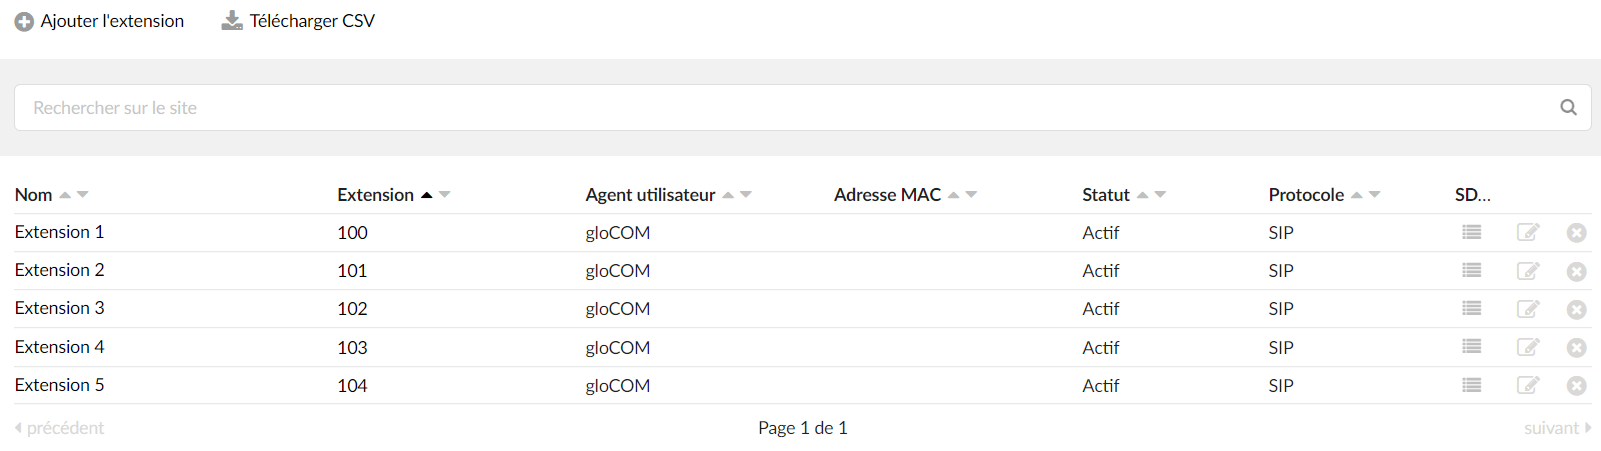
Then click Add an extension.
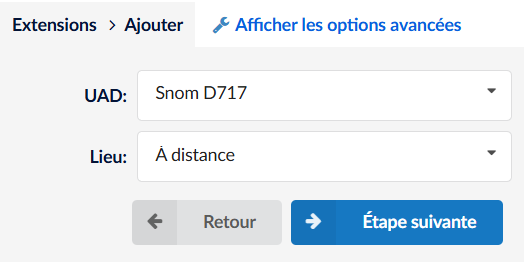
Then choose the UAD you previously activated. The field Location allows you to define whether the phone is on the same network as PBXware or on a remote network.
Click on Next step.
In the previously created extension,
Now, retrieve the MAC address of your phone (via the phone's graphical interface), copy & paste it into the field MAC address :
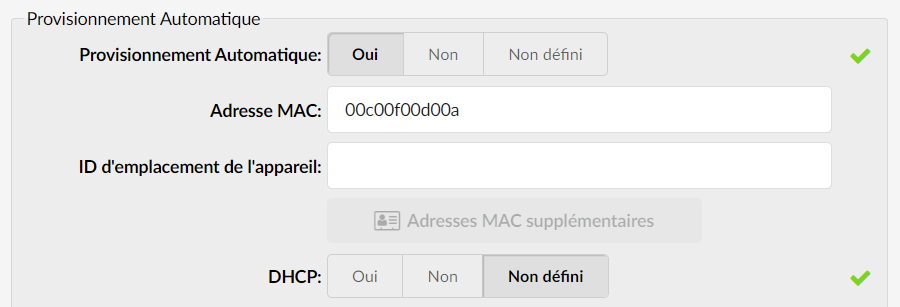
Everything is configured on the PBXware side. Now, go to your phone.
Make sure that your phone is powered on and reachable on the network.
Snom
- On the PBXware side, make sure you have enabled the UAD corresponding to your phone as well as entered its MAC address in the extension.
- Open a new browser window and enter your phone's IP address, for example http://192.168.1.22
- Enter the username and the password of the phone (default admin:admin) and press the Confirm .
- Click on Advanced in the left navigation menu.
NOTE:
The interface may change depending on how recent your device is
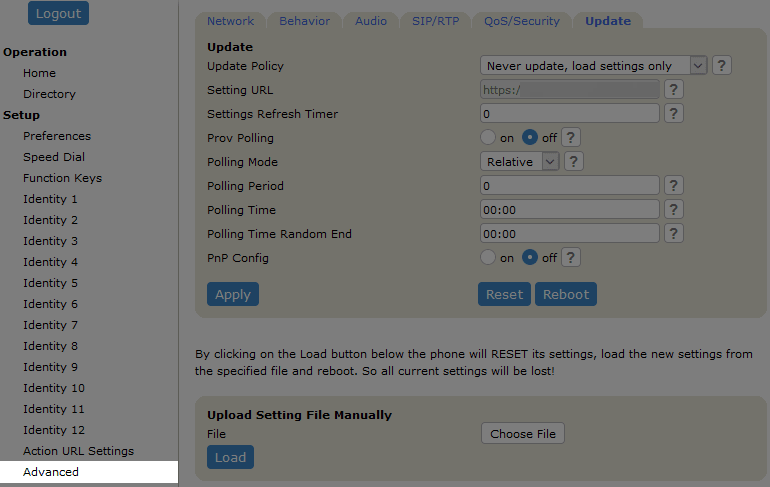
- Click the tab QoS/Security in the top navigation menu.
- Enter the autoprovisioning username and password defined in the section Retrieve the provisioning login/password in the fields User and Password under HTTP Client.
- Click the button Apply.
- Click the tab Update in the top navigation menu.
- Choose the server type you want to use: HTTP , HTTPS or Trivial FTP. Our recommendation is to use HTTP.
- Enter http:// followed by the hostname or IP address of your PBXware server then followed by /prov/snomd717-{mac}.htm
- Replace snomd717 by your phone's model (example: /prov/snomd785-{mac}.htm)
- Do not substitute {mac} by the phone's MAC address; leave this variable spelled out unchanged.
- URL example:
- http://abc.ags-next.com/prov/snomd717-{mac}.htm
- http://abc.ags-next.com/prov/snomd785-{mac}.htm
- http://abc.ags-next.com/prov/snomd715-{mac}.htm
NOTE:
For Snom D812, D815, D862, D865 phones, the provisioning URL must be in the following format:
- http://abc.ags-next.com/prov/snomd812-{mac}.xml
- http://abc.ags-next.com/prov/snomd815-{mac}.xml
- http://abc.ags-next.com/prov/snomd862-{mac}.xml
- http://abc.ags-next.com/prov/snomd865-{mac}.xml
NOTE:
For DECT base stations, namely the M500, M700 & M900 models, the provisioning URL must be in the following format:
- http://abc.ags-next.com/prov/snomm500-{mac}.xml
- http://abc.ags-next.com/prov/snomm700-{mac}.xml
- http://abc.ags-next.com/prov/snomm900-{mac}.xml
- Click the button Apply (if the option appears)
- Click the button Reboot or Save and reboot depending on the template
- A pop-up window will appear, click the button Yes to confirm the action and restart the phone.
- Once the restart is complete, dial *123 on the phone to check the registration.
