



TUTORIAL: Yealink autoprovisioning
The Yealink phone models supported for auto-provisioning on PBXware are as follows:
- T18P, T23G, T29G
- T30, T30P, T31, T31G, T31P, T31W, T33G, T33P, T34W
- T41P, T41S, T41U, T42U, T43U, T44U, T44W, T46U, T48U, T53
- T53W, T54W, T57W, T58V, T58W, T60P
- T65P
- CP860, CP920,CP925, CP930W, CP935W
- CP960, CP965
- VP59
- DECT: W53H,W60B,W70B,W80B,W90DM
Process
- Set a dedicated username/password pair for provisioning on the PBXware.
- Enable the phone UAD on PBXware & create an extension
- Enter the phone's MAC address in the extension
- Enter the server URL, the login and provisioning password in the phone
RPS Provisioning
RPS provisioning allows you to quickly and easily configure your Yealink phones without needing to unbox them.
See the TUTORIAL: Yealink RPS Provisioning
Retrieve the provisioning login/password
Phone provisioning will be carried out using a provisioning URL linked to your phone system, along with a provisioning username and password to authenticate the requests.
This password is configured in the server settings for the PBXware Business/Contact Center editions and in the tenant settings for the Multi-Tenant editions.
- On Business/CC editions, click Settings > Server > Click your server > Auto provisioning
- On the Multi-tenant edition, position yourself on the Master-tenant & click on Settings > Tenants > Click your tenant > Auto provisioning

Enable the UAD
On PBXware, when you want to provision a phone, the server will need to send a configuration file specific to the phone.
This is why you will need to enable a UAD matching your phone model. When you create a new extension, choose this model.
To enable your first UAD, go to Settings > UAD (place yourself in your tenant if you are on a Multi-Tenant system).
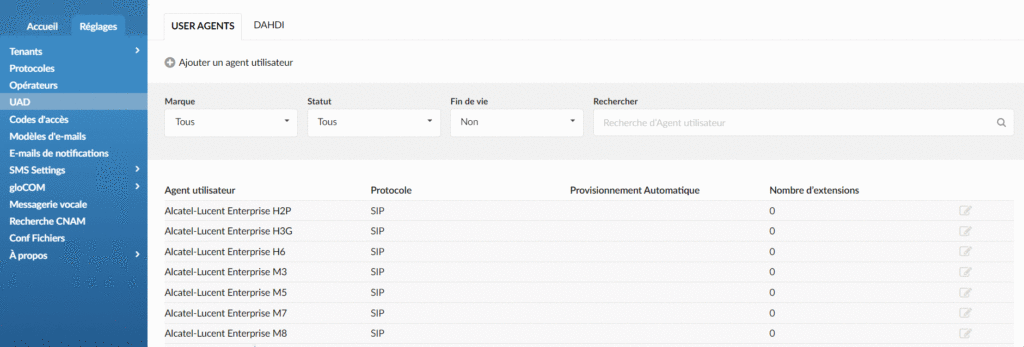
Click the UAD you want to enable then change the field Status of Inactive to Active:
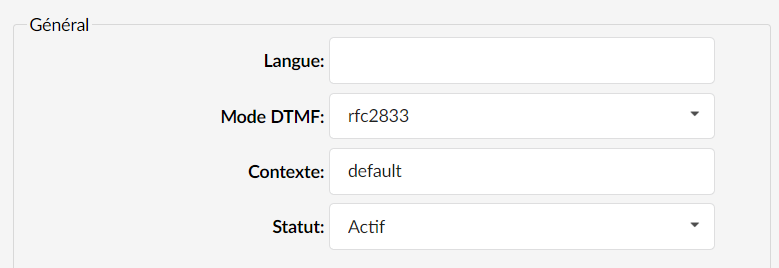
Set the field Auto provisioning on Yes and DHCP on Yes:

Configure the extension
You are now ready to create a new extension.
To create your first extension, click the tab Home >Extensions.
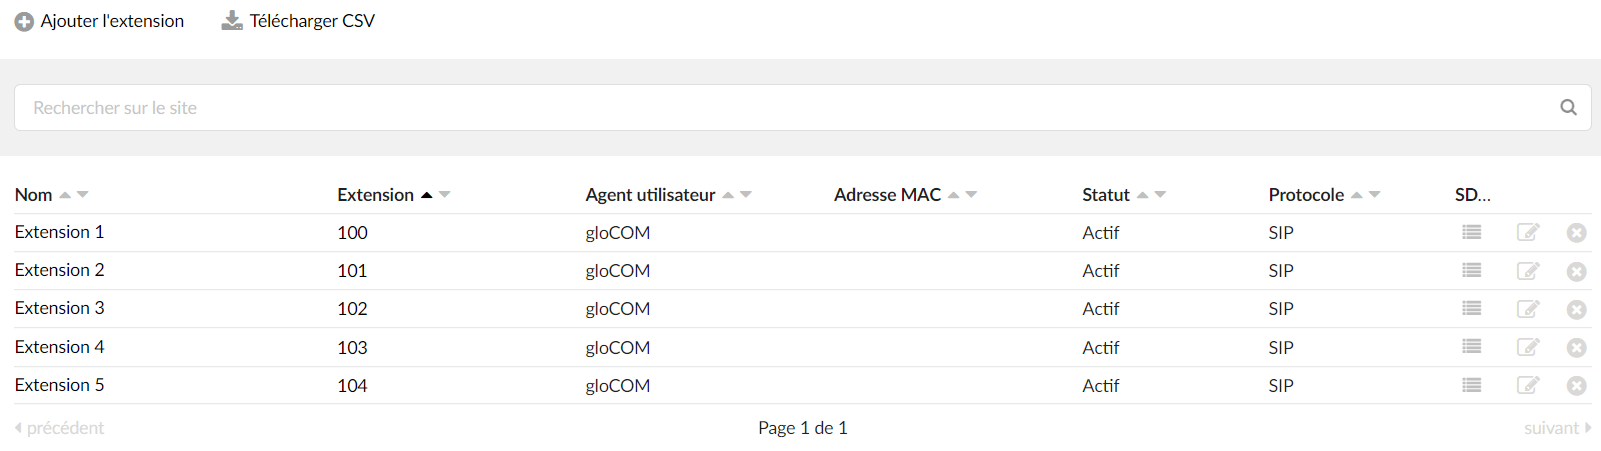
Click on Add an extension.
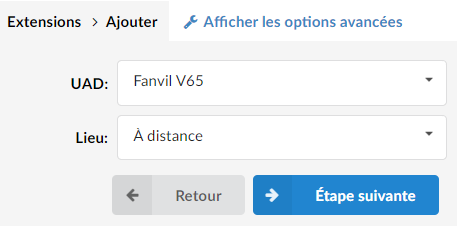
Then choose the UAD you previously activated. The field Location allows you to define whether the phone is on the same network as PBXware or on a remote network.
Click on Next step.
In the previously created extension,
Now, retrieve the MAC address of your phone (via the phone's graphical interface), copy & paste it into the field MAC address :
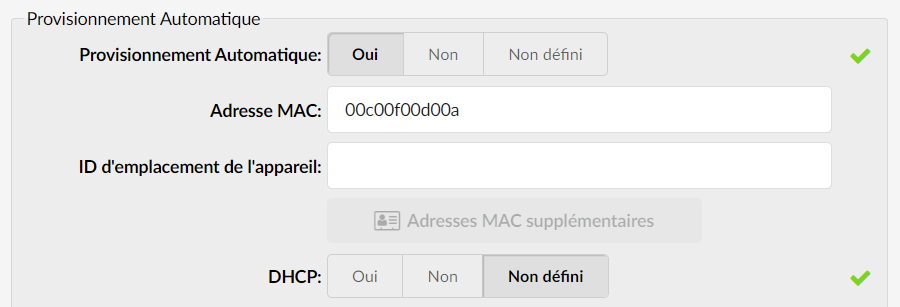
Everything is configured on the PBXware side. Now, go to your phone.
Provisioning
Make sure that your phone is powered on and reachable on the network.
- On the PBXware side, make sure you have enabled the UAD corresponding to your phone as well as entered its MAC address in the extension.
- Open a new browser window and enter your phone's IP address, for example http://192.168.1.22
- Enter the username and the password of the phone (default admin:admin) and press the Confirm .
- Click the tab Settings in the left navigation menu.
- Click the link Auto provisioning under the tab Settings.
NOTE:
The interface may change depending on how recent your device is
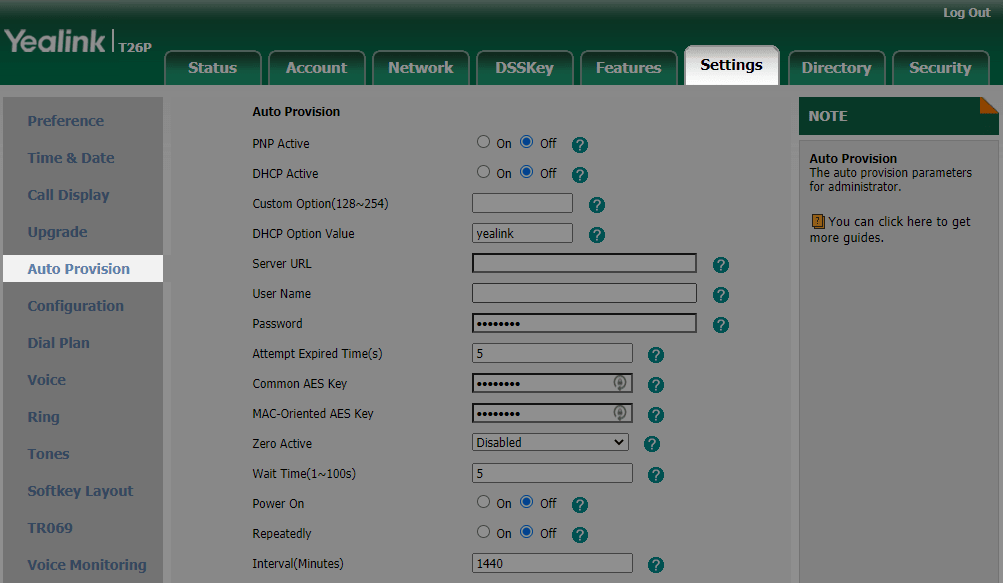
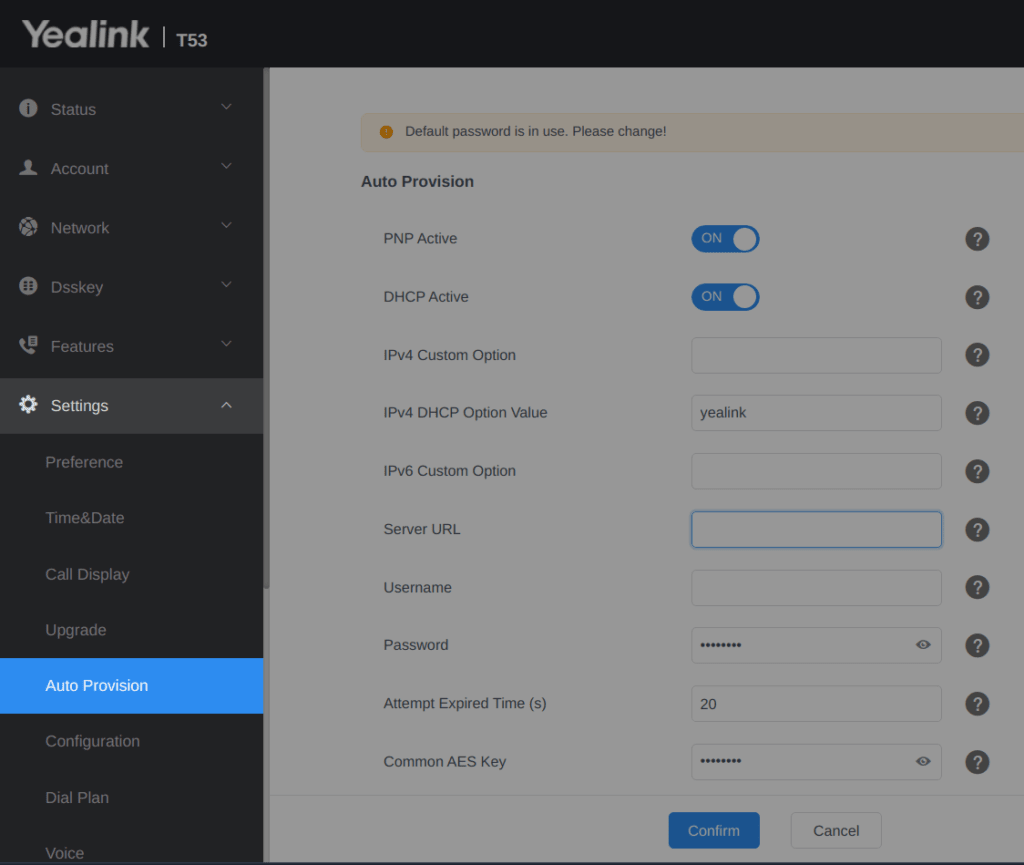
- Enter http:// followed by the hostname or address IP, followed by /prov in the field Server URL.
Example hostname using HTTP: http://abc.ags-next.com/prov
Example IP address using HTTP: http://192.168.1.10/prov
- Enter the username and password autoprovisioning defined in the section Retrieve the provisioning login/password in the fields Username and Password .
- Click the button Confirm.
- Click the button Autoprovision now. A pop-up window will appear, click the button OK to confirm your action.
- You will need to wait a few seconds for the configuration to be updated.
The auto-provisioning process starts during the phone reboot; the phone retrieves the appropriate configuration file from PBXware. If everything is done as described above, you should have successfully registered your phone on PBXware. Dial *123 to verify the registration.
Additional settings
Below you will find a list of codes to configure your phones (change the password, the language, the transfer mode…)
To do this, go to your tenant then to Settings > UAD to enable these configurations at the global level of your tenant.
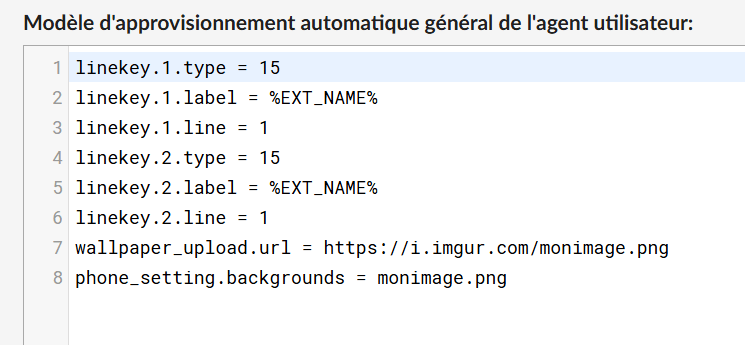
Choose the appropriate Yealink model, then scroll down to the bottom of the page to the section General user agent auto-provisioning template.
Now review the following codes and copy/paste them into this section to apply the changes.
Enable the French language on the phones:
lang.gui = French Enable the French language on the phones’ web interface:
lang.wui = French Change the name displayed on the phone:
account.1.label = Prénom account.1.display_name = Prénom Change the username/password of the web interface:
static.security.user_name.admin = admin static.security.user_password = admin:motdepasse Add multiple line keys (e.g. take several calls):
linekey.1.type = 15 linekey.1.label = Prénom linekey.1.line = 1 linekey.2.type = 15 linekey.2.label = Prénom linekey.2.line = 1 It is also possible to apply these configurations at the UAD level using variables such as %EXT_NAME% or %EXT_NUMBER% in order to apply the extension name or number.
linekey.1.type = 15 linekey.1.label = %EXT_NAME% linekey.1.line = 1 linekey.2.type = 15 linekey.2.label = %EXT_NAME% linekey.2.line = 1 Enable supervised transfer during a transfer via BLF:
transfer.dsskey_deal_type = 1 Enable the LDAP directory on the Directory function key
programablekey.2.type = 38 programablekey.2.line = 0 programablekey.2.label = Annuaire Enable native PBXware forwarding:
forward.always.on_code = *71 forward.always.off_code = *72 Enable display of numbers during transfers/pickups
account.1.cid_source = 4 NOTE
The Enable Remote-Party-ID and Send Remote-Party-ID options (choose Remote-Party-ID from the drop-down list) must be enabled on the extension in question.
Change the wallpaper:
wallpaper_upload.url = https://i.imgur.com/monimage.png phone_setting.backgrounds = monimage.png NOTE
The image size must match the screen resolution; see this documentation to obtain more information.
To avoid the daylight saving time change occurring one week too early:
local_time.manual_ntp_srv_prior=1 local_time.ntp_server1=fr.pool.ntp.org local_time.time_zone=+1 local_time.summer_time=1 local_time.time_zone_name=France(Paris) local_time.time_format=1 local_time.date_format=3 local_time.dst_time_type = 1 local_time.start_time = 3/5/7/2:0 local_time.end_time = 10/5/7/3:0 TIP
Reprovision the extension remotely via the page Monitor. Check the extension and click the button Check the configuration to launch a provisioning.
