5. SMS
SMS is a PBXware feature that allows users to send and receive messages in order to achieve faster communication. SMS has become a globally accepted communication channel and an effective means of providing information within seconds due to its simplicity and accuracy. The implementation of SMS in PBXware allows users to communicate efficiently and have their messages at their disposal at all times.
Numbers
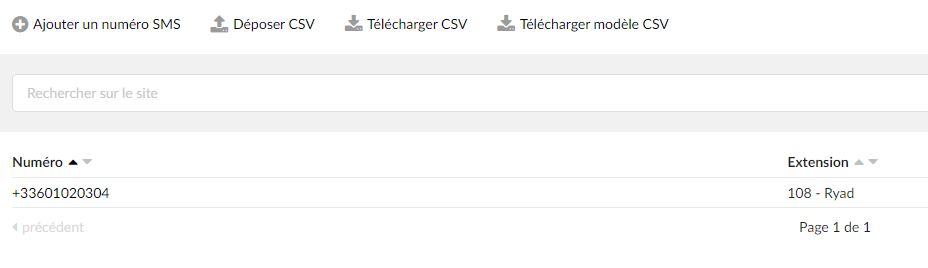
The Numbers section allows users to add numbers to the system and assign them to specific extensions. From this section, it is possible to manage number configuration by editing or deleting it.
Numbers can be added in two ways:
- By dropping a CSV file created using the PBXware CSV template or the provider's CSV template.
- By adding the numbers manually.
Click the button Add an SMS number to add a new SMS number.
Click the button Drop a CSV to drop a CSV file.
NOTE:
CSV files can be uploaded using one of the following two templates:
- PBXware CSV template : for this template to be uploaded successfully, a user must fill in the following fields:'sms_number' and 'extension'.
- Provider CSV template: if this template is used (for example, Twilio’s, the CSV file downloaded from the Twilio website already containsall the necessary data, so the next step would simply be to download the CSV file
Furthermore, since the SMS feature allows various CSV upload methods, certain restrictions exist in order to ensure data protection and provide users with additional information regarding software operations. Therefore, once a user drops a desired CSV file, they will receive these messages regarding the upload procedure:

![]()
This CSV message will appear once the CSV file has been successfully dropped onto the system. The additional explanation shows that there were three numbers in the CSV file and that all three numbers were imported. In addition, no number was ignored, which shows that these numbers were not found on the system. In the event that the user accidentally adds a number that already exists, the number that was previously on the system will be deleted and added again via this upload, which ensures no data loss.
Click this button to download a CSV file.
NOTE:
This CSV file contains the data displayed in the “Numbers” list. It can be used for faster management of numbers and extensions on the system.
Click the button Download CSV template to download a CSV template.
NOTE:
To properly handle the CSV file, proceed as follows:
- Download an empty CSV template
- Fill in the fields with specific information
- Save the settings
- Upload it using the « Drop CSV » button
- The data is now displayed in the list.
- Number
Displays the number added to the system.
NOTE:
Hovering over the Number section and clicking on it will prompt users to the window Add an SMS number. A user cannot modify the numbers from there, but the extensions. For more information on this, click the link provided.
- Extension
Displays an extension and an extension name to which the number was previously assigned.
Click the edit button to modify the SMS number configuration
If a user decides to change the configuration and assign the existing number to another extension, the following warning message appears: " The extension is already in use. Do you want to remove it from another number and assign it to this one? ».
If users click on the button Cancel, the action will be aborted. On the contrary, if you click OK, the number will be assigned to a different extension and removed from the old one. Please refer to the screenshot.
You can click the delete button to remove the SMS number configuration.
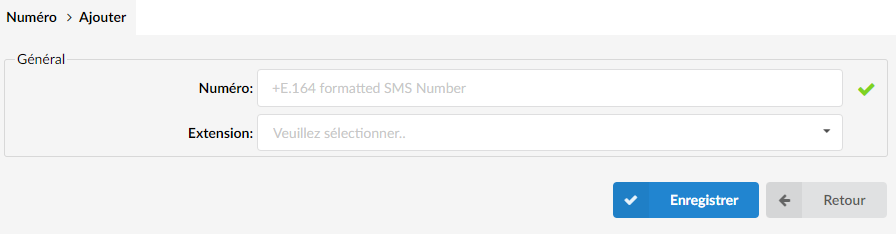
Add an SMS number

NOTE:
The "Number" field is required and must be filled in.
General
- Number
Enter the number to which the SMS messages will be sent.
NOTE:
Please note that the number must be in E.164 format.
NOTE:
Once users have saved the settings, it is no longer possible to modify a number. However, if there is an input error, follow this procedure
- Click on Back.
- Delete the list configuration by clicking on Delete.
- Add the number again.
- Assign it an extension and click on Save.
- Extension
Assign this number to a specific extension.
NOTE:
These steps must be followed if a user has already added a DID and filled in all the other required fields. Once this is done, a user must proceed as follows:
- Go to the “DID” section
- Find the DID to use for SMS
- Hover over the DID and click on it to be prompted to another window
- Click “Show advanced options”
- Assign a desired DID to a specific extension
- Set "SMS enabled" to "Yes"
- Click on Save.
The SMS feature also allows you to enter PBXware DIDs in this field.
Assuming the user has completed the procedure described above, they must perform the following operations:
- Go to the “Numbers” section
- Check whether the configuration is set up correctly
Grouped messages
The section Grouped messages allows users to send bulk SMS messages. By using this feature, users can send important information to a larger number of people. In addition to adding bulk SMS messages via the GUI, users can easily upload their data using CSV files or filter their bulk SMS messages by status. They can start bulk messages or stop active ones. It is also possible to restart them.
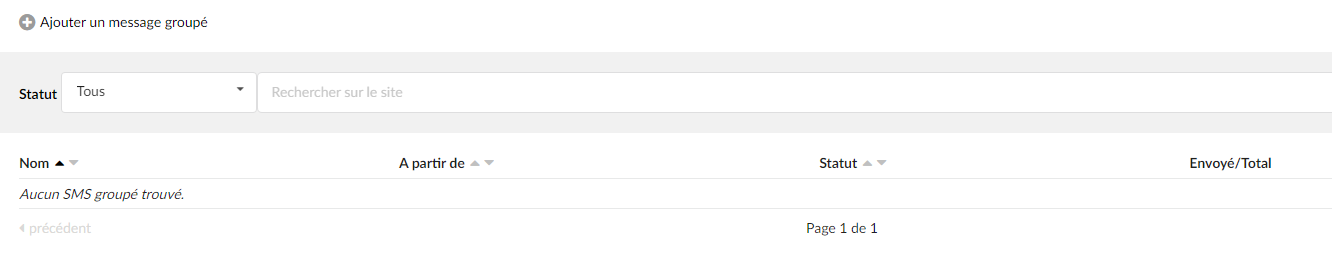
Users can use the “Search” option and filter their data accordingly. Please refer to the drop-down list:
- All
- Active
- Inactive
- Pause
- Stopped
- Completed
This page displays the following information:
Name
Displays the name of the bulk message.
Starting from
Show the number/alphanumeric from which the bulk message was sent.
Status
Show status
Sent/Total
Show the number of messages sent and the total number of numbers to which the message is to be sent.
Create a group message
Click the button Add a group message to add a group message.
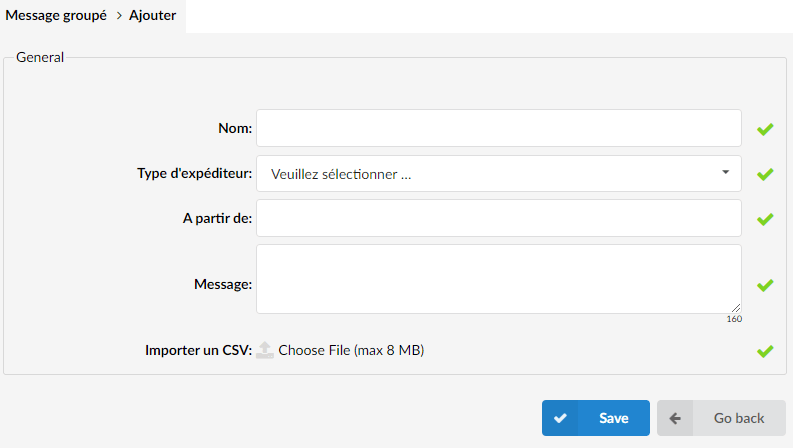
Name
Enter the name of a group message.
Sender type
Select a sender type (Numeric/Alphanumeric).
Starting from
This field allows you to enter the sender number/name.
Message
This field allows you to write the message to be sent.
Import a CSV
Click this button to upload a CSV file containing the numbers to which you will send the message.
The CSV file must be in the following format:
Headers:
to_number,Name,LastName
For example:
+1234567890,John,Smith
SMS Trunk

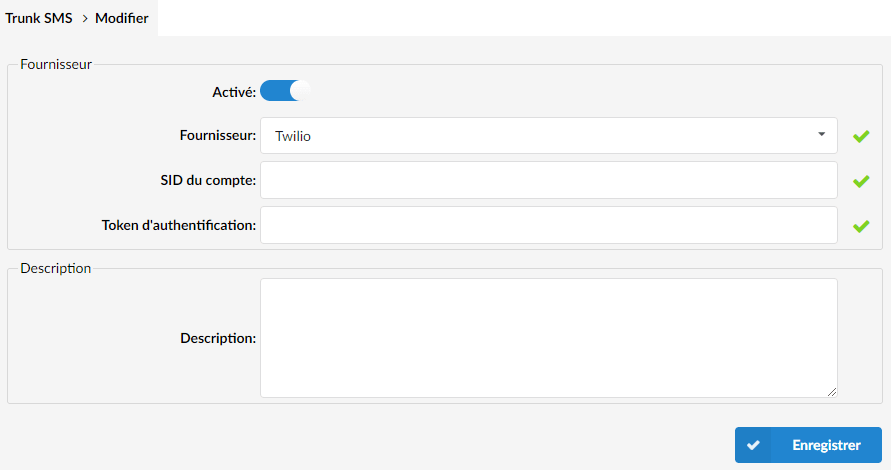
The Trunks section allows users to create SMS Trunks and specify the configuration details. Here users can configure a new Trunk and/or edit the existing one.
NOTE:
The "Provider" field is required. Depending on the chosen provider, additional fields will appear that must be filled in. Failing to set these fields will result in warning messages being displayed. Please refer to the screenshots.
Twilio is the only European SMS trunk provider supported by PBXware.
Provider
Select Twilio from the drop-down menu.
Account SID
Fill in the field with an appropriate account SID.
Authentication token
Fill in the field with an appropriate authentication token.
NOTE:
The description can contain any information necessary to differentiate this SMS trunk from the other trunks on the system. Since this field is not mandatory, you can leave it empty.