



FR | EN
Wiki Bicom Systems EnglishWiki Bicom Systems English
  • Home
  • Documentation
    • PBXware
      • Installation
      • Getting started
      • Editions
        • PBXware Multi-Tenant
        • PBXware Business
        • PBXware Contact Center
        • PBXware Service Provider
      • Advanced services
      • Supported phones
      • Autoprovisioning
    • Communicator
      • Communicator Desktop
      • Communicator GO
      • Communicator Web
    • SERVERware
      • Standalone
      • Mirror
      • Cluster
    • sipPROT
    • Tutorials
  • Videos
    • Communicator Desktop
  • Operators
  • Downloads
  • FAQ
Support
leafleaf
Most popular:
  • PBXware
  • Communicator
  • SIP
  1. Home
  2. SERVERware Mirror
  3. 21. Access control
Updated on November 6, 2023
SERVERware Mirror
  • Folder icon closedFolder open icon1. Deployment guide
  • Folder icon closedFolder open icon2. Installation wizard
    • Add a backup host
  • Folder icon closedFolder open icon3. Configure the wizard steps
  • Folder icon closedFolder open icon4. Architecture
  • Folder icon closedFolder open icon5. Dashboard
  • Folder icon closedFolder open icon6. BSSUP
  • Folder icon closedFolder open icon7. Partitions
  • Folder icon closedFolder open icon8. Hosts
  • Folder icon closedFolder open icon9. Virtual private servers (VPS)
  • Folder icon closedFolder open icon10. Statistics
  • Folder icon closedFolder open icon11. Backup
  • Folder icon closedFolder open icon12. Geo-redundancy
    • Resource control
    • Configure geo-redundancy
    • Configure a replication cycle
    • Search and recovery
    • Site monitoring
  • Folder icon closedFolder open icon13. sipPROT
  • Folder icon closedFolder open icon14. Settings
  • Folder icon closedFolder open icon15. Archive
  • Folder icon closedFolder open icon16. Network
  • Folder icon closedFolder open icon17. Reports
  • Folder icon closedFolder open icon18. System settings
  • Folder icon closedFolder open icon19. Administrators
  • Folder icon closedFolder open icon20. Partition users
  • Folder icon closedFolder open icon21. Access control
  • Folder icon closedFolder open icon22. Role and permissions
  • Folder icon closedFolder open icon23. Service pools
  • Folder icon closedFolder open icon24. Alarms
  • Folder icon closedFolder open icon25. Instance templates
  • Folder icon closedFolder open icon26. Templates
  • Folder icon closedFolder open icon27. Notifications
  • Folder icon closedFolder open icon28. Updates
  • Folder icon closedFolder open icon29. SSL
  • Folder icon closedFolder open icon30. License

21. Access control

Estimated reading: 2 minutes

Access control is an access management feature for SERVERware administration. In this menu, you will find options to manage blocked IP addresses, trusted IP addresses, as well as the configuration of automatic lockout after a certain number of failed login attempts.

Login lockout

Set the limit for allowed unsuccessful login attempts. The user's IP address will be blocked after a specified number of unsuccessful attempts within the specified retry period in minutes.
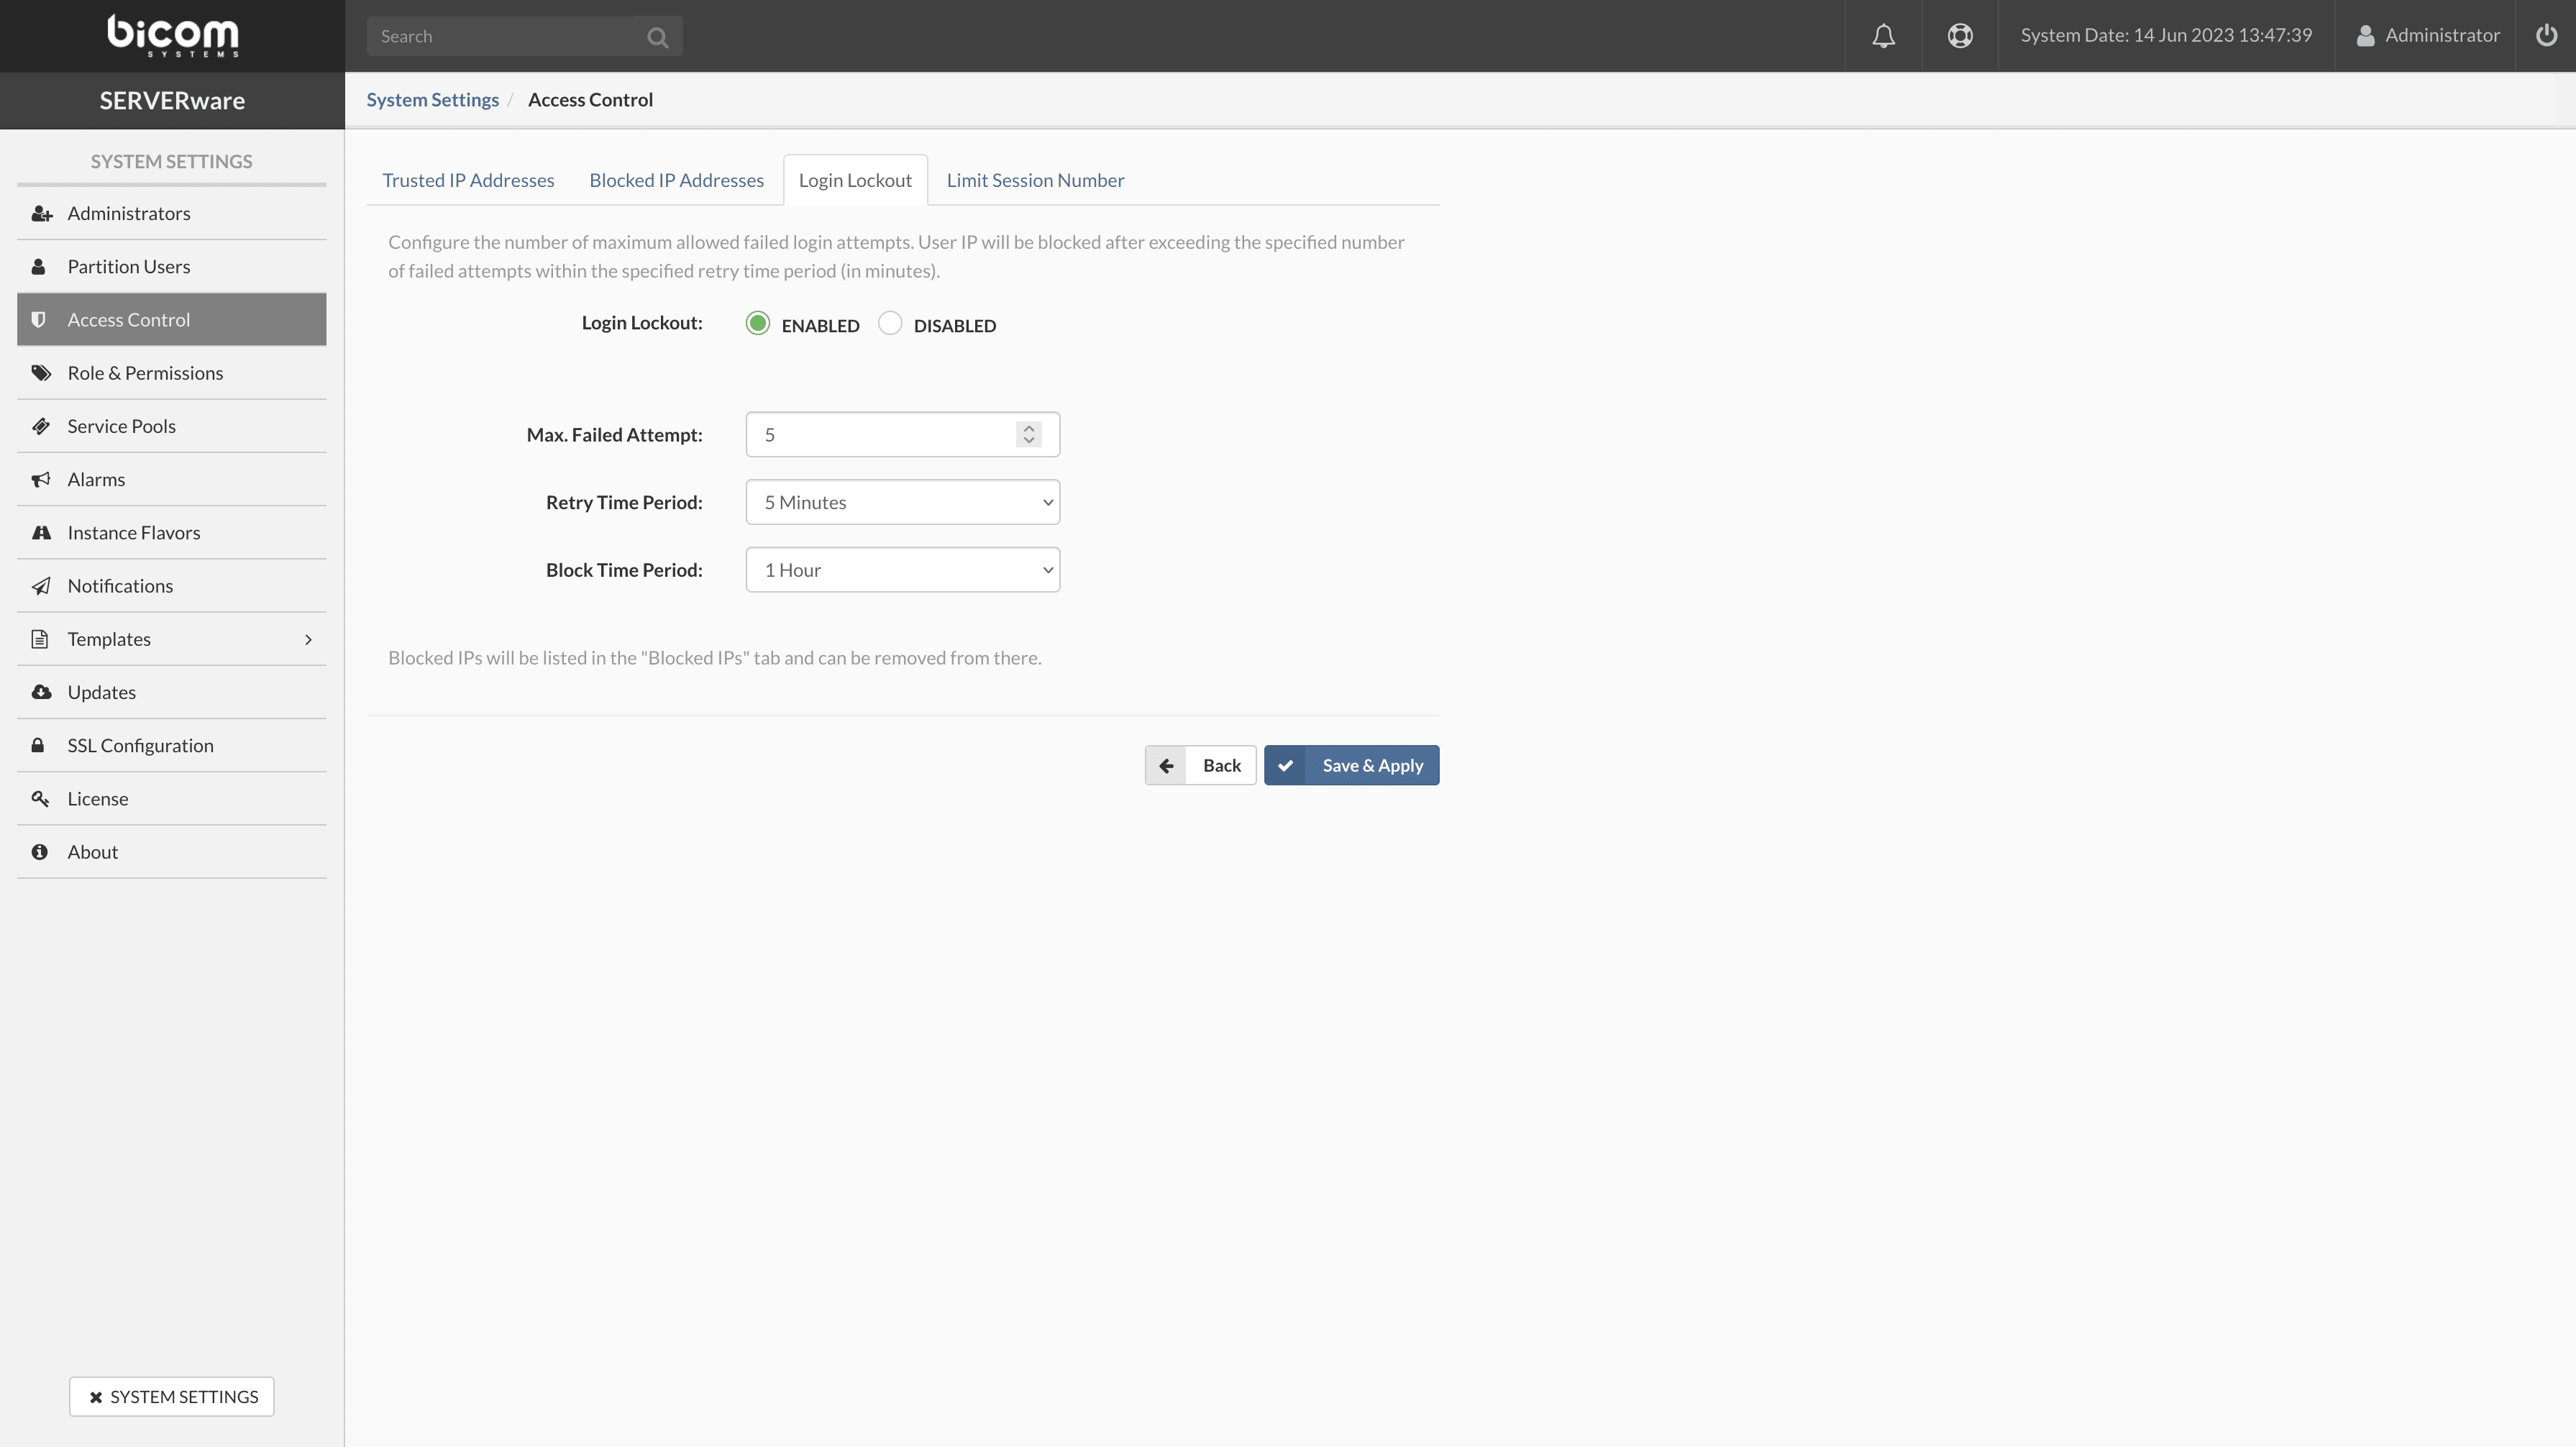
  • Enable/Disable the login lockout
  • Max. Failed attempts : maximum number of failed attempts within a given period before SERVERware blocks the user account.
  • Retry period : the period during which the previous failed attempt occurred is blocked. The available choices are 1 minute, 5 minutes, 10 minutes, 30 minutes, and 60 minutes.
  • Blocking period : period during which the restricted user will be denied access.

If all the above rules are respected, the user account will be blocked after n failed attempts within n minutes and will be added to the list of blocked IP addresses.

Blocked IP addresses
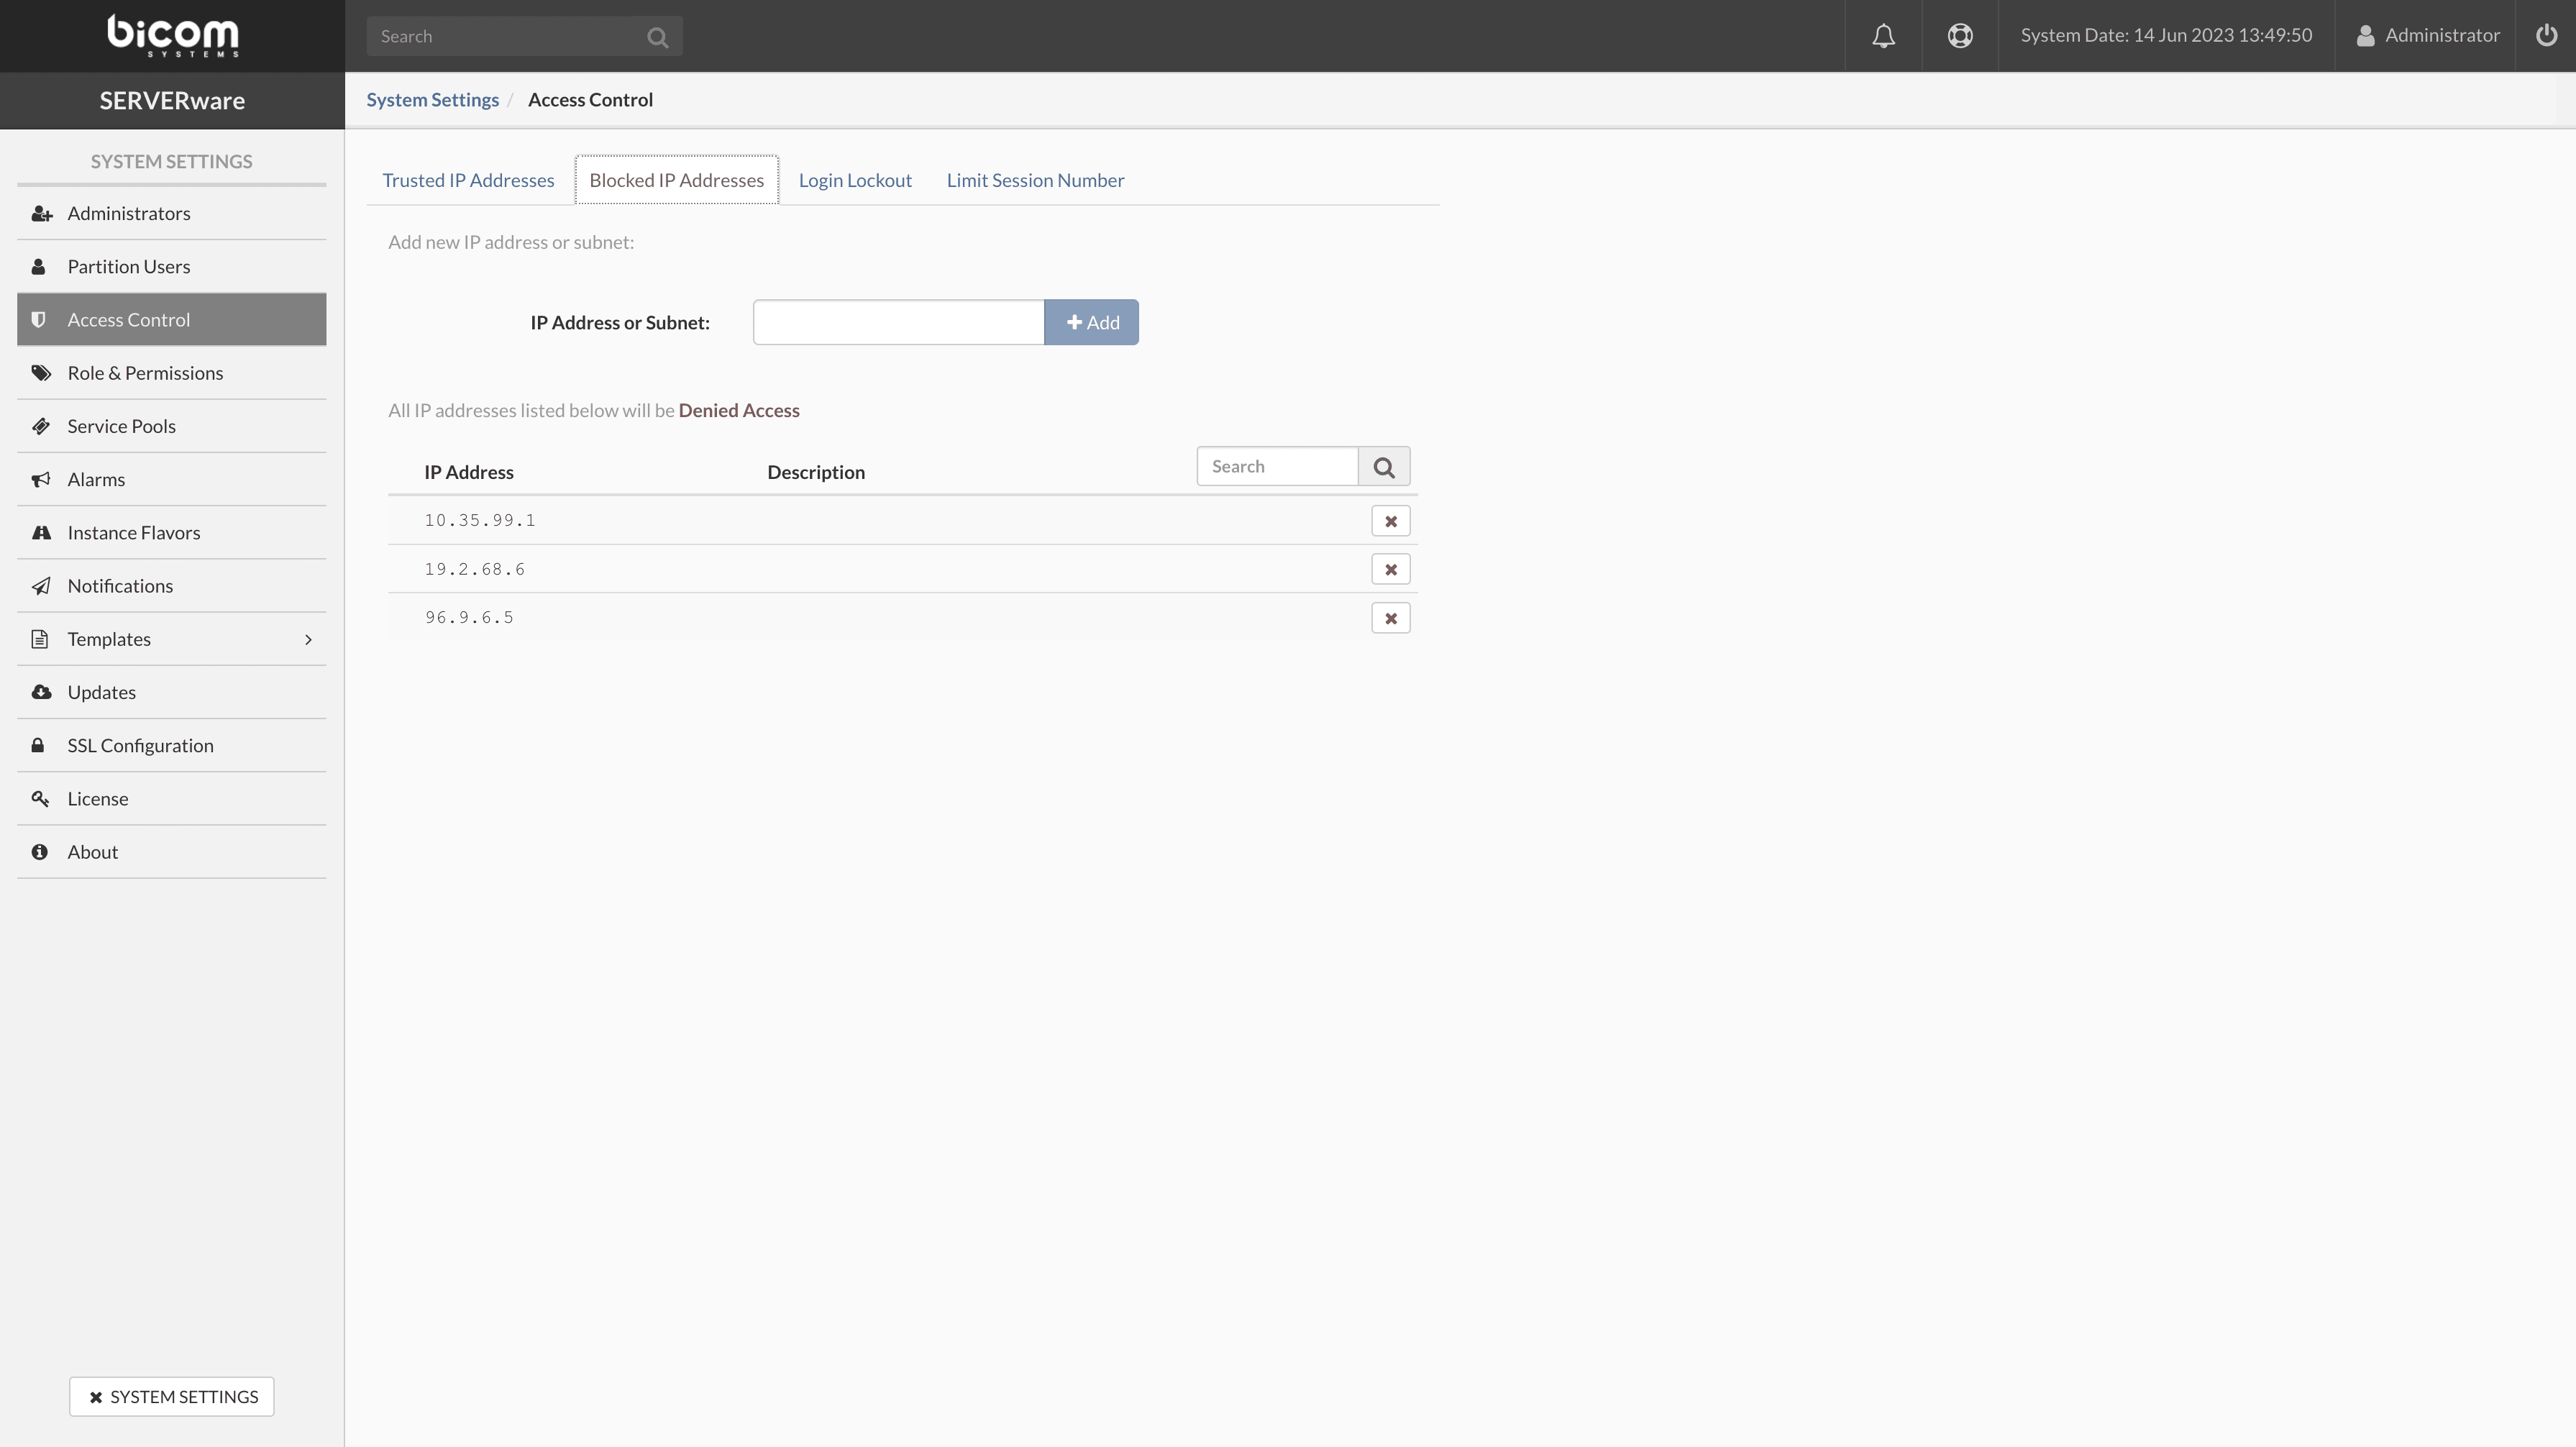
  • IP address or subnet : to block access to a specific IP address, enter the address you want to block in the input field and press the button + Add.
  • To remove a specific address from the list of blocked addresses, press the X next to the blocked IP address in the list.

Trusted IP addresses
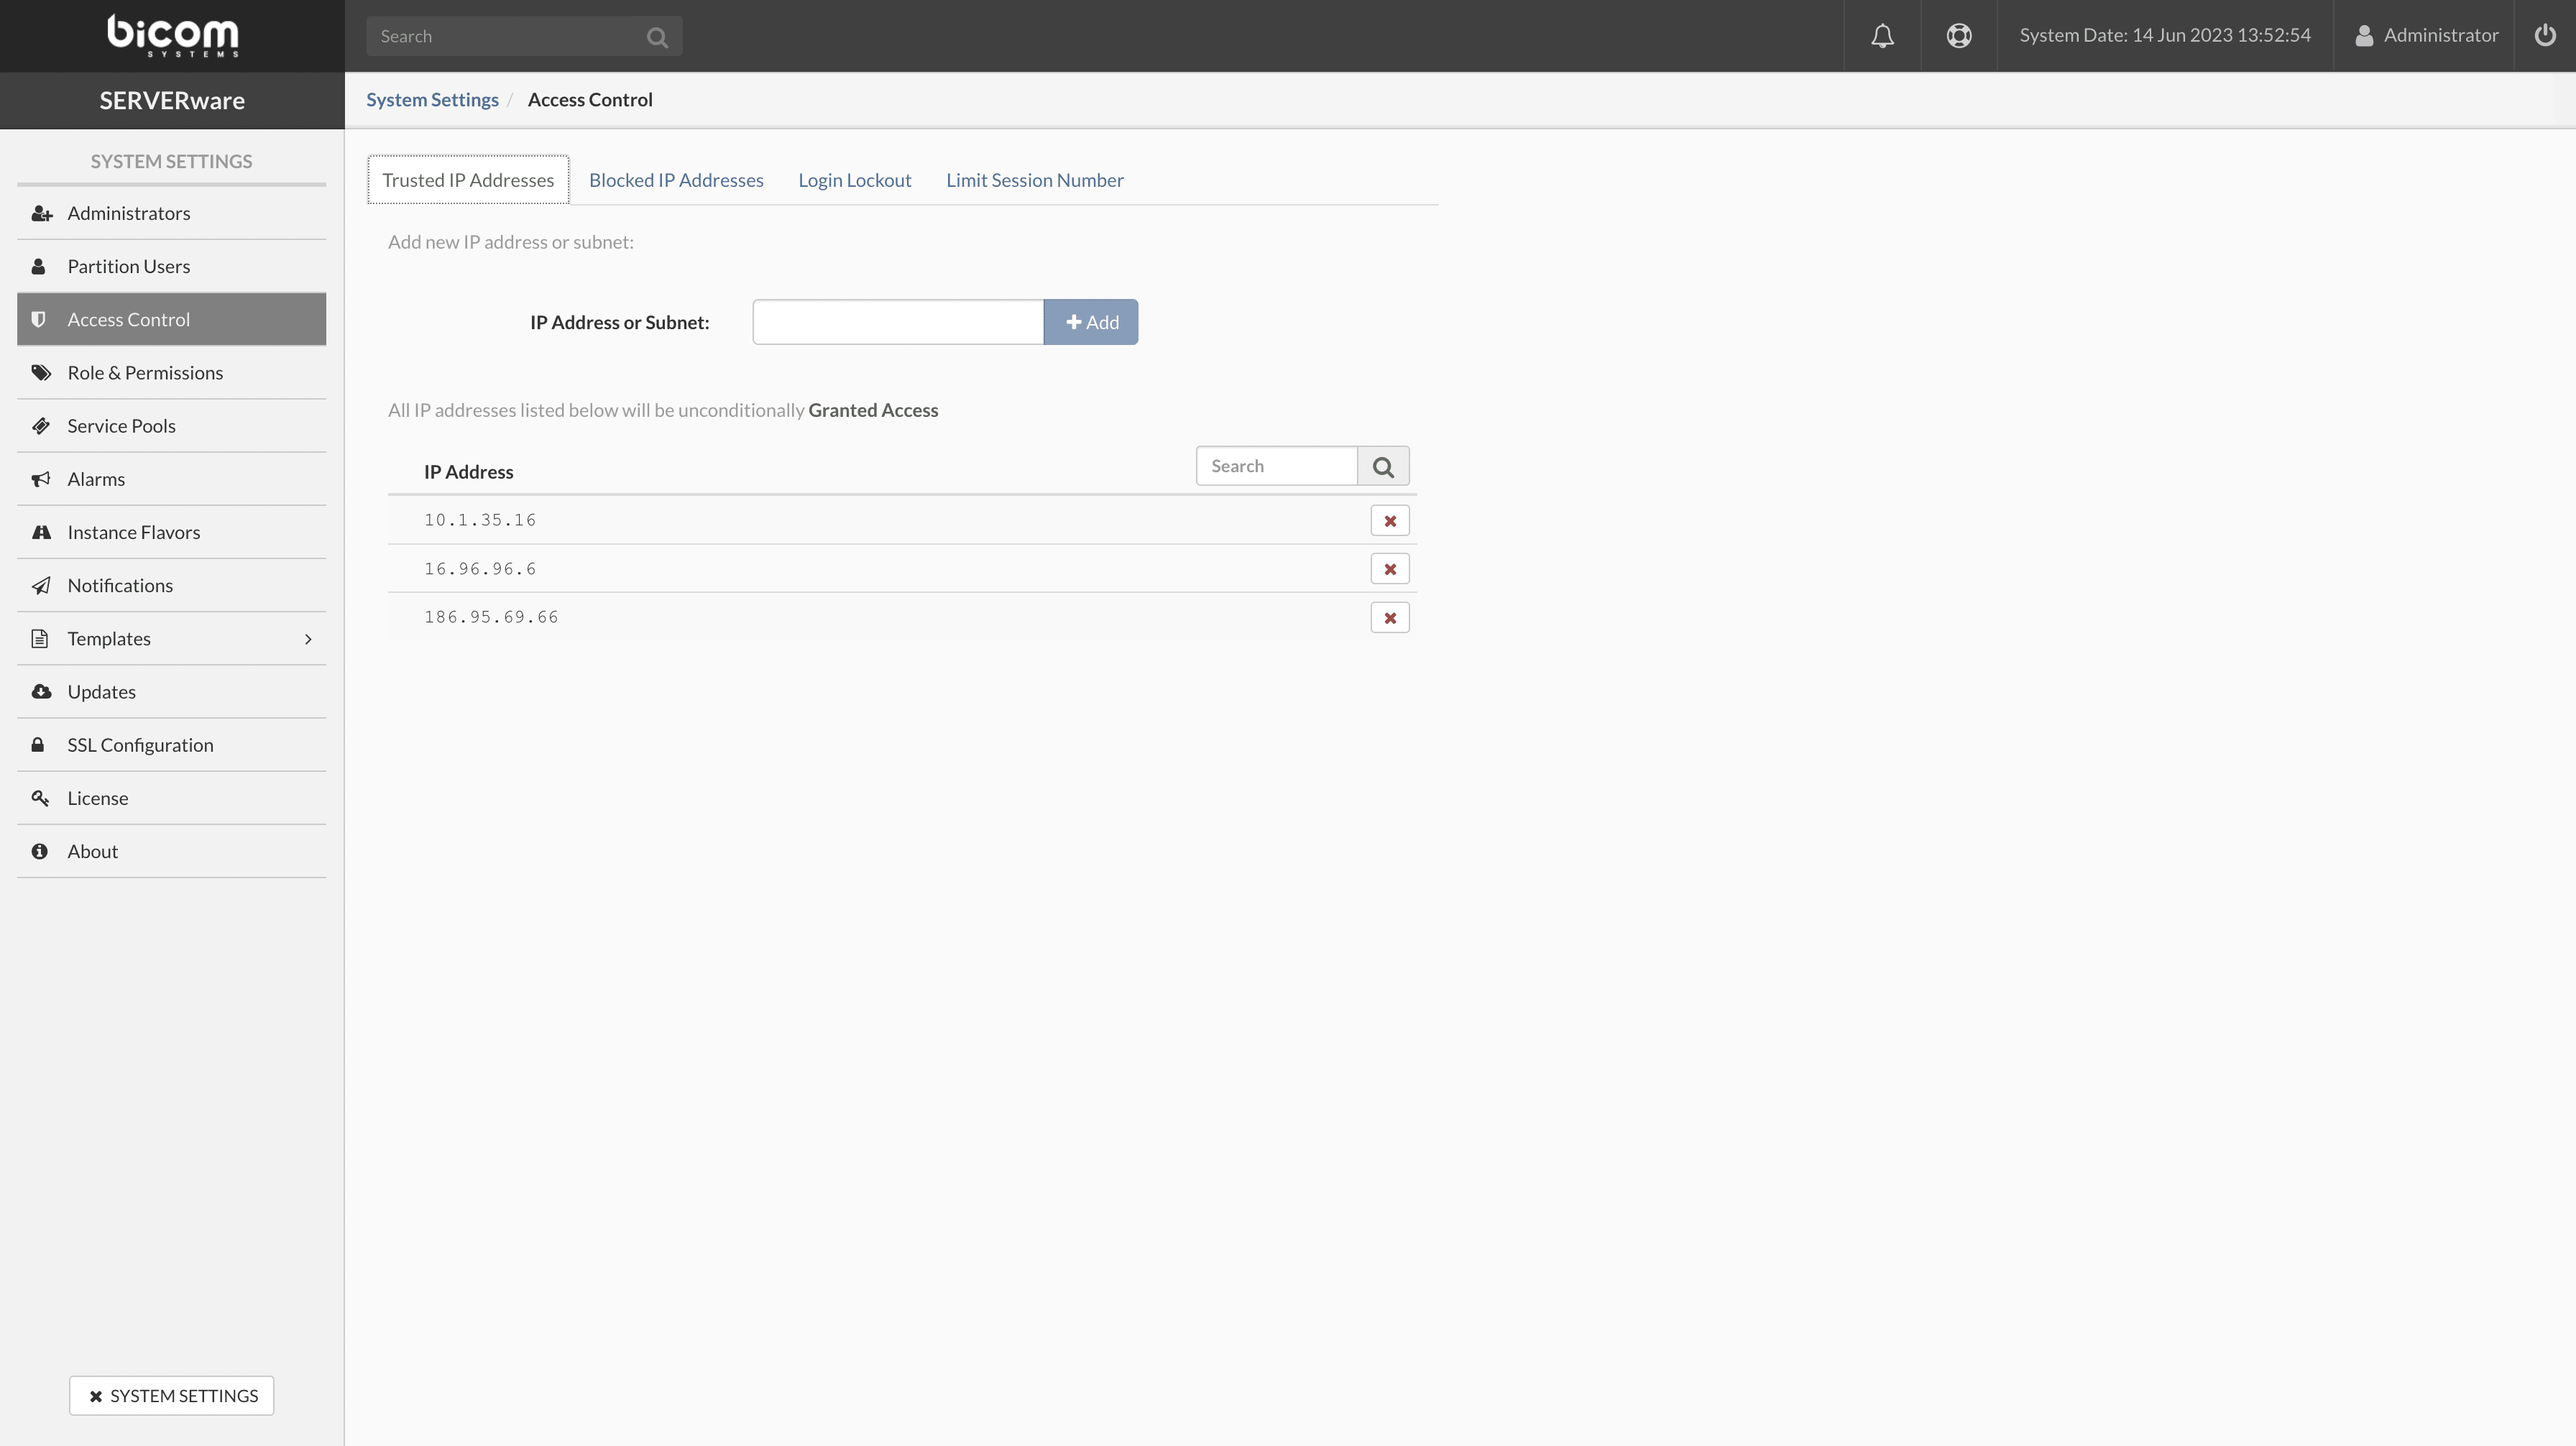
  • IP address or subnet To grant access to a specific IP address, in the input field, enter the address to which you need to grant access and press the button + Add button.
  • To remove the specific address from the list of granted addresses, press the X check the button next to the granted IP address in the list.

Limit the number of sessions
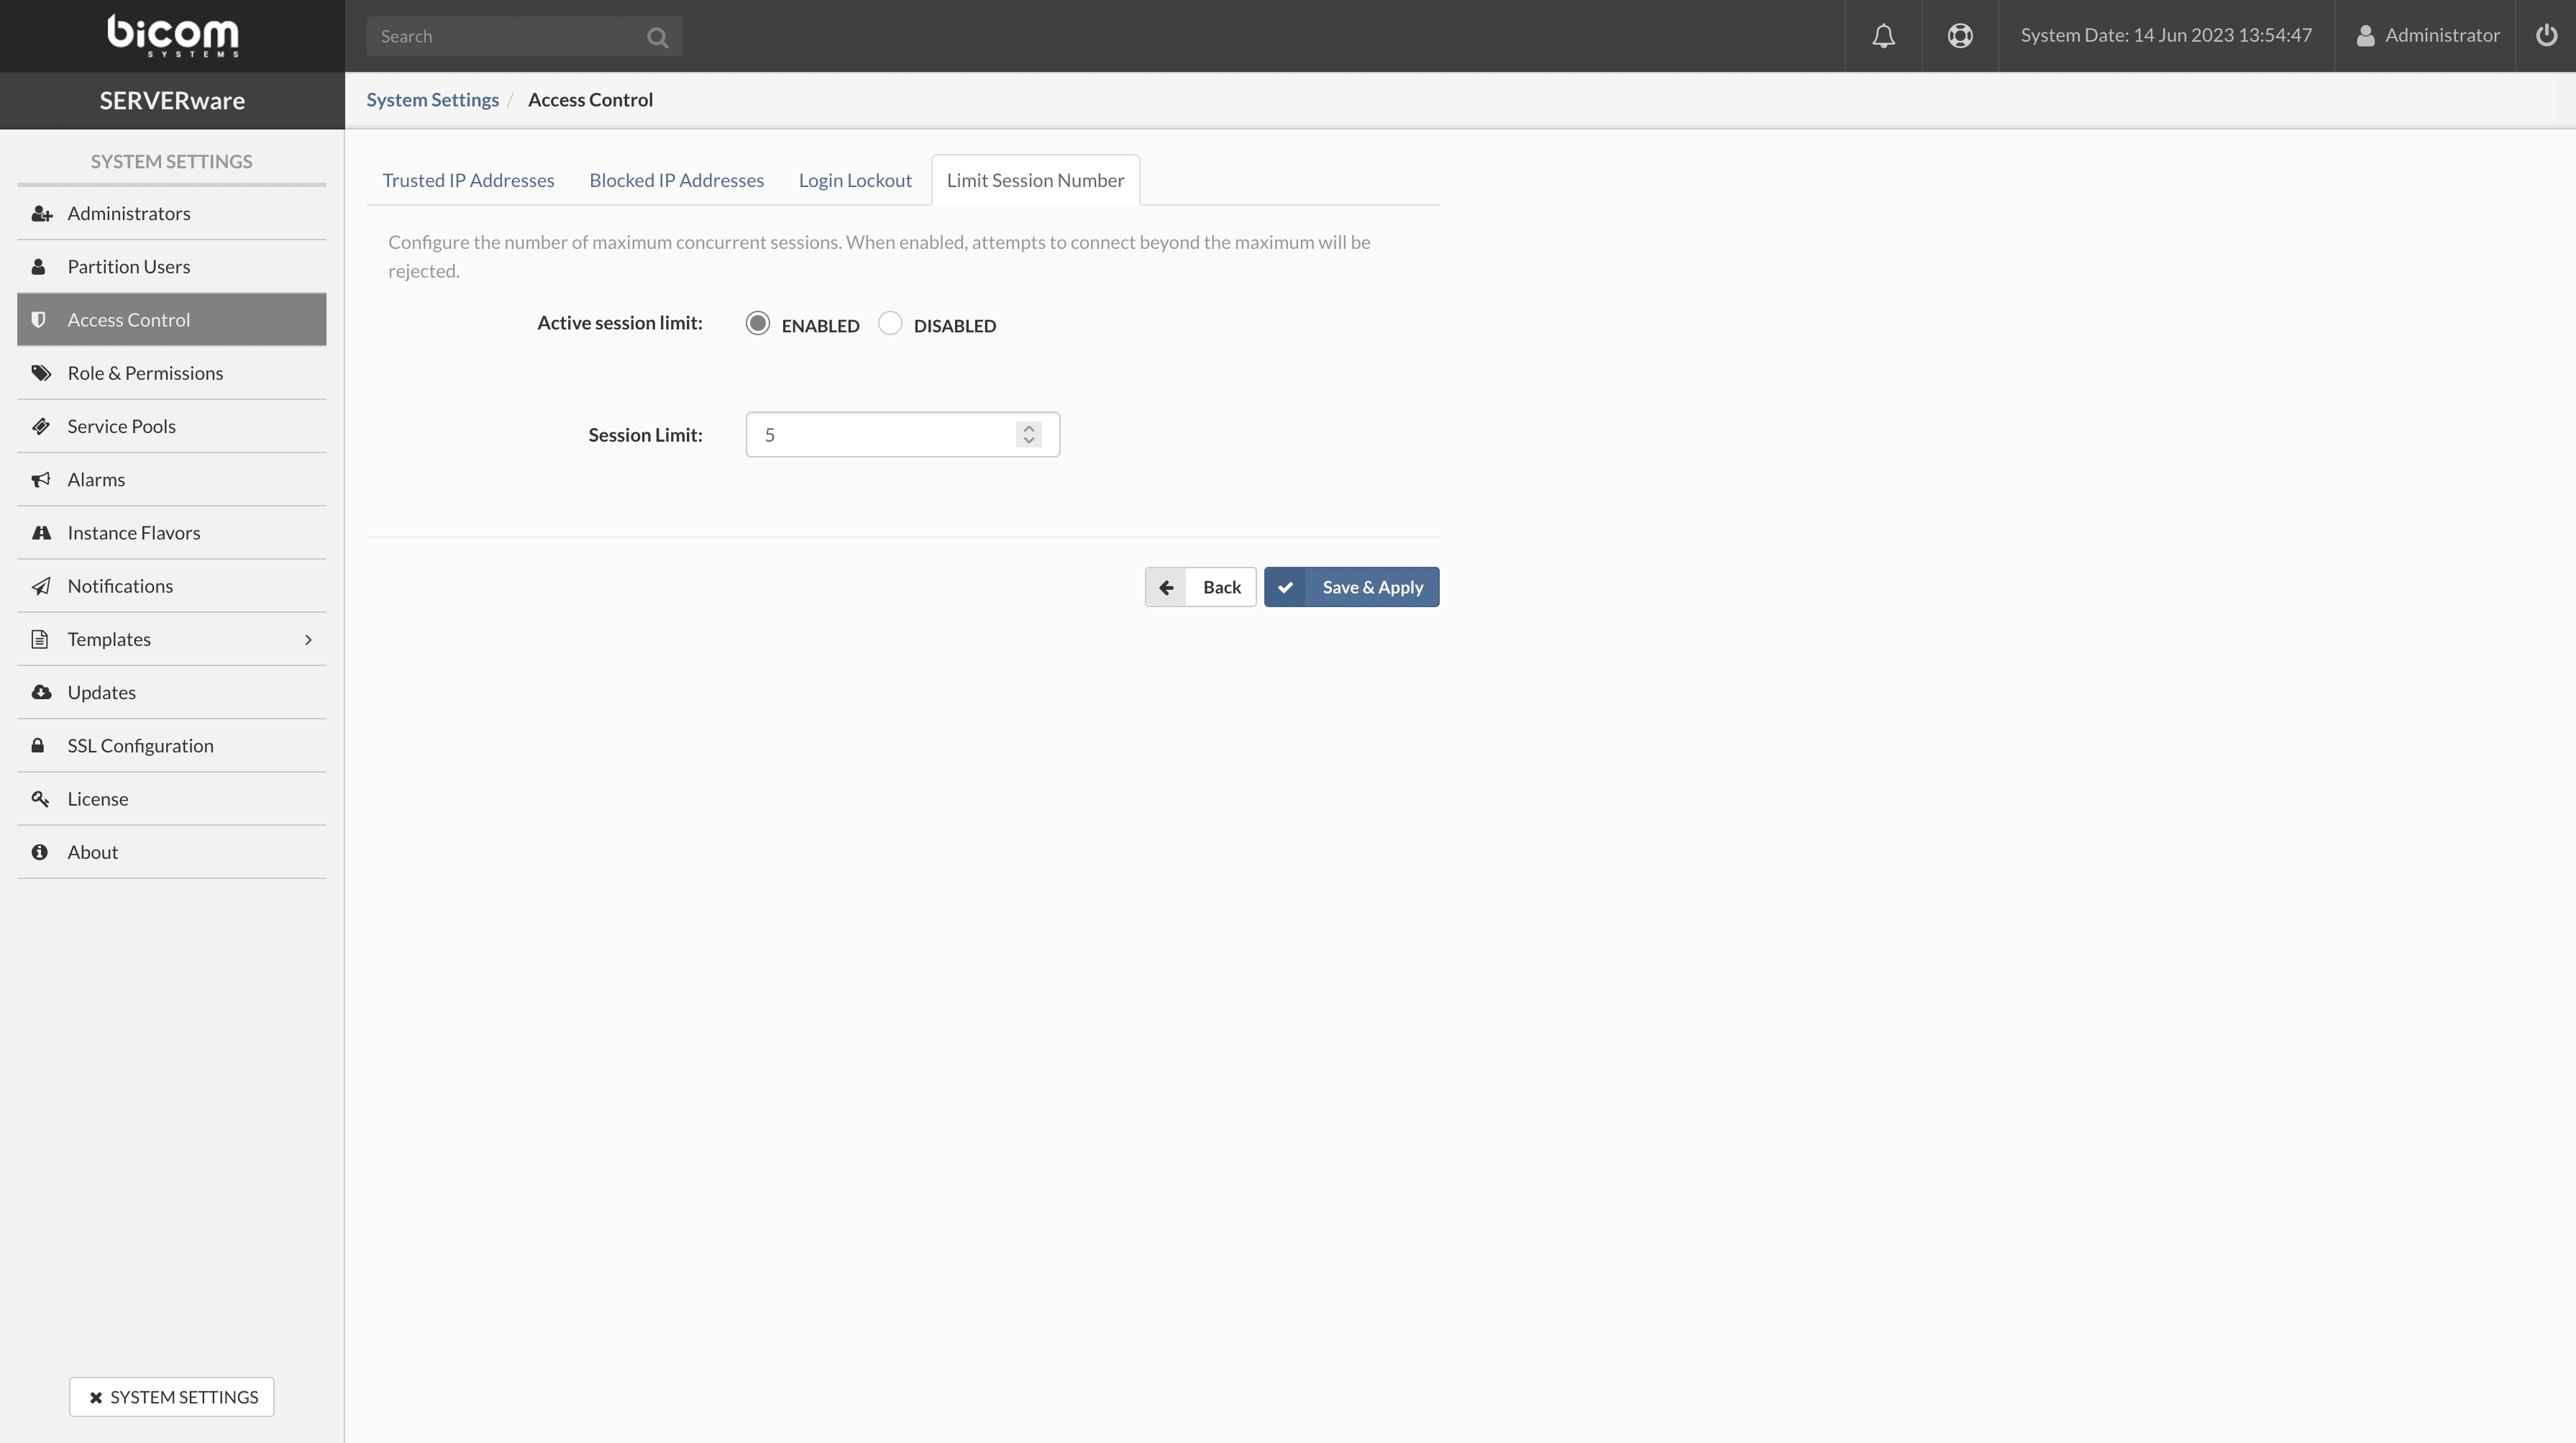
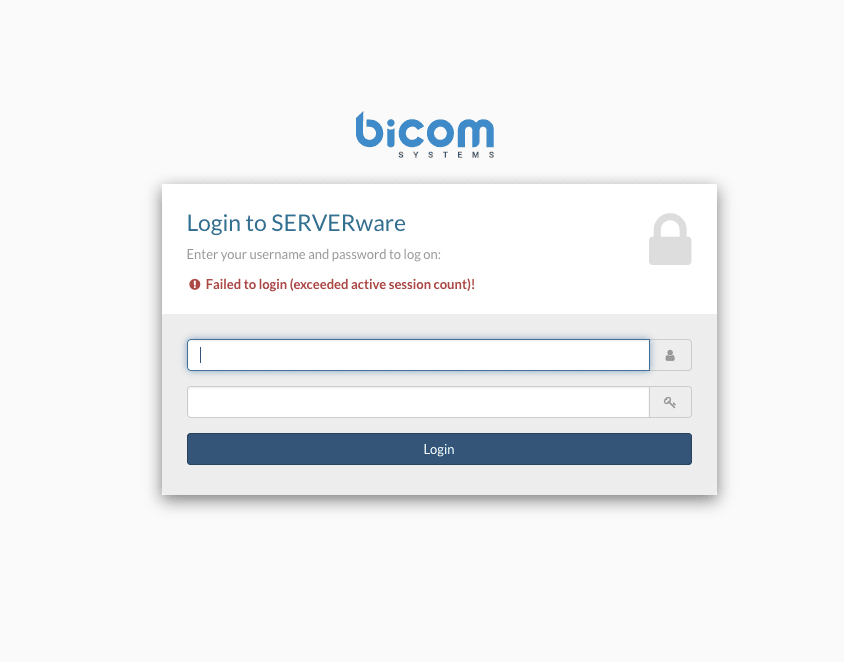
Set the maximum number of concurrent sessions. When this feature is enabled, login attempts beyond the maximum limit will be rejected. For example, if the session limit is set to 3, only 3 users can be logged in simultaneously. Any additional login attempt will be rejected.
Share

21. Access control

Or copy the link below

Clipboard Icon
CONTENT
Leaf Illustration

© Bicom Systems France

Last updated: 4 July 2026 Legal noticePrivacyCookiesTerms © 2026 Bicom Systems