

FR EN

Chat

Estimated reading: 18 minutes

Communicator brings unified chat across desktop, mobile, and web applications. Chat history is stored on the server and synchronized across all user devices. For example, if you have to leave the office but are chatting with your colleagues, you can seamlessly continue the chat using your mobile application. Furthermore, if you switch PCs or laptops, the entire chat history will be synchronized upon your first login on the new computer

Synchronize the chat history

After each connection, the application ensures that each chat session has synchronized the last 20 messages, and by scrolling, you will get the older messages.

Chat server unavailable

If the chat server is down, you can neither send nor receive messages until it is restored. When the chat server is down, an indication appears in the conversation list to alert you. As soon as the application detects that the chat server is back, the warning message disappears and you can continue chatting where you left off.

Start a conversation

There are several ways to start a conversation or open an existing one.

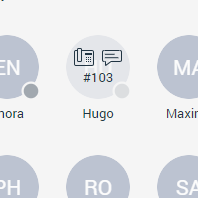
Click the chat icon while hovering over a contact in the contact list (grid mode only).

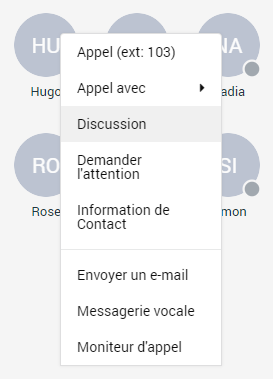
Right-click on the contact in the contact list and select the Chat option from the drop-down menu.

Click a contact in the contact list (list view only):

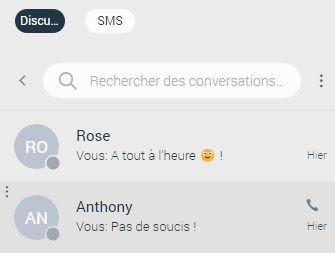
Click a contact in the conversation list to open an existing conversation or use the search field above the conversation list to find the contact and start a new conversation. Additionally, the existing conversation can be found using the search field above the conversation list.

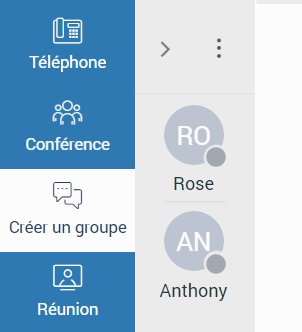
Click the Create group icon in the navigation bar, select several contacts from the contact list, enter the group name and click Create.

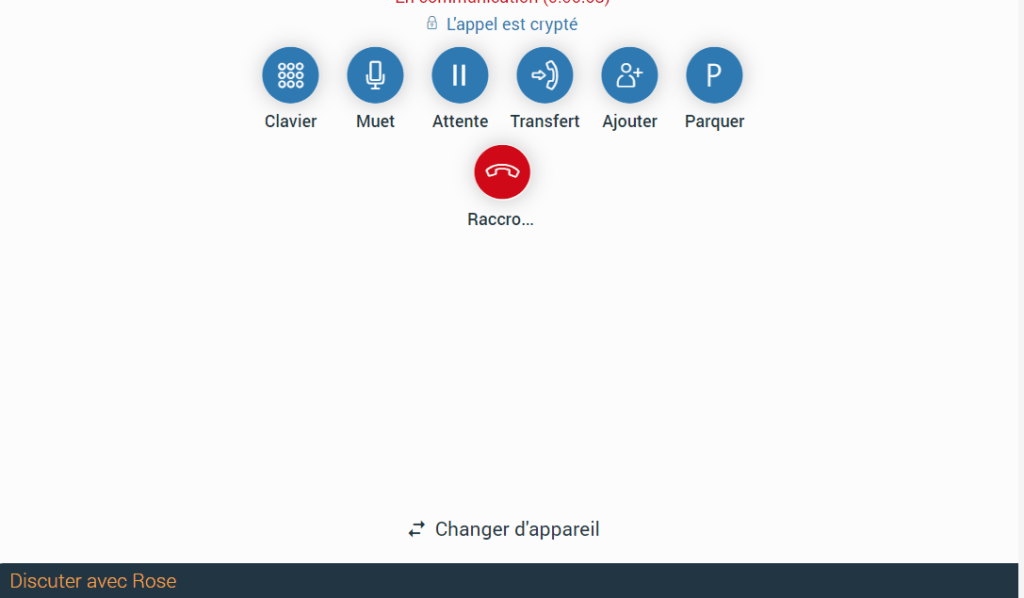
Start a conversation from a regular call (person-to-person conversation).

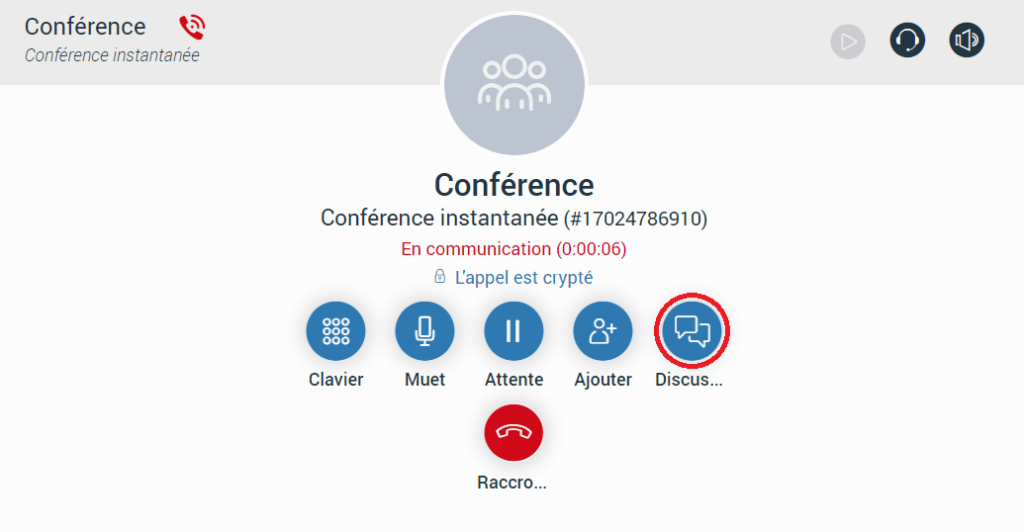
Start a group chat from a conference (group conversation).

Context bar

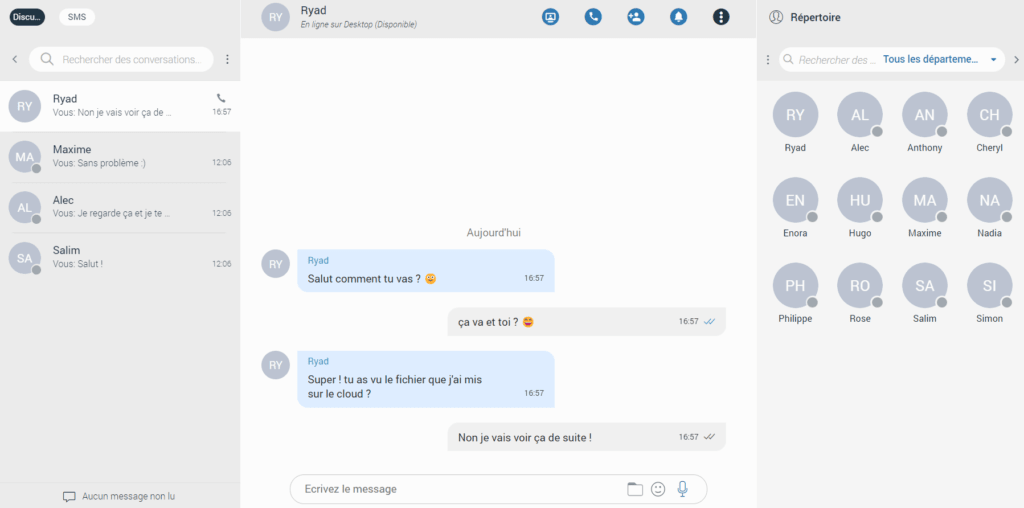
At the top of the chat screen area is a context bar. It contains information about the currently selected conversation and also offers various actions available for that conversation. At the far left is an avatar of the currently selected conversation. Next to it is a username (or a group name in case of a group conversation). Below the name is information about the user's presence and status (for example, online status, status message, etc.).

In the case of a group conversation, there is a label indicating the number of participants in the conversation.

Direct conversations

On the right side of the context bar are buttons for performing the actions available for the currently selected conversation.

  • Start meeting button Start a meeting from the chat (Starting a meeting from the chat will automatically send an invitation link in that chat.).

  • Start call button Call the currently selected contact (create a voice conference in the case of a group conversation).

  • Add user button Add more contacts to the currently selected conversation.

  • Request attention button Ask the other party for immediate attention (not available for group conversations.).

  • More options button More options such as:
    • Call 
    • Call (Select the number on which you want to call the contact)
    • Call with (select whether you want to use the softphone or a desk phone)
    • Contact information opens a contact information screen
    • Send an SMS to the currently selected contact 
    • Pin/Unpin the chat – Pin/Unpin the currently selected conversation
    • Send an email to the contact
    • Voicemail – leave a voice message for the contact
    • Call monitor
    • Delete the conversation

When adding contacts to the currently selected conversation, the user can filter contacts by searching for a contact's name or extension number. Furthermore, contacts can be filtered by department or even add an entire department to the conversation. Added contacts cannot read previous messages in the chat conversation.

Group chats

On the right side of the context bar are buttons for performing the actions available for the currently selected conversation.

  • Start meeting button Start a meeting from the chat (Starting a meeting from the chat will automatically send an invitation link in that chat.).
  • Star conference call button Set up a conference call for the currently selected group conversation.
  • Add user button Add more contacts to the currently selected conversation.
  • Group information button Group information opens a group information screen. The group information screen provides information about the chat administrator, the participants and an option to add more participants to the group.
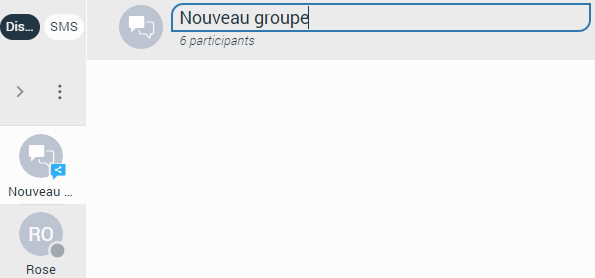
Suppose you are a group chat administrator. In this case, you can modify the group name, remove participants from the group chat, and select a new administrator for the group chat.

If you want to remove a participant from the group chat, you must access the Group Information screen and, in the list of participants, click the avatar of the participant you want to remove.

To change the group chat administrator, you must click your avatar in the Group Information screen, select a new administrator from the list of participants, and click the “Transfer” button.

More options button The additional options are:

  • Pin/Unpin the chat : Pin/Unpin the currently selected conversation.
  • Disable/Re-enable chat : Mute/Unmute the currently selected conversation.
  • Quit : leave the currently selected conversation.
  • Quit and delete : leave and delete the currently selected conversation
Create a group chat

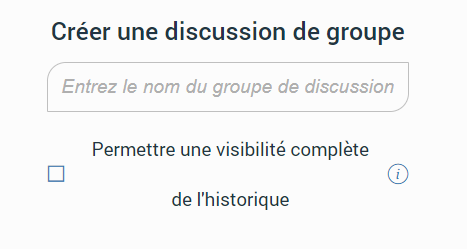
The Create group chat option is used to create group conversations (as the creator of the group, you are automatically the group administrator). Two types of groups are available. The first type of groups consists of ordinary groups, which means that the chat history will not be available to newly added participants. The second type of groups is groups with a visible chat history, which means that the full chat history will be available to newly added participants.

To create a group with a visible chat history, check the Allow full history visibility option.

Shared group indicator Indicates that the chat history is visible to newly added participants.
The group name may or may not be provided when creating the group. If you do not provide a group name, the group name will simply be Group. However, you can change the group name at any time after creating the group by clicking the group name.

Filtering and selecting contacts is the same as described in the Conference section. The user can filter contacts by name, extension number and department. Created groups are permanent, which means you will remain a member of the group after closing the application.

It is possible to have multiple groups with the same participants and identical or different names. For example, you can create Sales Reports and New Releases groups. 

Both groups can have the same participants, and the user can use them for different topics, so that unrelated topics are not mixed into a single conversation.

Mention participants in group conversations

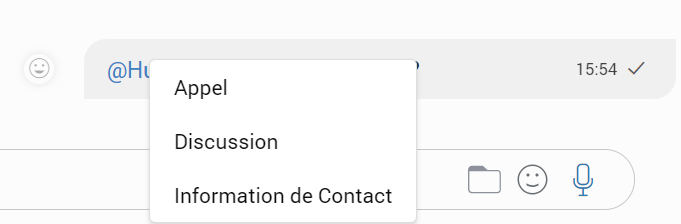
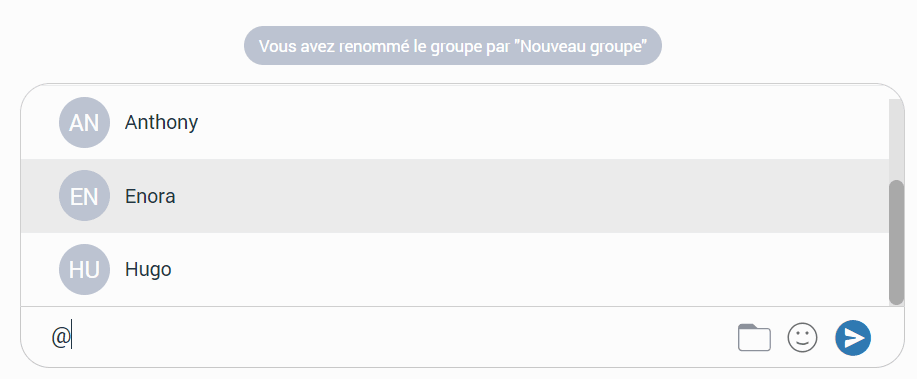
Mention as a feature represents a good way to attract someone's attention within the group conversation. It allows you to indicate one or more participants and provide the context of your mention within the message. Mentioned participants will receive a notification even in group conversations they currently have muted.

To mention a participant, you must enter the @ sign followed by the name of the desired participant. Immediately after entering the @ sign, the list of participants who can be mentioned will be displayed above the input field.

Only participants in the group conversation can be mentioned.

You have a few options for selecting the participants:

– The first is to scroll through the list using the up and down arrow keys and select the participant by pressing the Entrée of their keyboard or by using the mouse wheel and clicking on the participant.

– The second is to keep typing the participant's name after the sign @. In this case, the list above the input field will only display the participants whose names match the input.

The mentioned participant will be colored blue within the conversation.

By clicking on the participant mentioned in the conversation, a context menu appears with the following options:

  • Call : Call the participant directly.
  • Chat : start a one-on-one conversation with the participant or open an existing conversation.
  • Send an SMS : Start an SMS conversation with the participant or open the existing one.
  • Contact details : Display contact details.

Message display

The messages of the currently selected conversation are visible in the middle of the screen. If there are no unread messages, the application loads the last 20 messages and places the scroll bar at the bottom of the message display area. The user must scroll up if they want to see older messages. This way, they can scroll to the beginning of the conversation.

In contrast, the scroll bar will be positioned on the first unread message (if any) with theindicator New messages to notify the user of the start of new messages.

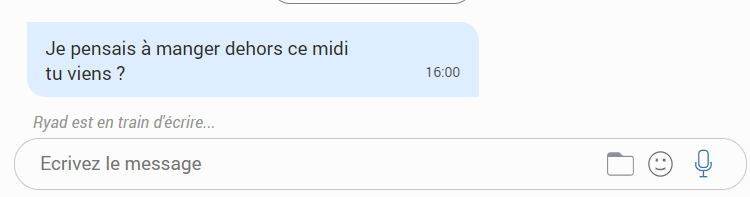
In addition, you can see when the other party is typing. The typing indicator is visible above the message input field and in the conversation list. For a group conversation, if more than one participant is typing, at that point the typing indicator will take the form "N participants are typing", where N represents the number of participants who are typing.

When scrolling up in the currently selected conversation, a "Jump to the most recent message" button appears in the lower right corner of the message view so you can easily jump to the end of the conversation. If new messages are received while scrolling, the "Jump to the most recent message" button displays the number of received messages. Clicking on it takes you to the first received message.

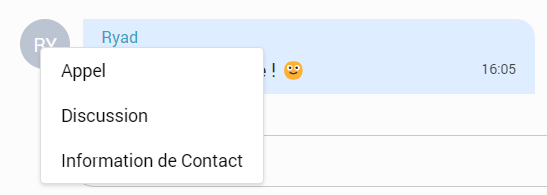
Furthermore, while you are in a group conversation, a left click on the participant’s avatar in the message area will display a context menu with the following options:

  • Call : Call the participant directly.
  • Chat : start a one-on-one conversation with the participant or open an existing conversation.
  • Send SMS : Start an SMS conversation with the participant or open the existing one.
  • Contact details : Display contact details.

Message statuses

For outgoing messages, there is an indicator explaining the current status of the message:

  • Sending the messageThe message is on its way to the server.
  • Message sentThe message is sent and has reached the server.
  • Message deliveredThe message is delivered to the other users.
  • Message seenThe message has been read by the other user(s).
  • Failure messageThe message could not reach the server.
Text selection and context menu

You can select text by pressing and dragging the mouse over the message area. Clicking anywhere in the message area deselects all previously selected messages.

While there is text selected in the messages area, a right-click displays a context menu with the Copy option to copy all selected messages to the clipboard. 

Furthermore, you can press CTRL + C  under Windows or CommandC on macOS to copy all selected messages to the clipboard.

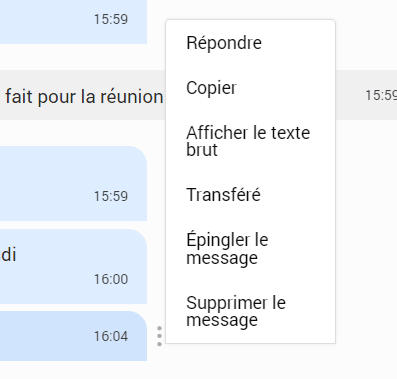
If you hover over a message bubble (gray or blue rectangle), the three dots will appear.

Click it to display a context menu with these options:

– Answer : The “Reply” function allows you to respond to a specific message in several ways. The first is to click the reply button that appears in the message when you hover over it. The second method is to click the three-dot menu that appears on the right side of the message when you hover over it, then select the “Reply” option in the drop-down menu. This will bring up the message you want to reply to above the input field. By clicking on the replying message in the chat, you can return to the original message.

– Copy : The “Copy” function allows you to copy the message content to the clipboard.

– Display plain text: allows you to disable all message formatting (links, emojis, etc.) to see the source of the original message. If you right-click the message again after selecting the “Show plain text” option, a “Show rich text” option will appear in the drop-down menu. This way, you can return to the previous state of the message and see the message formatted with links and emojis.

– Transfer : allows you to forward messages and files from one conversation to another. You can forward the messages or files to up to 10 conversations at a time.

– Pin/Unpin a message : allows you to pin or unpin an important message or a file message at the top of the conversation. Anyone can pin or unpin the message in the conversation. By clicking the pinned message, you will be directed to that message in the conversation. It is possible to have only one pinned message at a time.

– Info: allows you to see the delivery and read status information of a single message in a group conversation.

– Delete the message : allows you to delete text messages and files.

After the delete action, the confirmation dialog will appear with two options for outbound messages:

– Delete for me with the following sub-content : This message will be deleted only for you. The other members of the chat will still be able to see it. Are you sure you want to continue?

– Delete for everyone with the following sub-content : This message will be deleted for all participants. Are you sure you want to continue?

For incoming messages, there is only one option:

– Delete for me with the following sub-content : This message will be deleted only for you. The other members of the chat will still be able to see it. Are you sure you want to continue?

In addition to the options mentioned above, the confirmation dialog box contains the buttons Delete and Cancel .

After deleting the message, the indicator Message deleted appears.

Message file

In addition to regular text messages, you can use chat in Communicator Web to share files.

For media and other file types, there is a thumbnail. Below the thumbnail is information about the file name and its size. At the bottom of the file message is an icon used to download, show download progress, or retry downloading/uploading the file depending on the file status. If the browser supports the file type, clicking the thumbnail opens the file in a new tab. Otherwise, it downloads it to the computer so you can open it with another program.

Clipboard

Communicator Web supports clipboard functionality for images and files. This means that the clipboard can now be used to copy/paste images from external applications (such as an image viewer, browsers, etc.) or to copy/paste images and files from the file explorer (Finder on macOS) directly into the chat session. With this at your disposal, you are no longer limited to simply using an image/file picker and a drag-and-drop feature to send images and files.

When using the clipboard feature to send images and files, instead of sending them immediately after pasting them into the chat, the application creates a list of attachments including thumbnails in the selected chat session. If possible, clicking the thumbnail opens the file in a separate browser tab. Otherwise, the application downloads it to the computer. This way, you have the option to double-check the selected files and images before sending them.

Adding files to the list of attachments when using the clipboard can be done in two ways:

– Use CTRLCmdon macOS) + CVto copy/paste files
– Use right-click of the mouse to copy/paste files.

Furthermore, when you hover over a file in the attachments list, a blue circle with a white dash appears in the upper right corner of the thumbnail. Click on it to remove the file from the list.

While the attachment list is active and you select files using a file picker or drag them into the chat, they will be added to the attachment list. Otherwise, the application will send them immediately.

Furthermore, as long as the attachments list is present in the selected chat conversation, you can compose a text message simultaneously. In this case, the application will first send the text message, then the attached files one by one.

The maximum number of files simultaneously attached to the attachment list is limited to five (5). Once the limit is reached, a popup message will appear displaying the following: “You cannot upload more than 5 files simultaneously.”

For larger images, the copy operation will take some time. During this time, the application will change the cursor type to loading, indicating that the file is being copied.

Input field

The message type field at the bottom of the chat is used to send messages to the currently selected conversation. After typing a message, press the Entrée of your keyboard to send a message. To enter a new line, press ShiftEntrée

The length of the message that can be sent is limited to 10,000 characters.

The folder icon, symbolizing the sending of files, allows you to send files. By clicking on it, a dialog box opens, allowing you to select up to 5 files to send to the currently selected conversation. In addition, you have the option to send files by dragging them from Windows Explorer (Finder on macOS) to the chat message area.

The emoticon icon, symbolizing the sending of emojis, allows you to send emojis. By clicking on it, an emoji window appears, allowing you to browse emojis separated into categories.

A microphone icon allows you to record voice messages for up to 2 minutes.

During recording, you have the option to use the following options:

– Delete the recording : this will delete a voicemail.
– Stop recording : The recording will stop. This way, the user can listen to the voice message before sending or deleting it.
– Send : It will stop the voicemail and send it immediately without the option to listen to it.

Playback of voice messages is possible within a chat by tapping the play button. It is possible to scrub through a selected voice message by clicking on the waveform.

Share

Chat

Or copy the link below

CONTENT