



23. Settings
The settings are used to define the global system variables. These settings are applied to the entire system if they are not specified at a lower level.
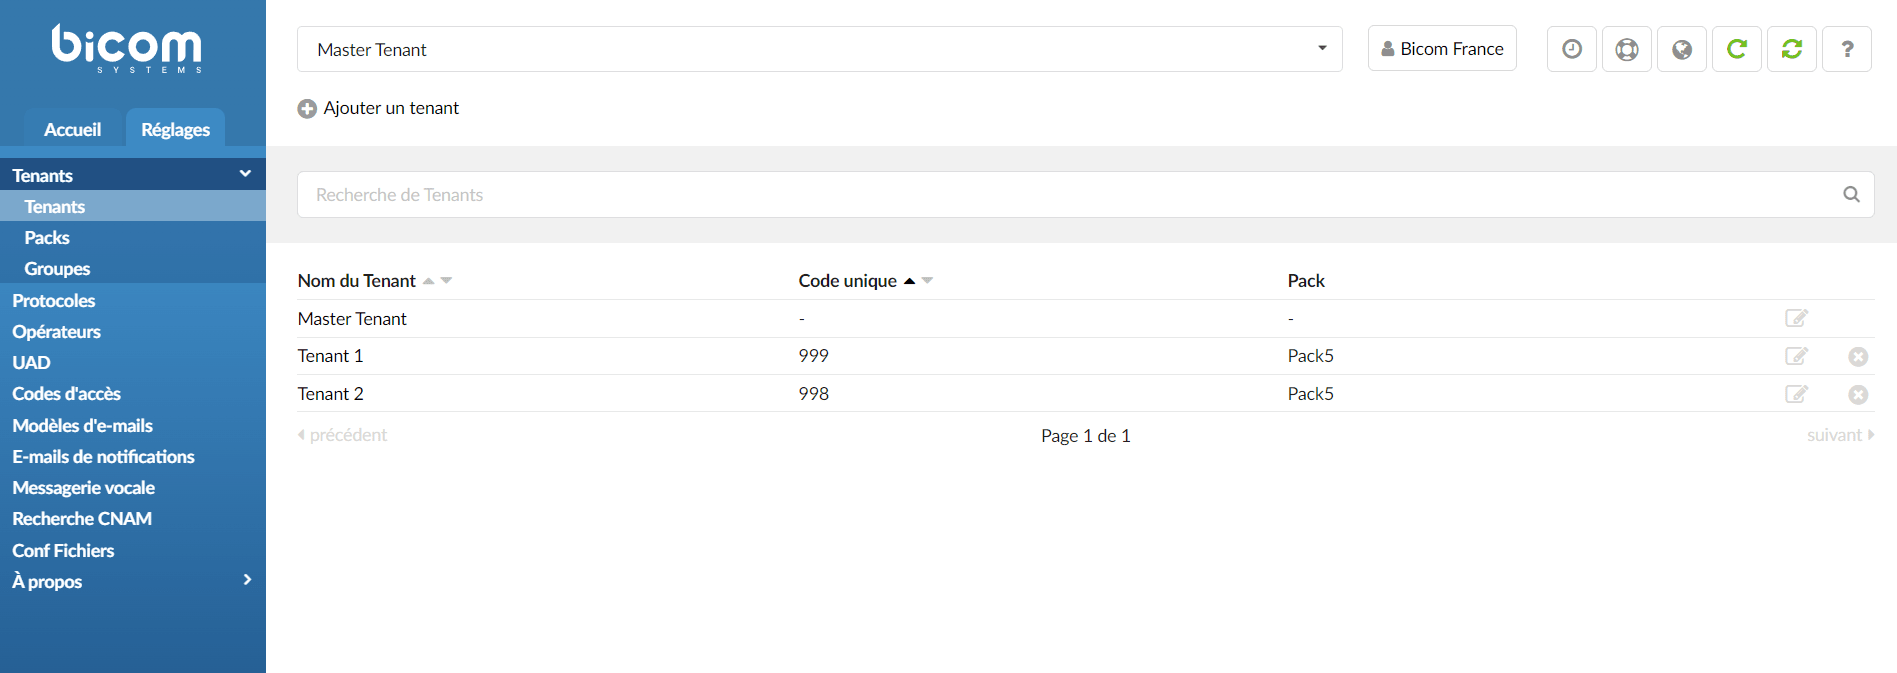
Tenants
PBXware MT system administration theoretically allows you to administer up to 800 slave tenants from a single administration interface.
This screen displays all the tenants on the system with the following details:

Tenant name:
Unique and custom tenant name on the network.
Tenant code
Unique custom tenant code.
Pack
Name of the package used by a slave tenant.
 Edits the server configuration.
 Deletes a tenant from the system.
Edit the Master Tenant
The master tenant settings are used to define the global MT variables. These settings are applied to the entire system unless otherwise specified at a lower level.
Network info
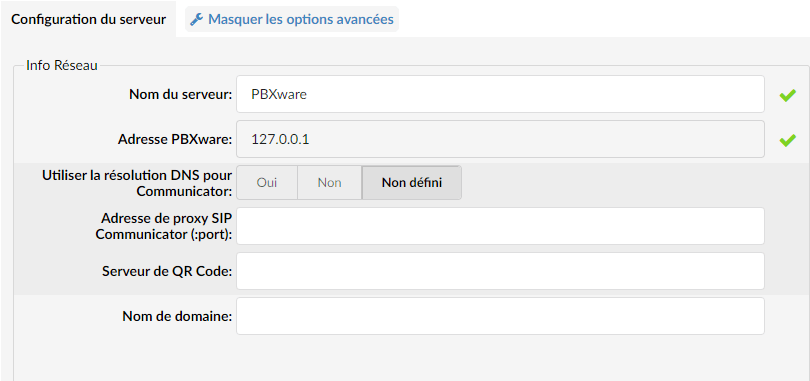
Server name:
Enter the custom server name (sometimes used in system notifications).
PBXware address :
Enter the IP address on which the PBXware daemon runs. Since the PBXware daemon will always run on the same server, this IP address cannot be changed and it is always ‘127.0.0.1’.
Use DNS resolution for Communicator
Select whether or not Communicator will use DNS SRV lookup.
Communicator SIP proxy address (:port):
Enter the public IP address/domain of the Communicator SIP Proxy.
Auto Provisioning
Auto Provisioning sets the values to use for the auto provisioning system in order to create auto provisioning files correctly based on the UAD location (local/remote).
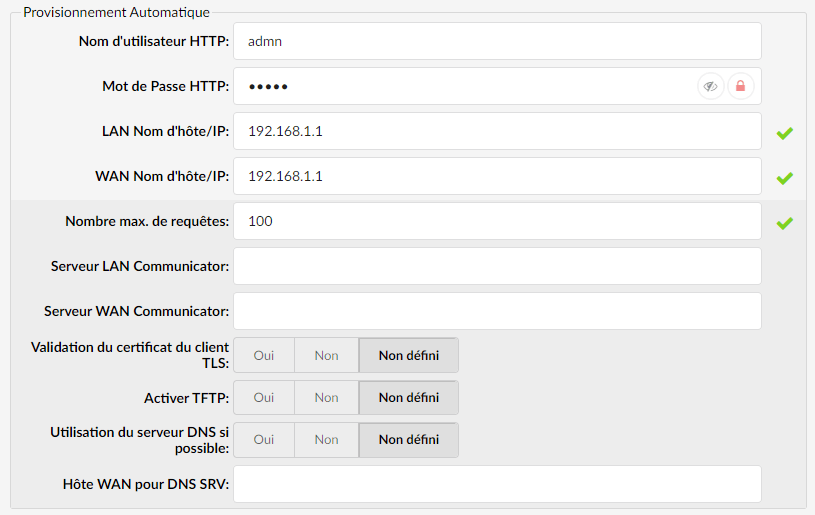
HTTP Username
Username for HTTP auto-provisioning. Required to authenticate auto-provisioning requests with the PBXware server.
HTTP password
Password for HTTP auto provisioning. Required to authenticate auto provisioning requests with the PBXware server.
LAN Hostname/IP:
LAN IP address used for auto-provisioning of local UADs.
WAN Hostname/IP:
WAN IP address used for auto-provisioning of remote UADs.
Max number of requests:
The value represents the maximum number of auto-provisioning requests accepted by PBXware in a one-minute period.
If the number of requests is greater than the defined number, the IP address of the provisioning request will be blocked for a period of 5 minutes.
The user will still be able to access the PBXware GUI.Communicator LAN server:
PBXware LAN IP address that users connecting to PBXware from the LAN will use to register their Communicator clients.
Communicator WAN server:
PBXware WAN IP address that users connecting to PBXware from the WAN will use to register their Communicator clients.
TLS client certificate validation

During its operation, the system sends notifications and alerts by email to various users and administrators. These emails can be sent using a built-in “local mail server” or a remote SMTP server.
From the email address:
Allows you to set the From: field in Email.
Locality
The locality defines where the system operates.
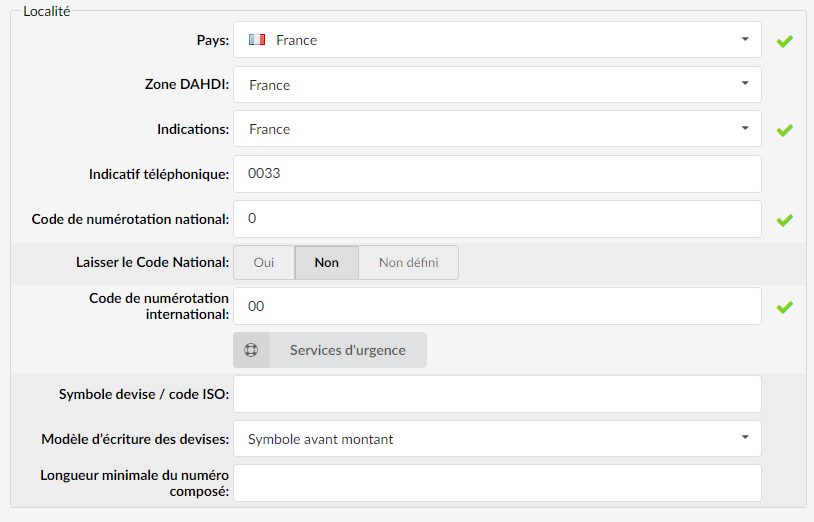
Country:
Country from which the server operates.
DAHDI zone:
Overrides automatic country detection
It is recommended to keep this setting on "Automatic".Indications:
Which indications (ringing, busy, etc.) should be used by PBXware?
Phone code:
Area code in which the system is located or from which it operates.
(For example, if the system is located in New York, indicate the New York area code (212) here).National dialing code:
Code required to dial national destinations.
Leave National Code:
In some countries, the national code is automatically removed. If this setting is set to "Yes", the national code will not be removed from the dialed number.
International dialing code:
Code required to dial international destinations.
International dialing code:
Code required to dial international destinations.
Currency symbol / ISO code:
Symbol of the currency of the country where the server is located.
Currency formatting template:
- Symbol before amount – The currency symbol will be displayed before the amount.
- Symbol after the amount – The currency symbol will be displayed after the amount.
Minimum length of the dialed number:
Set the minimum number of digits dialed for a call to leave the system.
Emergency services
By clicking on the “Emergency services” button, a pop-up window appears in which users can enter the emergency numbers for the police, fire department, and ambulance.
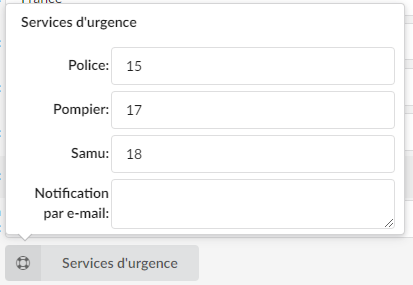
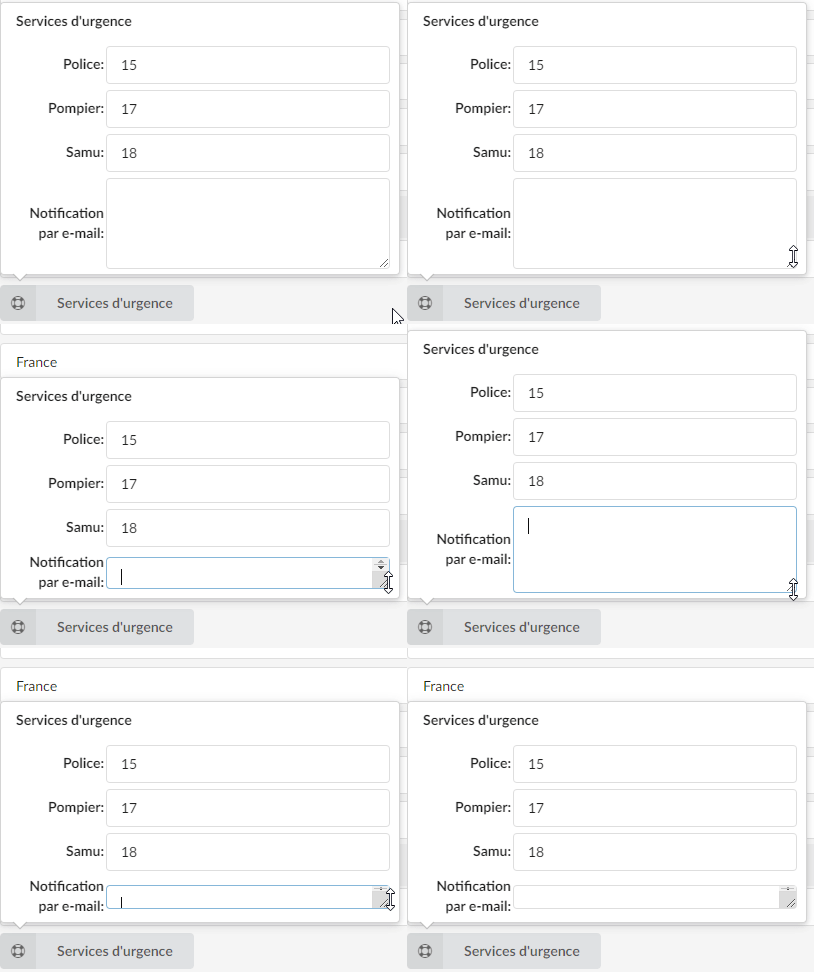
Email notification:
After dialing one of the emergency numbers, an email will be sent to the address specified in this field. Users can enter one or more email addresses according to their preferences and needs.
If several addresses are added, they can be separated by a new line or a semicolon ';'.
Default dialing
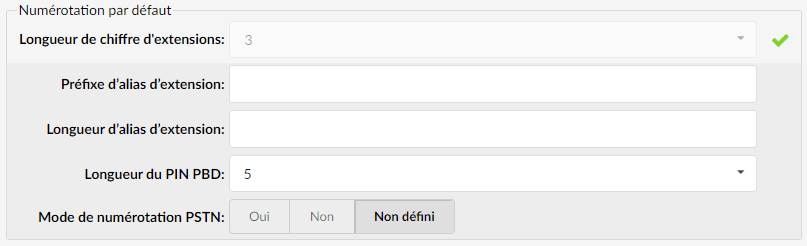
The default dialing is defined during the initial system setup to determine the number of digits the system will use by default. You can select a value between 2 and 16.
Extension digit length:
Number of digits used by the system to create local extensions, IVRs, queues, voicemail boxes, conferences, etc. This option is only available during the setup wizard installation procedure. To change the number of digits after the setup wizard has been installed, you will need to delete all extensions, ring groups, DIDs, conferences, IVRs and voicemail boxes. The recommended value for this field is 4.
Extension alias prefix:
Digit preceding the dialed number on systems that switched from 3 to 4 digits, for example.
(For example, if your old system used 3 digits and you want to switch to 4 digits, set '1' here to assign '1' as a prefix to all extensions on the system. In this way, the old extension 300 becomes 1300).Extension alias length:
Length of the old numbering system.PSTN dialing mode:
If this option is enabled, when a number is dialed, it is not necessary to use the DID; the system automatically calls that extension.
LDAP
If this option is enabled, auto-provisioned phones will receive the contacts of the company directory instead of the system extensions. Currently, this feature only applies to Yealink, Polycom, and Cisco phones. Phones from other manufacturers will ignore this option and use the directory as before.

Enable:
Enables/disables the LDAP corporate directory feature.
Password:
Password sent to phones with the auto provisioning configuration and used to authenticate the phone with PBXware when searching for/retrieving contacts.Include system extensions:
By default, when LDAP is enabled, phones only serve the contacts defined in the company directory. If this option is set to Yes, the contact list will also include the system's extensions.
STIR/SHAKEN
This will only work for calls originating from Trunks.
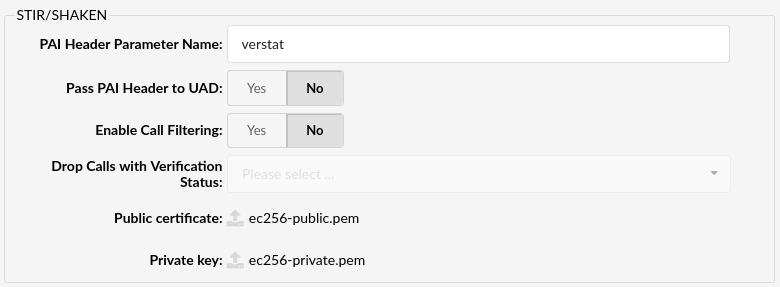
PAI header parameter name
Set this field to the desired value.
General settings
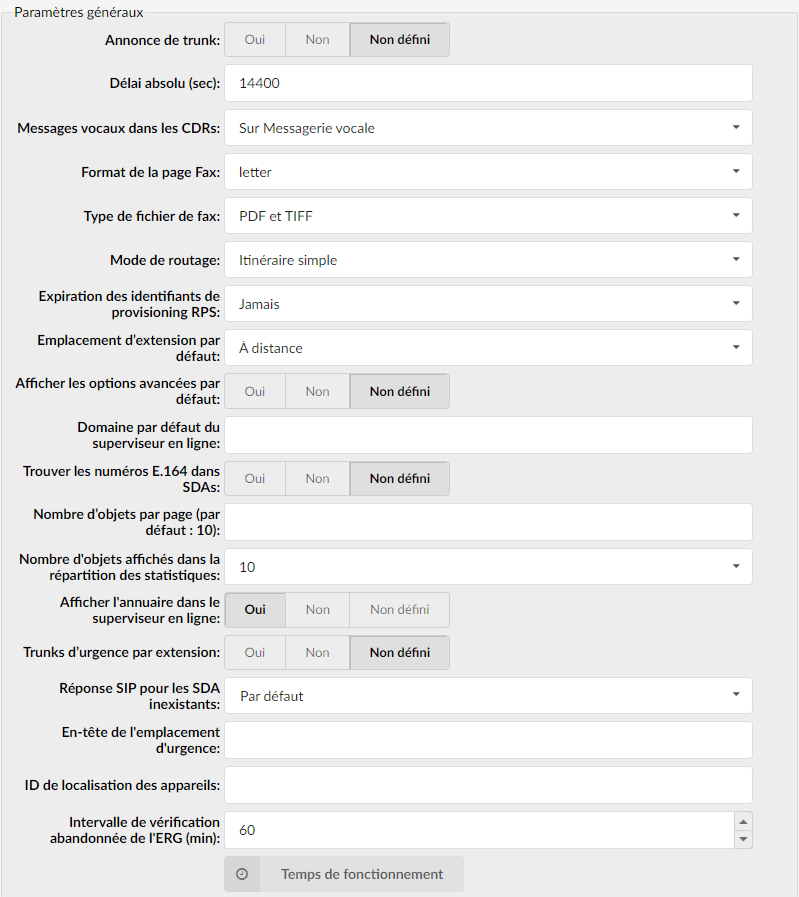
Trunk announcement
Sets whether or not to announce on which trunk the call is routed
(For example, John dials ‘55510205’ and this call goes through the system's default secondary trunk. John will hear the following message: “Using secondary trunk to complete your call”).
Absolute delay (sec)
Set the maximum duration in seconds of a call.
Voice messages in CDRs
Define how unanswered calls and those redirected to voicemail are displayed in the CDR.
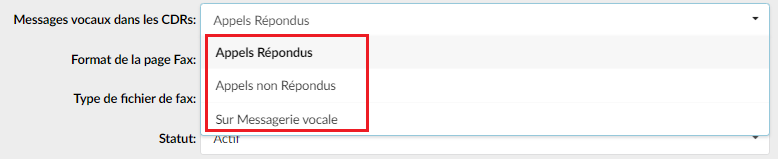
The options are as follows:
- Answered calls: When a call is redirected to voicemail, it will appear as "Answered" in the CDR.
- Unanswered calls: When a call is redirected to voicemail, it will appear as "No Answer" in the CDR.
- On Voicemail: When a call is redirected to voicemail, it appears as "Voicemail" in the CDR.
Call recordings
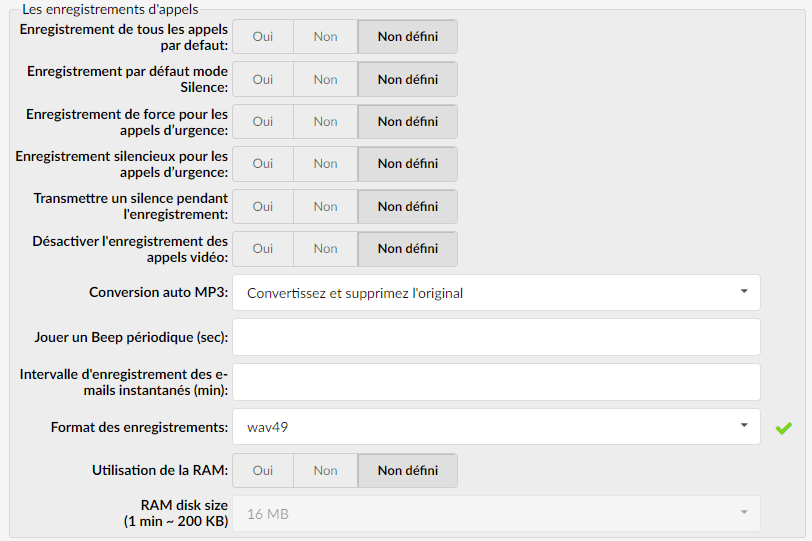
Record all calls by default:
Set this option to “Yes” to enable call recording at the system level.
Administration
This section allows remote administration of the system.
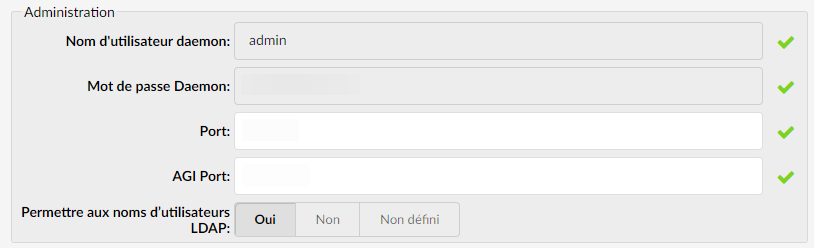
Daemon username:
Username that PBXware uses to connect to the Asterisk Manager.
Daemon password:
Password that PBXware uses to connect to Asterisk Manager. The password is randomly generated during installation and cannot be changed.
Port:
PBXware Daemon connection port.
(Default value 10001)AGI Port:
AGI connection port.
(For example, 4573)Allow LDAP usernames:
This tells PBXware to accept Communicator registrations when it uses a Windows® username for this.
Location

Audio language:
Sets the language in which the audio files are played.
Enhanced call parking

During a call, the user can dial ‘#800’. The call will be parked and “the announcement extension” will ring for a certain number of seconds.
Timeout (s):
Extension that will receive a call from PBXware and be notified on which parking lot the call is parked. If this extension does not answer the call after a certain time, the call will be directed to the Timeout extension.
Announcement extension:
Extension that will receive a call from PBXware and be notified on which parking lot the call is parked. If this extension does not answer the call after a certain time, the call will be directed to the Timeout extension.Extension timeout:
Destination to which the call will be directed if the call is not answered after the Parking timeout.
Limit notification for the extensions channel
Here you can define whether there will be a notification when users exceed their outgoing call limits. These options apply to all extensions.

Listen to the recording:
This option tells the system to play a notification sound when an extension exceeds its outbound call limit.Send the email:
Whether or not to send a notification email when the limit is exceeded.Email notification:
Email address to which a notification mail should be sent if the number of calls exceeds the limit.
Slices
Depending on the server's processor power, a custom limit can be assigned to the different slice types.
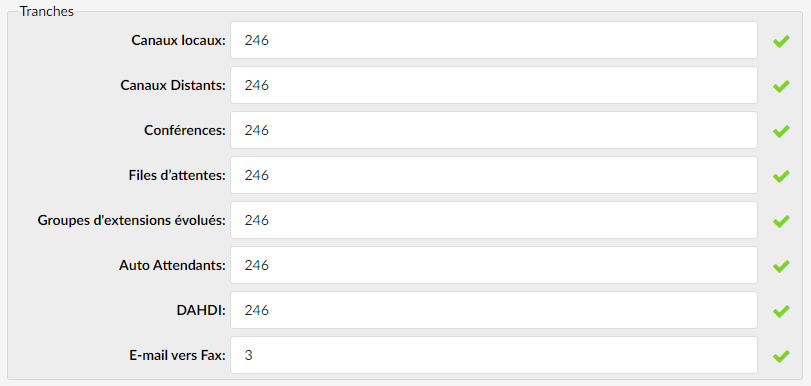
Local channels:
Total number of channels used by local UADs.Remote channels:
Maximum number of active incoming or outgoing channels for the server.Conferences:
Total number of conferences in the system.Queues:
Total number of ACD queues in the system.Auto Attendants:
Total number of all IVRs in the system.DAHDI:
Total number of all trunks in the system using the DAHDI protocol.Email to Fax
Maximum number of simultaneous fax calls via the Email to Fax application.
DIDs missed call notifications
Missed calls on DIDs will be logged and sent as a summary email. Here you can define where this email will be sent, how the call entries will be sorted, and the interval at which the notification is sent.
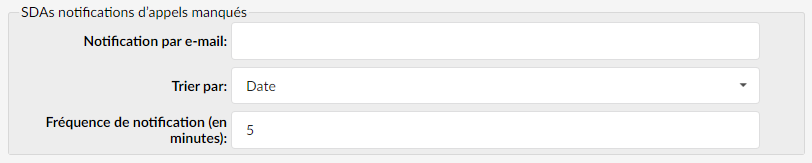
Email notification:
Recipient of the notification email.
Sort by:
How calls are categorized in the email
- Date: All entries are presented as a single table sorted by call date.
- DID: Entries are distributed across multiple tables (one table per DID) and sorted individually by date within each table.
Notification frequency (in minutes):
Indicates how often (in minutes) the notification email will be sent. If no call has been missed during this period, no email is sent. The email is only sent if there has been at least one missed call.
Jitter Buffer
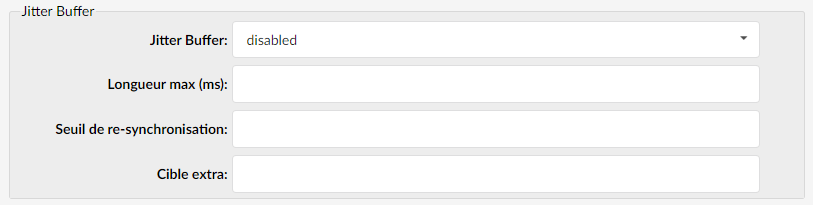
Jitter Buffer:
- Inherit
Inherits the Jitter Buffer settings from the tenant configuration. - Fixed
Sets a fixed Jitter Buffer on the channel. - Adaptive
Sets an adaptive Jitter Buffer on the channel. - Disabled
Deletes a Jitter Buffer previously set on the channel.
- Inherit
Max length (ms):
Buffer length in milliseconds. By default, it is 200 ms.
Re-synchronization threshold:
Duration in milliseconds beyond which a timestamp difference will trigger a resynchronization of the Jitter Buffer. The default value is 1000 ms.
Extra target:
This parameter only affects the adaptive Jitter Buffer. It represents the time in milliseconds by which the size of the new Jitter Buffer will be increased. The default value is 40.
Default codecs
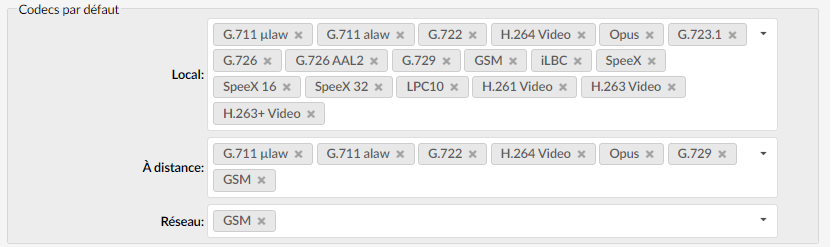
Default codecs can be set for the following groups:
Local
Local extensions.Remote
Extensions and trunks.Network
PBXware network (two or more servers).
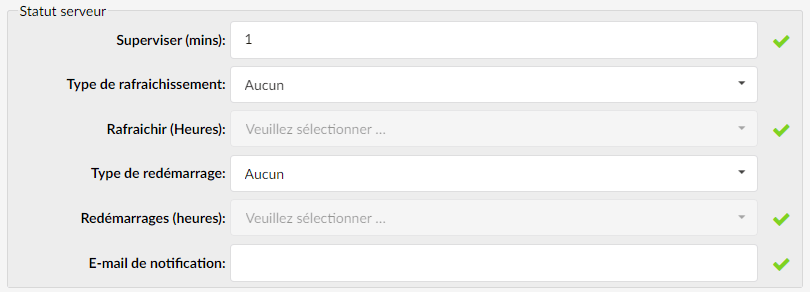
Server status
Monitoring defines the alarms and notifications with which the system will monitor itself. Monitoring also allows you to define where notifications will be sent when alarms are triggered.
Hot Desking
Here you can set the Hot Desking security details.
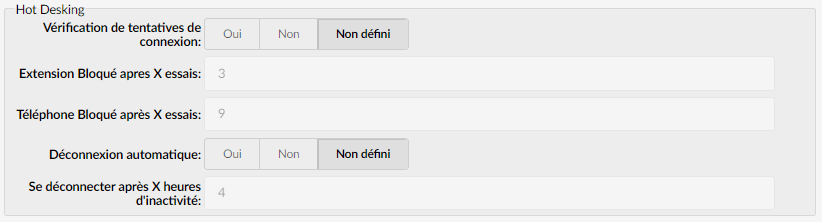
Login attempt checking
The login attempt verification option allows you to enable or disable login attempt verification for hot desking. When set to yes, users can define two additional options: Extension Blocked after X attempts and Phone blocked after X attempts.
Extension Blocked after X attempts
This option allows the user to set the maximum number of unsuccessful attempts before the extension is locked. The default value is 3. Thus, if the phone operator makes three unsuccessful login attempts in a row during the same day, the extension will be locked.
Phone blocked after X attempts
This option sets the number of locked extensions after which the phone (device) should be locked. The default value is 9, which means that after nine extensions on the same device are locked, the device will be locked.
Automatic logout
When this option is set to yes, it enables the automatic logout feature. When enabled, hot desking phones log out after X hours of inactivity.
This option can also be set per extension, under Extensions Advanced Options -> Hot Desking, and in that case, it will override this setting and use the value set in the extension's Hot Desking section.Log out after X hours of inactivity
In this field, the user can define the idle time required to restart the phone, in hours. The default value is 4 hours.
At each login, the system checks whether the number of extensions blocked per device is equal to or greater than what is defined on the settings/servers page. This way, you can unblock the phone by simply increasing the values on this page. For example, if the option “Phone Blocked after X attempts” is set to 3 and there are 3 blocked extensions on that day, the phone (device) will be blocked and no one will be able to log in from that device until an administrator unlocks the extensions.
Now, if someone sets the “Phone Locked after X attempts” option to 4, the phone will be available until an additional extension is locked.
Features
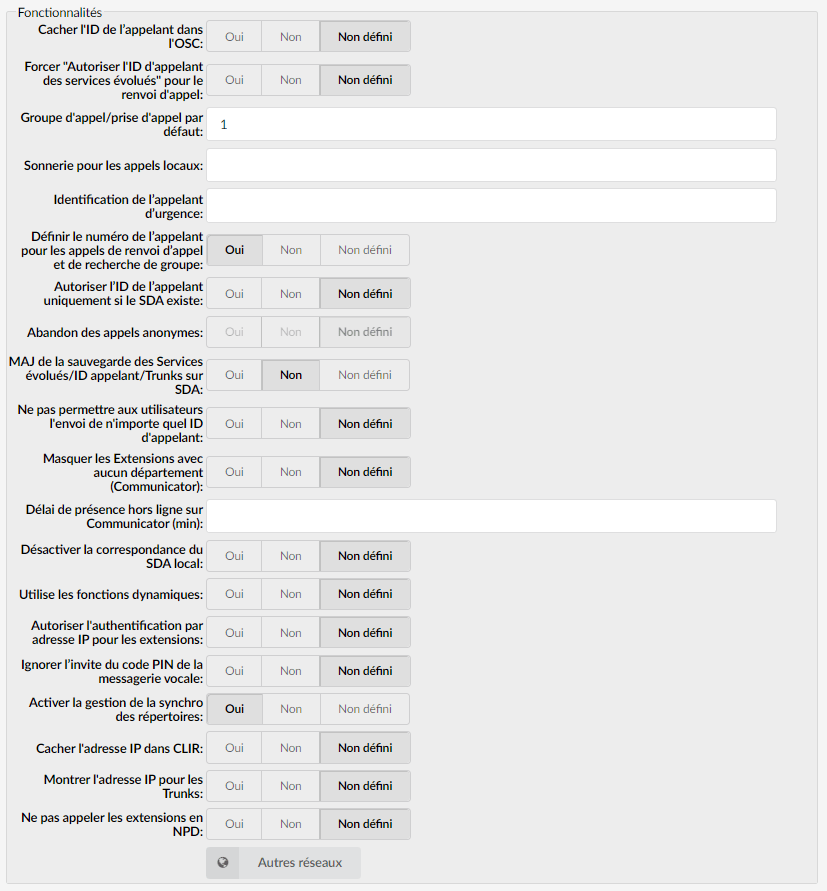
Hide the caller ID in OSC
This option allows you to hide or not the enhanced services caller ID in the online supervisor (OSC). Set this option to "Yes" to prevent users from modifying the caller ID.Force “Allow Enhanced Services caller ID” for call forwarding
Forces the display of the caller ID of the user who transferred the call.
(For example, John calls Michael and Michael transfers the call to Steven. Steven will see that Michael is calling him instead of seeing John).
Other networks

The system can be part of the "default" PBXware network where all extensions share the same unified dial plan. To do this, simply select the PBXware network the system belongs to in the selection box.
By clicking on “Other networks”, the following options open:
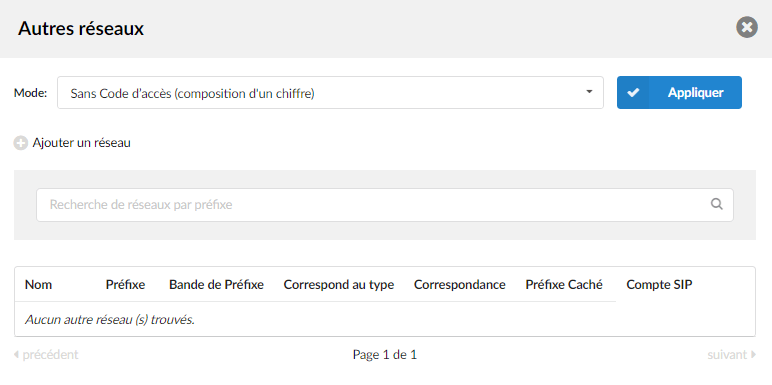
Mode:
Defines how other PBXware networks are dialed.
- With access code – Access code + network number + extension
- Without access code (single-digit dialing) – network number only + extension
Name:
Name of the other network.
Prefix:
Displays the prefix of the other network.
Prefix band:
Indicates the value chosen for the Prefix Strip option when adding/editing the other network.
Matches type:
Indicates the type of matching defined for the Match type option.
Match:
Indicates the value that will be used for matching.
Hidden prefix:
Displays the value of the hidden prefix.
SIP account:
Trunk used once the other network number has been dialed.
- Click here to edit the configuration of the other networks.
- Click here to delete the other network connection.+
For users to be able to use 2- or 3-digit prefixes, you must enable the “Mode: * with access code”, a 2- or 3-digit prefix. After configuring this option, you must dial *188 XXX YYYYYY, where XXX is the 3-digit prefix and YYYYYY is the phone number you want to dial.
If you have enabled "Mode: * without access code" (1-digit dialing), users will be able to dial the numbers defined with your 1-digit prefixes without using the *188 access code, by simply typing X YYYYYY, where X is your 1-digit prefix and YYYYYYY is the number you want to dial.
Add/Edit a network
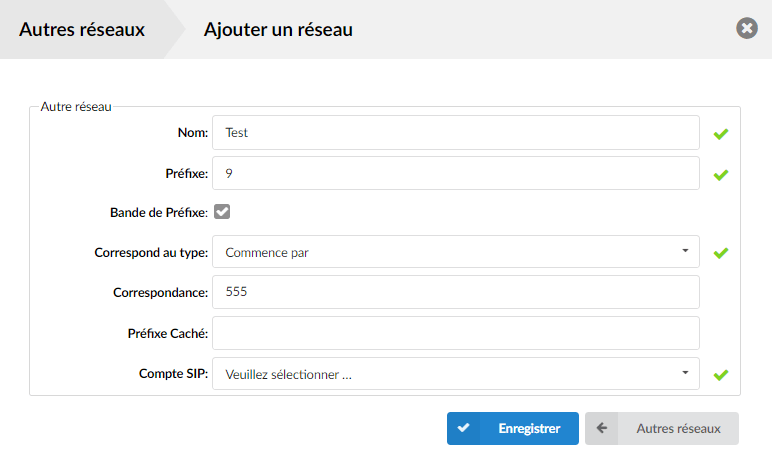
Name:
Customize the name of the Other network.
Prefix:
Number used to access other networks (maximum 3 digits).
(For example, if this field is set to '7', dial '*188 7 {NETWORK NAME}').Prefix band:
Should the prefix be removed when dialing the number of the other network?
(For example, if the "Prefix" field is set to "7" and this field is enabled, when the user dials *188 7 55510205, the system dials 55510205. If this field is disabled, 755510205 will be dialed).Matches type:
Range of numbers allowed to be dialed after the *188 access code of the Other network
Different types of matching can be chosen.- Interval: Select the range of numbers allowed to be dialed on this network.
Starts with:
All numbers that begin with the entered digit(s) will be allowed to pass through the network.
- Regex:
The type of an entry in the Match Type field must be a regular expression. Suppose we want to enter "7" as the prefix number. In this case, the correct entry with prefix 7 is: [0-9]{3}. The first part of the expression [0-9] represents a digit from 0 to 9. And {3} represents the quantity (3 digits from 0 to 9). The correct solution is also: [0-9][0-9][0-9]. It is important to mention that the prefix must be excluded from the regular expression, since it is already included by entering a digit in the Prefix field.
Match:
The value for which the match type rule will be applied. It can be one of the following values:
- A range of numbers for the Matches type.
(For example, 200000-200999) - Starting digits of the numbers for the Match type Starts with.
- A regular expression for the Regex match type.
- A range of numbers for the Matches type.
Hidden prefix:
Prefix added before the dialed number
(For example, if this field is set to 212 and we dialed *188 7 55510205, the number 21255510205 will be dialed. This is useful if the provider requires a certain code before dialing the destination, if the area code is inserted automatically, etc.).SIP account:
Select the trunk that will be used for calls passing through this network.
Emergency call notifications
When an emergency number, such as 112, is dialed, an automated call is placed to a specified number, extension, or ring group, broadcasting an announcement indicating that 112 was dialed from this extension.
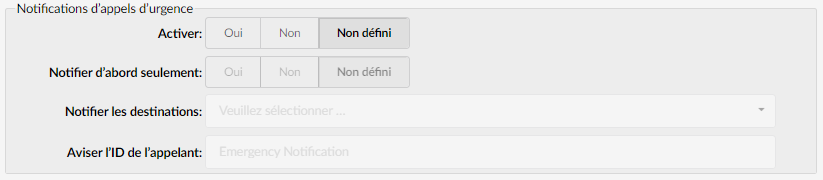
Enable:
Choose whether to enable or disable notifications for emergency calls.Notify first only:
Indicate whether you wish only the first destination to be notified in the event of an emergency call. (If this setting is set to “No”, each configured destination will receive the playback individually, if it answers).Notify destinations:
Enter the destinations you wish to be notified in the event of an emergency call.Notify the caller ID:
Add a custom caller number that will be used for emergency calls (it will be displayed on the configured destination).
Example: Extension 101 dials 112. The automated call is sent to extensions 102, 103 and 104. The person who answers will hear "1-1-2 was dialed from extension 1-0-1".
File sharing
Options for the file-sharing service used by the desktop and mobile apps.

Maximum file transfer size (MB):
Maximum allowed size for sending files using desktop and mobile applications.
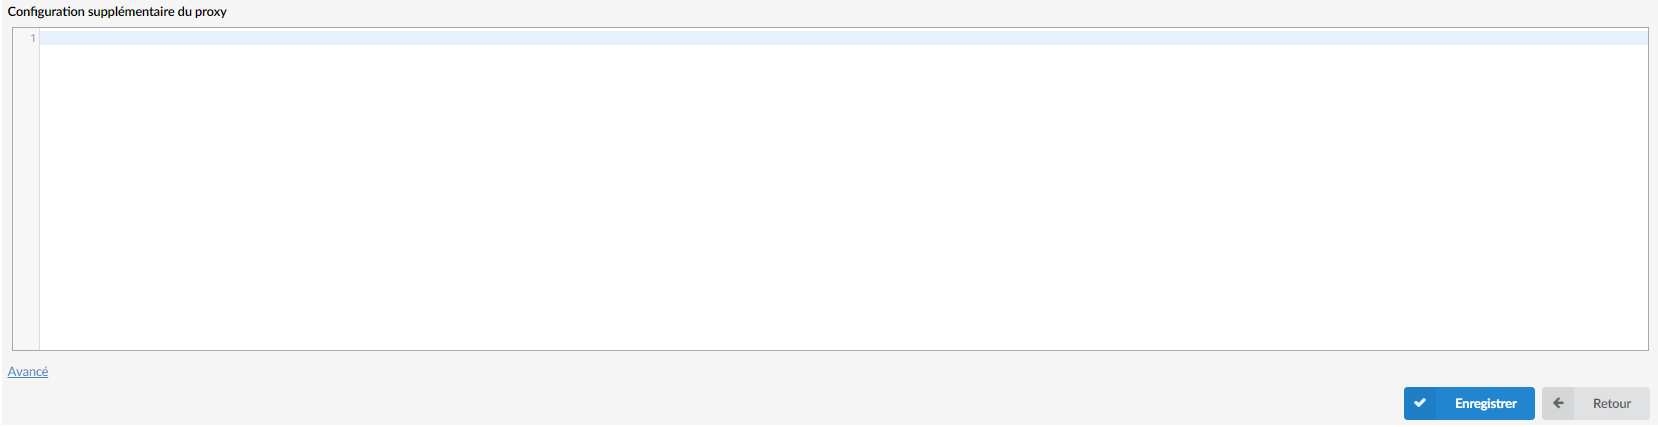
Additional proxy configuration
Here, users can add custom/hidden proxy configuration parameters.
Packs
Packs are “presets” used to determine the number of slaves among the following: extensions, voicemails, queues, IVRs, conferences and ring groups.
- Pack name
Package name.
- Number of uses
Number of tenants using this plan.

Click here to edit the package configuration

Click here to delete the package from the system.
Add/Edit a package
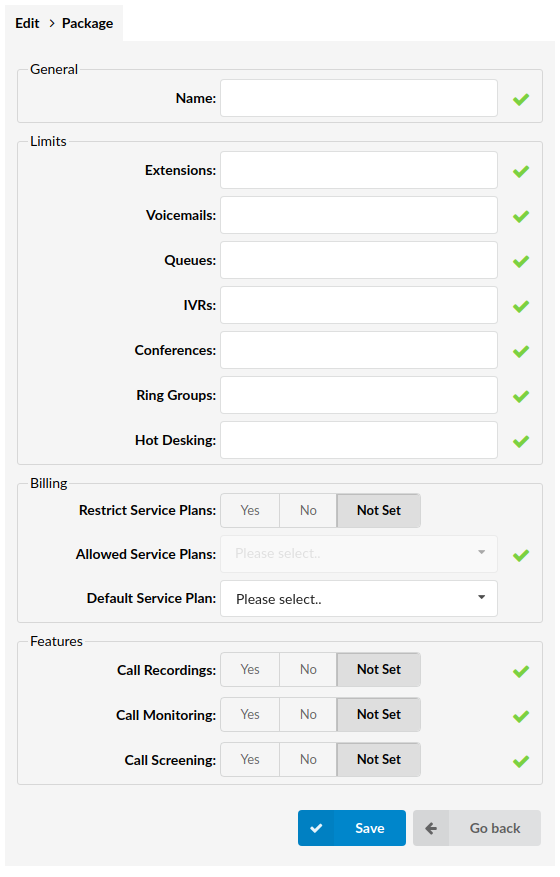
General
- Name
Tenant package name.
- Extensions
Number of extensions that can be created on a tenant using this package.
- Voice messages:
Number of voice messages that can be created on a tenant using this package.
- Queues
Number of queues that can be created on a tenant using this package.
- IVR
Number of IVRs that can be created on a tenant using this package.
- Conferences
Number of conferences that can be created on a tenant using this package.
- Ring groups
Number of ring groups that can be created on a tenant using this package.
- Shared desk
Number of desk sharing devices that can be created on a tenant using this package.
Features
- Call recordings
Choose whether to enable or disable call recordings on the tenant using this package. If you disable it, you will not be able to record the call at the extension and DID level. Options such as instant recording, delete recording and listen to recordings in enhanced services will be disabled for all extensions, in case you have set call recordings to No.
- Call supervision
Enabling or disabling this option will allow or prohibit the use of the call monitoring option in enhanced services for all extensions.
- Call filtering
If you enable this option, the Call Screening option under Enhanced Services will be listed. The user will have the ability to enable or disable this option. Setting the Call Screening option to No will not display this option in the enhanced services.
Groups
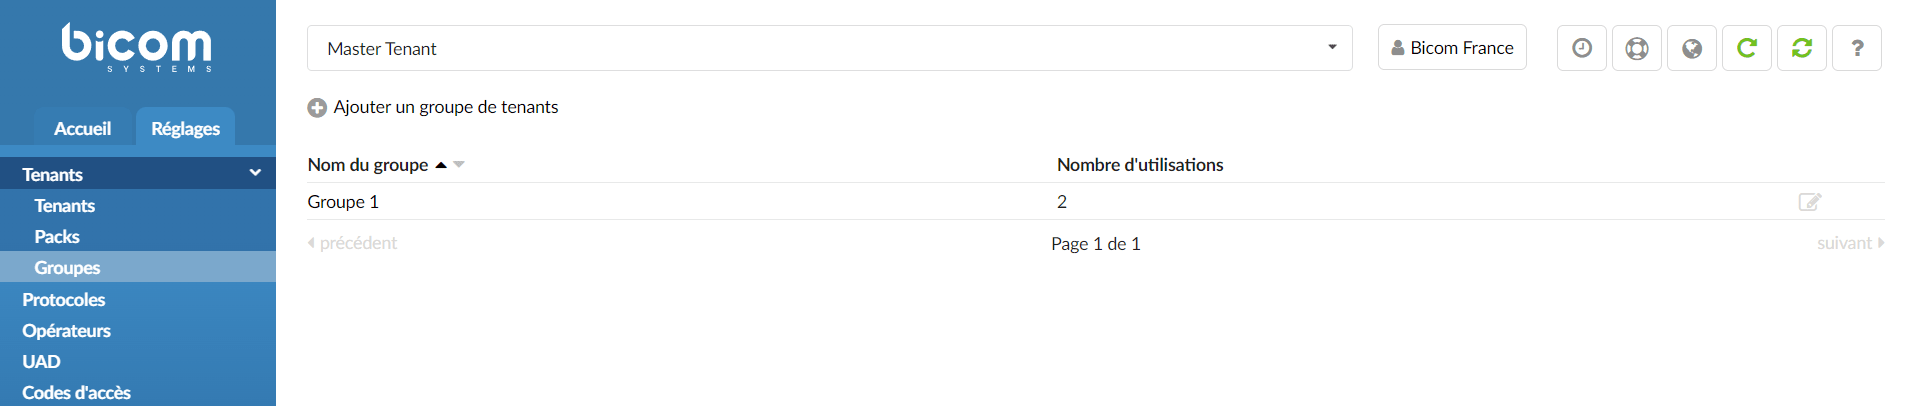
This screen displays all the tenant groups on the system with the following details:
- Group name
Group name
- Number of uses
Number of tenants in the group
Click here to edit the tenant group configuration
Click here to delete the tenant group connection.
Add/Edit a tenant group
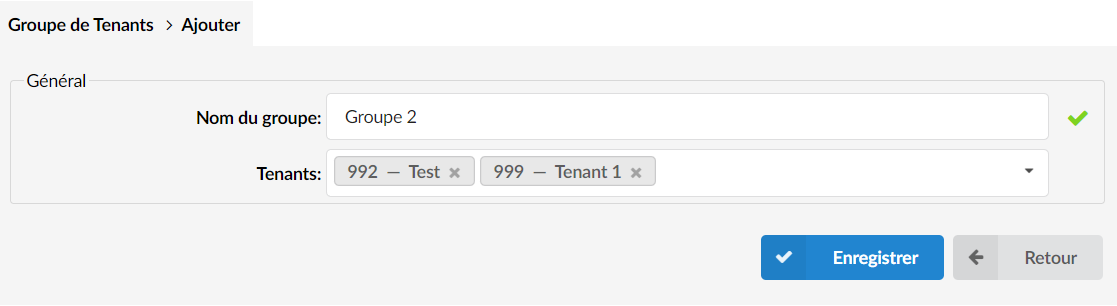
You can create one or more inter-tenant call groups with the list of tenants authorized to call each other.
- Group name:
Enter the group name
- Tenants:
Select two or more tenants to enable inter-tenant calls
(For example, tenant 200, tenant 201)
Protocols
A protocol is a set of rules that allows the UAD, systems, networks, etc. to communicate using a defined standard.
The supported protocols are as follows:
- SIP
- IAX
- RTP
SIP
SIP (Session Initiation Protocol) is a signaling protocol for Internet conferencing, telephony, presence, event notification and instant messaging. The protocol initiates call setup, routing, authentication and other function messages to endpoints within an IP domain.
General
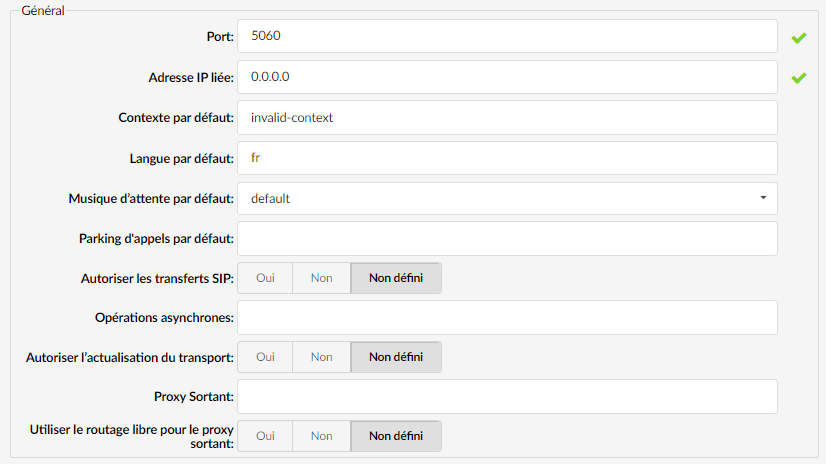
Port:
SIP server port to bind to
(default value 5060,)
TLS settings
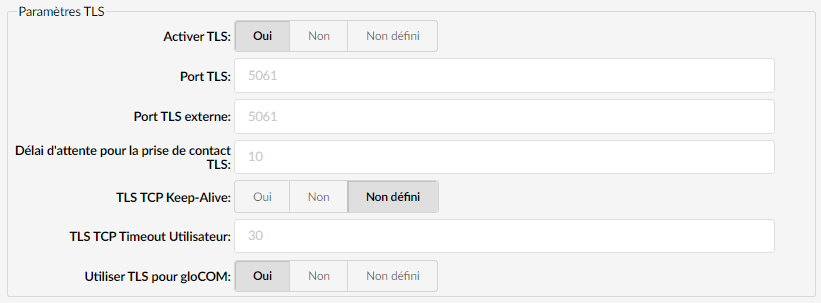
Enable TLS:
Enable the server for incoming TLS (secure) connections
(for example: Yes, No, Not set)
NAT
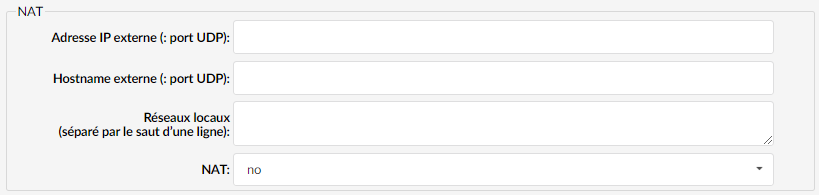
External IP address (: UDP port) :
External/public/Internet IP address used by the system.
If your system is behind a NAT, set this option to the public/Internet IP address used by the system when registering with other proxy servers on the Internet. If this field is not filled in, users will experience one-way audio recording from the WAN.External hostname (:UDP Port):
DynDNS address used by the system
If your system is behind a NAT, you can use the UDP service in addition to the external IP address.Local networks (separated by a line break):
If the system is used in a local network, define the local network address here
(For example 192.168.0.0/255.255.0.0)NAT:
Global SIP NAT setting that affects all users/peers.
Options:- yes – forces RFC 3581 behavior and enables symmetric RTP support.
- no – only enables RFC 3581 behavior if the remote party requests it and disables symmetric RTP support.
- force_rport – forces RFC 3581 behavior and disables symmetric RTP support.
- comedia – enables RFC 3581 behavior if the remote side requests it and enables symmetric RTP support
Security

OPTIONS packets requested:
Enabling this option allows OPTIONS requests to be authenticated in the same way as INVITE requests. By default, this option is disabled.
Options: Yes, No, N/A
RTP timer

RTP delay (sec):
Maximum RTP timeout
(For example, all calls (if they are not on hold) will be interrupted if there is no RTP activity for the number of seconds defined here (60 for example)).RTP timeout (sec:
Maximum RTP wait time.
SIP Timers
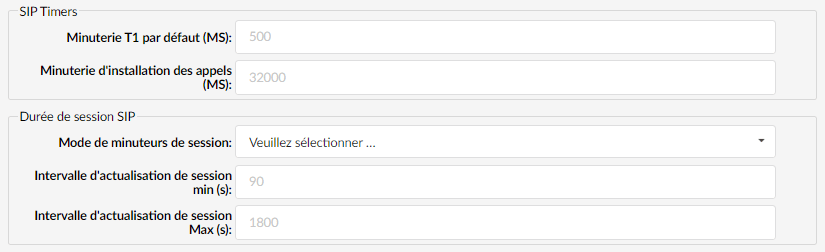
Default T1 timer (MS):
Default T1 timeout.
The default value is 500 ms or the measured round-trip time to a peer (qualify=yes).Call setup timer (MS):
Call setup timer.
If a provisional response is not received within this time frame, the call automatically drops. The default value is 32000 ms.
SIP session duration
Session timers mode:
The session timer feature operates in the following three modes:- originate: always requests and runs session timers.
- accept: Run session timers only on request from another UA.
- decline: do not run session timers under any circumstances.
Call setup timer (MS):
Minimum session refresh interval in seconds.
The default value is 90 seconds.Max session refresh interval (s):
Maximum session refresh interval in seconds.
The default value is 1800 seconds.
DTMF

DTMF Mode:
The choices are inband, rfc2833, info, or auto:
- inband: The device on which you press the key generates the DTMF tones. If the codec is not ulaw or alaw, the DTMF tones will be distorted by audio compression and will not be recognized. If the phone is set to RFC2833 and Asterisk is set to inband, you may not hear anything.
- rfc2833:http://www.ietf.org/rfc/rfc2833.txt
- info: See SIP info method and SIP info DTMF or http://www.ietf.org/rfc/rfc2976.txt
- auto: Asterisk will use rfc2833 for DTMF relay by default but will switch to in-band DTMF tones if the remote side does not indicate support for rfc2833 in SDP. This feature was added on September 6, 2005 and is not available in Asterisk 1.0.x.
Quality of Service (QOS)
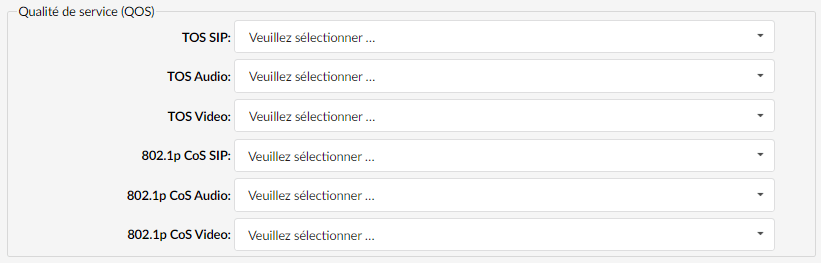
SIP TOS:
Audio TOS:
Video TOS:
Available options: CS0, CS1, CS2, CS3, CS4, CS5, CS6, CS7, AF11, AF12, AF13, AF21, AF22, AF23, AF31, AF32, AF33, AF41, AF42, AF43, EF802.1p CoS SIP:
802.1p CoS Audio:
802.1p CoS Video:
Available options: 0-7
Remote-Party-Id
The From header provides basic caller ID data, but it is too easy to modify, block, or spoof to be useful to the network. The Remote Party ID header is added by one of the network's servers and should therefore provide much more reliable and trustworthy identification than the From header, which can be set by users at the client device level. Another approach is described in the RFC 3325. It explains the requirements for providing an authenticated caller ID within a trusted network, using the P-Asserted-Identity (PAI) header to convey the authenticated identity of a caller, as well as a separate Privacy header to indicate whether this data should be hidden.

Allow Remote-Party-ID:
Sets whether PBXware allows the Remote-Party-ID header.
Sending Remote-Party-ID:
Whether to add "Remote-Party-ID" to the uri.
Options:- Use Remote-Party-ID – Uses the “Remote-Party-ID” header to send the identity of the remote party.
- Use P-Asserted-Identity – Use the “P-Asserted-Identity” header to send the identity of the remote party.
Other
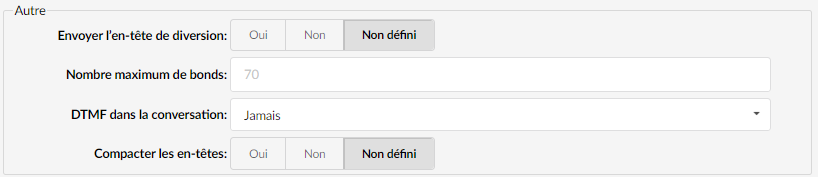
Send the diversion header:
The new version of PBXware includes a new SIP header that will display the standard caller ID details as well as information about the number from which the call is being transferred.
The "From" and "Via" information is enabled by default but can be disabled by setting this option to No.- Maximum number of hops:
The Max-Forwards header limits the number of hops a request can make on the way to its destination. It is an integer that is decremented by one at each hop. If the Max-Forwards value reaches 0 before the request reaches its destination, it is rejected with a 483 ("Too Many Hops") error response.
The default value is 70 DTMF in the conversation:
Inband means that the DTMF is transmitted within the audio of the phone conversation, i.e. it is audible to the parties. Set whether the system generates an inband ringtone.
(For example, it is recommended to set this option to “Never”).Compact headers:
You can set compact headers to yes or no. If this option is set to yes, SIP headers will use a compact format, which may be necessary if the SIP header size is larger than the maximum transmission unit (MTU) of your IP headers, causing the IP packet to fragment. Do not use this option if you do not know what you are doing.
(For example, it is recommended to set this option to “No” unless otherwise indicated).
Authentication

User agent:
Set the user agent string
(for example, “Custom string”)Domain:
Domain for digest authentication
(for example, “Custom string”)
Recording
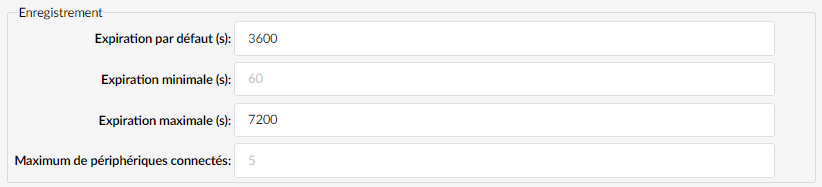
Default expiry (s):
Default duration (in seconds) for incoming/outgoing recordings.
Default value: 3600 seconds.Minimum expiry (s):
Minimum duration (in seconds) for incoming recordings
Default value: 60 seconds.Maximum expiry (s):
Maximum duration (in seconds) for incoming recordings.
Default value: 7200 seconds.Maximum number of connected devices:
Maximum number of contacts per extension. This number is set by default at the global level.
It can be changed by changing the maximum number of contacts per extension.
MWI

MWI From header:
When sending MWI NOTIFY requests, use this parameter in the From: header as the "name" part. Also fill in the "user" part of the URI in the From: header with this value if no "fromuser" is defined. Default value: emptyOutbound MWI expiry:
Outgoing MWI subscriptions timeout (seconds).
Default value: 3600.MWI Task Processor queue size:
This option gives us information about the number of task processor queues for a certain number of messages it needs to process.
Subscriptions

Allow subscriptions:
Disable subscription support. The default value is Yes.
Session Description Protocol

T38 support:
The value of this field enables T.38 fax support on SIP calls with different options. The default value is disabled.Session name:
This field allows you to modify the SDP session name string. Like the useragent parameter, the default user agent string also contains the Asterisk version.Session owner selection:
This field allows you to modify the username field in the SDP owner string.
In the asterisk logs, you can find messages such as:
The ‘<name>’ task processor queue reached <number> scheduled tasks.
In this case, you are probably experiencing thread pool overload, and the parameters below give you the ability to improve performance.
In the worst case, the PJSIP dialogs start to break down.
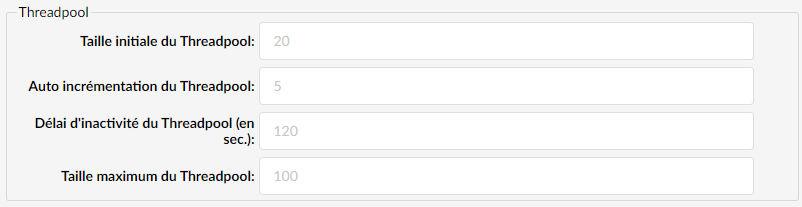
Initial Threadpool size:
Initial Threadpool size. The default value is 10.
Threadpool auto increment:
When additional threads are needed, how many should be created. The default value is 5.
Threadpool idle timeout:
Number of seconds a thread must be idle before it disappears. 0 means threads never stop. The default value is 120.
Maximum Threadpool size
Maximum number of threads in the Stasis thread pool. The default value is 100.
Additional configuration
This option is used to provide additional configuration parameters for the SIP configuration files. The values provided here will be written to these configuration files.
IAX
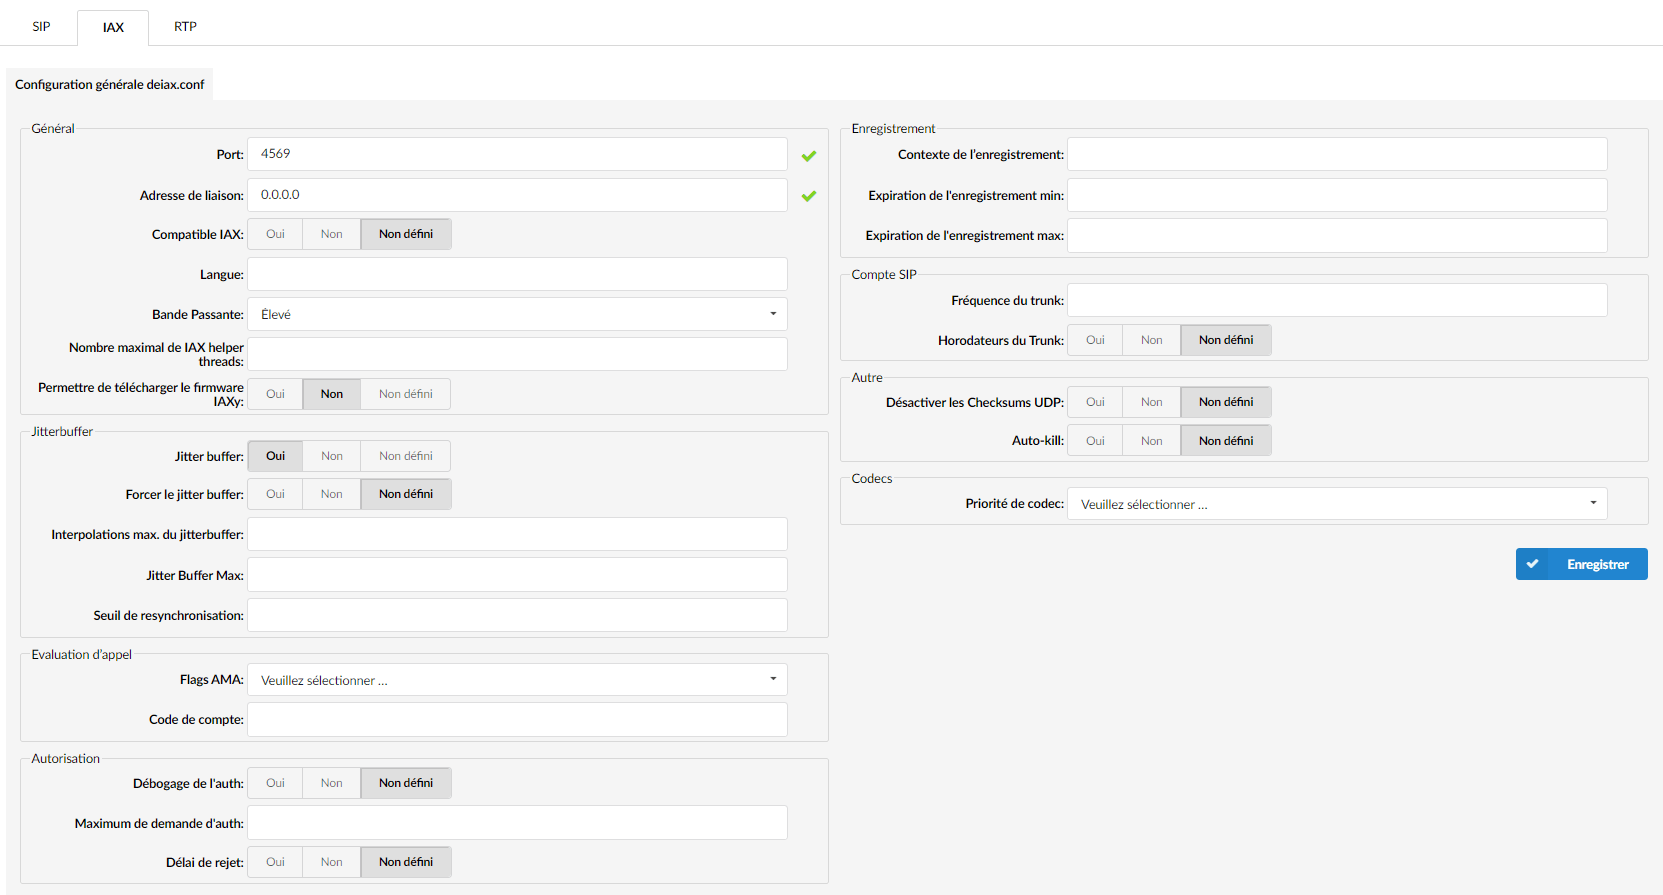
IAX (Inter Asterisk eXchange) is a simple, low-cost and low-bandwidth VoIP protocol designed to allow multiple PBXs to communicate with each other without resorting to more complex protocols.
General
Port:
IAX binding port.
Bind address :
This allows you to bind IAX to a specific local IP address instead of binding it to all addresses. This could be used to improve security if, for example, you wanted IAX to be available only to users on your local network.
IAX compatible:
Whether to use layered switches or another scenario?
(For example, set to yes if you plan to use layered switches or another scenario that may cause a delay when searching the dial plan).Language:
Default language settings for all users/peers.
(For example, set this option to "fr" (French), for example).Bandwidth:
Set the bandwidth to control the codecs used in general
(for example, choosing between low, medium or high).Maximum number of IAX helper threads:
Determines the number of additional dynamic threads that can be created to handle I/O.
Allow downloading the IAXy firmware:
Controls whether this host will serve firmware to IAX clients that request it.
Jitterbuffer
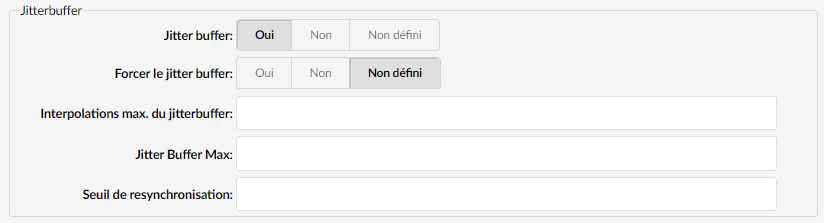
Jitter Buffer:
Disables the jitter buffer for this peer.
Force the jitter buffer:
Should the jitter buffer be forced (default value 10)
(For example, the jitter buffer is usually handled by the UADs/Phones. But in case they do it poorly, the jitter buffer can be forced on the PBXware side).Max jitterbuffer interpolations:
Maximum number of interpolation frames the jitter buffer should return in a row.
Jitter Buffer Max:
Maximum jitter buffer size. By setting a reasonable maximum, you will prevent the call delay from reaching ridiculous values in extreme situations; you will hear SOMETHING, even if it is jitter.
Resynchronization threshold:
Resync the detection threshold for a change in the measured delay.
Call rating

AMA flags:
AMA = Automated Message Accounting.+
These indicators are used in the generation of call detail records (for example, "default").- default: Sets the system default value.
- omit: Does not record calls.
- billing: Marks the entry for call billing
- documentation: Mark the entry for documentation
Account code:
Default account for CDR (Call Detail Records)
Authorization

Auth debugging:
Should authentication be debugged?
(For example, if this option is set to "Yes", the debugging traffic will be greater).Maximum auth request:
Maximum number of authentication requests awaiting responses. Any new authentication attempt will be blocked.Rejection delay:
Set this option to “Yes” to strengthen security against brute-force password attacks.
Recording

Recording context:
If the specified PBXware dynamically creates and destroys a priority 1 NoOp extension for a given peer that registers or unregisters with us.
Min registration expiry:
Minimum duration that IAX peers can request as a registration expiry interval (in seconds).
Max registration expiry:
Maximum duration that IAX peers can request as a registration expiry interval (in seconds).
SIP account

Trunk frequency:
Frequency of sending trunk msgs (in ms).Trunk timestamps:
Whether to send timestamps for individual subframes in the trunk frames.
Other

Disable UDP Checksums:
Should checksums be calculated?Auto-Kill:
If no response is received within 2000ms, and this option is set to yes, the operation is canceled.
Codecs

Codec priority:
This option controls the codec negotiation of an incoming IAX call.
Example:- Caller – Consider the caller's preferred order before the host's.
- Host – Considers the host's preferred order before that of the caller.
- Disabled – Completely disables the consideration of codec preferences (this is the original behavior before preferences were added)
- Request only – Same as disabled, but does not take capabilities into account; if the requested format is not available, the call will only be accepted if the requested format is available.
Additional configuration
This option is used to provide additional configuration parameters for the IAX configuration files.
The values provided here will be written to these configuration files.
RTP
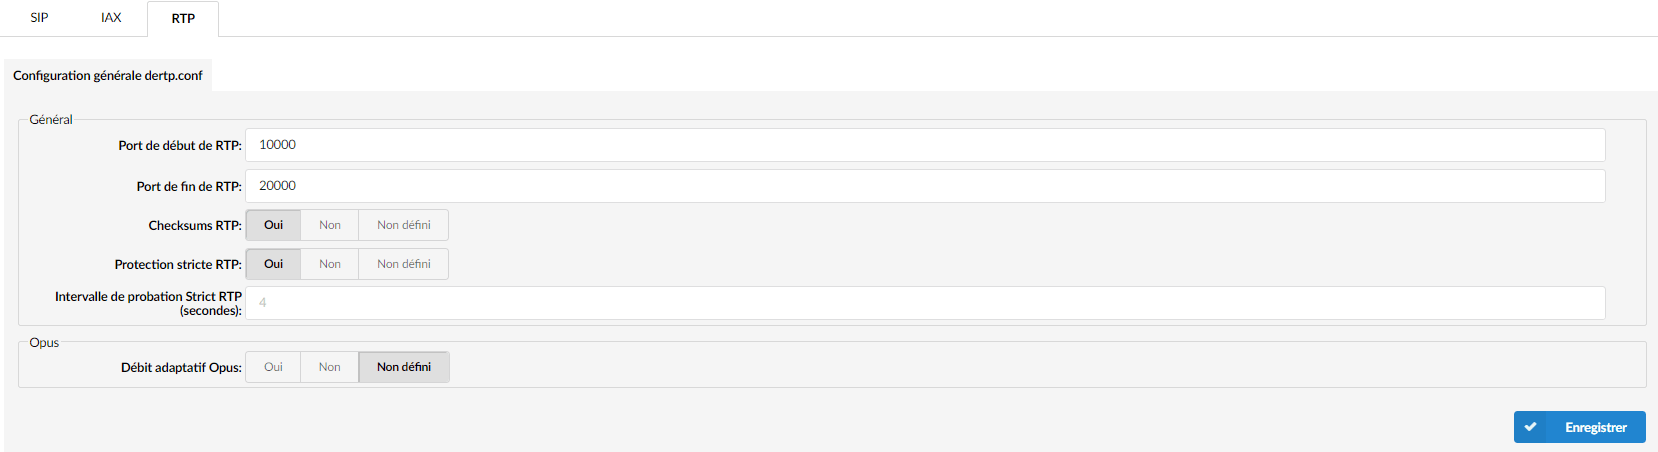
General
RTP start port:
Start port used for RTP.
RTP end port:
End port used for RTP.
RTP Checksums:
Enable or disable UDP Checksums on RTP traffic.
Strict RTP protection:
This function allows RTP packets that do not originate from the recognized source of the RTP stream to be rejected. Strict RTP qualifies the sources of RTP packet streams before accepting them at the initial connection and when the connection is renegotiated (for example, transfers and direct media).
The initial connection and the renegotiation start a learning mode to qualify the addresses of the stream sources. Once Asterisk has recognized a stream, it allows other streams to qualify and replace the current stream for 5 seconds after the learning mode is started. Once the learning mode is complete, the current stream is locked and can no longer be changed until the next renegotiation.
This option is enabled by default.
Opus

Opus adaptive bitrate:
It is used for mobile devices in order to improve audio performance in case of a poor network.
Additional configuration
This option is used to provide additional configuration parameters for the RTP configuration files. The values provided here will be written to these configuration files.
Operators
PBXware comes with a range of preconfigured VoIP and PSTN providers to make it easier to add trunks to the system. This screen allows you to add a custom provider.

Provider:
Provider name.Protocol:
Protocol used by the provider.Type:
Service type.- Edit the provider configuration.
- Delete the provider configuration.
Add a custom operator

Configuration
- Choose a type:
Service type (VoIP or PSTN). - Protocol:
Protocol used by the provider. Depending on the service type, SIP, IAX and DAHDI are offered. - Name
Provider name (for example Generic Analog).
- Choose a type:
PSTN
DAHDI
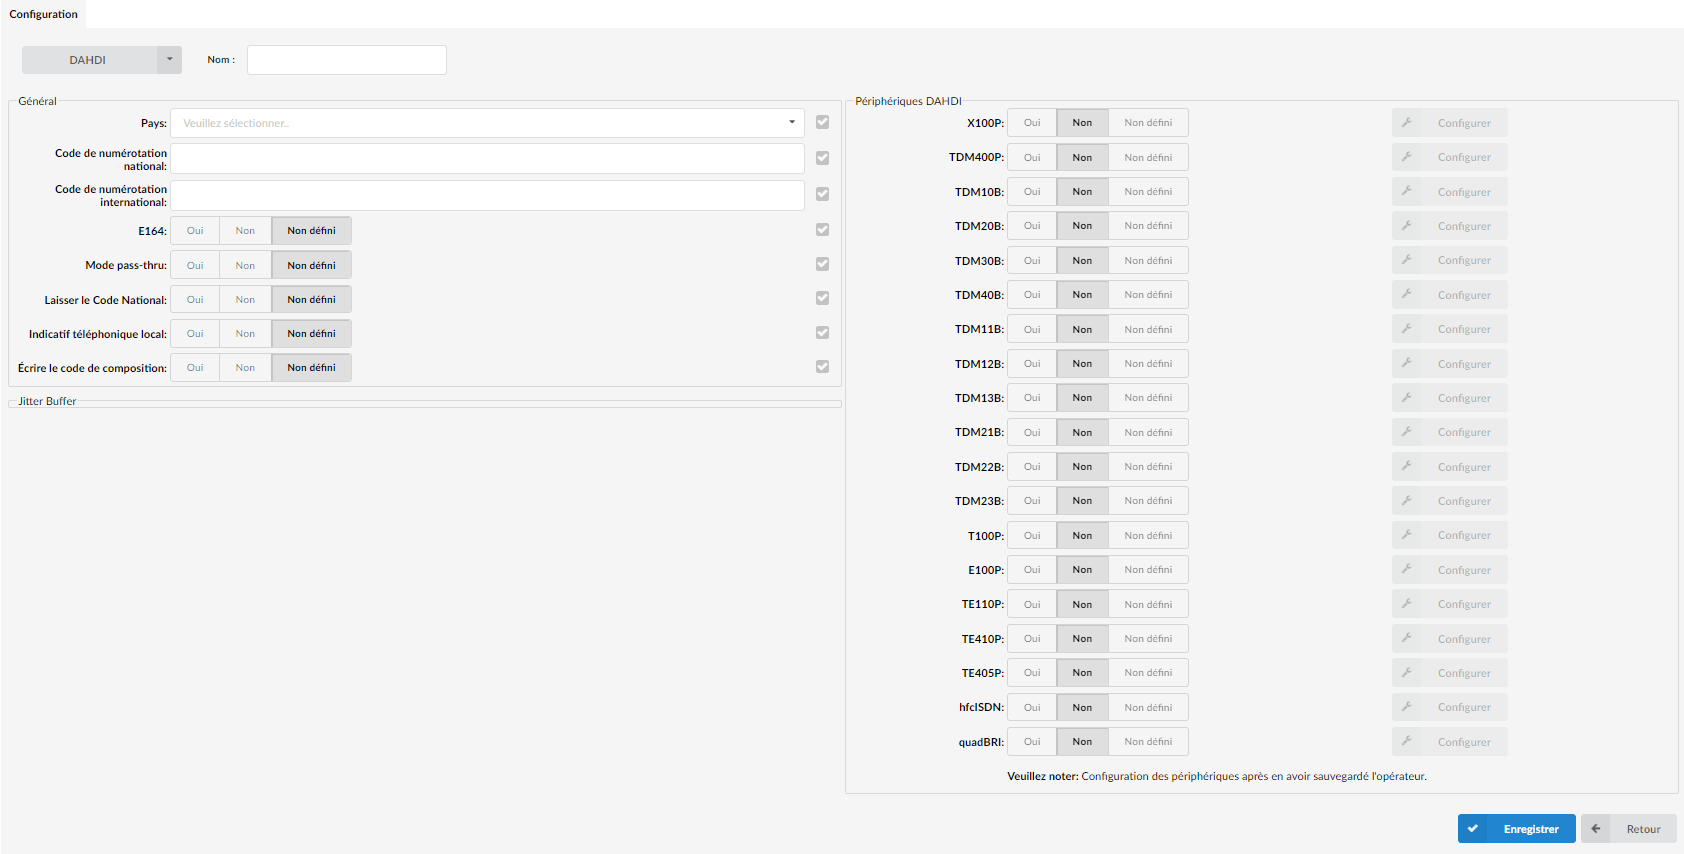
General
Country:
Destination of the trunk connection.
National dialing code:
National dialing code of the provider's destination.
(For example, for the United States 1, the United Kingdom, Germany 0)International dialing code:
International dialing code of the provider's destination.
(For example, for the United States 011, the United Kingdom, Germany 00)E.164:
Does the provider support dialing destinations in E164 format?
(For example, enabling this option will reformat any dialed number into the following form: COUNTRY CODE + LOCAL CODE + DIALED NUMBER. For example, if the user dials 55510205, the system will dial 121255510205).Pass-thru mode:
If this option is enabled, the dialed number is passed through the trunk without modification.
Leave National Code:
In some countries, the national code is automatically removed. If this setting is set to "Yes", the national code will not be removed from the dialed number.
SIP
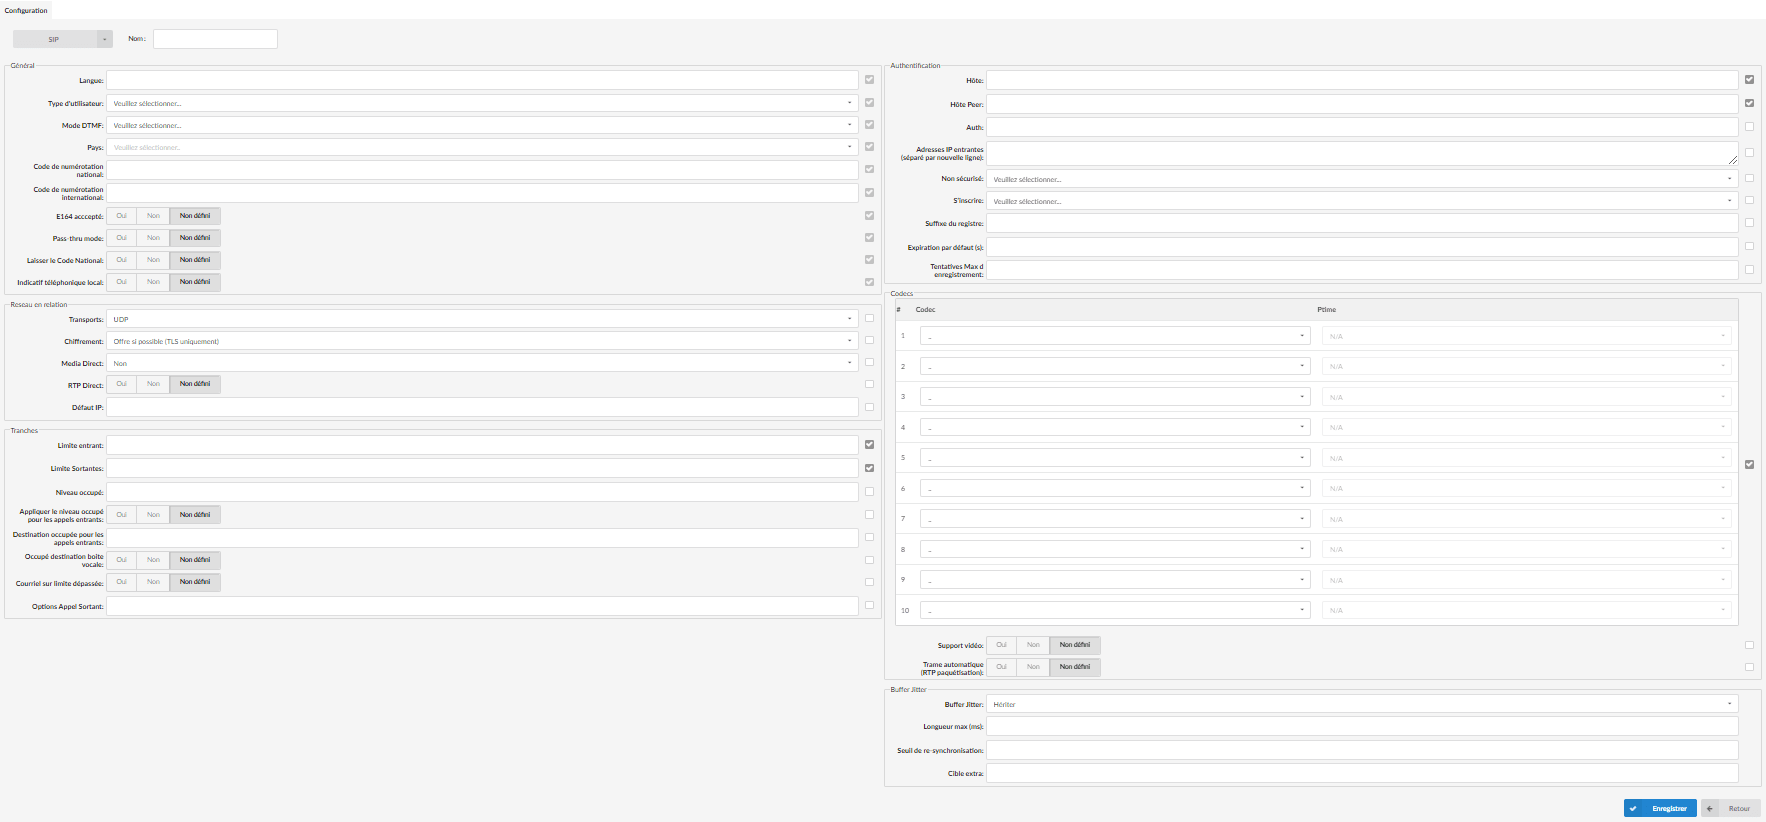
General
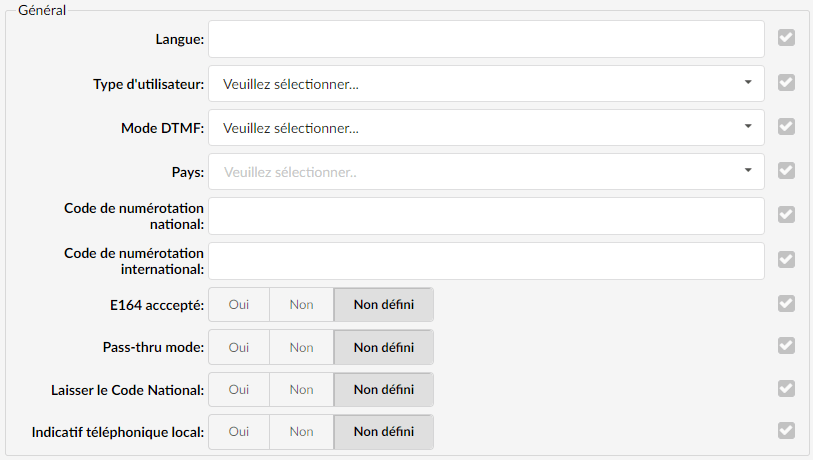
User type:
The user's relationship with the system
- user – The provider only accepts inbound calls
- peer – The provider only makes outbound calls
- friend – The provider makes inbound and outbound calls.
DTMF (Dual Tone Multi-Frequency) mode:
DTMF mode used by the provider. A specific frequency (made up of two distinct tones) is assigned to each key so that it can be easily identified by a microprocessor.
Example:
inband – inband audio (requires a 64 kbit codec – alaw, ulaw).
rfc2833 – default.
info – SIP INFO messages.Country:
Destination of the trunk connection.National dialing code:
National dialing code used at the provider's destination.
(For example, for the United States 1, the United Kingdom and Germany 0)International dialing code:
International dialing code used by the destination's provider.
(For example, for the United States 011, the United Kingdom and Germany 00)E.164 accepted:
Does the network support dialing destinations in E164 format?
(For example, enabling this option will reformat any dialed number into the following form COUNTRY_CODE + LOCAL_CODE + DIALED NUMBER. For example, if the user dials 55510205, the system will dial 121255510205).Pass-thru mode:
If this option is enabled, the dialed number is passed through the trunk without modification.Leave National Code:
In some countries, the national code is automatically removed. If this setting is set to "Yes", the national code will not be removed from the dialed number.
Network link
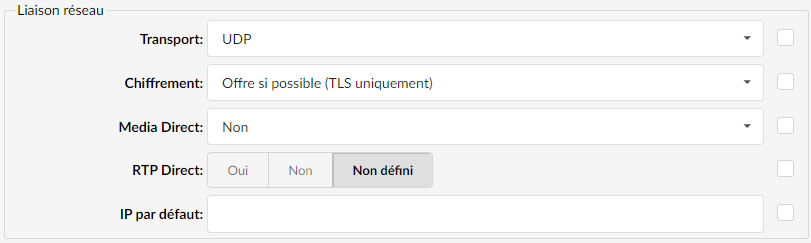
Transport:
Type of transfer protocol that will be used on PBXware.
- UDP (User Datagram Protocol) - is used mainly to establish low-latency and loss-tolerant connections between applications on the internet. UDP allows process-to-process communication. With UDP, computer applications can send messages, called datagrams in this case, and it is considered a "best-effort" mode of communication. UDP is considered a connectionless protocol because it does not require the establishment of a virtual circuit before any data transfer.
- TCP (Transmission Control Protocol) - ensures the reliable, ordered and verified transmission of a stream of bytes between programs running on computers connected to an intranet or the public internet. TCP sends individual packets and is considered a reliable means of transport.
- TLS (Transport Layer Security) - a cryptographic protocol that ensures the security of communications over the internet.[1] It uses asymmetric cryptography for the authentication of the key exchange, symmetric encryption for confidentiality and message authentication codes for message integrity.
- TLS (Transport Layer Security) - a cryptographic protocol that ensures the security of communications over the internet.[1] It uses asymmetric cryptography for the authentication of the key exchange, symmetric encryption for confidentiality and message authentication codes for message integrity.
Encryption:
This option enables or disables encryption in the PBXware transport.The options offered are as follows:- Offer if possible(TLS only)Offers encryption only if it is possible and only with the TLS protocol.
- RequiredEncryption is always required.
- Offer(TLS only)Always offers encryption, but only with the TLS protocol.
Media Direct:
Whether you allow RTP voice traffic to bypass Asterisk.
Options:- No – this option tells Asterisk to never send a reinvite to the client.
- Yes – sends a re-invite to the client.
- No NAT – allows reinvite locally, denies reinvite over NAT.
- Update usage – uses UPDATE instead of INVITE.
- No NAT update – use UPDATE locally, reject in NAT.
Channels
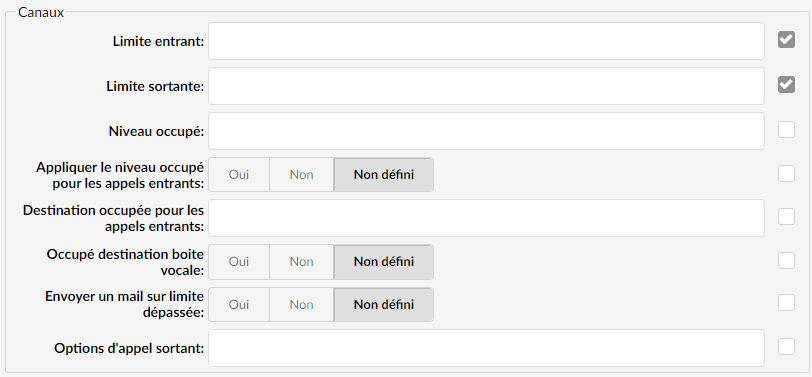
Inbound limit:
Number of simultaneous incoming calls the provider can handle.
(For example, 4 = four simultaneous incoming calls. Any additional call will be given a busy tone).Outbound limit:
Number of simultaneous outgoing calls the provider can handle.
(For example, 4 = four simultaneous outgoing calls. Any additional call attempting to use this provider will be rejected or redirected to other providers depending on the settings defined in the system/extensions).Busy level:
Limits the number of simultaneous active inbound calls.
Apply busy level for inbound calls:
Indicates whether the busy level will be applied to incoming calls.
Busy destination for incoming calls:
If an extension has a busy level set and the busy level matches, the system will try to contact the busy level destination.
This option can only be used if the busy level is set to Yes.Busy destination for voicemail:
Indicates whether the busy level destination will be a voicemail.
Send an email when the limit is exceeded:
Send an email when the inbound/outbound limit is reached.
Outbound call options:
Advanced dialing options for all outbound calls
By default, this field is empty.Dialing options:
- t – Allows the called user to transfer the call by pressing #.
- T – Allows the calling user to transfer the call by pressing #.
- r – Generates a ringtone for the caller and passes no audio to the called channel(s) until one of them answers. Use this option with caution and do not insert it by default in all your dial instructions, as you destroy call progress information for the user. You probably do not need to use this function. Asterisk automatically generates ringtones when it is appropriate to do so. 'r' moves it to the next step and additionally generates ringtones where it is probably not appropriate to do so.
- R – Indicates a ringtone to the caller when the called party indicates that it is ringing, but does not pass any audio until they answer. This option is only available if you are using Kapejod's bristuff software.
- m – Provides music on hold to the caller until they answer the call. This option is incompatible with the “r” option. Use m(class) to specify a class for the music on hold.
- o – Restores Asterisk v1.0 Caller ID behavior (sending the original Caller ID) in Asterisk v1.2 (default: sending the number of this extension).
- j – Asterisk 1.2 and above: Jump to priority n+101 if all requested channels are busy (as in Asterisk 1.0.x).
- M (x) – Runs the macro (x) when connecting to the call (i.e., when the called party answers).
- h – Allows the called party to hang up by dialing *.
- H – Allows the caller to hang up by dialing *.
- C – Resets the CDR (Call Detail Record) for this call. This is equivalent to using the NoCDR command.
- P (x) – Use the privacy manager, using x as the database (x is optional).
- g – When the called party hangs up, exit to execute other commands in the current context.
- G (context^exten^pri) – If the call is answered, both parties are transferred to the specified priority. The caller is transferred to priority x and the called party to priority x+1.
- A (x) – Play an announcement (x.gsm) to the called party.
- S (n) – Hang up the call n seconds AFTER the callee has answered.
- d – This flag takes precedence over the 'H' flag and intercepts any DTMF while the call is waiting to be answered and returns that value on the spot. This allows you to dial a single-digit exit extension number while waiting for the call to be picked up – see also RetryDial.
- D (digits) – After the called party has answered, send the digits as a DTMF stream, then connect the call to the original channel.
- L (x[:y][:z]) – Limit the call to "x" minutes, warning when "y" minutes remain, repeated every "z" minutes). Only "x" is mandatory; "y" and "z" are optional. The following special variables are optional for limited calls: (taken from app_dial.c).
- + LIMIT_PLAYAUDIO_CALLER – yes|no (default yes) – Plays sounds to the caller.
- + LIMIT_PLAYAUDIO_CALLEE – yes|no – Plays sounds to the callee.
- + LIMIT_TIMEOUT_FILE – File to play when time has run out.
- + LIMIT_CONNECT_FILE – File to play at the start of the call.
- + LIMIT_WARNING_FILE – File to play as a warning if ‘y’ is set. If LIMIT_WARNING_FILE is not set, the default behavior is to announce (“You have [XX minutes] YY seconds”).
- f – forces the caller ID to be set for the extension of the line placing/redirecting the outbound call. For example, some PSTNs do not allow the caller ID for extensions other than those assigned to you.
- w – Allows the called user to start recording after pressing *1 or what is defined in features.conf, requires Set(DYNAMIC_FEATURES=automon).
- W – Allows the calling user to start recording after pressing *1 or any other item defined in features.conf, requires Set(DYNAMIC_FEATURES=automon).
Authentication
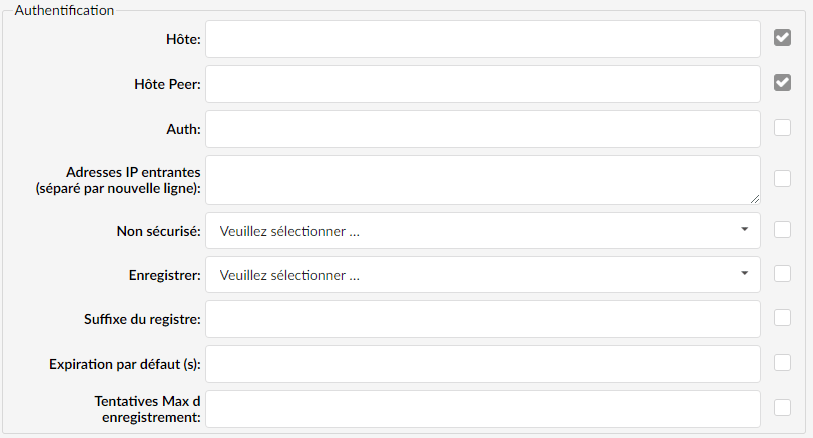
Host:
Provider IP address
(Enter the IP address of the host, 192.168.1.1 for example, or set "dynamic" if the host is behind a dynamic IP address).Peer host:
The IP of a peer host system sends the calls to
(for example 192.168.1.1).Auth:
Global credentials for outgoing calls, i.e. when a proxy asks your PBXware to authenticate, these credentials take precedence over any credentials in the peer/registration definition if the domain is the same.Inbound IP addresses
(separated by new line):
If your provider has several IP addresses from which it sends traffic, all these IP addresses must be indicated here, separated by a new line.Insecure:
Which of the selected options are not used for authentication.
Example:- Port – Disregards the port number from which the request originates.
- Invite – Does not require authentication of incoming INVITEs.
- Port,Invite – Does not require authentication of the initial INVITE and ignores the port from which the request originates.
- very – Ignores authentication (username/password).
Save:
Registration method on the remote server. Providers may require a different registration method on their server. The user can choose the following options:- Not required
- Test the phone number
- With username
- With identification name
- With authname@host
- With authname@trunk-name
Registry suffix:
The service provider may require different registration methods for its services. Select the appropriate method according to the provider’s requirements.Default expiry (s):
Duration of the recording before the session expires.
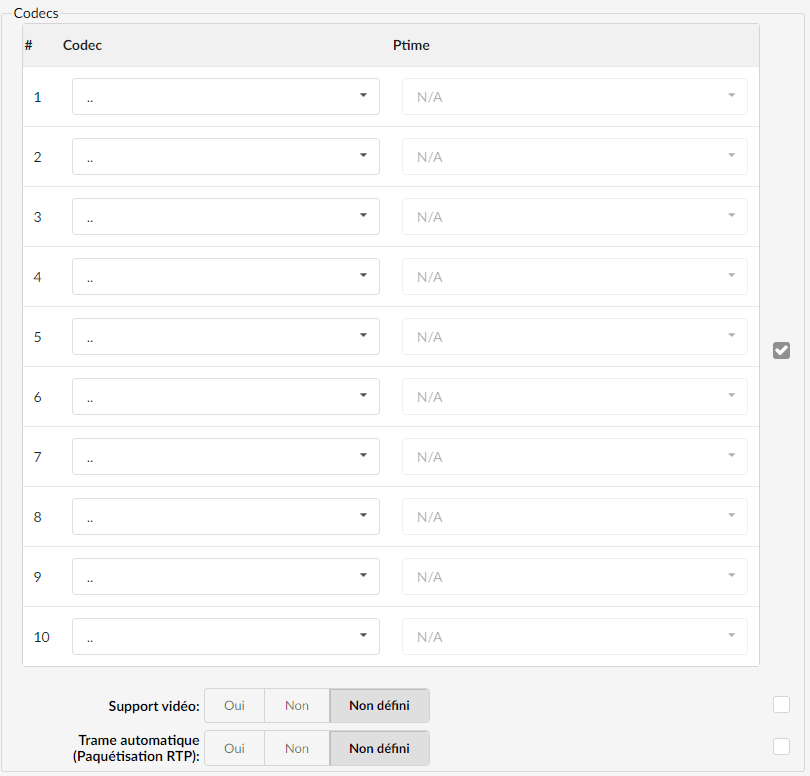
Codecs
Jitter Buffer
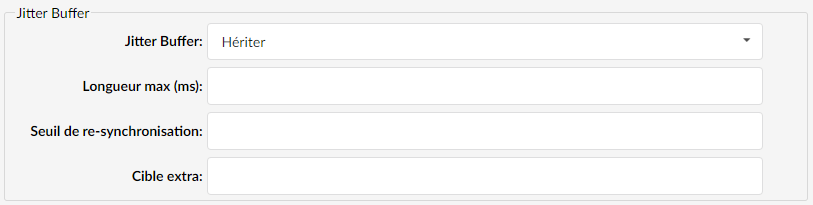
Jitter Buffer:
- Inherit – inherits the Jitter Buffer settings from the tenant configuration.
- Fixed – Sets a fixed Jitter Buffer on the channel.
- Adaptive – Sets an adaptive Jitter Buffer on the channel.
- Disabled – Removes a Jitter Buffer previously set on the channel.
Max Length (ms):
Buffer length in milliseconds. By default, it is 200 ms.Re-synchronization threshold):
Duration in milliseconds beyond which a timestamp difference will trigger a resynchronization of the Jitter Buffer. The default value is 1000 ms.Extra target:
This parameter only affects the adaptive Jitter Buffer. It represents the time in milliseconds by which the size of the new Jitter Buffer will be increased. The default value is 40.
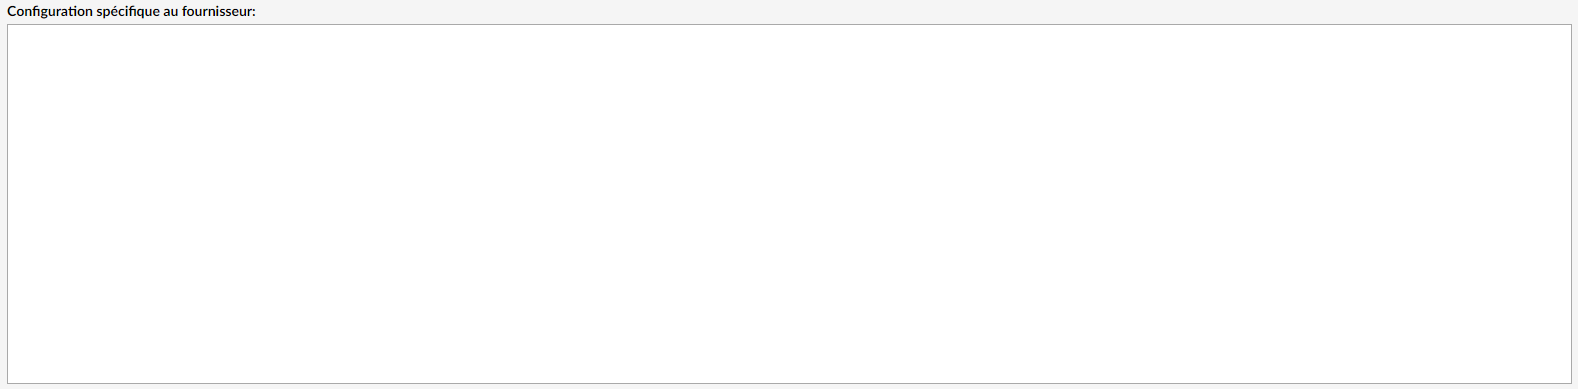
Provider-specific configuration
This option allows you to enter the provider-specific configuration parameters for the IAX configuration files.
IAX
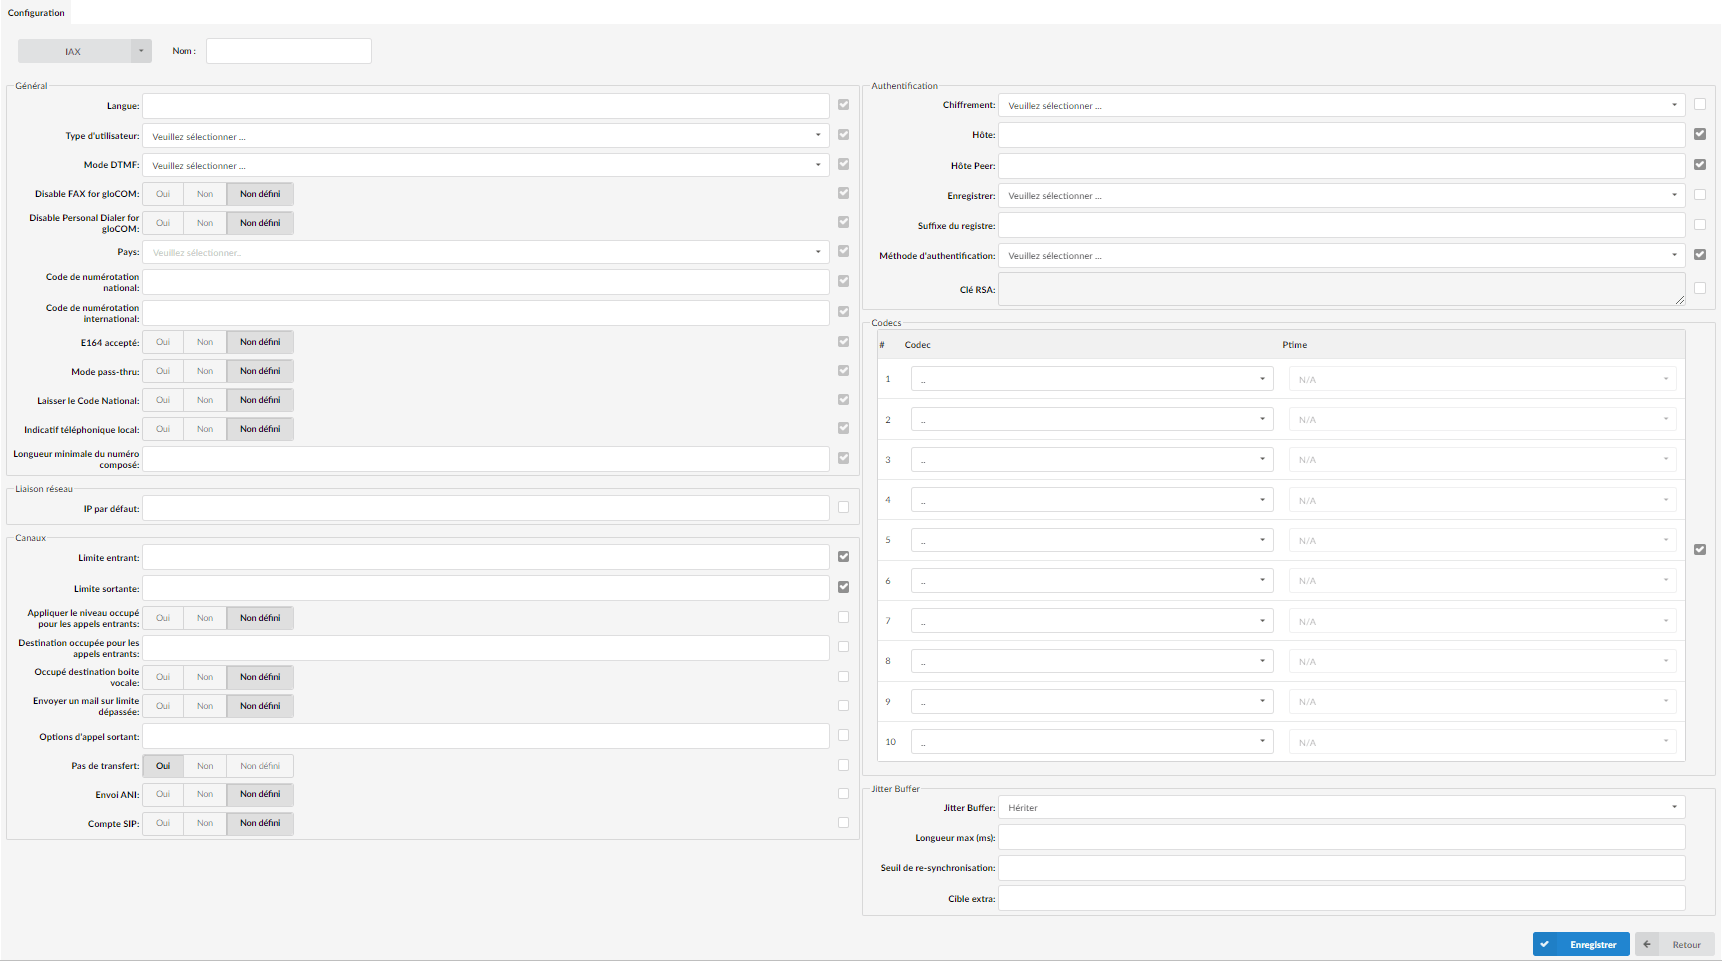
General
User type:
The user's relationship with the system
- user – The provider only accepts inbound calls
- peer – The provider only makes outbound calls
- friend – The provider makes inbound and outbound calls.
DTMF (Dual Tone Multi-Frequency) mode:
DTMF mode used by the provider. A specific frequency (made up of two distinct tones) is assigned to each key so that it can be easily identified by a microprocessor.
Example:
inband – inband audio (requires a 64 kbit codec – alaw, ulaw).
rfc2833 – default.
info – SIP INFO messages.Country:
Destination of the trunk connection.
National dialing code:
National dialing code used at the provider's destination.
(For example, for the United States 1, the United Kingdom and Germany 0)International dialing code:
International dialing code used by the destination's provider.
(For example, for the United States 011, the United Kingdom and Germany 00)E.164 accepted:
Does the network support dialing destinations in E164 format?
(For example, enabling this option will reformat any dialed number into the following form COUNTRY_CODE + LOCAL_CODE + DIALED NUMBER. For example, if the user dials 55510205, the system will dial 121255510205).Pass-thru mode:
If this option is enabled, the dialed number is passed through the trunk without modification.
Leave National Code:
In some countries, the national code is automatically removed. If this setting is set to "Yes", the national code will not be removed from the dialed number.
Network link

Default IP:
IP address to use until registration.
Channels
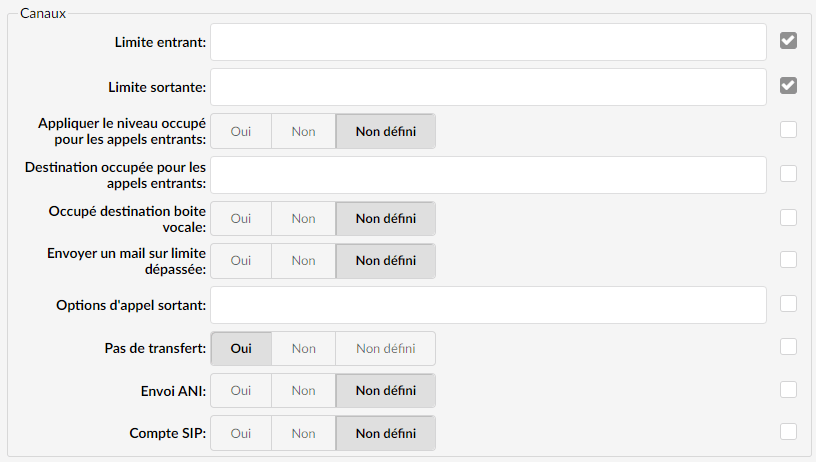
Inbound limit:
Number of simultaneous incoming calls the provider can handle
(For example, 4 equals four simultaneous incoming calls. Any additional call will be given a busy line announcement).Outbound limit:
Number of simultaneous outgoing calls the provider can handle
(For example, 4 equals four simultaneous outgoing calls. Any additional call attempting to use this provider will be rejected or redirected to other providers depending on the settings defined in the system/extensions).Apply busy level for inbound calls:
Indicates whether the busy level will be applied to incoming calls.Busy destination for incoming calls:
If an extension has a busy level set and the busy level matches, the system will try to contact the busy level destination.
This option can only be used if the busy level is set to Yes.Busy destination for voicemail:
Indicates whether the busy level destination will be a voicemail.Send an email when the limit is exceeded:
Sending an email when the outbound limit is reached.Outbound call options:
Advanced dialing options for all outbound calls. By default, this field is empty.
Authentication
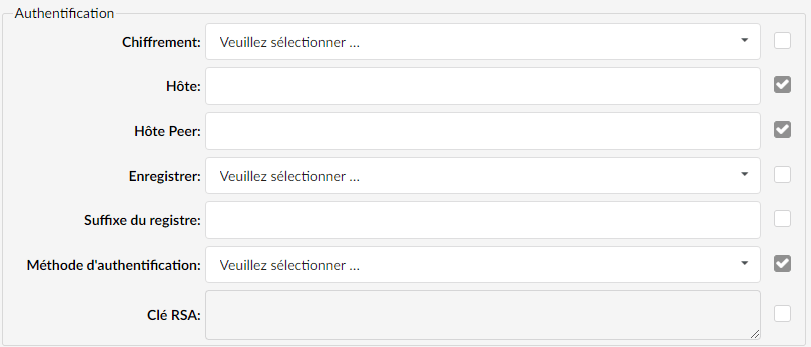
Encryption:
Should encryption be used when authenticating with the peer?
Host:
Provider IP address
(Enter the IP address of the host, 192.168.1.1 for example, or set "dynamic" if the host is behind a dynamic IP address).Peer host:
IP of a peer host system that sends calls to
(For example 192.168.1.1)Save:
Registration method on the remote server. Providers may require a different registration method on their server. The user can choose the following options:
- Not required
- Test the phone number
- With username
- With identification name
- With authname@host
- With authname@trunk-name
Registry suffix:
The service provider may require different register methods for its services. Select the appropriate method according to the provider’s requirements.Authentication method:
Authentication method required by the provider.
The least secure is “plaintext”, which sends passwords in clear text over the network.
The “md5” uses an md5 sum challenge/response arrangement, but still requires that both parties have access to the clear-text secret.
“rsa” allows one-way knowledge of the secret through public/private keys. If “rsa” authentication is used, “inkeys” is a list of acceptable public keys on the local system that can be used to authenticate the remote peer, separated by the ” :” character.
rs4RSA key:
RSA authentication key
(For example, if the authentication method is set to RSA, provide the RSA key here)
Codecs
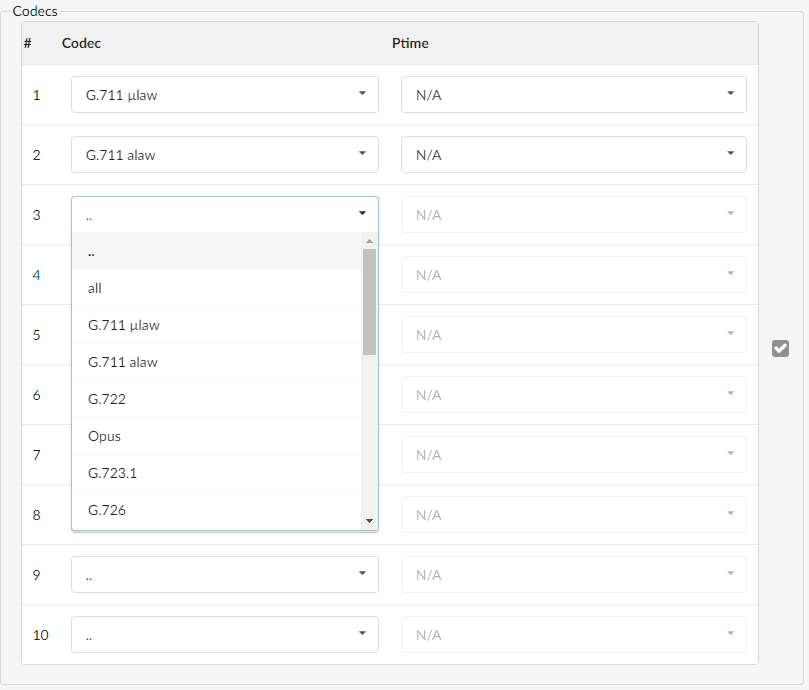
Jitter Buffer
Jitter Buffer:
- Inherit
Inherits the Jitter Buffer settings from the tenant configuration. - Fixed
Sets a fixed Jitter Buffer on the channel. - Adaptive
Sets an adaptive Jitter Buffer on the channel. - Disabled
Deletes a Jitter Buffer previously set on the channel.
- Inherit
Max length (ms):
Buffer length in milliseconds. By default, it is 200 ms.
Re-synchronization threshold:
Duration in milliseconds beyond which a timestamp difference will trigger a resynchronization of the Jitter Buffer. The default value is 1000 ms.
Extra target:
This parameter only affects the adaptive Jitter Buffer. It represents the time in milliseconds by which the size of the new Jitter Buffer will be increased. The default value is 40.
Provider-specific configuration
This option allows you to enter the provider-specific configuration parameters for the IAX configuration files.
Default trunk
The system uses its trunks to make calls to various destinations. In order to allow an organization to control its voice communications budget and provide fallback termination, the default trunks make it possible to define primary, secondary, and tertiary trunks.
The system will use the primary trunk as the first choice for each destination called. If, for any reason, the primary line fails to complete the call, the secondary trunk will be used by the system. If, for any reason, the secondary trunk fails to complete the call, the tertiary trunk will be used by the system.
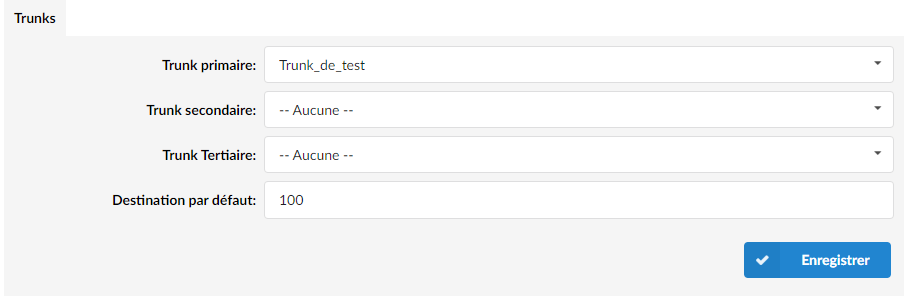
Primary/Secondary/Tertiary Trunk:
Allows you to select the default trunks at the system level.
UAD
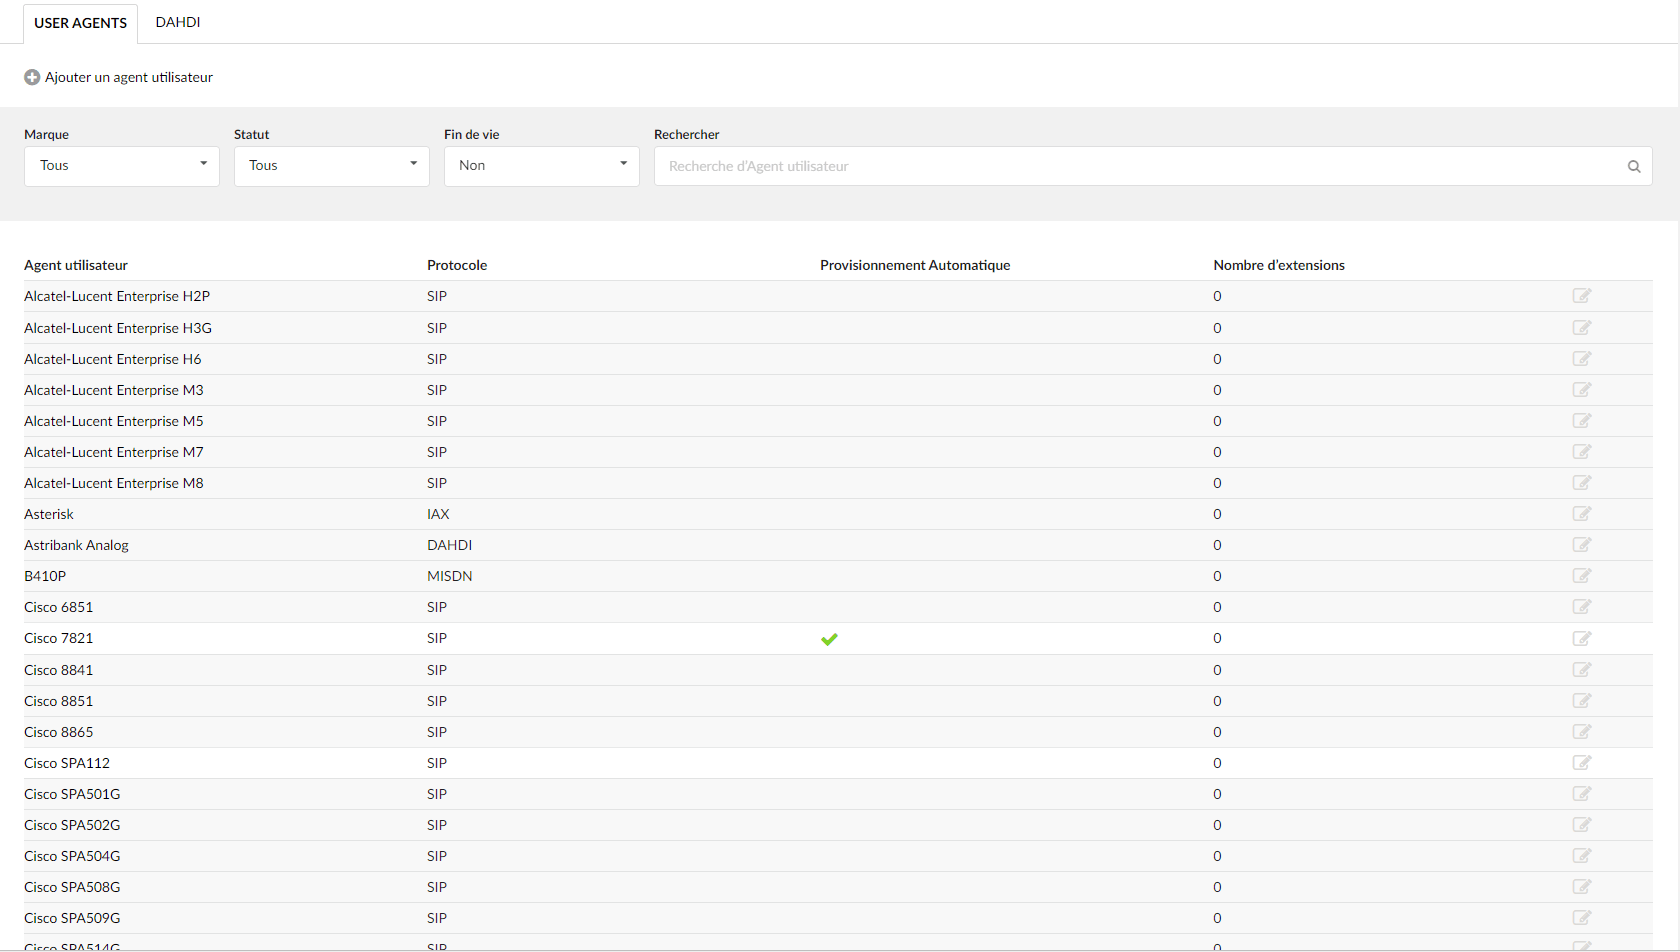
UADs (User Agent Devices) are IP phones, softphones, ATAs (Analog Telephone Adaptors) and IADs (Integrated Access Devices) used for the system extensions. PBXware supports a wide range of UADs using the SIP, IAX, MGCP and DAHDI protocols.
Supported devices are already preconfigured with the most common settings to make it easy for administrators to add extensions. However, some PBXware installations have specific requirements, so it is advisable to edit the selected UAD and configure it with the required values. Additionally, if an installation needs to use an unlisted UAD, clicking "Add user agent" allows you to add a new UAD.
End of life
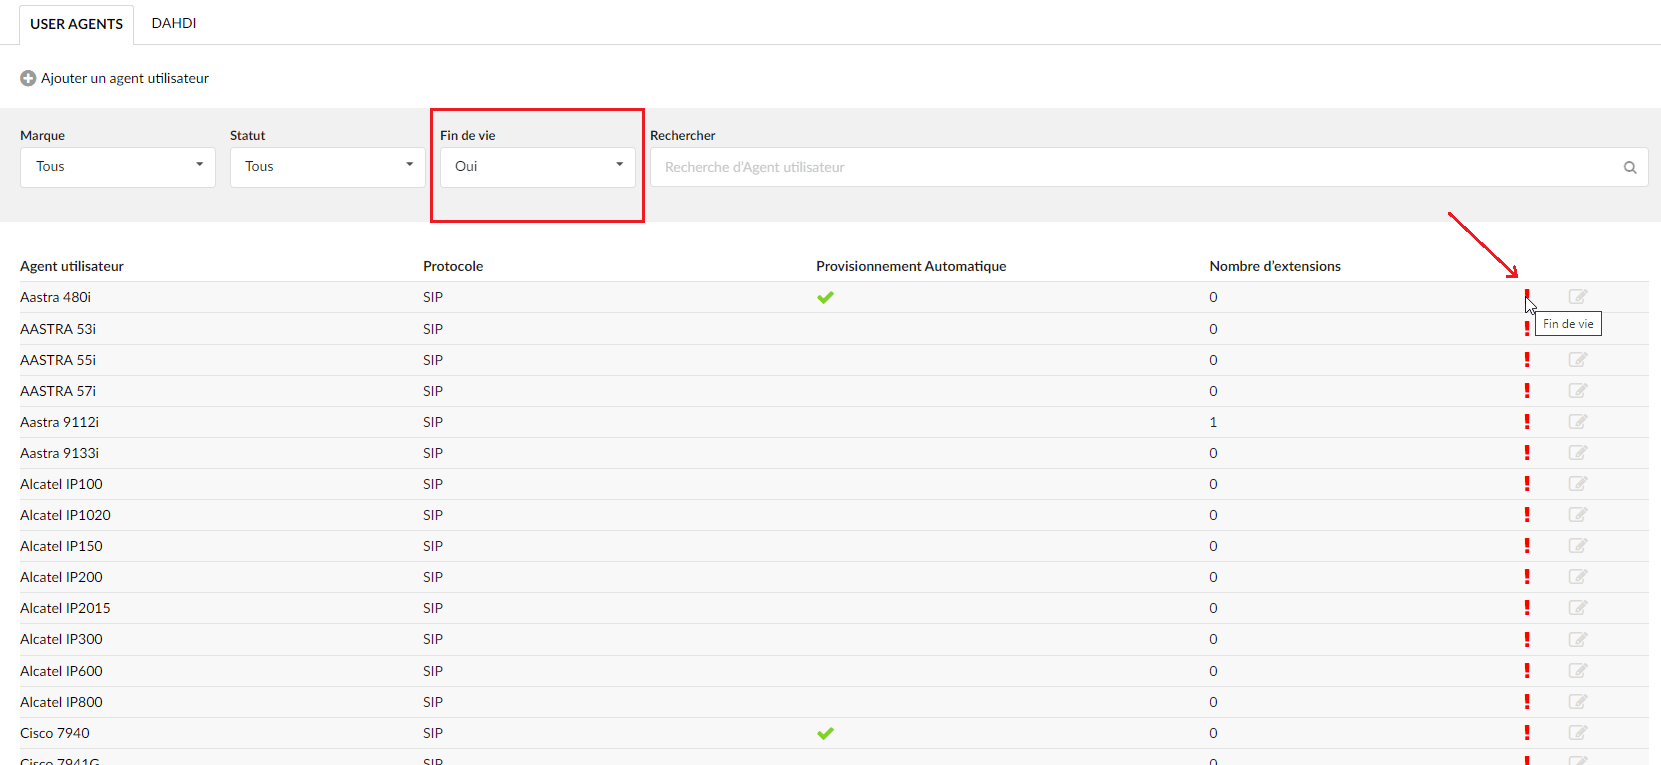
All end-of-life devices are now correctly indicated on the Bicom Systems Wikimedia site in the UAD section.
- As for the PBXware graphical interface:
To see which devices are end-of-life, freely navigate to the tab Settings > select the UAD page and a selection box indicating "End of life" will be displayed. Simply choose ‘Yes’ if you want to see the list of end-of-life devices.
Requirements
SIP
General
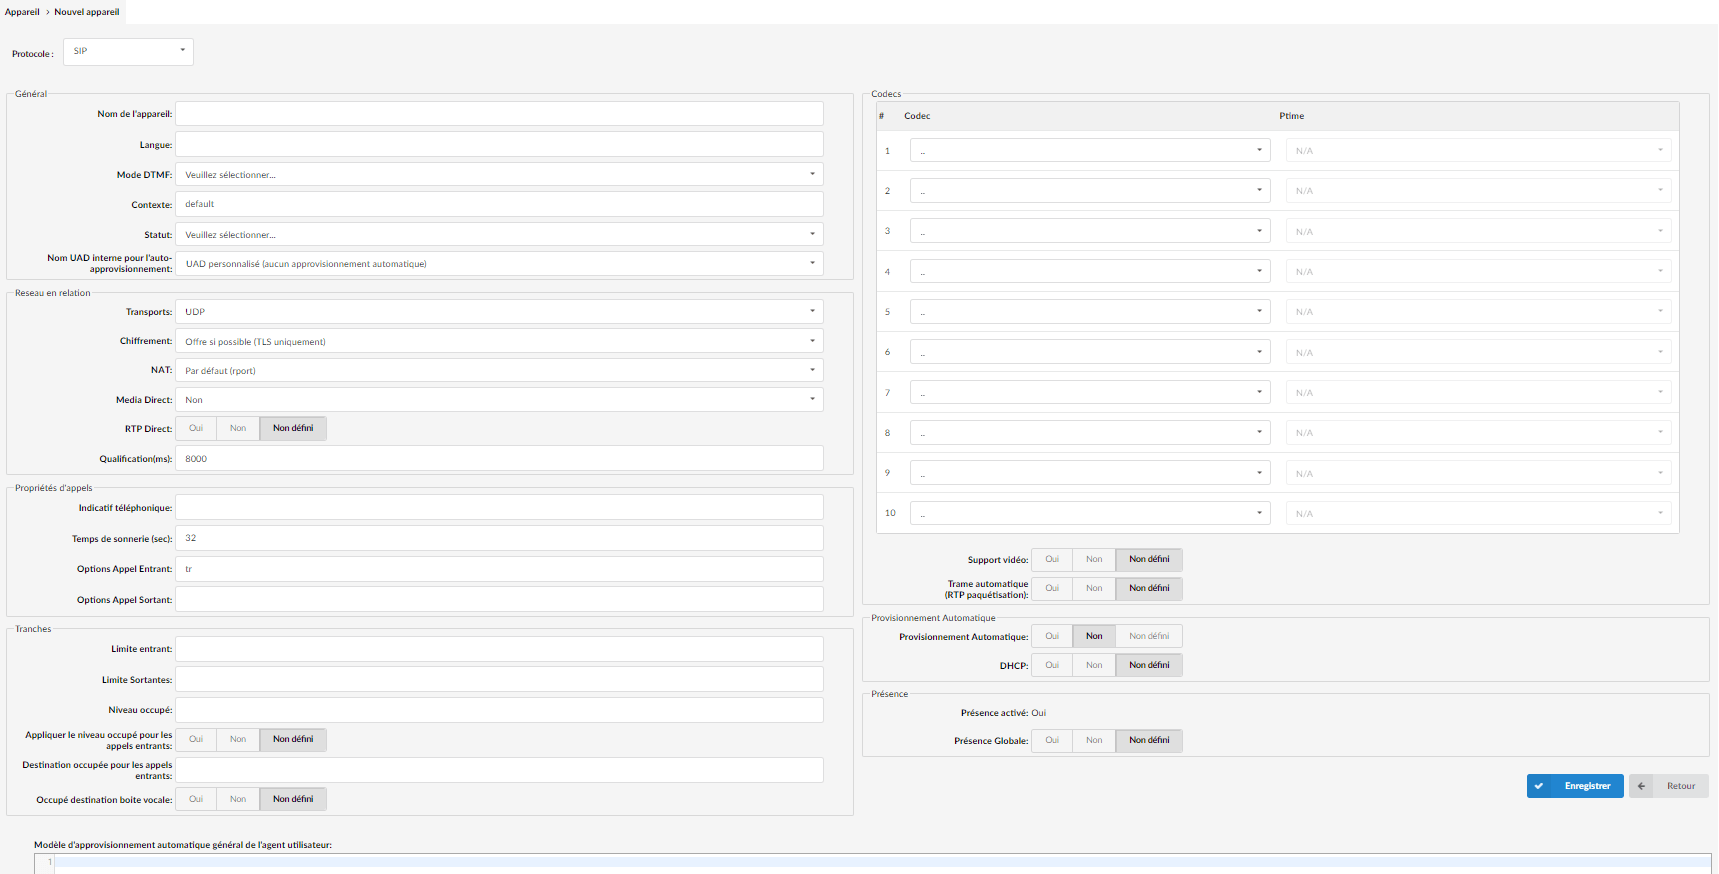
Device name:
Unique name of the device.
DTMF (Dual Tone Multi-Frequency) mode:
A specific frequency made up of two distinct tones. A specific tone is assigned to each key so that it can be easily identified by a microprocessor. These are the tones generated on the keypad of your telephone device.
(For example, each phone has a different “DTMF mode”. By default, this field is automatically filled in for supported devices. If you add other UAD/phones, select the ‘inband’, ‘rfc2833’ or ‘info’ options).Context:
Each extension on the system belongs to a certain system context. The context can be described as a collection/group of extensions. The default context used by PBXware is “default” and should not be used by custom extensions.Status:
Device status/presence on the network
If this field is set to “Active”, this UAD/phone will be available by default in the “UAD” selection box when adding new extensions.)Internal UAD name for auto-provisioning:
This is where you define how the system will recognize the UAD internally
Related network
Transport:
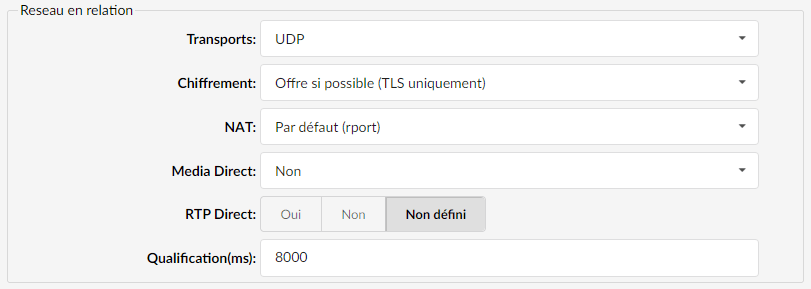
Type of transfer protocol that will be used on PBXware.
- UDP (User Datagram Protocol) - is used mainly to establish low-latency and loss-tolerant connections between applications on the internet.
UDP enables process-to-process communication. With UDP, computer applications can send messages, in this case called datagrams, and it is considered a "best-effort" mode of communication. UDP is considered a connectionless protocol because it does not require the establishment of a virtual circuit before any data transfer. - TCP (Transmission Control Protocol) - ensures the reliable, ordered and verified transmission of a stream of bytes between programs running on computers connected to an intranet or the public internet. TCP sends individual packets and is considered a reliable means of transport.
- TLS (Transport Layer Security) - a cryptographic protocol that ensures the security of communications over the internet[1] and that uses asymmetric cryptography for the authentication of the key exchange, symmetric encryption for confidentiality and message authentication codes for message integrity.
- UDP (User Datagram Protocol) - is used mainly to establish low-latency and loss-tolerant connections between applications on the internet.
Encryption:
This option enables or disables encryption in the PBXware transport.
The options offered are as follows:- Offer if possible (TLS only)
Offers encryption only if it is possible and only with the TLS protocol. - Required
Encryption is always required. - Offer (TLS only)
Always offers encryption, but only with the TLS protocol.
- Offer if possible (TLS only)
NAT (Network Address Translation):
Set the appropriate Extension – PBXware NAT relationship
Example:
If extension 1000 tries to register with PBXware from a remote site/network and that network is behind a NAT, select the appropriate NAT settings here:- Yes – Always ignore the information and assume it is a NAT.
- No – Use NAT mode only according to RFC3581.
- Default (rport) – force_rport – forces RFC 3581 behavior and disables symmetric RTP support.
- Comedia RTP – enables RFC 3581 behavior if the remote side requests it and enables symmetric RTP support.
Media direct:
This option tells the Asterisk server never to issue a re-invite to the client, if set to No.
Available options:- No
If this option is set to ‘No’, Asterisk will never send a re-invite to the client. - Yes
Asterisk will send a re-invite to the client. - Non-NAT only
- Update usage
- No NAT update
- No
Direct RTP:
Here you can enable or disable the new experimental direct RTP configuration. The value “yes” allows the call to be established directly with peer-to-peer media without a re-invite. This will not work for video and in cases where the caller sends RTP payloads and fmtp headers in the 200 OK that do not match the caller’s INVITE. It will also fail if MediaDirect is enabled while the device is behind a NAT.
Qualification(ms):
Time interval in milliseconds during which a "ping" is sent to the UAD/phone or trunk, in order to know its status (online/offline).
Qualification is set to 8000 by default.
(For example, set this option to "2500" to send a ping signal every 2.5 seconds to the UAD/phone or trunk).
Call properties
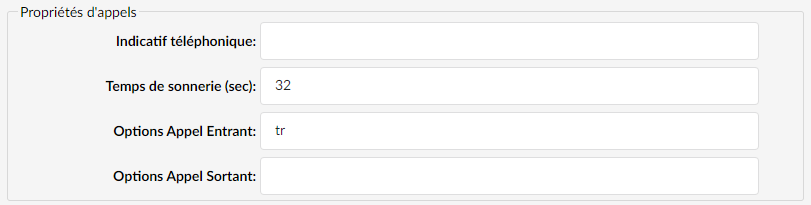
Phone code:
Area code from which the UAD operates.
(For example, the New York area code – 212)Ring time (sec):
Ring duration of the UAD/phone. This is the time in seconds during which the UAD/Phone will ring before the call is considered unanswered.
The default value is 32 seconds.Inbound Call Options:
Advanced dialing options for all inbound calls
The default value is tr.
(default value: tr)).Outbound Call Options:
Advanced dialing options for all outbound calls. The default value is empty.
Slices
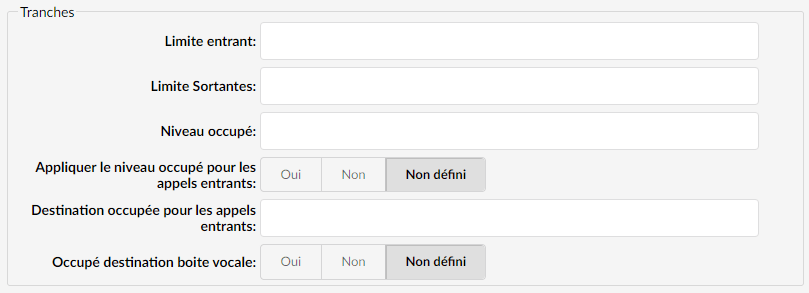
Inbound limit:
Maximum number of incoming calls.
Outbound limit:
Maximum number of outgoing calls.Busy level:
Maximum number of simultaneous incoming calls until the user/peer is busy.Apply busy level for inbound calls:
Indicates whether the busy level will be applied when the maximum number of simultaneous incoming calls is reached.Busy destination for incoming calls:
Define the extension/number to which the call will be redirected if the busy level is reached.Busy voicemail destination:
Select “yes” if you want voicemail to be a busy destination.
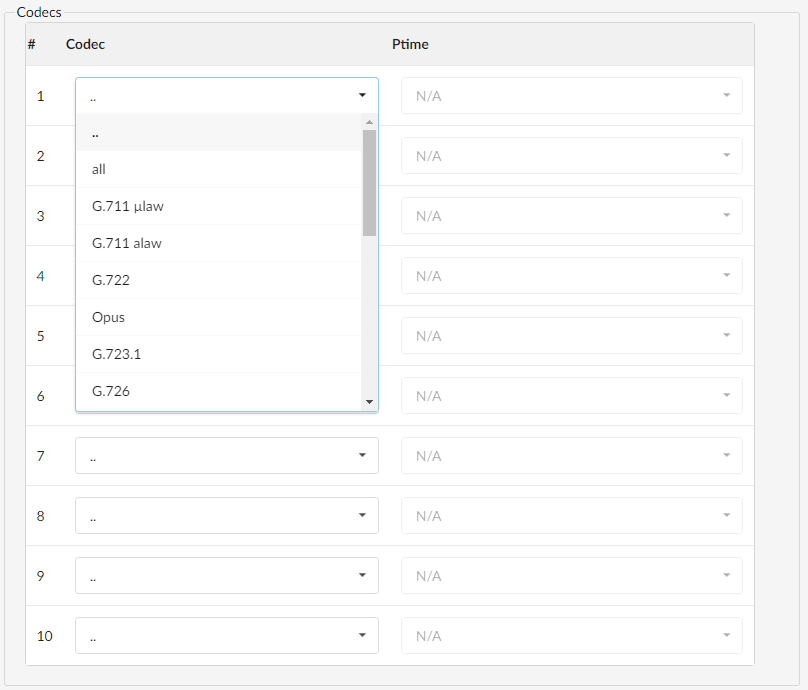
Codecs
Sets the codecs the extension is allowed to use.
Video support:
Set this option to Yes to enable SIP video support.
Automatic framing (RTP packetization):
If auto-framing is enabled, the system will choose the packetization level based on the preferences of the remote users.
Auto Provisioning

Auto Provisioning:
Enable the auto-provisioning service for this particular model.
(For example, connect the UAD/Phone to PBXware without any problem by providing the UAD/Phone's MAC address (and optionally adding the UAD/Phone's static IP address and network details)).DHCP:
Define whether the UAD/Phone is on a DHCP address or a static IP address.
Set DHCP to 'Yes' if the UAD/Phone is on a dynamic IP address, or DHCP to 'No' if the UAD/Phone is on a static IP address. If the UAD/Phone is on a static IP address, you will need to provide more network details in the fields below.
Presence

Presence enabled:
Presence allows the UAD to subscribe to the indications used for BLF.
Global Presence
Additional configuration
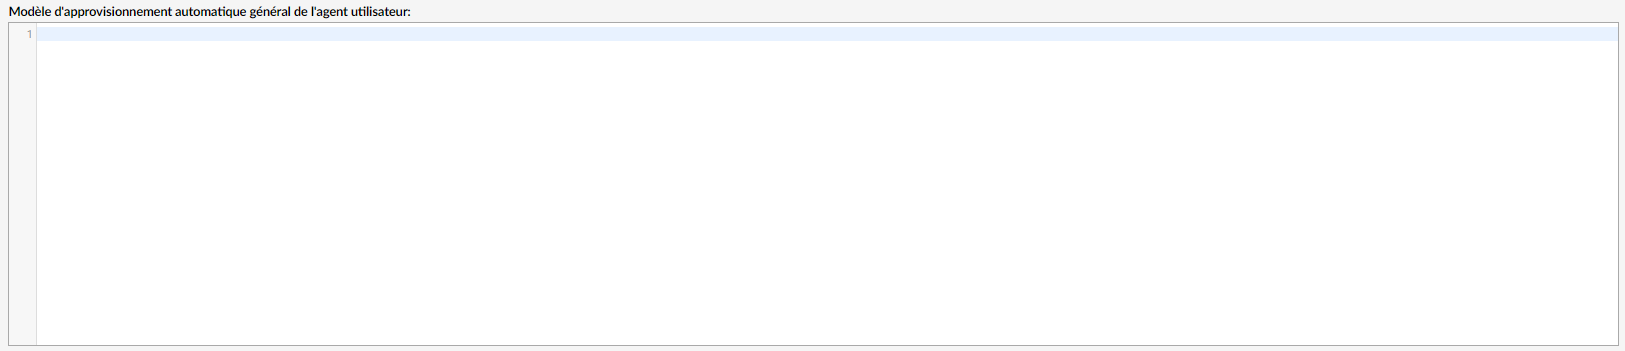
General user agent auto provisioning template:
General user agent auto provisioning template
Here, users can define a custom configuration that will be served to all phones of the same model.
User agent auto provisioning template:
User agent auto provisioning template
This option is used to provide additional configuration parameters for the SIP, IAX, and MGCP configuration files. The values provided here will be written to these configuration files.
The following variables can be used:- %EXT_NUMBER% – Extension number
- %EXT_NAME% – Extension name
- %MAC_ADDRESS% – MAC address of the extension (the MAC from the auto-provisioning request)
- %WAN_IP% – WAN/IP hostname defined in Servers > Edit
- LAN_IP% – LAN Hostname/IP defined in Servers > Edit
- %AUTH_USERNAME% – HTTP username
- %AUTH_PASSWORD% – HTTP username
- %VM_PIN% – Extension voicemail PIN
- %EXT_SECRET% – Extension secret
- %EXT_LABEL% – Extension label
- %EXT_TITLE% – Extension title
User agent-specific configuration:
Dialing options
- t – Allows the called user to transfer the call by pressing #.
- T – Allows the calling user to transfer the call by pressing #.
- r – Generates a ringtone for the caller and passes no audio to the called channel(s) until one of them answers. Use this option with caution and do not insert it by default in all your dial instructions, as you remove call progress information for the user. You probably do not need to use this function. Asterisk automatically generates ringtones when it is appropriate to do so. 'r' moves it to the next step and also generates ringtones where it is probably not appropriate.
- R – Indicates a ringtone to the caller when the called party indicates that it is ringing, but does not pass audio until they answer. This option is only available if you are using Kapejod's bristuff software.
- m – Provides music on hold to the caller until they answer the call. This option is mutually exclusive with the ‘r’ option. Use m(class) to specify a class for the music on hold.
- o – Restores Asterisk v1.0 Caller ID behavior (send the original Caller ID) in Asterisk v1.2 (default: send the number of this extension).
- j – Asterisk 1.2 and above: Jump to priority n+101 if all requested channels are busy (as in Asterisk 1.0.x)
- M (x) – Runs the macro (x) when connecting the call (i.e., when the called party answers)
- h – Allows the called party to hang up by dialing *
- H – Allows the caller to hang up by dialing *.
- C – Resets the CDR (Call Detail Record) for this call. This is equivalent to using the NoCDR command
- P (x) – Uses the privacy manager, using x as the database (x is optional).
- g – When the called party hangs up, exit to execute other commands in the current context.
- G (context^exten^pri) – If the call is answered, both parties are transferred to the specified priority. The caller is transferred to priority x and the called party to priority x+1.
- A (x) – Plays an announcement (x.gsm) to the called party.
- S (n) – Hang up the call n seconds AFTER the callee has answered.
- d: – This flag takes precedence over the 'H' flag and intercepts any DTMF while waiting for the call to be picked up and returns that value on the spot. This allows you to dial a single-digit exit extension number while waiting for the call to be picked up – see also RetryDial.
- D (digits) – After the called party has answered, send the digits as a DTMF stream, then connect the call to the original channel.
- L (x[:y][:z]) – Limit the call to "x" minutes, warn when "y" minutes remain, repeat every "z" minutes). Only "x" is mandatory; "y" and "z" are optional. The following special variables are optional for limited calls: (pasted from app_dial.c)
- + LIMIT_PLAYAUDIO_CALLER – yes|no (default yes) – Plays sounds to the caller.
- + LIMIT_PLAYAUDIO_CALLEE – yes|no – Plays sounds for the callee.
- + LIMIT_TIMEOUT_FILE – File to play when time has run out.
- + LIMIT_CONNECT_FILE – File to play at the start of the call.
- + LIMIT_WARNING_FILE – File to play as a warning if “y” is set. If LIMIT_WARNING_FILE is not set, the default behavior is to play a warning file (LIMIT_WARNING_FILE).
- f – forces the caller identification to be set for the extension of the line placing/redirecting the outbound call. For example, some PSTNs do not allow the caller identification for extensions other than those assigned to you.
- w – Allows the called user to start recording after pressing *1 or any other parameter defined in features.conf, requires Set(DYNAMIC_FEATURES=automon)
- W – Allows the calling user to start recording after pressing *1 or any other item defined in features.conf, requires Set(DYNAMIC_FEATURES=automon)
IAX
IAX
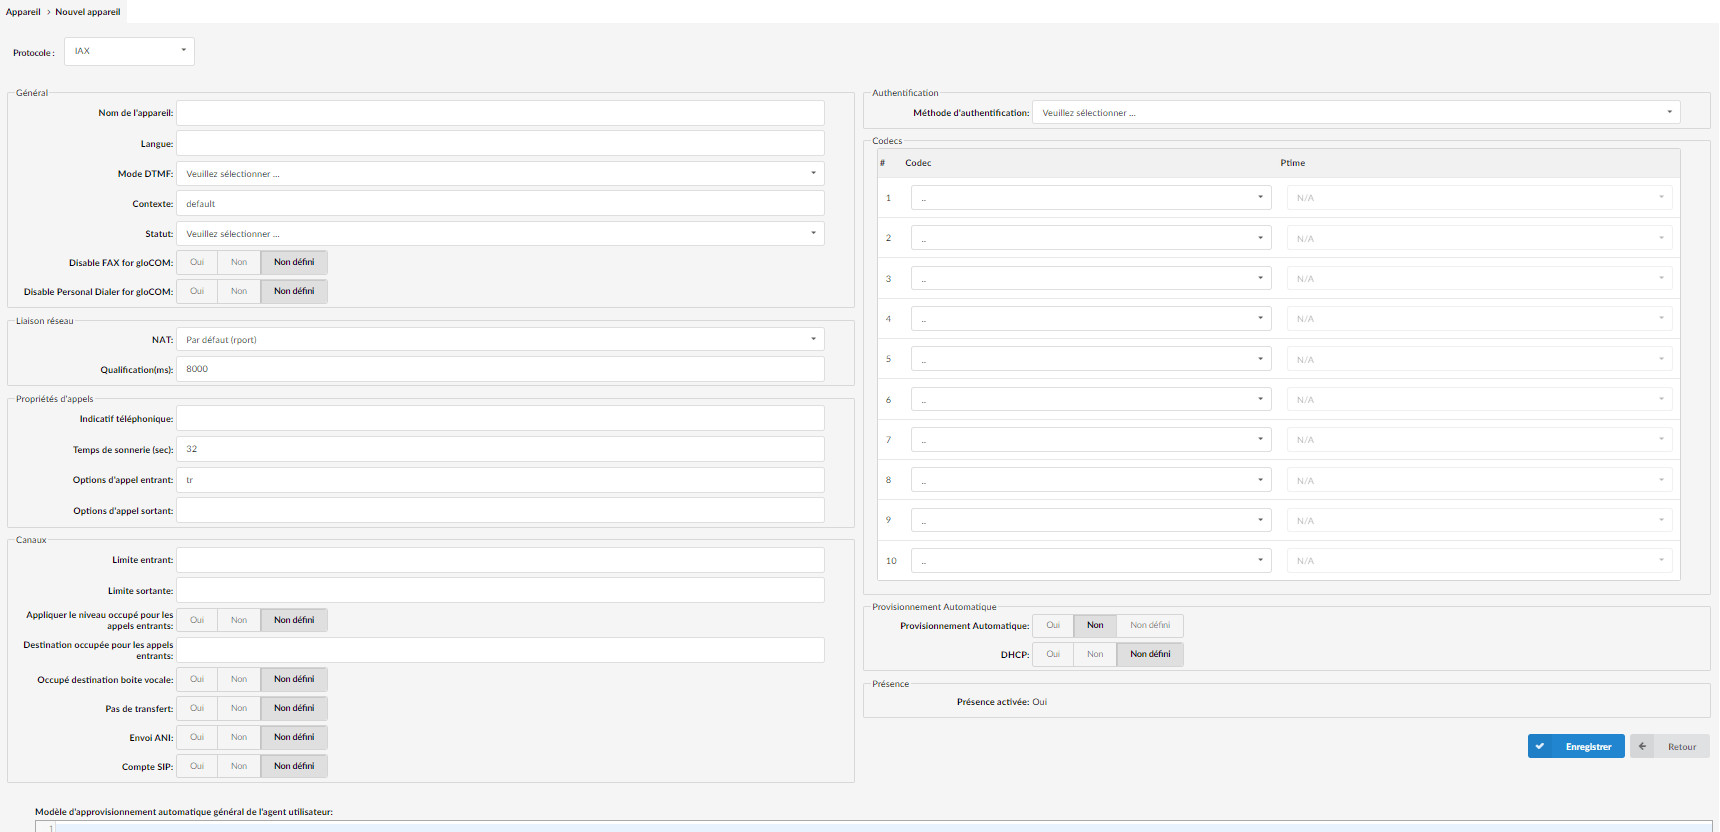
General
Device name:
Unique name of the device.DTMF mode:
A specific frequency, made up of two distinct tones. A specific tone is assigned to each key so that it can be easily identified by a microprocessor. These are the tones generated on the keypad of your telephone device.
(For example, each phone has a different “DTMF mode”. By default, this field is automatically filled in for supported devices. If you add another UAD/phone, select the “inband”, “rfc2833” or “info” options).Context:
Each extension on the system belongs to a certain system context. The context can be described as a collection/group of extensions. The default context used by PBXware is “default” and should not be used by custom extensions.Status:
Device status/presence on the network
(For example, if this field is set to "Active", this UAD/phone will be available by default in the "UAD" selection box when adding new extensions).
Network link

NAT (Network Address Translation)
Set the appropriate Extension – PBXware NAT relationship.
If extension 1000 tries to register with PBXware from a remote site/network and that network is behind a NAT, select the appropriate NAT settings here:- Yes – Always ignore the information and assume it is NAT
- No – Use NAT mode only according to the RFC3581 standard
- Default (rport) – this setting enforces RFC3581 behavior and disables symmetric RTP support.
- Comedia RTP – enables RFC3581 behavior if the remote side requests it and enables symmetric RTP support.
Qualification(ms):
Time interval in milliseconds during which a 'ping' is sent to a UAD/phone or a trunk in order to know its status (online/offline).
In PBXware 6.0, the ‘Qualify’ option is set by default to 8000 ms.
(For example, set this option to '2500' to send a ping signal every 2.5 seconds to the UAD/phone or trunk).
Call properties
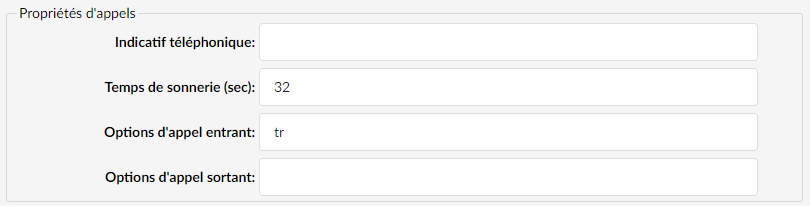
Phone code:
Phone code from which the UAD operates.
(For example, the New York area code – 212)Ring time (sec):
UAD/phone ringing time. This is the time in seconds during which the UAD/Phone will ring before the call is considered unanswered.
(For example, the time in seconds that the UAD/Phone will ring before the call is considered unanswered).Inbound call options:
Advanced dialing options for all inbound calls
The default value is 32s.Outbound call options:
Advanced dialing options for all outbound calls. The default value is empty.
Channels
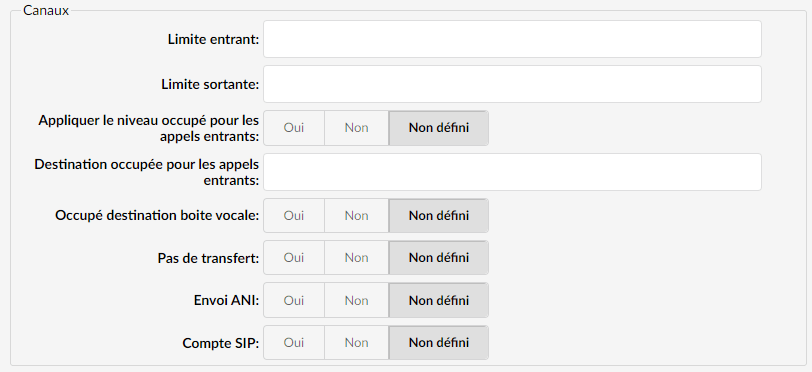
Inbound limit:
Maximum number of incoming calls.Outbound limit:
Maximum number of outgoing calls.Apply busy level for inbound calls:
Indicates whether the busy level will be applied when the maximum number of simultaneous incoming calls is reached.Busy destination for incoming calls:
Define the extension/number where the call will be redirected if the occupancy level is applied.Busy voicemail destination:
Select “yes” if you want voicemail to be a busy destination.No transfer:
Disable native IAX transfer.ANI sending:
ANI – Automatic number identification
Should the ANI ("super" caller ID) be sent through this provider?SIP account:
Use IAX2 trunking with this host
Authentication

- Authentication method:
Authentication method required by the provider- none – does not use authentication
- plaintext – uses plaintext as a means of authentication
- md5 – uses an md5 sum challenge/response arrangement, but still requires both parties to have access to the plaintext secret.
- rc4
- rsa – allows one-way knowledge of the secret through public/private keys. If “rsa” authentication is used, “inkeys” is a list of acceptable public keys on the local system that can be used to authenticate the remote peer, separated by the “:” character.
Codecs
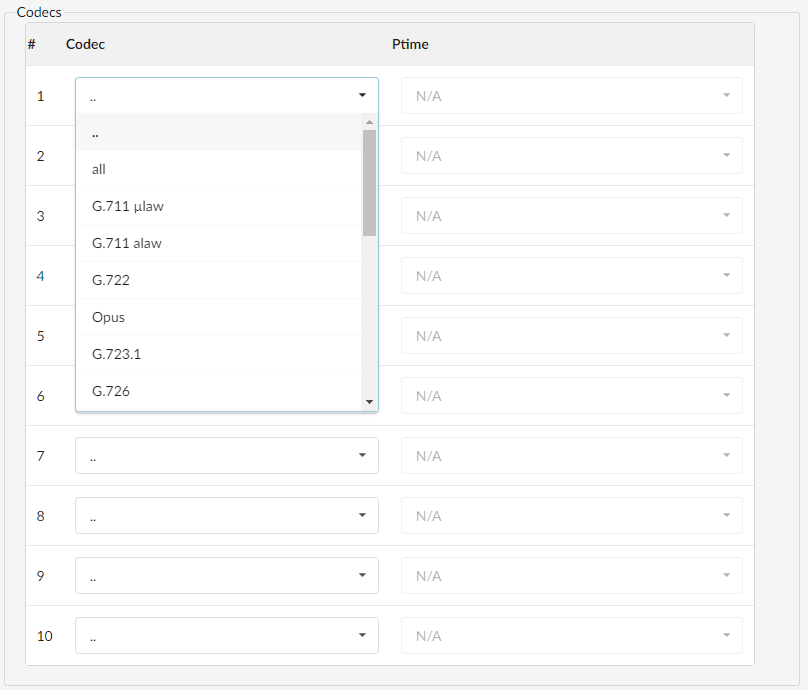
Sets the codecs the extension is allowed to use. N/A means “not allowed”.
Auto Provisioning
Auto Provisioning:
Enable the auto-provisioning service for this particular model.
(For example, connect the UAD/Phone to PBXware without any problem by providing the UAD/Phone's MAC address (and optionally adding the UAD/Phone's static IP address and network details)).DHCP:
Define whether the UAD/Phone is on a DHCP address or a static IP address.
Set DHCP to 'Yes' if the UAD/Phone is on a dynamic IP address, or DHCP to 'No' if the UAD/Phone is on a static IP address. If the IP address is static, you will need to provide more network details in the fields below.
Presence

- Presence enabled:
Presence allows the UAD to subscribe to hints that are used for BLF. - Global presence
Additional Config
Additional configuration for Auto Provisioning on the following pages can use template variables :
General user agent auto-provisioning template:
Here, users can define a custom configuration that will be served to all phones of the same model.
User agent auto provisioning template:
This option is used to provide additional configuration parameters for the SIP, IAX, and MGCP configuration files. The values provided here will be written to these configuration files.
The following variables can be used:
- %EXT_NUMBER% – Extension number
- %EXT_NAME% – Extension name
- %MAC_ADDRESS% – MAC address of the extension (the MAC from the auto-provisioning request)
- %WAN_IP% – WAN/IP hostname defined in Servers > Edit
- LAN_IP% – LAN Hostname/IP defined in Servers > Edit
- %AUTH_USERNAME% – HTTP username
- %AUTH_PASSWORD% – HTTP username
- %VM_PIN% – Extension voicemail PIN
- %EXT_SECRET% – Extension secret
- %EXT_LABEL% – Extension label
- %EXT_TITLE% – Extension title
User agent-specific configuration:
Dialing options
- t – Allows the called user to transfer the call by pressing #.
- T – Allows the calling user to transfer the call by pressing #.
- r – Generates a ringtone for the caller and passes no audio to the called channel(s) until one of them answers. Use this option with caution and do not insert it by default in all your dial instructions, as you remove call progress information for the user. You probably do not need to use this function. Asterisk automatically generates ringtones when it is appropriate to do so. 'r' moves it to the next step and also generates ringtones where it is probably not appropriate.
- R – Indicates a ringtone to the caller when the called party indicates that it is ringing, but does not pass audio until they answer. This option is only available if you are using Kapejod's bristuff software.
- m – Provides music on hold to the caller until they answer the call. This option is mutually exclusive with the ‘r’ option. Use m(class) to specify a class for the music on hold.
- o – Restores Asterisk v1.0 Caller ID behavior (send the original Caller ID) in Asterisk v1.2 (default: send the number of this extension).
- j – Asterisk 1.2 and above: Jump to priority n+101 if all requested channels are busy (as in Asterisk 1.0.x)
- M (x) – Runs the macro (x) when connecting the call (i.e., when the called party answers)
- h – Allows the called party to hang up by dialing *
- H – Allows the caller to hang up by dialing *.
- C – Resets the CDR (Call Detail Record) for this call. This is equivalent to using the NoCDR command
- P (x) – Uses the privacy manager, using x as the database (x is optional).
- g – When the called party hangs up, exit to execute other commands in the current context.
- G (context^exten^pri) – If the call is answered, both parties are transferred to the specified priority. The caller is transferred to priority x and the called party to priority x+1.
- A (x) – Plays an announcement (x.gsm) to the called party.
- S (n) – Hang up the call n seconds AFTER the callee has answered.
- d: – This flag takes precedence over the 'H' flag and intercepts any DTMF while waiting for the call to be picked up and returns that value on the spot. This allows you to dial a single-digit exit extension number while waiting for the call to be picked up – see also RetryDial.
- D (digits) – After the called party has answered, send the digits as a DTMF stream, then connect the call to the original channel.
- L (x[:y][:z]) – Limit the call to "x" minutes, warn when "y" minutes remain, repeat every "z" minutes). Only "x" is mandatory; "y" and "z" are optional. The following special variables are optional for limited calls: (pasted from app_dial.c)
- + LIMIT_PLAYAUDIO_CALLER – yes|no (default yes) – Plays sounds to the caller.
- + LIMIT_PLAYAUDIO_CALLEE – yes|no – Plays sounds for the callee.
- + LIMIT_TIMEOUT_FILE – File to play when time has run out.
- + LIMIT_CONNECT_FILE – File to play at the start of the call.
- + LIMIT_WARNING_FILE – File to play as a warning if “y” is set. If LIMIT_WARNING_FILE is not set, the default behavior is to play a warning file (LIMIT_WARNING_FILE).
- f – forces the caller identification to be set for the extension of the line placing/redirecting the outbound call. For example, some PSTNs do not allow the caller identification for extensions other than those assigned to you.
- w – Allows the called user to start recording after pressing *1 or any other parameter defined in features.conf, requires Set(DYNAMIC_FEATURES=automon)
- W – Allows the calling user to start recording after pressing *1 or any other item defined in features.conf, requires Set(DYNAMIC_FEATURES=automon)
IAX
DAHDI
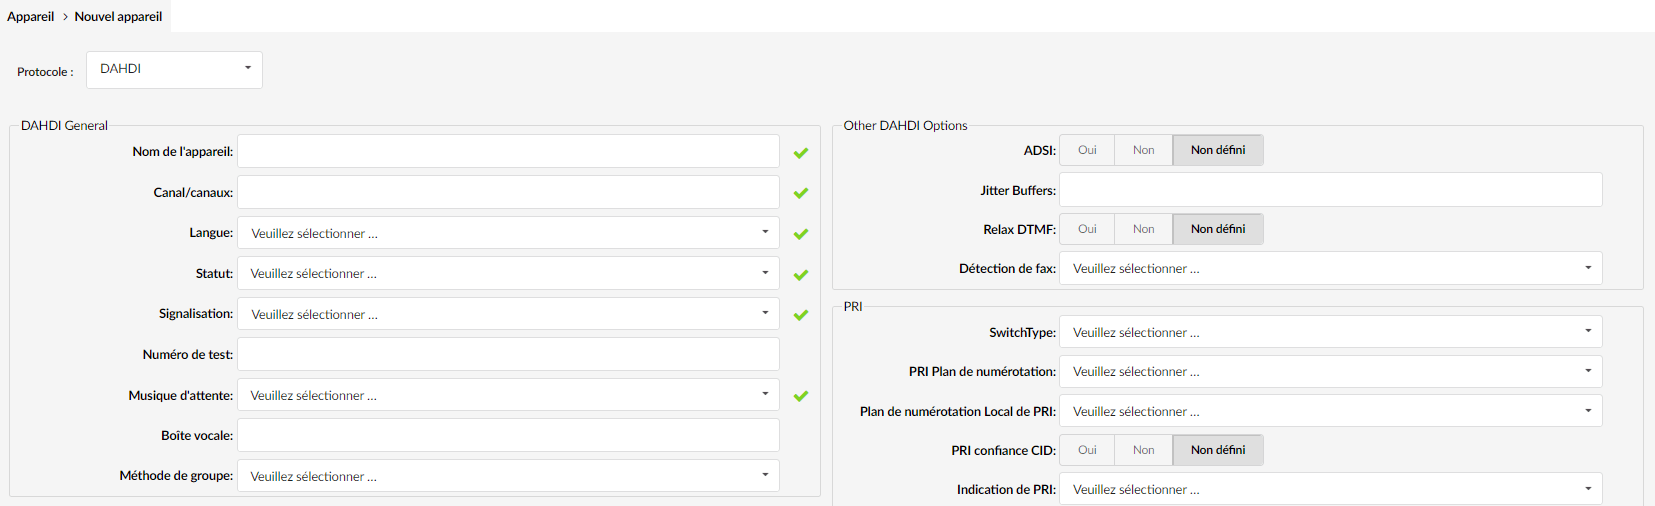
DAHDI General
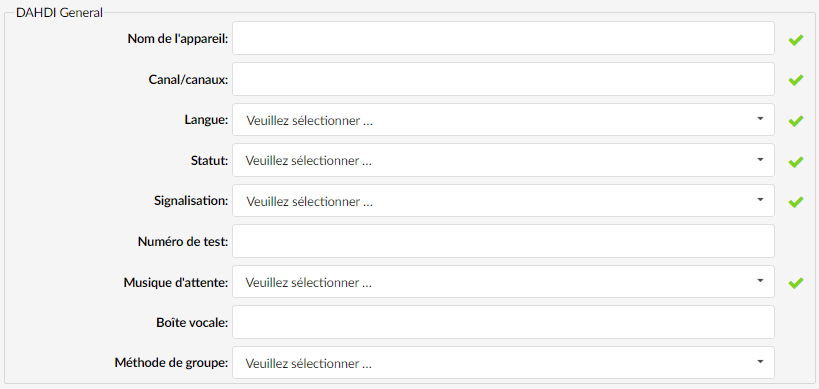
Device name:
Unique name of the device.
Channels:
What are the card channels used?
Language:
Default language.
Status:
Device status/presence on the network
(For example, if this field is set to "Active", this UAD/phone will be available by default in the "UAD" selection box when adding new extensions).Signaling:
Signaling method
Possible choices:- E&M
- E&M Wink
- FXS Loopstart
- FXS Groundstart
- FXS Kewlstart
- FXO Loopstart
- FXO Groundstart
- FXO Kewlstart
- PRI CPE side
- PRI Network side
- BRI Network side
- BRI CPE PTMP
- BRI Network PTMP
Test number:
This number is used for trunk monitoring in Monitor -> Trunks Settings -> Monitor Trunks.
Music on hold:
Select the music class to be used for music on hold. If not specified, the “default” value will be used.
Voicemail:
Set a voicemail context.
(for example 1234, 1234@context)Group method:
It specifies the group to dial and how to choose a channel to use within the specified group. The four possible options are as follows:
- g: selects the lowest unoccupied DAHDI channel (also known as an ascending sequential hunt group).
- G: selects the highest unoccupied DAHDI channel (also known as a descending sequential hunt group).
- r: use a round-robin search, starting with the next highest channel relative to the last time (aka ascending rotary hunt group).
- R: use a round-robin search, starting with the lowest channel following the last one (aka descending rotary hunt group).
Span
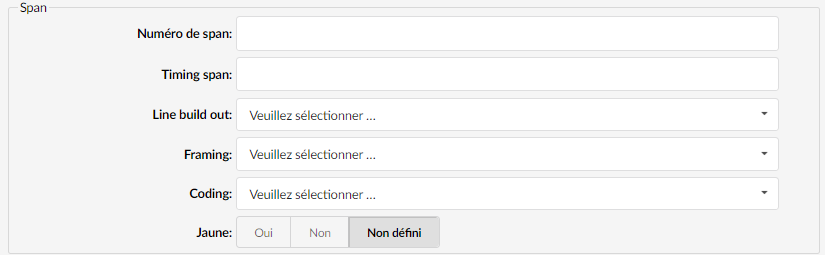
Span number:
Span number.Timing span:
How to synchronize synchronization devices
Example:- 0 – do not use this representation range as a synchronization source
- 1 – use as primary synchronization source
- 2 – as a secondary source, and so on
Line Build Out:
Length of the last leg of the connection. The value is set to zero if the length is less than 133 feet.
Example:- 0 db (CSU) / 0-133 feet (DSX-1)
- 133-266 feet (DSX-1)
- 266-399 feet (DSX-1)
- 399-533 feet (DSX-1)
- 533-655 feet (DSX-1)
- -7,5db (CSU)
- -15db (CSU)
- -22,5db (CSU)
Framing:
How to communicate with the hardware at the other end of the line.
Example:- For T1: The framing is one of the following: d4 or esf.
- For E1: the framing is one of the following: cas or ccs.
Coding:
How to encode communication with the hardware at the other end of the line.
Example:- For T1: the coding is ami or b8zs.
- For E1: the encoding is one of the following: ami or hdb3 (E1 may also need a crc).
Yellow:
Indicates whether the yellow alarm is transmitted when no channel is open.
Dynamic Span
 Dynamic span driver:
The name of the driver (e.g. eth)
Dynamic span address:
Driver-specific address (such as a MAC for eth).
Dynamic span channels:
Number of channels.
Dynamic span channels:
Sets the synchronization priority, as for a normal range. Use “0” not to use it as a synchronization source, or give them priority as a primary, secondary, etc. source.
Echo Canceller
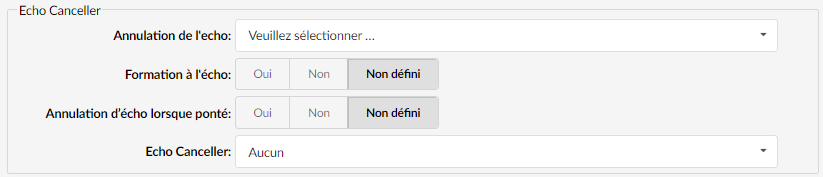
Echo cancellation:
Enable/disable echo cancellation. You can choose echo cancellation between delays of 32, 64, 128 and 256 ms.Echo training:
Briefly mute the channel, for 400 ms, at the start of a conversation, which cancels the echo. (Use only if the "Echo Cancellation" option does not work as expected).Echo cancellation when bridged:
Enables echo cancellation when bridging. In general, it is not necessary, and in fact it is not desirable, to cancel echo when the circuit path is entirely TDM.Echo Canceller:
Echo canceller types:- mg2
- oslec
- kb1
or none.
Jitterbuffer
A Jitterbuffer temporarily stores incoming packets in order to minimize delay variations. If packets arrive too late, they are discarded. A Jitterbuffer can be misconfigured and be too large or too small.
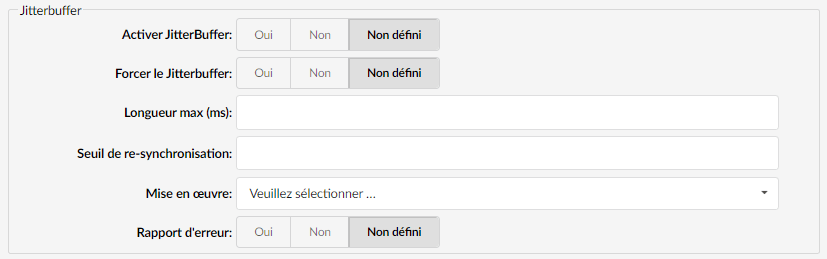
Enable Jitterbuffer:
Enables the use of a Jitterbuffer on the receiving side of a SIP channel. An enabled Jitterbuffer will only be used if the sending side can create Jitter and the receiving side cannot accept it. The SIP channel can accept Jitter, so a Jitterbuffer on the receiving SIP side will only be used if it is forced and enabled.Force Jitterbuffer:
Whether to force the Jitterbuffer.
Call indications
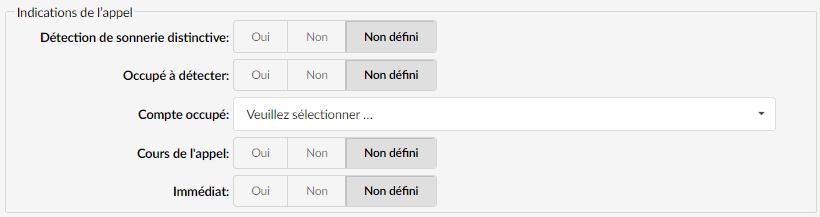
Distinctive ring detection:
Whether or not to allow distinctive ring detection on FXO lines.Busy detecting:
Enabling monitoring of the busy detection beep.Account busy:
Number of busy tones to wait for before hanging up. Higher values reduce the likelihood of hanging up at random.
Call groups

Call group:
Set the call group to which the extension belongs.
(Similar to the "Context" group, but this option defines the call group to which the extension belongs (allowed range: 0-63)).Pickup group:
Sets the call pickup groups as being allowed to pick up.
(Similar to the 'Context' grouping, but this option allows defining the extension of the call groups as allowed to pick up by dialing '*8').
Codecs
Sets the codecs the extension is allowed to use.
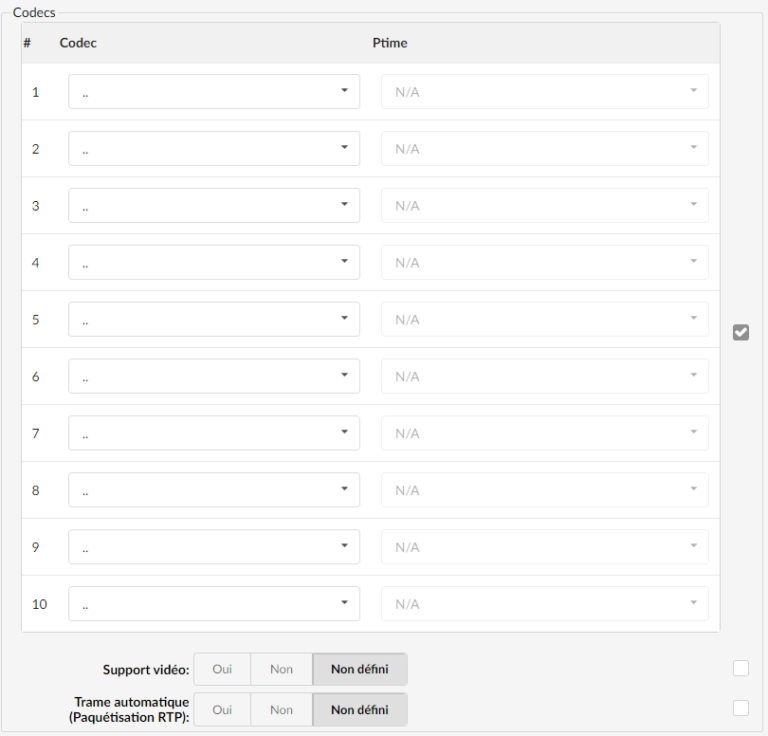
Video support:
Set this option to Yes to enable SIP video support.Automatic framing (RTP packetization):
If auto-framing is enabled, the system will choose the packetization level based on the preferences of the remote users.
Auto Provisioning
Auto Provisioning:
Enable the auto-provisioning service for this particular model.
(For example, connect the UAD/Phone to PBXware without any problem by providing the UAD/Phone's MAC address (and optionally adding the UAD/Phone's static IP address and network details)).DHCP:
Define whether the UAD/Phone is on a DHCP address or a static IP address.
Set DHCP to 'Yes' if the UAD/Phone is on a dynamic IP address, or DHCP to 'No' if the UAD/Phone is on a static IP address. If the UAD/Phone is on a static IP address, you will need to provide more network details in the fields below.
Presence
Presence enabled:
Presence allows the UAD to subscribe to the indications used for BLF.
Global Presence
Additional configuration
General user agent auto provisioning template:
General user agent auto provisioning template
Here, users can define a custom configuration that will be served to all phones of the same model.
User agent auto provisioning template:
User agent auto provisioning template
This option is used to provide additional configuration parameters for the SIP, IAX, and MGCP configuration files. The values provided here will be written to these configuration files.
The following variables can be used:- %EXT_NUMBER% – Extension number
- %EXT_NAME% – Extension name
- %MAC_ADDRESS% – MAC address of the extension (the MAC from the auto-provisioning request)
- %WAN_IP% – WAN/IP hostname defined in Servers > Edit
- LAN_IP% – LAN Hostname/IP defined in Servers > Edit
- %AUTH_USERNAME% – HTTP username
- %AUTH_PASSWORD% – HTTP username
- %VM_PIN% – Extension voicemail PIN
- %EXT_SECRET% – Extension secret
- %EXT_LABEL% – Extension label
- %EXT_TITLE% – Extension title
User agent-specific configuration:
Dialing options
- t – Allows the called user to transfer the call by pressing #.
- T – Allows the calling user to transfer the call by pressing #.
- r – Generates a ringtone for the caller and passes no audio to the called channel(s) until one of them answers. Use this option with caution and do not insert it by default in all your dial instructions, as you remove call progress information for the user. You probably do not need to use this function. Asterisk automatically generates ringtones when it is appropriate to do so. 'r' moves it to the next step and also generates ringtones where it is probably not appropriate.
- R – Indicates a ringtone to the caller when the called party indicates that it is ringing, but does not pass audio until they answer. This option is only available if you are using Kapejod's bristuff software.
- m – Provides music on hold to the caller until they answer the call. This option is mutually exclusive with the ‘r’ option. Use m(class) to specify a class for the music on hold.
- o – Restores Asterisk v1.0 Caller ID behavior (send the original Caller ID) in Asterisk v1.2 (default: send the number of this extension).
- j – Asterisk 1.2 and above: Jump to priority n+101 if all requested channels are busy (as in Asterisk 1.0.x)
- M (x) – Runs the macro (x) when connecting the call (i.e., when the called party answers)
- h – Allows the called party to hang up by dialing *
- H – Allows the caller to hang up by dialing *.
- C – Resets the CDR (Call Detail Record) for this call. This is equivalent to using the NoCDR command
- P (x) – Uses the privacy manager, using x as the database (x is optional).
- g – When the called party hangs up, exit to execute other commands in the current context.
- G (context^exten^pri) – If the call is answered, both parties are transferred to the specified priority. The caller is transferred to priority x and the called party to priority x+1.
- A (x) – Plays an announcement (x.gsm) to the called party.
- S (n) – Hang up the call n seconds AFTER the callee has answered.
- d: – This flag takes precedence over the 'H' flag and intercepts any DTMF while waiting for the call to be picked up and returns that value on the spot. This allows you to dial a single-digit exit extension number while waiting for the call to be picked up – see also RetryDial.
- D (digits) – After the called party has answered, send the digits as a DTMF stream, then connect the call to the original channel.
- L (x[:y][:z]) – Limit the call to "x" minutes, warn when "y" minutes remain, repeat every "z" minutes). Only "x" is mandatory; "y" and "z" are optional. The following special variables are optional for limited calls: (pasted from app_dial.c)
- + LIMIT_PLAYAUDIO_CALLER – yes|no (default yes) – Plays sounds to the caller.
- + LIMIT_PLAYAUDIO_CALLEE – yes|no – Plays sounds for the callee.
- + LIMIT_TIMEOUT_FILE – File to play when time has run out.
- + LIMIT_CONNECT_FILE – File to play at the start of the call.
- + LIMIT_WARNING_FILE – File to play as a warning if “y” is set. If LIMIT_WARNING_FILE is not set, the default behavior is to play a warning file (LIMIT_WARNING_FILE).
- f – forces the caller identification to be set for the extension of the line placing/redirecting the outbound call. For example, some PSTNs do not allow the caller identification for extensions other than those assigned to you.
- w – Allows the called user to start recording after pressing *1 or any other parameter defined in features.conf, requires Set(DYNAMIC_FEATURES=automon)
- W – Allows the calling user to start recording after pressing *1 or any other item defined in features.conf, requires Set(DYNAMIC_FEATURES=automon)
IAX
IAX
General
Device name:
Unique name of the device.DTMF mode:
A specific frequency, made up of two distinct tones. A specific tone is assigned to each key so that it can be easily identified by a microprocessor. These are the tones generated on the keypad of your telephone device.
(For example, each phone has a different “DTMF mode”. By default, this field is automatically filled in for supported devices. If you add another UAD/phone, select the “inband”, “rfc2833” or “info” options).Context:
Each extension on the system belongs to a certain system context. The context can be described as a collection/group of extensions. The default context used by PBXware is “default” and should not be used by custom extensions.Status:
Device status/presence on the network
(For example, if this field is set to "Active", this UAD/phone will be available by default in the "UAD" selection box when adding new extensions).
Network link
NAT (Network Address Translation)
Set the appropriate Extension – PBXware NAT relationship.
If extension 1000 tries to register with PBXware from a remote site/network and that network is behind a NAT, select the appropriate NAT settings here:- Yes – Always ignore the information and assume it is NAT
- No – Use NAT mode only according to the RFC3581 standard
- Default (rport) – this setting enforces RFC3581 behavior and disables symmetric RTP support.
- Comedia RTP – enables RFC3581 behavior if the remote side requests it and enables symmetric RTP support.
Qualification(ms):
Time interval in milliseconds during which a 'ping' is sent to a UAD/phone or a trunk in order to know its status (online/offline).
In PBXware 6.0, the ‘Qualify’ option is set by default to 8000 ms.
(For example, set this option to '2500' to send a ping signal every 2.5 seconds to the UAD/phone or trunk).
Call properties
Phone code:
Phone code from which the UAD operates.
(For example, the New York area code – 212)Ring time (sec):
UAD/phone ringing time. This is the time in seconds during which the UAD/Phone will ring before the call is considered unanswered.
(For example, the time in seconds that the UAD/Phone will ring before the call is considered unanswered).Inbound call options:
Advanced dialing options for all inbound calls
The default value is 32s.Outbound call options:
Advanced dialing options for all outbound calls. The default value is empty.
Channels
Inbound limit:
Maximum number of incoming calls.Outbound limit:
Maximum number of outgoing calls.Apply busy level for inbound calls:
Indicates whether the busy level will be applied when the maximum number of simultaneous incoming calls is reached.Busy destination for incoming calls:
Define the extension/number where the call will be redirected if the occupancy level is applied.Busy voicemail destination:
Select “yes” if you want voicemail to be a busy destination.No transfer:
Disable native IAX transfer.ANI sending:
ANI – Automatic number identification
Should the ANI ("super" caller ID) be sent through this provider?SIP account:
Use IAX2 trunking with this host
Authentication
- Authentication method:
Authentication method required by the provider- none – does not use authentication
- plaintext – uses plaintext as a means of authentication
- md5 – uses an md5 sum challenge/response arrangement, but still requires both parties to have access to the plaintext secret.
- rc4
- rsa – allows one-way knowledge of the secret through public/private keys. If “rsa” authentication is used, “inkeys” is a list of acceptable public keys on the local system that can be used to authenticate the remote peer, separated by the “:” character.
Codecs
Sets the codecs the extension is allowed to use. N/A means “not allowed”.
Auto Provisioning
Auto Provisioning:
Enable the auto-provisioning service for this particular model.
(For example, connect the UAD/Phone to PBXware without any problem by providing the UAD/Phone's MAC address (and optionally adding the UAD/Phone's static IP address and network details)).DHCP:
Define whether the UAD/Phone is on a DHCP address or a static IP address.
Set DHCP to 'Yes' if the UAD/Phone is on a dynamic IP address, or DHCP to 'No' if the UAD/Phone is on a static IP address. If the IP address is static, you will need to provide more network details in the fields below.
Presence
- Presence enabled:
Presence allows the UAD to subscribe to hints that are used for BLF. - Global presence
Additional Config
Additional configuration for Auto Provisioning on the following pages can use template variables :
General user agent auto-provisioning template:
Here, users can define a custom configuration that will be served to all phones of the same model.
User agent auto provisioning template:
This option is used to provide additional configuration parameters for the SIP, IAX, and MGCP configuration files. The values provided here will be written to these configuration files.
The following variables can be used:
- %EXT_NUMBER% – Extension number
- %EXT_NAME% – Extension name
- %MAC_ADDRESS% – MAC address of the extension (the MAC from the auto-provisioning request)
- %WAN_IP% – WAN/IP hostname defined in Servers > Edit
- LAN_IP% – LAN Hostname/IP defined in Servers > Edit
- %AUTH_USERNAME% – HTTP username
- %AUTH_PASSWORD% – HTTP username
- %VM_PIN% – Extension voicemail PIN
- %EXT_SECRET% – Extension secret
- %EXT_LABEL% – Extension label
- %EXT_TITLE% – Extension title
User agent-specific configuration:
Dialing options
- t – Allows the called user to transfer the call by pressing #.
- T – Allows the calling user to transfer the call by pressing #.
- r – Generates a ringtone for the caller and passes no audio to the called channel(s) until one of them answers. Use this option with caution and do not insert it by default in all your dial instructions, as you remove call progress information for the user. You probably do not need to use this function. Asterisk automatically generates ringtones when it is appropriate to do so. 'r' moves it to the next step and also generates ringtones where it is probably not appropriate.
- R – Indicates a ringtone to the caller when the called party indicates that it is ringing, but does not pass audio until they answer. This option is only available if you are using Kapejod's bristuff software.
- m – Provides music on hold to the caller until they answer the call. This option is mutually exclusive with the ‘r’ option. Use m(class) to specify a class for the music on hold.
- o – Restores Asterisk v1.0 Caller ID behavior (send the original Caller ID) in Asterisk v1.2 (default: send the number of this extension).
- j – Asterisk 1.2 and above: Jump to priority n+101 if all requested channels are busy (as in Asterisk 1.0.x)
- M (x) – Runs the macro (x) when connecting the call (i.e., when the called party answers)
- h – Allows the called party to hang up by dialing *
- H – Allows the caller to hang up by dialing *.
- C – Resets the CDR (Call Detail Record) for this call. This is equivalent to using the NoCDR command
- P (x) – Uses the privacy manager, using x as the database (x is optional).
- g – When the called party hangs up, exit to execute other commands in the current context.
- G (context^exten^pri) – If the call is answered, both parties are transferred to the specified priority. The caller is transferred to priority x and the called party to priority x+1.
- A (x) – Plays an announcement (x.gsm) to the called party.
- S (n) – Hang up the call n seconds AFTER the callee has answered.
- d: – This flag takes precedence over the 'H' flag and intercepts any DTMF while waiting for the call to be picked up and returns that value on the spot. This allows you to dial a single-digit exit extension number while waiting for the call to be picked up – see also RetryDial.
- D (digits) – After the called party has answered, send the digits as a DTMF stream, then connect the call to the original channel.
- L (x[:y][:z]) – Limit the call to "x" minutes, warn when "y" minutes remain, repeat every "z" minutes). Only "x" is mandatory; "y" and "z" are optional. The following special variables are optional for limited calls: (pasted from app_dial.c)
- + LIMIT_PLAYAUDIO_CALLER – yes|no (default yes) – Plays sounds to the caller.
- + LIMIT_PLAYAUDIO_CALLEE – yes|no – Plays sounds for the callee.
- + LIMIT_TIMEOUT_FILE – File to play when time has run out.
- + LIMIT_CONNECT_FILE – File to play at the start of the call.
- + LIMIT_WARNING_FILE – File to play as a warning if “y” is set. If LIMIT_WARNING_FILE is not set, the default behavior is to play a warning file (LIMIT_WARNING_FILE).
- f – forces the caller identification to be set for the extension of the line placing/redirecting the outbound call. For example, some PSTNs do not allow the caller identification for extensions other than those assigned to you.
- w – Allows the called user to start recording after pressing *1 or any other parameter defined in features.conf, requires Set(DYNAMIC_FEATURES=automon)
- W – Allows the calling user to start recording after pressing *1 or any other item defined in features.conf, requires Set(DYNAMIC_FEATURES=automon)
IAX
DAHDI
DAHDI General
Device name:
Unique name of the device.
Channels:
What are the card channels used?
Language:
Default language.
Status:
Device status/presence on the network
(For example, if this field is set to "Active", this UAD/phone will be available by default in the "UAD" selection box when adding new extensions).Signaling:
Signaling method
Possible choices:- E&M
- E&M Wink
- FXS Loopstart
- FXS Groundstart
- FXS Kewlstart
- FXO Loopstart
- FXO Groundstart
- FXO Kewlstart
- PRI CPE side
- PRI Network side
- BRI Network side
- BRI CPE PTMP
- BRI Network PTMP
Test number:
This number is used for trunk monitoring in Monitor -> Trunks Settings -> Monitor Trunks.
Music on hold:
Select the music class to be used for music on hold. If not specified, the “default” value will be used.
Voicemail:
Set a voicemail context.
(for example 1234, 1234@context)Group method:
It specifies the group to dial and how to choose a channel to use within the specified group. The four possible options are as follows:
- g: selects the lowest unoccupied DAHDI channel (also known as an ascending sequential hunt group).
- G: selects the highest unoccupied DAHDI channel (also known as a descending sequential hunt group).
- r: use a round-robin search, starting with the next highest channel relative to the last time (aka ascending rotary hunt group).
- R: use a round-robin search, starting with the lowest channel following the last one (aka descending rotary hunt group).
Span
Span number:
Span number.Timing span:
How to synchronize synchronization devices
Example:- 0 – do not use this representation range as a synchronization source
- 1 – use as primary synchronization source
- 2 – as a secondary source, and so on
Line Build Out:
Length of the last leg of the connection. The value is set to zero if the length is less than 133 feet.
Example:- 0 db (CSU) / 0-133 feet (DSX-1)
- 133-266 feet (DSX-1)
- 266-399 feet (DSX-1)
- 399-533 feet (DSX-1)
- 533-655 feet (DSX-1)
- -7,5db (CSU)
- -15db (CSU)
- -22,5db (CSU)
Framing:
How to communicate with the hardware at the other end of the line.
Example:- For T1: The framing is one of the following: d4 or esf.
- For E1: the framing is one of the following: cas or ccs.
Coding:
How to encode communication with the hardware at the other end of the line.
Example:- For T1: the coding is ami or b8zs.
- For E1: the encoding is one of the following: ami or hdb3 (E1 may also need a crc).
Yellow:
Indicates whether the yellow alarm is transmitted when no channel is open.
Dynamic Span
- Dynamic span driver:
The name of the driver (e.g. eth)
Dynamic span address:
Driver-specific address (such as a MAC for eth).
Dynamic span channels:
Number of channels.
Dynamic span channels:
Sets the synchronization priority, as for a normal range. Use “0” not to use it as a synchronization source, or give them priority as a primary, secondary, etc. source.
Echo Canceller
Echo cancellation:
Enable/disable echo cancellation. You can choose echo cancellation between delays of 32, 64, 128 and 256 ms.Echo training:
Briefly mute the channel, for 400 ms, at the start of a conversation, which cancels the echo. (Use only if the "Echo Cancellation" option does not work as expected).Echo cancellation when bridged:
Enables echo cancellation when bridging. In general, it is not necessary, and in fact it is not desirable, to cancel echo when the circuit path is entirely TDM.Echo Canceller:
Echo canceller types:- mg2
- oslec
- kb1
or none.
Jitterbuffer
A Jitterbuffer temporarily stores incoming packets in order to minimize delay variations. If packets arrive too late, they are discarded. A Jitterbuffer can be misconfigured and be too large or too small.
Enable Jitterbuffer:
Enables the use of a Jitterbuffer on the receiving side of a SIP channel. An enabled Jitterbuffer will only be used if the sending side can create Jitter and the receiving side cannot accept it. The SIP channel can accept Jitter, so a Jitterbuffer on the receiving SIP side will only be used if it is forced and enabled.Force Jitterbuffer:
Whether to force the Jitterbuffer.
Call indications
Distinctive ring detection:
Whether or not to allow distinctive ring detection on FXO lines.Busy detecting:
Enabling monitoring of the busy detection beep.Account busy:
Number of busy tones to wait for before hanging up. Higher values reduce the likelihood of hanging up at random.
Call groups
Call group:
Set the call group to which the extension belongs.
(Similar to the "Context" group, but this option defines the call group to which the extension belongs (allowed range: 0-63)).Pickup group:
Sets the call pickup groups as being allowed to pick up.
(Similar to the 'Context' grouping, but this option allows defining the extension of the call groups as allowed to pick up by dialing '*8').
gloCOM features
Select the gloCOM features that should be enabled and available to the users of a specific tenant.
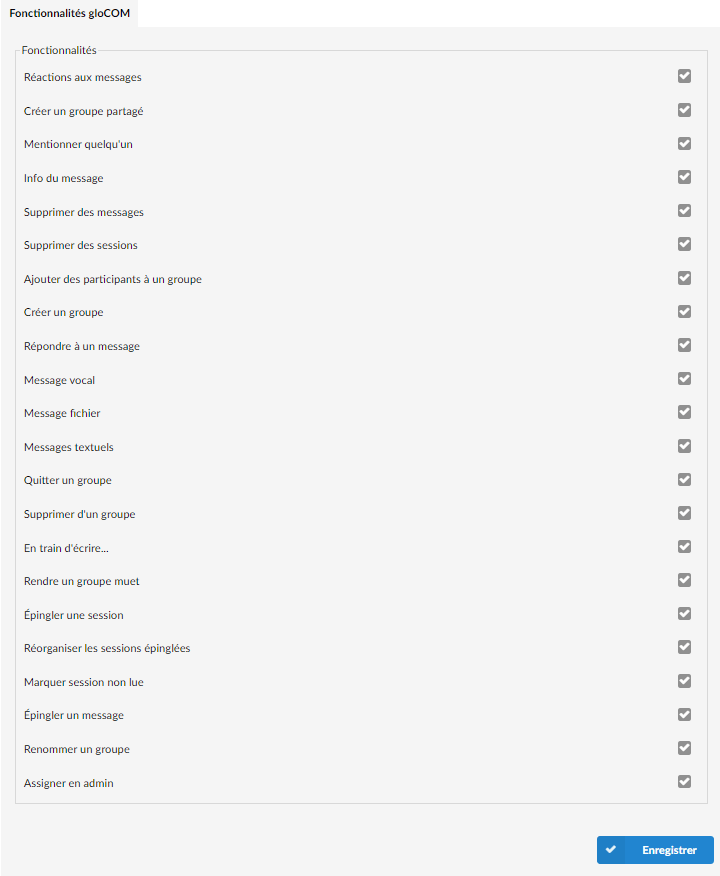
You can consult here the list of gloCOM features:
- Message reactions
- Create a shared group
- Mention someone
- Message info
- Delete messages
- Delete sessions
- Add participants to a group
- Create a group
- Reply to a message
- Voice message
- Message file
- Text messages
- Leave a group
- Remove from a group
- Typing…
- Mute a group
- Pin a session
- Reorder pinned sessions
- Mark session unread
- Pin a message
- Rename a group
- Assign as admin
Speed dial
Speed dial is used with the access code *130. When you dial *130XX, where XX is a speed dial code, you dial the extension associated with that code.

- Drop a CSV:
Click this button to load the speed dial code configuration from a CSV file.
To see which fields must be defined, download the CSV template by clicking the “Download CSV template” button. - Download the CSV:
Click this button to download the speed dial code configuration as a CSV file. - Download the CSV template:
The Download CSV template button will present you with a file that already contains the necessary headers, which should help you create the CSV file more easily. - Search:
The search is performed by speed dial code and name.
This screen contains information on all the system's speed dial codes with the following information:
- Code (XXX):
Maximum three-digit code that is entered after the speed dial access code, *130 by default. - Speed dial name:
Brief description of the destination to which this code points. - Destination:
Destination to which this code points. - Click to edit the speed dial code configuration.
- Click to delete the speed dial code from the system.
Add/edit a special dialing code
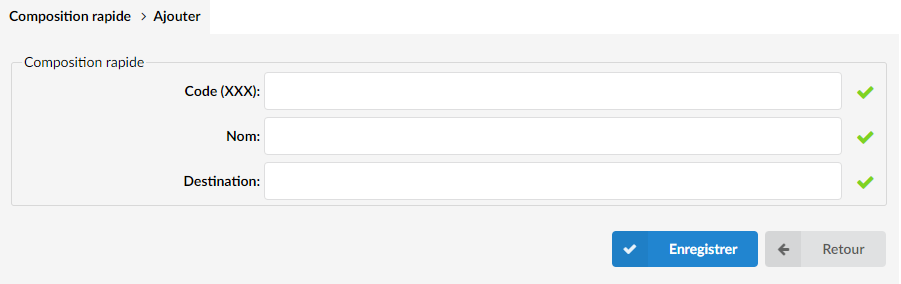
- Code(XXX):
Code entered after the speed dial access code. - Name:
Brief description of the destination to which this code points. - Destination:
Destination to which this code points.
CLI routing
This option allows you to add rules that send calls to different destinations based on the caller ID. For example, if the caller ID starts with 203, you can send all calls to the IVR; if the caller ID is specifically the number 063456789, then send that call to extension 4444, etc.

- Drop CSV:
Click this button to upload the CLI routing configuration from a csv file. - Download CSV:
Click this button to download the CLI routing configuration to a csv file. - Download the CSV template:
The Download CSV template button will present you with a file that already contains the necessary headers to help you create a CSV file more easily. - Search:
The search is performed by caller ID.
This screen displays all the CLI routing rules configured on the system with the following options:
- Caller ID:
The caller ID that is taken into account in the rule. - Destination:
Type of destination to which the call will be directed. - Extension:
Extension of the destination or selection where the call should be routed. - Matches type:
Caller ID matching mode.
(For example, if we set the Explicit Match option to "yes", it will read "Explicit Match". If this option is set to 'No' or 'Not defined', it will read here 'Begins With'). - Edit: Edits the CLI routing configuration.
- Delete: Deletes the CLI routing rule from the system.
Add/Edit a CLI routing rule
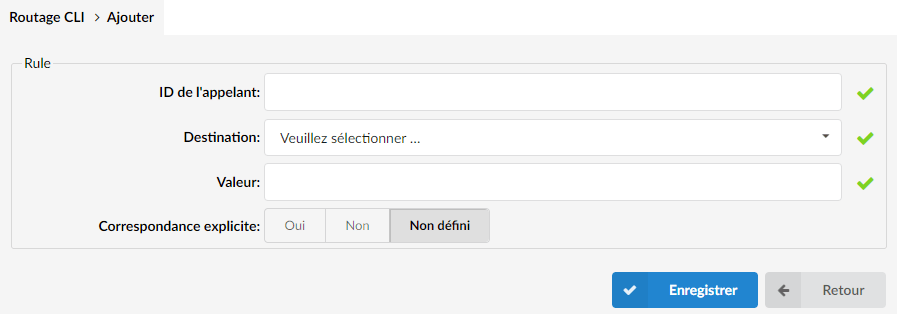
- Caller ID:
The caller ID that is taken into account in the rule. - Destination:
Type of destination to which the call will be directed. - Extension:
Value of the destination or selection where the call should end up. - Explicit match:
Should the system explicitly match the caller ID or handle all calls that begin with this ID.
General voicemail
The general fields are the most necessary for voicemail.
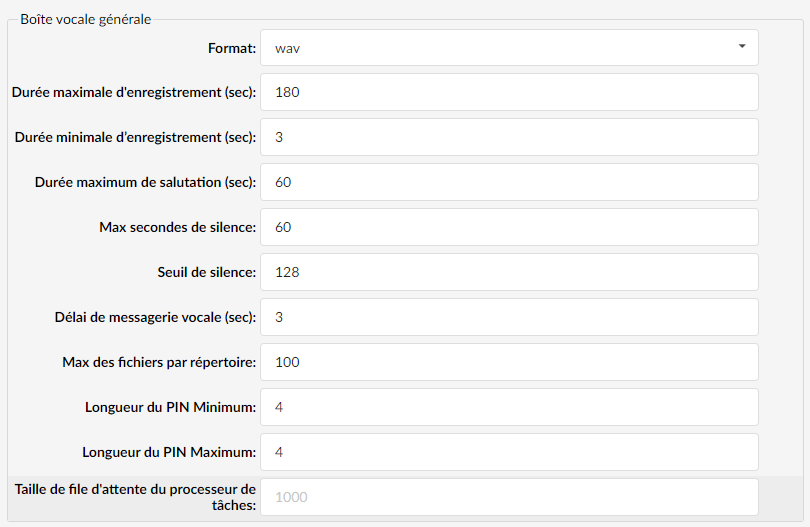
- Format:
Audio format in which voicemail messages are recorded
(For example, if "wav" is selected here, all voice messages will be recorded in this format. See below for disk usage). - Maximum recording duration (sec):
Maximum duration of a voice message in seconds
(For example, this field is set by default to ‘180’ seconds (3 minutes). - Minimum recording duration (sec):
Minimum duration of a voice message in seconds
(For example, the default value is set to “3” seconds. Messages shorter than this are rejected). - Maximum greeting duration (sec):
Maximum duration in seconds of the voicemail greeting message recorded by the user.
(for example, the default values are set to 60 seconds). - Max seconds of silence:
Maximum duration in seconds of the silence in a voice message
(For example, the default value is set to “10” seconds. Silence longer than this value will end the voice message). - Silence threshold:
Silence detection threshold
(For example, the default value is set to “128”. The higher the number, the more background noise is added). - Voicemail delay (sec):
Delay of a certain number of seconds before prompting the user for the password
(For example, if you hear a partial sound file asking the user for their password, set '1' or '2' here to add one or two seconds of silence before the sound file is played). - Max files per directory:
Maximum number of voice messages per voicemail directory.
(For example, each voicemail box has the following directories (INBOX, Old, Work, Family, Friends, Cust1, Cust2, Cust3, Cust4, Cust5). Set this field to ‘100’ to allow 100 voice messages per voice directory). - Minimum PIN Length:
Sets the minimum length of the PIN code used for voicemail. - Maximum PIN Length:
Sets the maximum length of the PIN code used for voicemail. - Task processor queue size:
Sets the maximum queue size for the voicemail task processor.
Disk space used by voicemail recording
With continuous tone for 60 seconds:
- wav49 = 91.0kb
- wav = 863.0kb
- gsm = 91.0kb
With a continuous silent tone (no sound) for 60 seconds:
- wav49 = 0.38kb
- wav = 3.0kb
- gsm = 0.32kb
Email account settings
Customize the display of emails that notify users of the arrival of new voice messages.
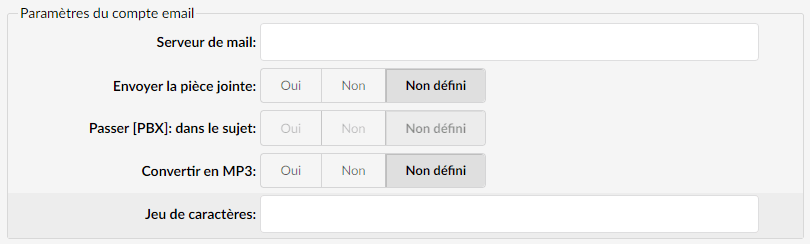
- Mail server:
This email address is used to identify the person who sent the message.
Application launch
Launch custom applications on certain voicemail actions.

- On Voicemail:
Run a custom application when a new voicemail message is received.
(For example, set this field to ‘/usr/bin/myapp’ to run the ‘myapp’ application when a new voice message arrives) - On password change:
Run a custom application when your voicemail password is changed.
(For example, set this field to ‘/usr/bin/myapp’ to run the ‘myapp’ application when your voicemail password is changed.)
ADSI
- ADSI Feature Number :
Number of the ADSI feature descriptor to download. - ADSI Security Code :
The ADSI security code. - ADSI Application Version :
Version number of the ADSI voicemail application.
Main voicemail menu
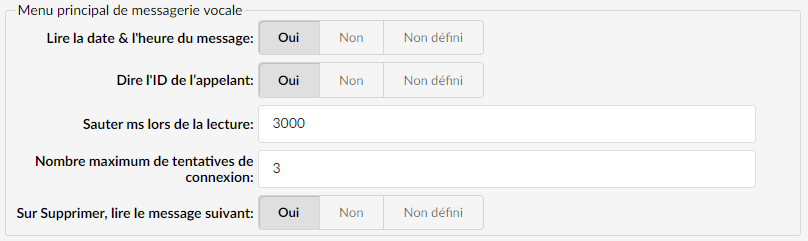
- Play the message date & time:
Announces the date and time as well as the extension number from which the message was recorded.
(For example, when the voicemail box is checked for new messages, if this option is set to “Yes”, the message “Received at {$DATE}. From phone number {$NUMBER}” will be played, giving more details about the message author). - Say Caller ID:
Announce the extension number from which the voicemail was recorded.
(For example, if this option is set to "Yes", the message "From phone number {$NUMBER}" will be heard when checking voicemail). - Skip ms during playback:
Interval in milliseconds to use to skip forward or backward during voicemail playback.
(For example, if this field is set to '3000', when listening to a voice message, there will be a 3-second skip when rewinding or fast-forwarding). - Maximum number of login attempts:
Maximum number of login attempts before the user is logged out.
(For example, this field is set by default to “3”. After 3 unsuccessful login attempts, the user is logged out).
Advanced features
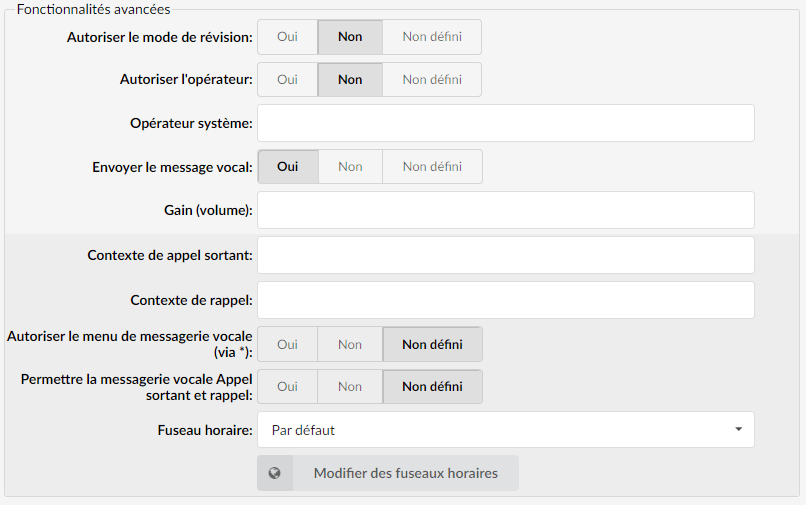
- Allow review mode:
Allows B to review the voicemail before permanently saving it in A's voicemail box.
Example:
B leaves a message on A’s voicemail, but instead of hanging up, presses ‘#’. Three options are offered to B:- Press 1 to accept this recording.
- Press 2 to listen to it.
- Press 3 to re-record your message.
- Allow operator:
Allows B to reach an operator from the voicemail box.
Example:
B leaves a message on A’s voicemail, but instead of hanging up, B presses ‘#’.
The message “Press 0 to reach an operator” is played (once the user has pressed “0”, the following options are offered):- Press 1 to accept this recording (if this option is selected, the message “Your message has been recorded.
- Please wait while I try to reach this extension” is played and the operator's number is dialed)
Or continue waiting (if B waits a moment, “Message deleted. Please wait while I try this extension” is played and the operator's number is composed)
- Send the voicemail:
Edit the voicemail sending context
(For example, select "Yes" to enable and provide new values for the "Dial Context" and "Callback Context" fields). - Gain (volume):
Set the gain you wish to apply to voicemail recordings.
(For example, enter 2 to amplify the recordings). - Outbound call context:
Context from which dialing must be performed
(for example, set this field to “fromvm”). - Callback context:
Context to call back
(For example, set this field to “tomv”. If this field is not filled in, sender callback will not be allowed). - Allow voicemail menu (via *):
Allows the caller to access the voicemail menu by dialing *.
(For example, when you call an extension's voicemail box to leave a message, pressing * allows you to access the extension's voicemail box). - Allow voicemail Outbound call and callback:
Allows the caller to use the voicemail call and callback feature from the voicemail menu by entering the extension's PIN code. - Time zone:
Time zone that the system will use to inform users of the receipt of a voicemail message. The time zone selected here will also be used to configure the time zone of auto-provisioned devices.  When you click this button, a new window opens with options to configure the time zones.
Edit time zones
- Time zone:
Time zone name
(for example, Bosnia and Herzegovina). - Click to edit the time zone configuration.
- Click to delete a time zone from the system.
Add/edit time zones
- Name:
Unique name of the time zone
(For example, the name provided here will be visible when setting the voicemail time zone. Type ‘Zenica’ here for example). - Time zone:
Set the correct time zone
(For example, if you have set 'Name'='Zenica' (a city in Bosnia), select here the time zone closest to Zenica (for example 'Europe/Sarajevo')). - Time format:
Set the appropriate time format:
Example:
Depending on the selected "time zone", you can choose from the following options:- 12-hour clock
- 12-hour clock with minutes
- 12-hour clock AM/PM
- 12-hour clock
- AM/PM, including minutes
- 24-hour clock
- 24-hour clock, including minutes
- AM/PM 12-hour syntax
- Dutch syntax
- German syntax
- Greek syntax
- Italian syntax
- Norwegian syntax
- Swedish syntax
- Date format:
Set the correct date format
Example:
Depending on the selected "time zone", you can choose from the following options- Month/Day/Year
- Day of week/Month/Day/Year
- Day/Month/Year
- Day of week/Day/Month/Year
- Custom sound:
This file is played before the arrival time of the voicemail
(For example, enter the name of the sound file, without the extension (for example, ‘arlington’) here)
Transcription

- Enable the service:
Whether the transcription will be enabled. - Default transcription:
This option determines whether transcription is enabled by default on all extensions. - Service:
Choose the service that will be used for speech-to-text conversion for voicemails.
IBM Watson
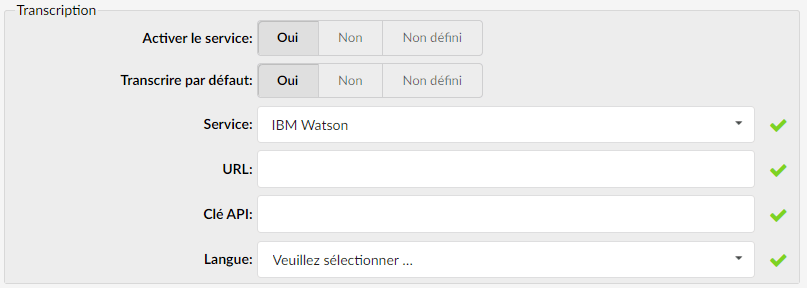
- URL:
Endpoint that the system will communicate with. - API key:
API key used for authentication. - Language:
Language expected by the translation service (language in which the audio file should be written).
Google Speech
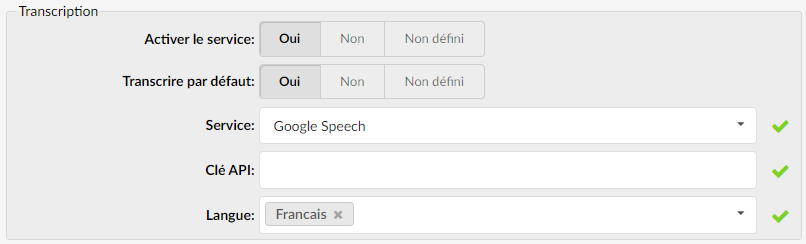
- API key:
API key used for authentication. - Language:
Language expected by the translation service (language in which the audio file should be written)
Acquisition of service credentials
IBM Watson
To obtain the credentials for the IBM Watson text-to-speech service, you must have an IBM Cloud account (a free account also works, but limits the number of possible requests). After logging into your IBM Cloud account, select Watson in the menu that opens after clicking the button located in the top left corner:
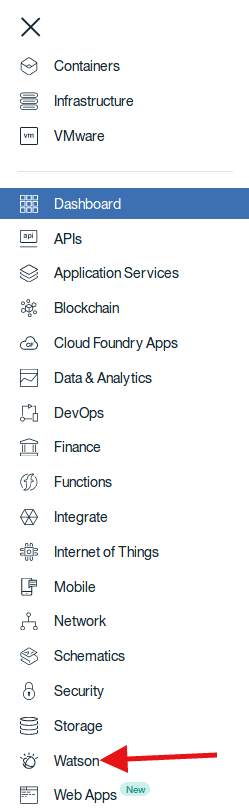
In the page that opens under Watson Services, select Browse Services (2). Among the services offered, select Speech to text (2) then click the button Add Service (3).
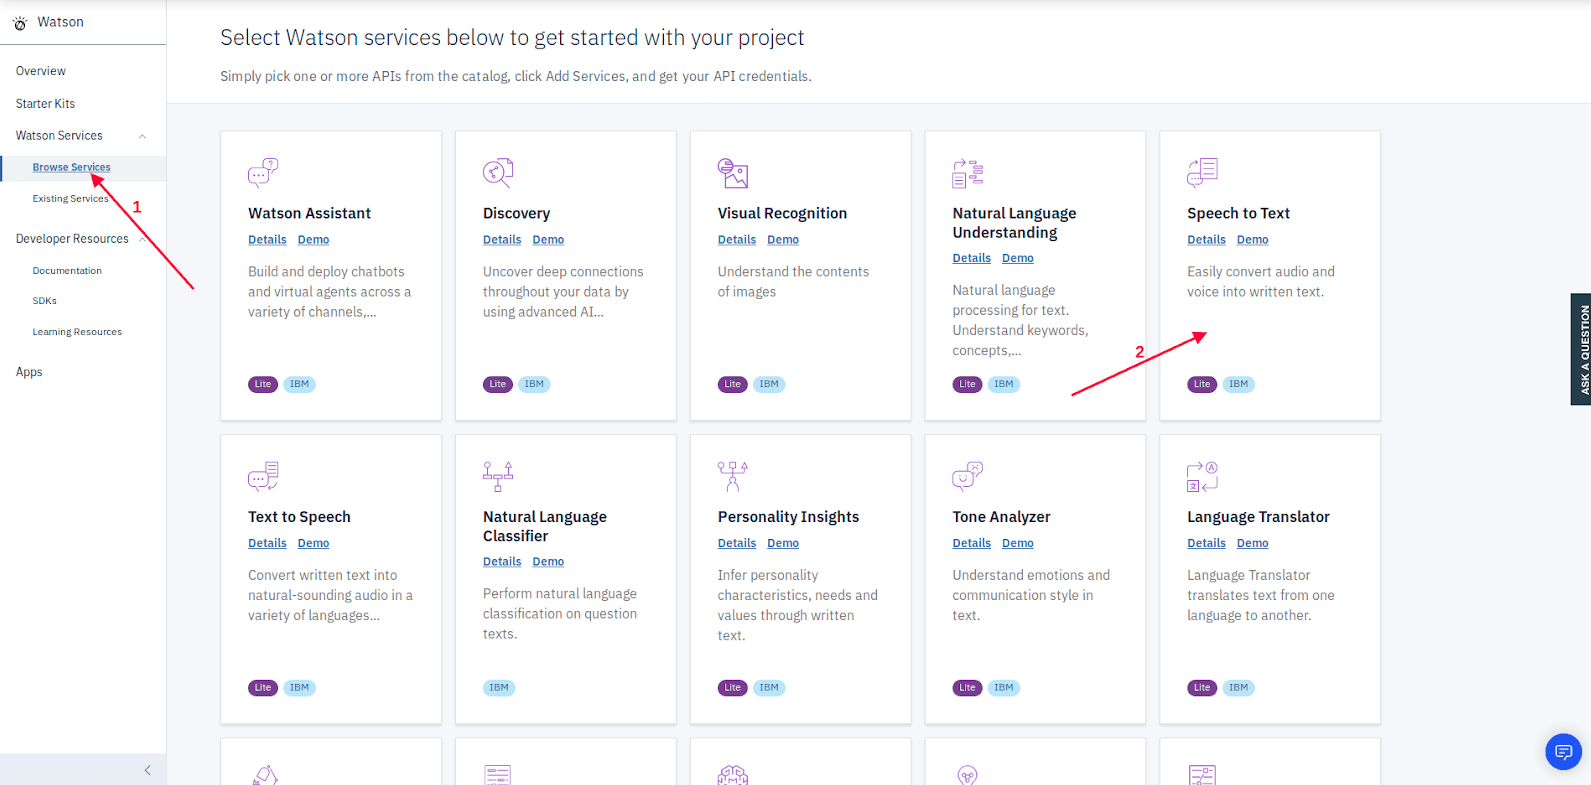
On the following page, under Service name, enter the project name (1). Then select the resource group (2), if several are available, as well as the deployment region (3).
You can also add an optional label to your project (4).
Once these options are filled in, scroll down to the bottom of the page, where you will select your pricing plan (1) and click Create (2) to create your project.
Once the project is created, go to the project identification page (1).
There will be a set of automatically generated credentials to use, or new credentials can be created by pressing the button New Credentials (1).
To use custom or automatically generated credentials, click Show credentials (2).
If new credentials are created, the following window is displayed, allowing you to enter the name (1) and role (2) of the credential.
Optionally, the service title ID (2) and the configuration settings (4) can be added.
Once the required fields are filled in, press Add (5).
Once a service ID is opened for viewing, only two fields are required for voicemail transcription: apikey (1) and url (2).
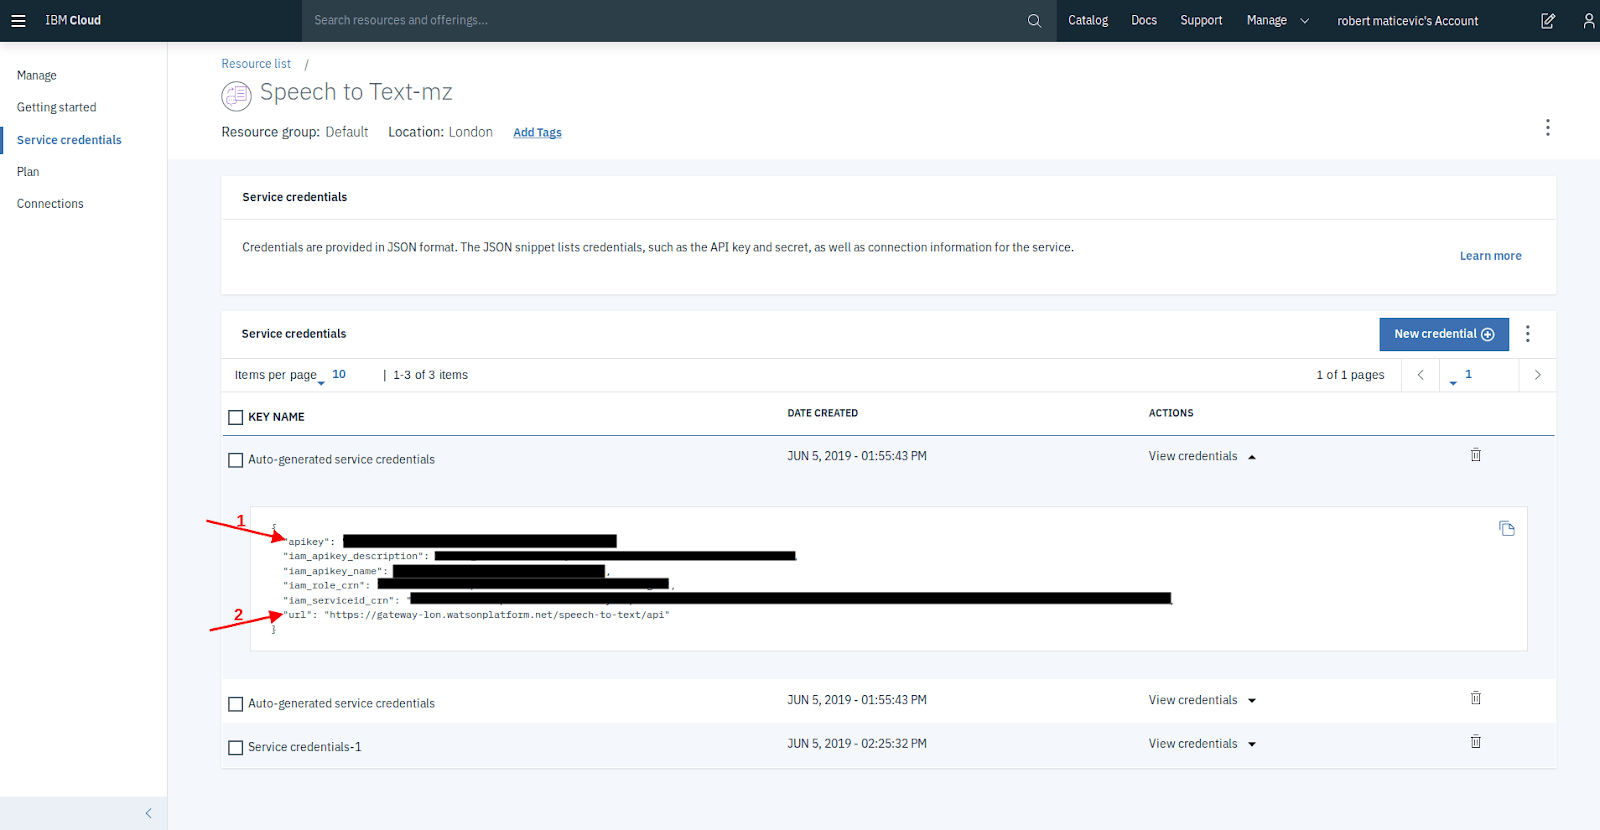
Google Speech
Log in to the Google Cloud console with an existing account. In the left menu, select API and services :
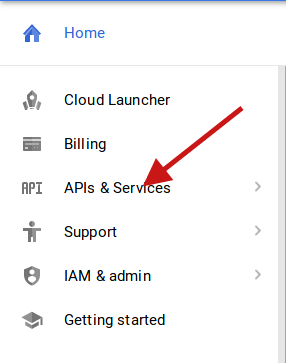
Click on Library or on ENABLE APIS AND SERVICES :
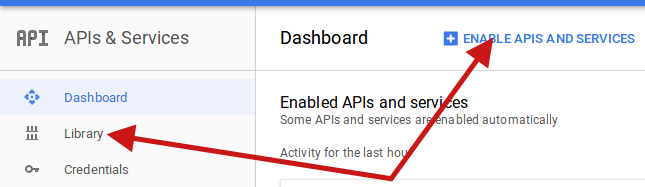
From there, manually search for the Google Cloud Speech API or use the search field and select it. On the page Google Cloud Speech API, click on the activation button:
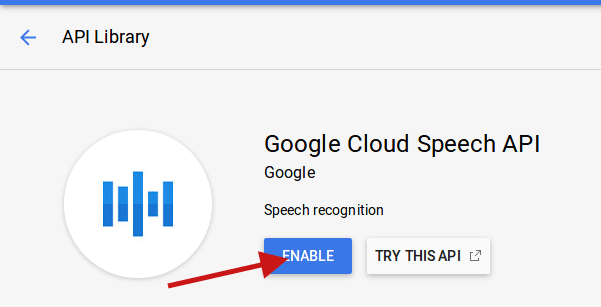
After enabling the API, press the button MANAGE which replaced the activation button. On the management page, go to the section Credentials (1) and press Create credentials (2) and select API key (3) :
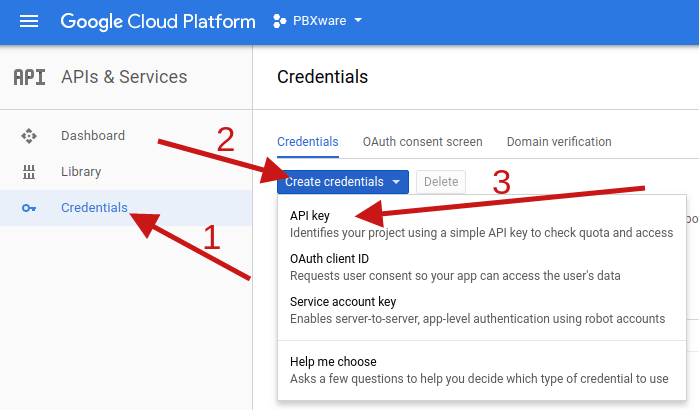
A pop-up window containing the generated key will appear. Press the copy icon (1) to copy the API key required for this feature. Certain restrictions can be placed on individual keys (IP address, ios/android apps..) by pressing the button RESTRICT KEY (2).
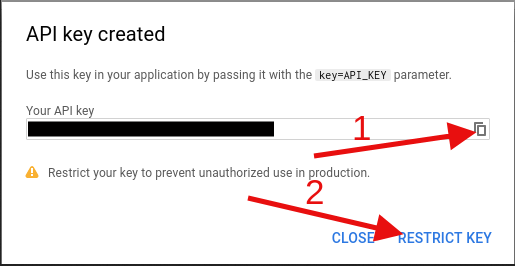
Keys that have already been created are accessible from the same page in the API keys section (the site may need to be refreshed for the keys to display). IP restriction is recommended and can be set by selecting the IP addresses (1) in the Key Restriction section of the API key options. Addresses are added separately by typing them into the IP address input field (2) and pressing Enter to confirm each one. Addresses that have already been added are displayed above the input field (3), where they can be modified or removed by clearing the content of the lines or pressing the appropriate x button (4).
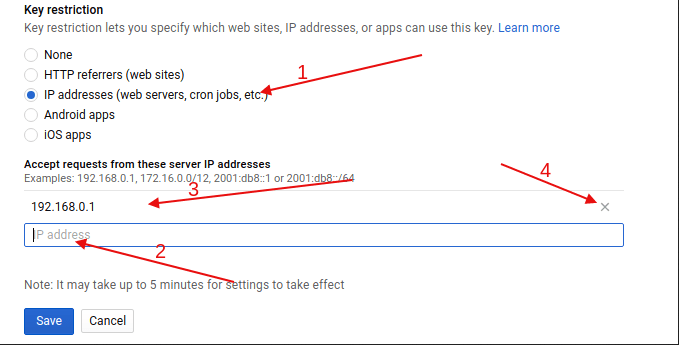
Usedge
The transcription can be added in the voicemail email template as shown below.
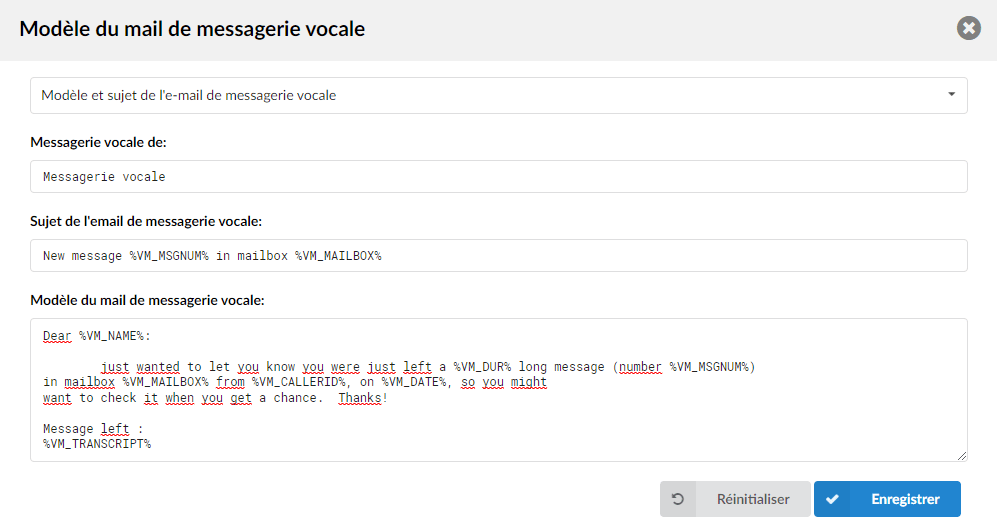
In order to make this feature easier to use, the default HTML template has been updated, adding an extra line with the transcription. This line will be omitted if no transcription is available. An additional option has been added to all email templates, which allows the default template to be restored. This reset will affect all templates of the resource on which it is used (for example, if the voicemail templates are reset, this will affect the plain text template, the html template and the pager template). A warning message is displayed to ask for confirmation of the reset in order to avoid accidental resets.
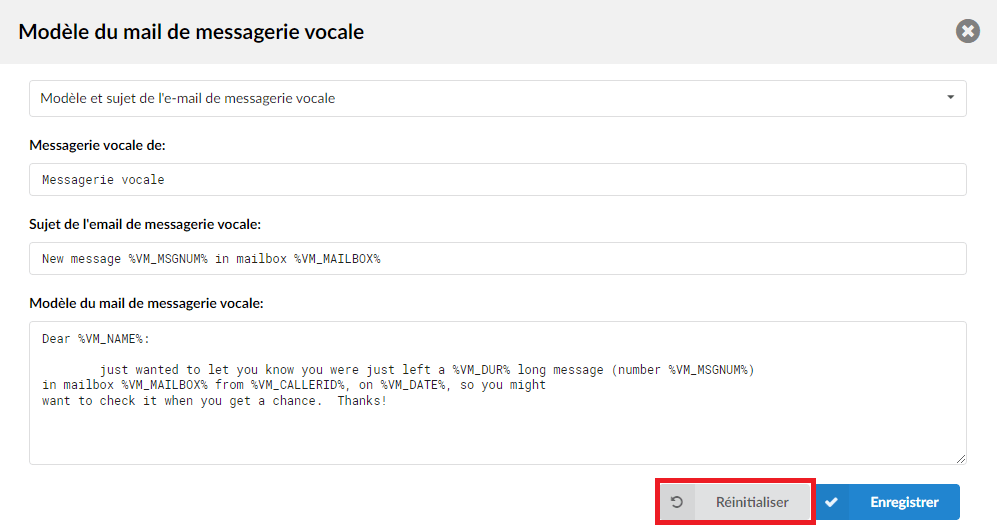
To see the transcription in OSC, click the bubble to the left of the message number:
If no transcript is available (as for voice messages created without this option), this field will be empty. The transcript will appear in a pop-up window above the bubble and disappear after the first click outside the window.
CNAM lookup
CNAM is an acronym that stands for Caller ID Name.
The CNAM lookup allows you to search for and display the caller's name based on the caller ID.
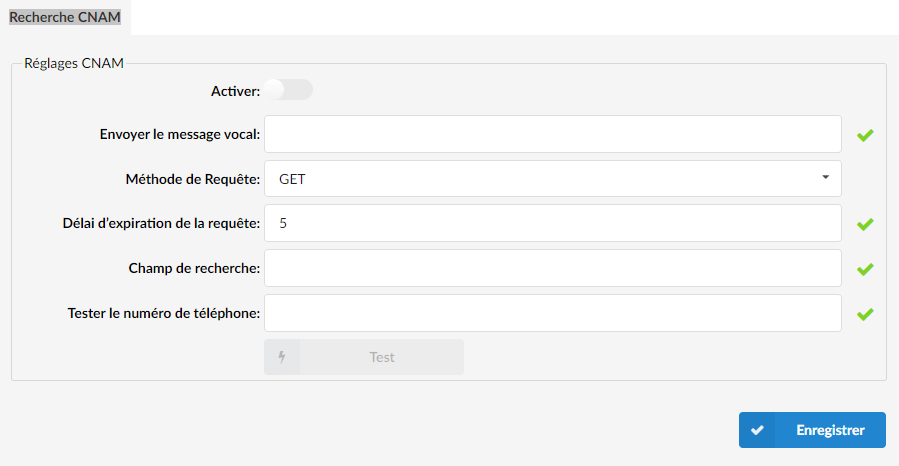
CNAM settings:
The following options are available and required:
- Enable – must be set to yes for the service to be used when a call comes into the system.
- Send the voicemail – a valid URL provided by a CNAM provider; the phone number in the URL must be replaced with “%NUMBER%”.
- Request method – preferred method for obtaining a response from a CNAM provider, defined by the provider itself (“get” or “post”).
- Request timeout (sec) – timeout in seconds to get a response from a CNAM provider.
- Search field – CNAM database field provided by a provider that contains the caller data we want to display (for example “name”).
- Test the phone number – Any familiar number to use for testing purposes.
A test request will be performed for each "save" and "test" action and the response will be displayed at the bottom of the CNAM configuration form.
CNAM lookup service providers that can be used:
Example CNAM lookup link for this provider:
Example CNAM lookup link for this provider:
Example CNAM lookup link for this provider:
Please check with your provider that the CNAM lookup link is in the correct format.
Conf Files
The system configuration files are accessible through this section. Only users trained for this purpose are allowed to modify the configuration files.
First, select a configuration file from the drop-down menu. The file will open in a large text area from which it can be edited. Once the file has been edited, click the “Save” button.
If a message stating that the configuration files have not been updated is displayed, click the "Import current file" or "Import all files" button to update the files. This error usually occurs if the configuration file is modified via the system console (shell).
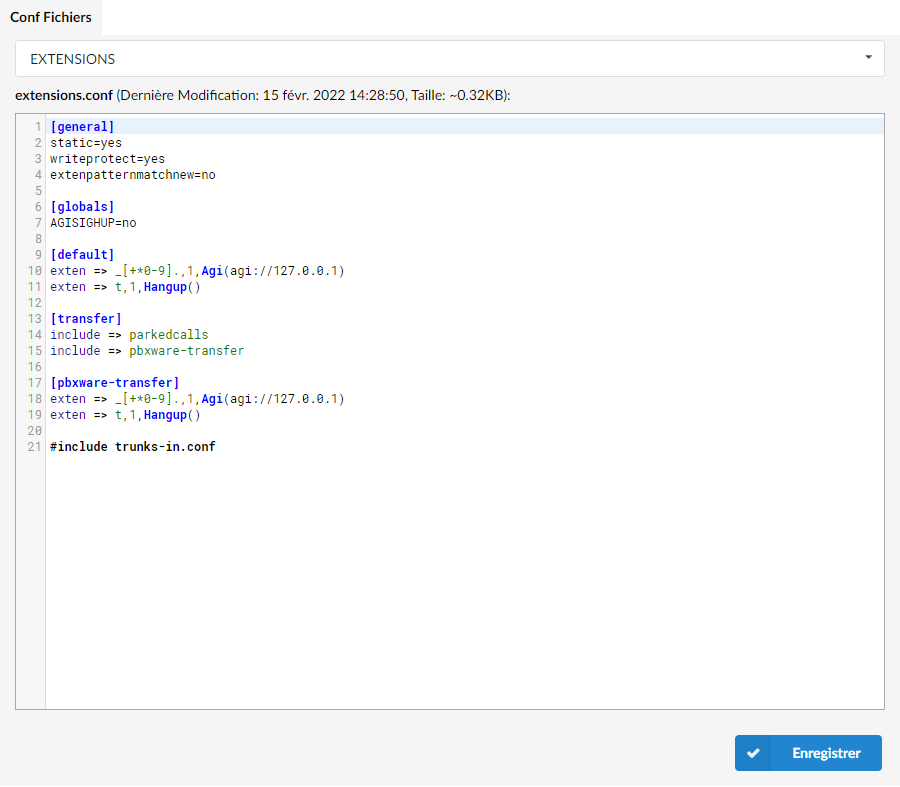
License
The License section displays the edition, version, extended services, and license details of the system.
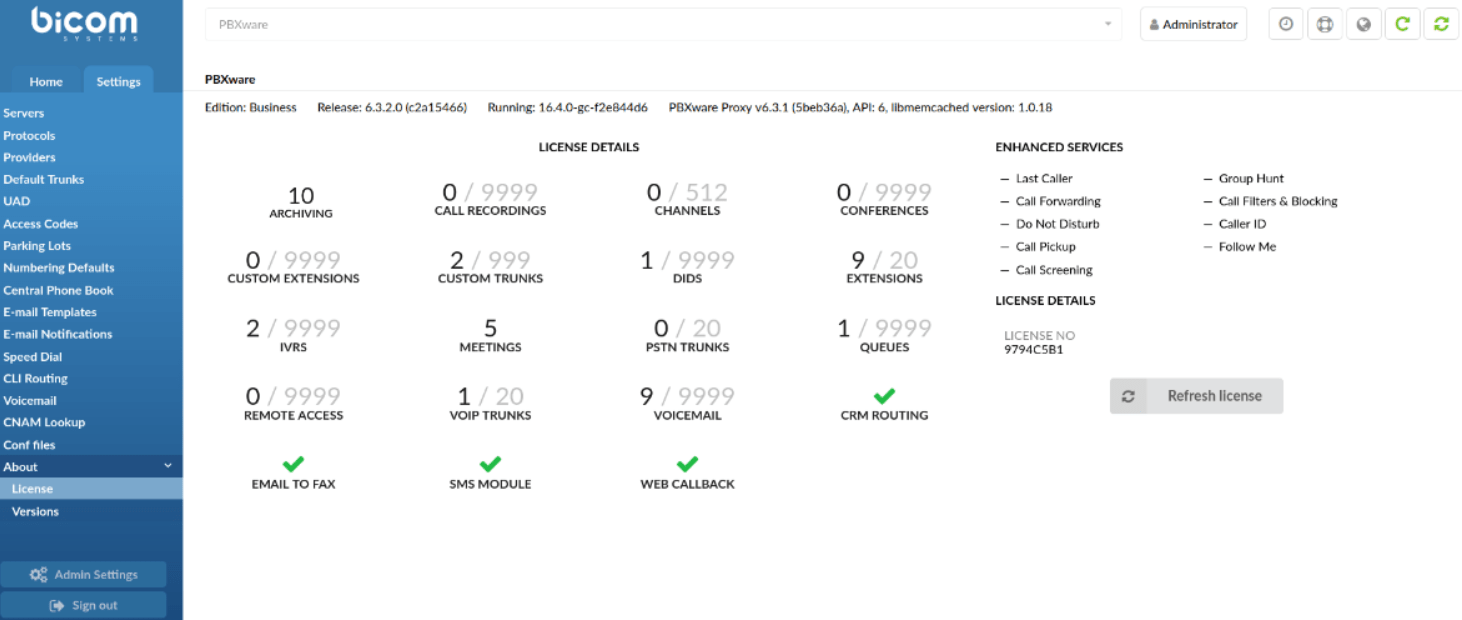
- PBXware:
This line identifies the edition and version of PBXware, as well as the Asterisk currently running.
(For example, Edition: Business Release: 6.1.1.0 (2812de6d) Runtime: 16.4.0-gc-11e60f76 PBXware Proxy v6.1.1 (3b98def), API: 6, libmemcached version: 1.0.18). - License details:
The License Details section displays all features enabled on the license, for example:- Channels
- DID
- Extensions
- Hot Desking
- IVR
- Conferences
- Call classification
- Meetings
- SMS module
- Enhanced services:
This section identifies the system's enhanced services:
(for example, the last caller, group pickup, call forwarding…) - License number:
Displays the license number.
(For example, license number: 531DAEE0)
 Updates the license-related information, where applicable.
Versions
The Versions section displays information about the "Application Name", "Release Version", and "Current Version". Through this presentation, users can detect whether an application's version differs from the release version, which would indicate that the application has undergone custom modifications on the system.
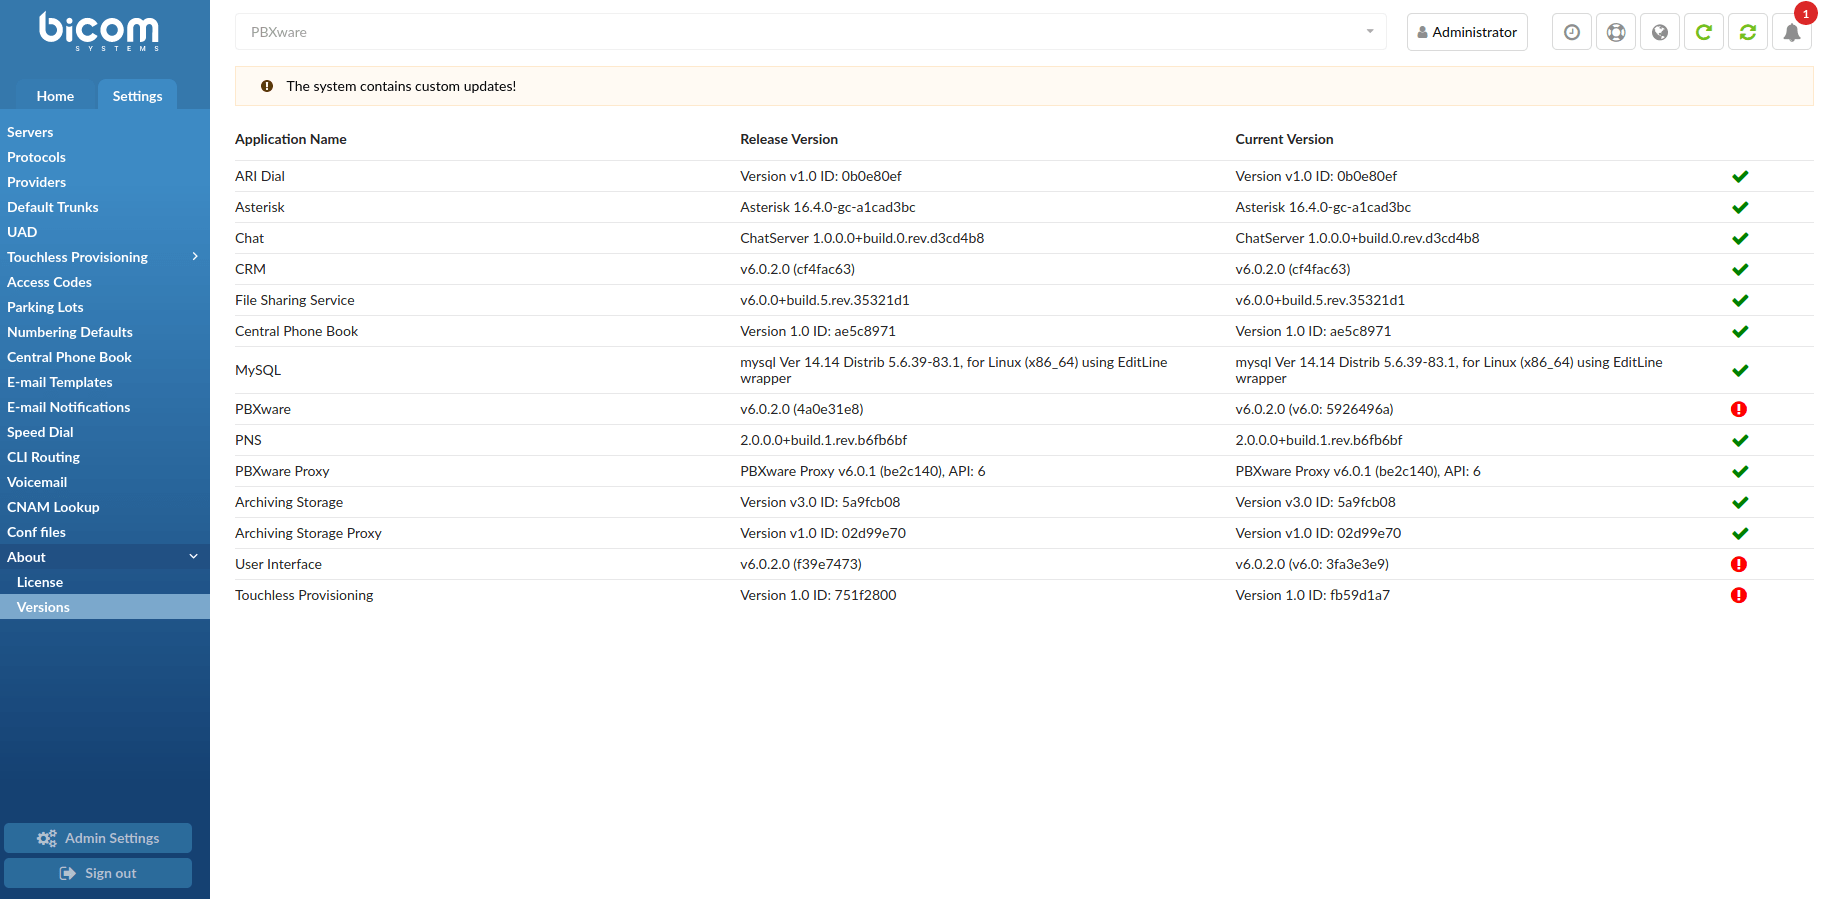
- Application name:
Displays the application name.
(For example, ARI Dial). - Release version:
Displays the version of the specified application.
(For example, Version v1.0 ID: 0b0e80ef). - Current version:
Displays the current version of the specified application on the system.
(For example, Version v1.0 ID: 0b0e80ef).  When the checkmark is displayed, it means that the release version and the current version are identical.
(For example, ‘ARI Dial’ -> Release version: Version v1.0 ID: 0b0e80ef & Current version: Version v1.0 ID: 0b0e80ef). When the exclamation icon appears, it means that the release version and the current version are not the same.
(For example, ‘Meeting Client’ -> Release version: Version v6.0.2 ID: 1715a622 & Current version: Version v6.0.0 ID: 1d67528c).

