



6. DID
DIDs are used to direct all incoming calls
(that pass through trunks) to specific system destinations.
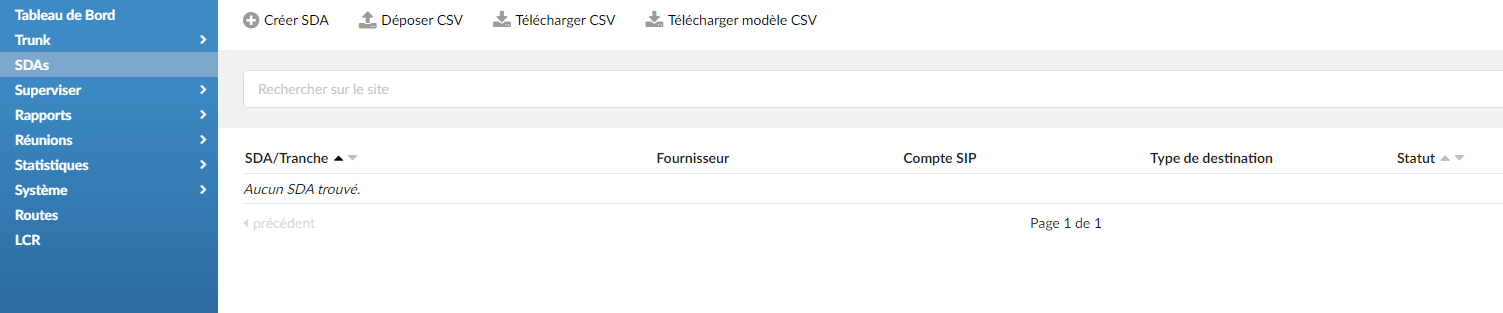
- Search
In the search section, you can find your DIDs by DID number, destination, country, state, city, and area code.
- Drop/upload CSV
Here, you can create multiple DIDs on the fly by dropping a .csv file with the DID details, or you can download the CSV for the current DIDs and review or modify them.
To upload, click the “Browse” button, select a .csv file on your computer, click “Open”, then click the “Upload CSV” button.
The CSV file must be in the following format:
Mandatory fields:
- Server name
- DID/channel (start)
- Trunk
- Destination
- Email/Extension/Value
All other fields must also be defined in CSV, but they may contain empty values.
- Download the CSV template
This option will allow you to download the CSV template that already contains the necessary headers, which should help you create a CSV file that can be used to upload a large number of DID entries at once.
Main screen
This screen lists all the system's DIDs with the following details.
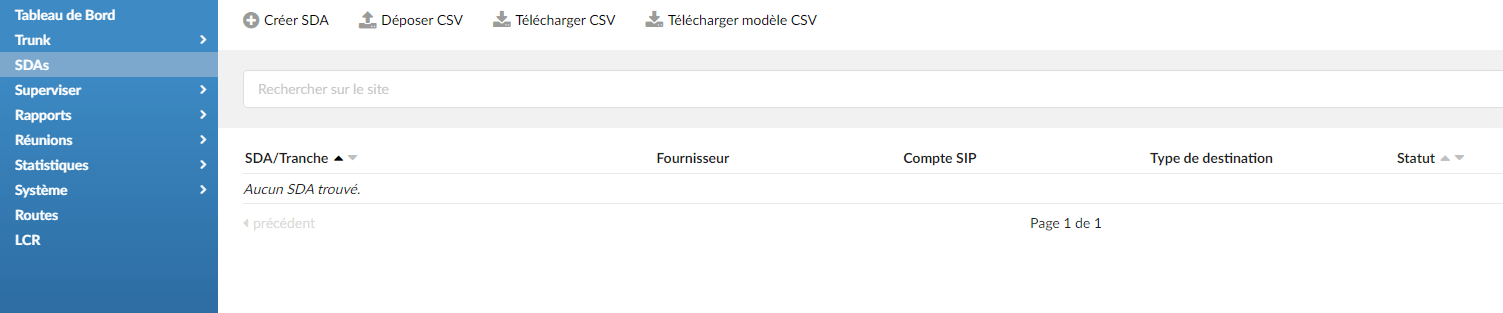
- DID/Range
Show the DID number or a PSTN channel slot number.
- Name
Show the name of a DID number to make navigation easier.
Add and edit a DID
Clicking “Add/Edit” will open the standard DID options.
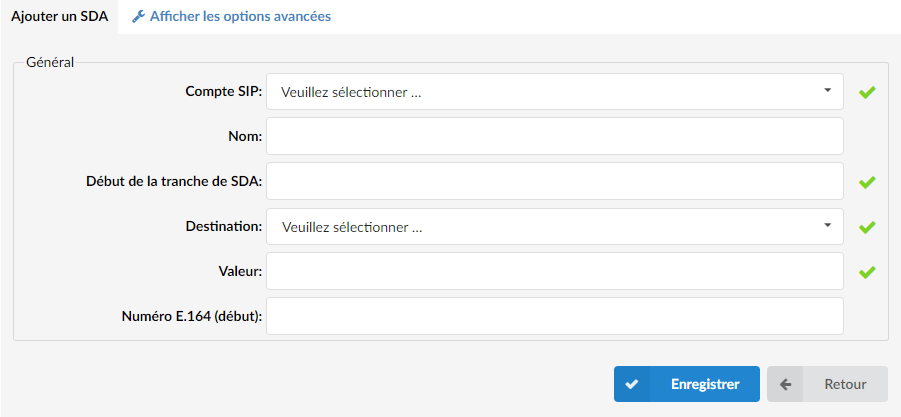
General
Trunk
Select the trunk from which the DID will take calls.
(For example, if you select "2554433" for example, the DID will wait for all incoming calls on this trunk, then forward the call according to the settings below).
Name
Note: Please note that this feature is part of the beta version and is only visible to beta testers. Once the stable version is released, it will be available for general use.
Enter the name of a DID
DID range start
Enter a DID number here
Destination
PBXware destination to which the DID will forward all calls.
Value
Destination value to which all DID calls will be forwarded.
(For example, if 'Destination'='Extension', set the extension number here (for example, 1002). In case 'Destination'='IVR', set the IVR extension number here).
Advanced options
Click the “Advanced options” button to open more detailed DID options.
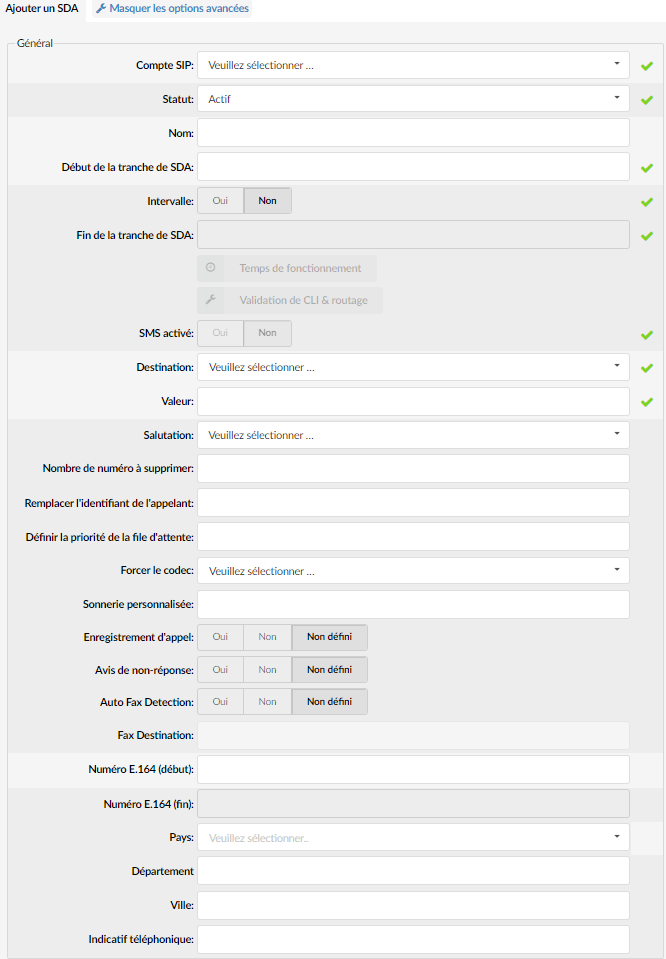
General
- Status
Set the DID status on the network.
(For example, rather than deleting the DID, you can disable it by selecting "Unassigned", then restore it later with "Active").
- Interval
If this option is enabled, users can use a range of DIDs and direct it to one or more endpoints. Users can then enter the desired DID/Range (start) and DID/Range (end) and/or E.164 (start) and E.164 (end) number, which gives them the ability to limit the start of the range and its end. If this feature is not enabled, users can only enter the DID/Range (start) and/or E.164 (start) number, which means there will be no range, but a single standard DID.
- End of the DID range
Some providers offer a range of numbers on a single trunk. Define whether this DID should be used to forward a range of numbers to a PBXware destination.
(For example, John purchased 10 DID numbers from a provider (55510205 – 55510215) and wants all calls coming from them to be transferred to the lobby queue. He must set “Range” = “yes”. Set 55510205 as (Start) and 55510215 in this field. Set “Destination” = “Queues” and “Value” = Queue number (for example 1000)).
- Uptime
Set the DID schedules.
- CLI validation and routing
Configure inbound routing for this DID.
- SMS enabled
Enable the SMS service for this DID.
CLI validation & routing
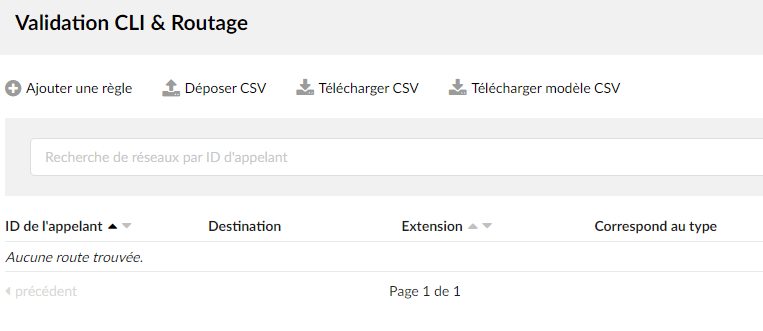
This option is used to fine-tune the DID functionality by adding rules that send calls to different destinations based on caller IDs. For example, if the caller ID starts with 203, you can send all these calls to the IVR; if the caller ID is specifically the number 063456789, send that call to extension 4444, etc.
Once you have clicked the CLI Validation & Routing button on the Edit DID page, a new window with the following option is displayed:
Drop CSV
Click this button to upload the CLI Validation & Routing configuration from a CSV file.
Download CSV
Click this button to download the CLI Validation & Routing configuration to a CSV file.
Download CSV template
The Download CSV template button will present you with a file that already contains the necessary headers, which should help you create a CSV file more easily.
Caller ID
The caller ID that matches the rule.
Destination type
The type of destination to which the call will be directed.
Extension
Extension of the destination or selection of the call destination.
Matches type
How the caller ID is matched.
(For example, if we set Explicit Match to "yes", here "Explicit Match" will be written. If we set this option to "No" or "Not defined", here "Begins With" will be written.).
Add/Edit a CLI validation and routing rule
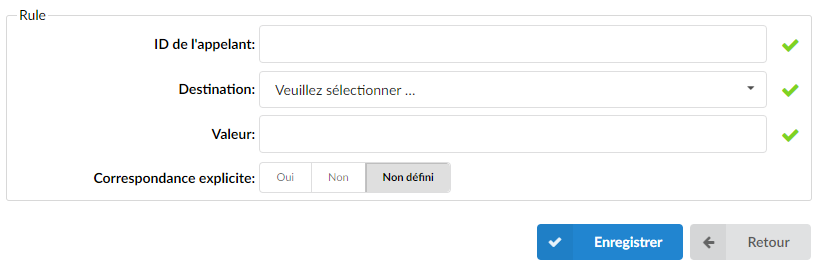
Caller ID
The caller ID that matches the rule.
Destination type
The type of destination to which the call will be directed.
Value
Value of the destination or selection where the call should go.
Explicit match
Should the system explicitly match the caller ID or handle all calls that begin with it?
