



Meeting
Meeting
“Meetings” is a Communicator module that allows the user to start video meetings without having to switch applications and to keep all your Communicator contacts. The softphone allows meetings with multiple users simultaneously with key features such as: video conferencing, audio conferencing, chat, screen sharing and local recording.
Communicator meetings can be private (invitation only) or public (anyone with the number or link can join).
Communicator needs permission to:
- The camera for video communication.
- The microphone for audio communication.
- Screen recording for screen sharing and remote control.
If the necessary permissions for the camera and/or microphone have not been granted, the user will see a dialog box asking them to grant the permissions. There will also be a red exclamation mark next to the icons in the options bar.
Start a meeting
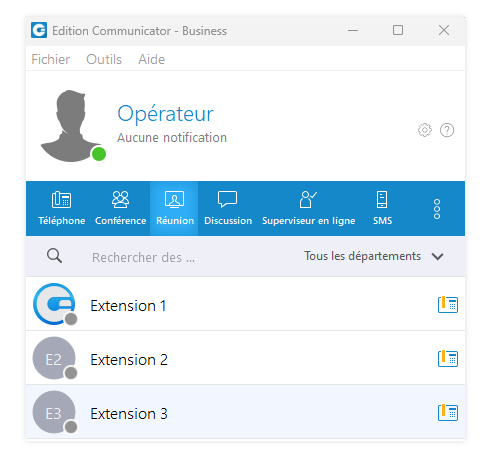
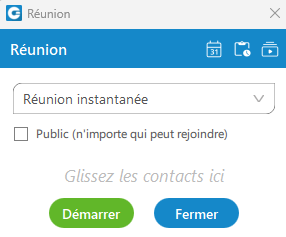
To start the meeting, you must first open Communicator, then simply click the icon labeled Meeting, this will open a small window that will allow you to drag and drop contacts. Once the contacts are filled in, you can start the meeting instantly. If you want anyone to access this meeting, check the Public box.
Communicator meetings can be private (invitation only) or public (anyone with the number or link can join).
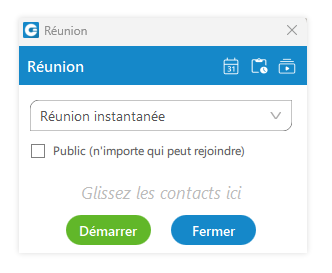
There are also a few alternative methods to start a meeting.
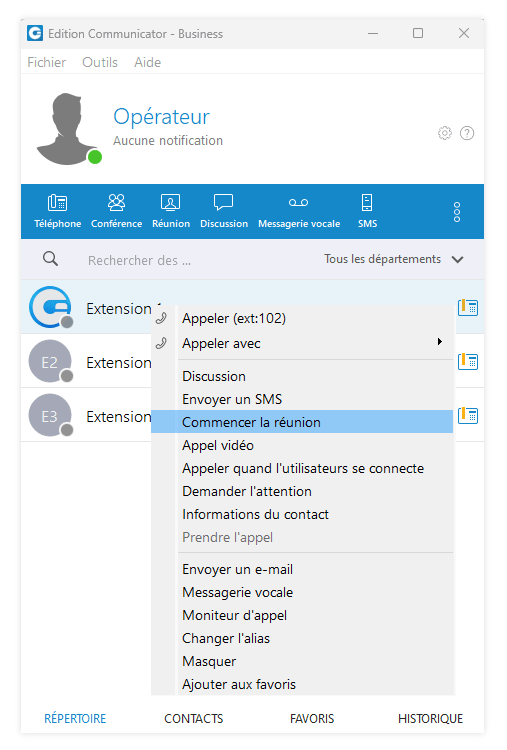
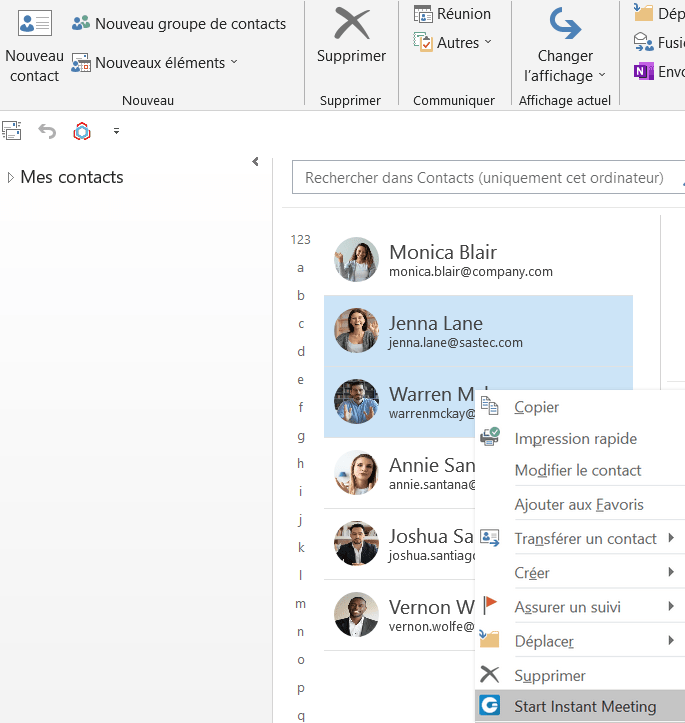
The user can find a contact in their directory and right-click on their name, which will provide the option to start a meeting instantly. This option can be useful to avoid having to navigate through the meeting menu and to start one-on-one meetings more quickly.
Communicator meetings can be private (invitation only) or public (anyone with the number or link can join).
When the meeting is started from the chat, the invitation link will be automatically sent to the chat.
Using this link, the user can easily join the meeting via a web or mobile application.
Meeting list
If the user wants to view any of the ongoing, scheduled, or previous meetings, they can open the meeting list. To do this, open the Meeting window and click the Meeting list icon at the top right. There will be a busy indicator in the meeting details until all data is available.
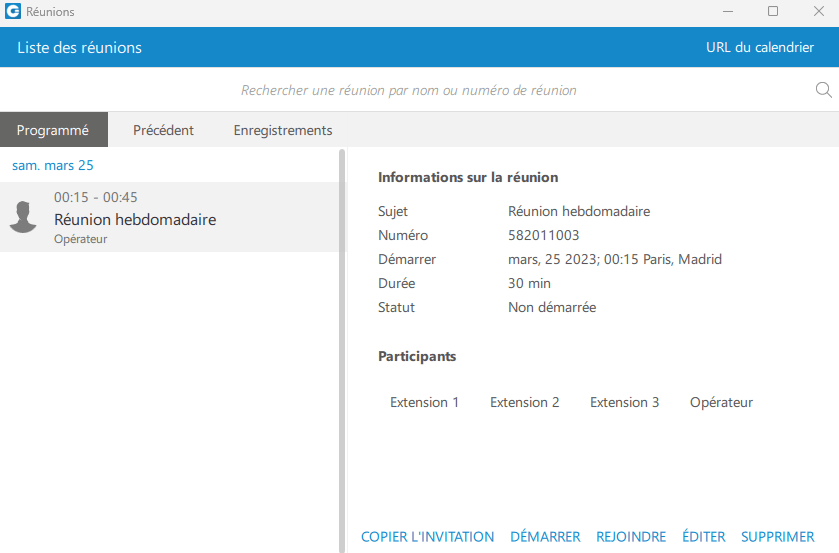
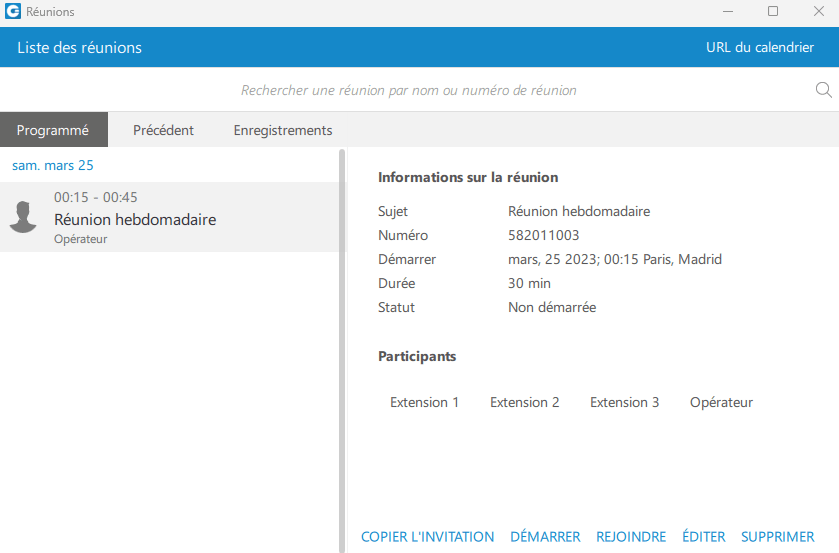
The meeting list will give you the following information:
- Start time and end time (the time of day at which it will occur)
- Date (what day you will have the meeting)
- Name/subject (What is the given subject for the meeting)
- Identification number (The randomly assigned number to distinguish meetings)
- Duration (How long the meeting will last)
- Status (The status of the meeting, for example completed or upcoming)
- Participants (Who is supposed to attend the meeting)
Communicator meetings can be private (invitation only) or public (anyone with the number or link can join).
Scheduled meetings
Scheduled meetings are all the meetings scheduled in the future. There is also a special category of meetings in progress which contains all currently active meetings you have been invited to.
Recurring meetings
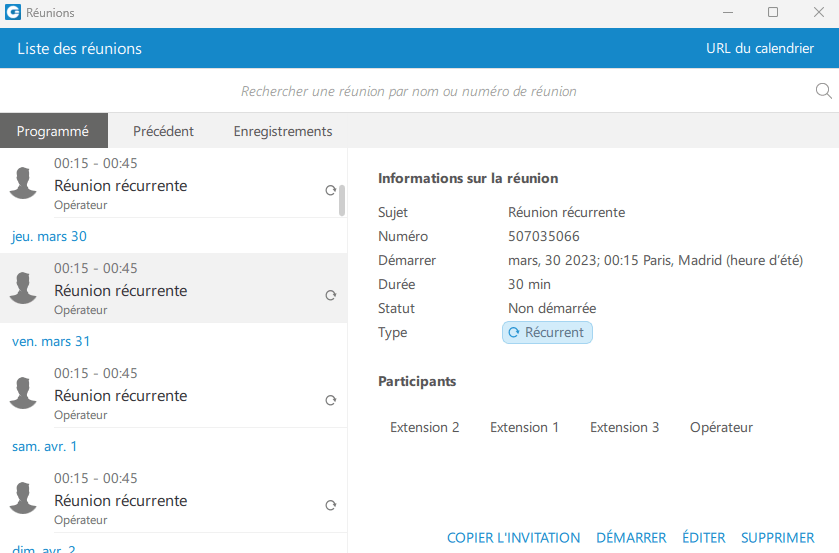
A recurring meeting is a meeting that will repeat at each defined time (every day, week or month).
You can modify recurring meetings according to your needs if you need to reschedule them.
Previous meetings
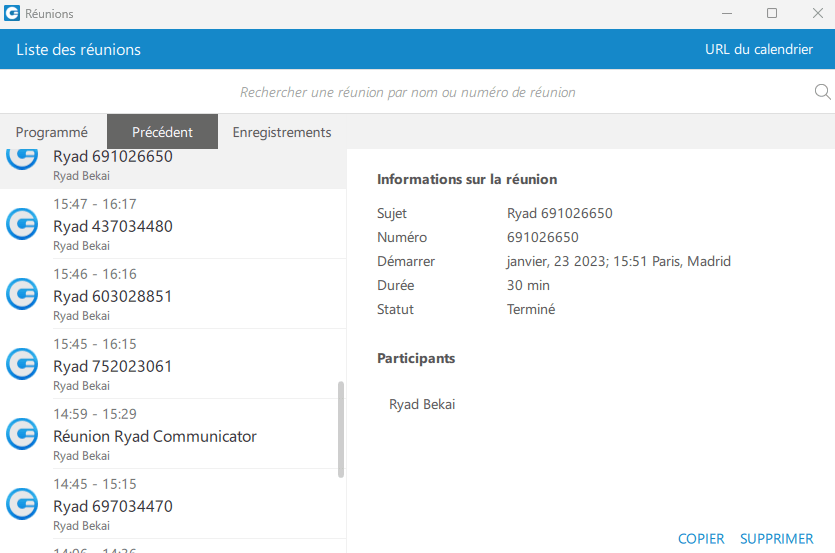
Under this tab, you can find all the meetings that have ended.
Recorded meetings
When recording meetings, the application stores all the information necessary to generate a recording later. This is done to prevent the recording process from interfering with an ongoing meeting, as converting a recording requires significant computing resources. To search for meetings for which you have created recordings, open the meeting list, then theRecordings tab. You can select a meeting and click on Convert to start the conversion process. You can also open the location of the recording on your computer or delete the recording.
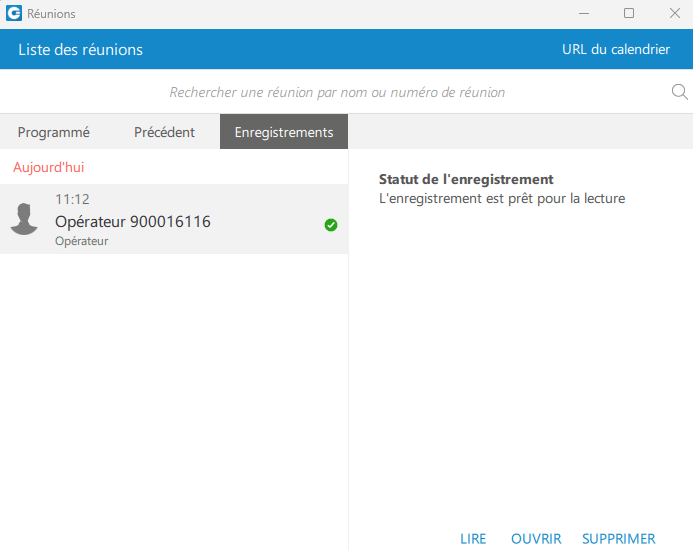
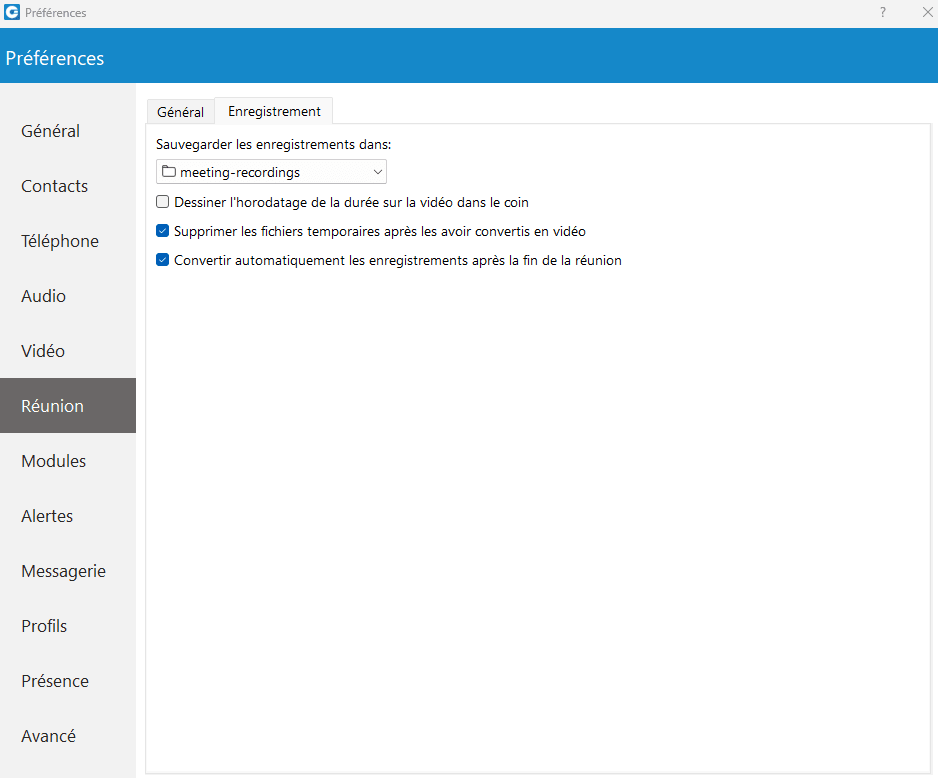
If you want to automatically convert each meeting recording, go to Preferences > Meeting > Recording and check Automatically convert recordings after the meeting ends.
Schedule a meeting
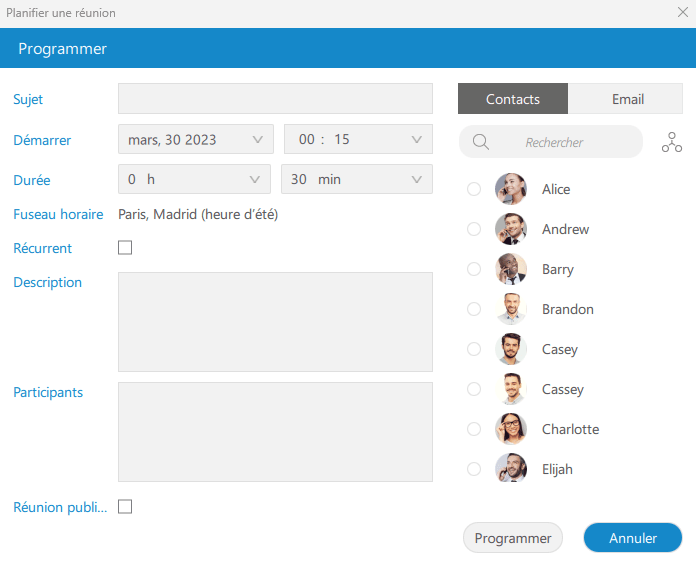
You can also schedule a meeting in advance. To be able to schedule a meeting, click the icon symbolized by a calendar (first button at the top right).
Here are the available options:
- Time
- Date
- Duration
- Time zone
- Subject
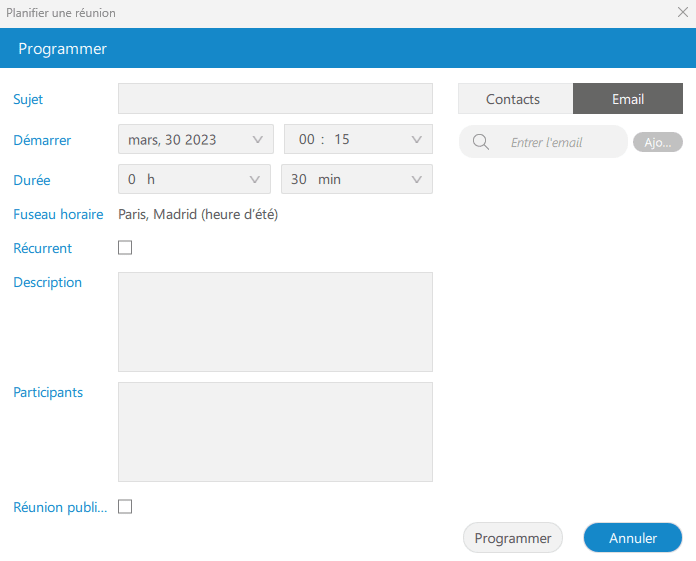
- Participants (you can invite external contacts by email)
- Recurrence
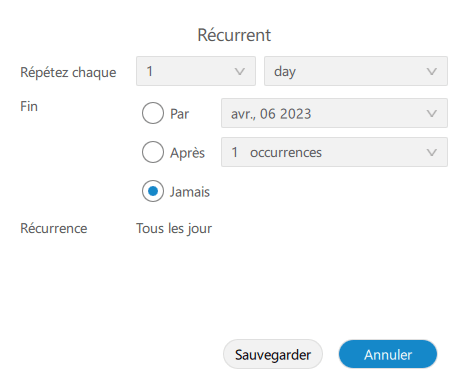
Join by number
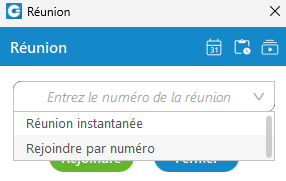
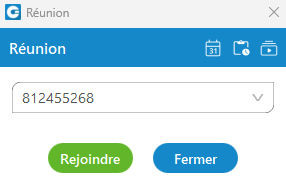
You can also join a meeting by number. To access it, click the drop-down list of the window Meeting and select Join by number. You can now enter the meeting number provided to you by the organizer.
Meeting interface
You can invite as many participants as you want to the meeting.
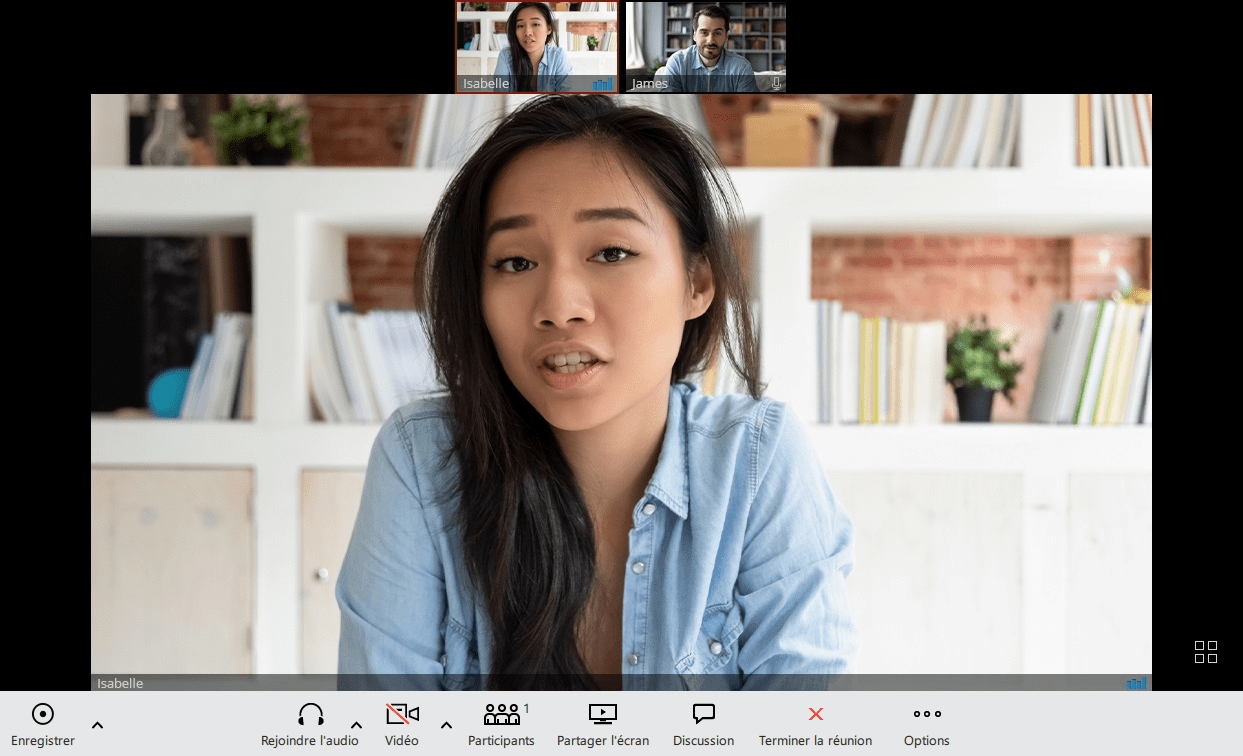
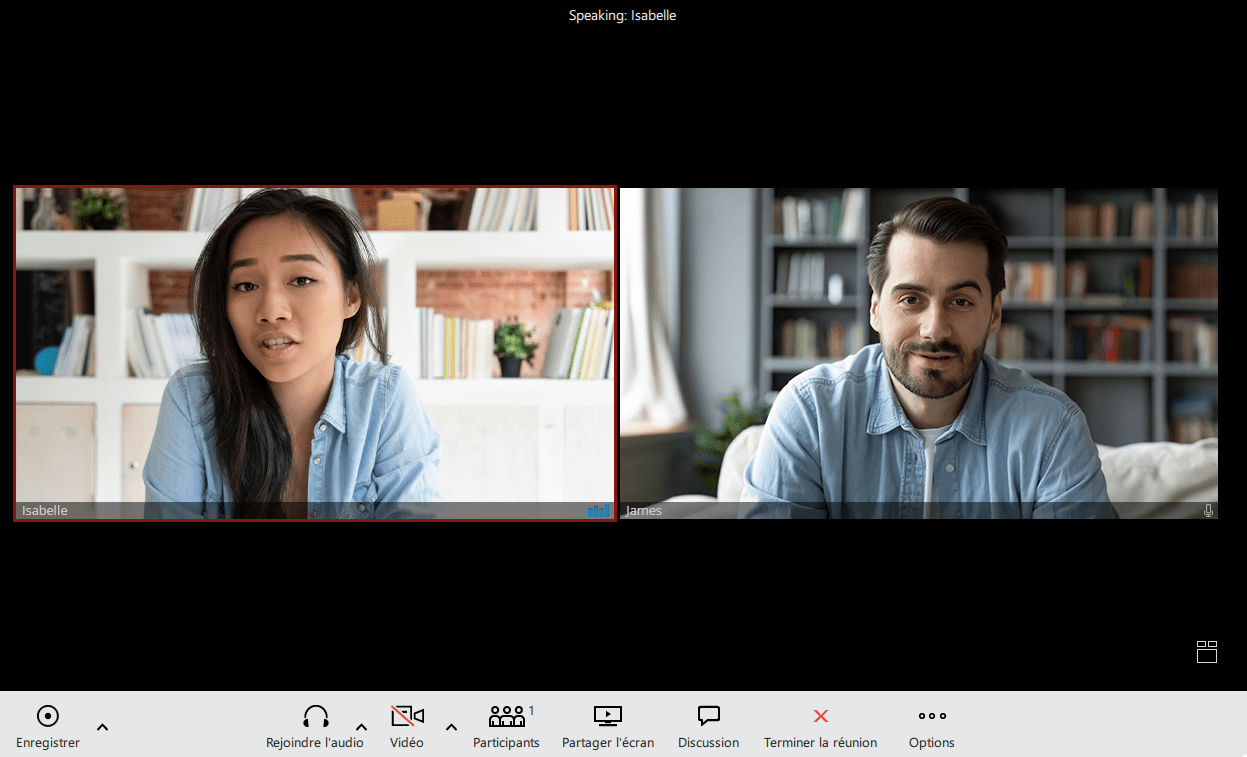
The meeting interface consists of:
- Local recording records audio, video, and screen sharing to a computer.
- Disable your own microphone
- Disable/enable your own video
- Show the participant list (If someone is missing, you have the option to re-invite them).
- Share your own screen
- Open the meeting chat window (the meeting window will expand with the chat on the right; here you can see participants' messages and enter your own messages. You can close the meeting chat by clicking the chat button again.)
- Leave/end the meeting
- Options – displays additional options for screen sharing, video, participants, and the meeting
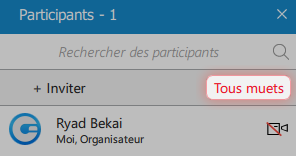
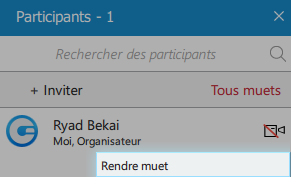
- Muting participants as the meeting host allows the user to mute participants:
- Mute participants as host: the meeting organizer can mute other participants from the carousel or the participant list.
- Mute all participants as organizer: the meeting organizer can mute all the other participants from the participant list.
- Mute participants as host: the meeting organizer can mute other participants from the carousel or the participant list.
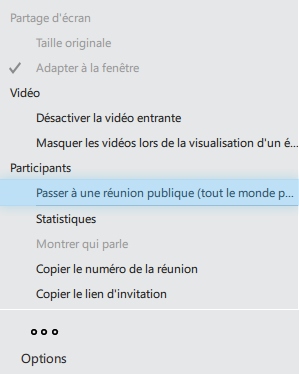
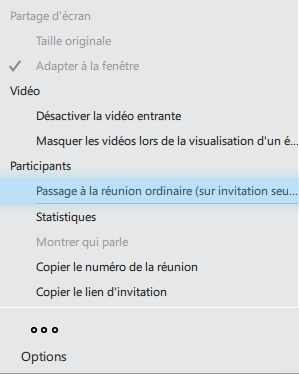
- Toggle the meeting privacy between public and private (ordinary) during an ongoing meeting.
- The statistics provide the user with details about the network quality during the meeting.
The statistics include measurements of audio, video and screen-sharing quality.
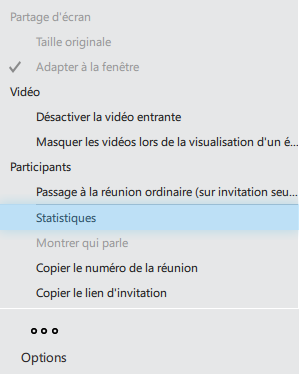
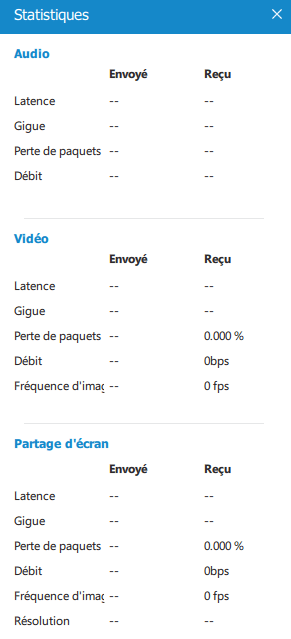
If there is a problem with the network connection that affects audio quality, a notification in the bottom left corner of the Meeting window will be displayed to inform the user of the cause of the poor sound.
There is also an option to change the layout of the other meeting participants (bottom right corner). The user can switch between the Speakers and Grid layouts. The speakers layout emphasizes one video stream. This video stream is either the person currently speaking or the user's pin. This is also the default view when a screen sharing session is active.
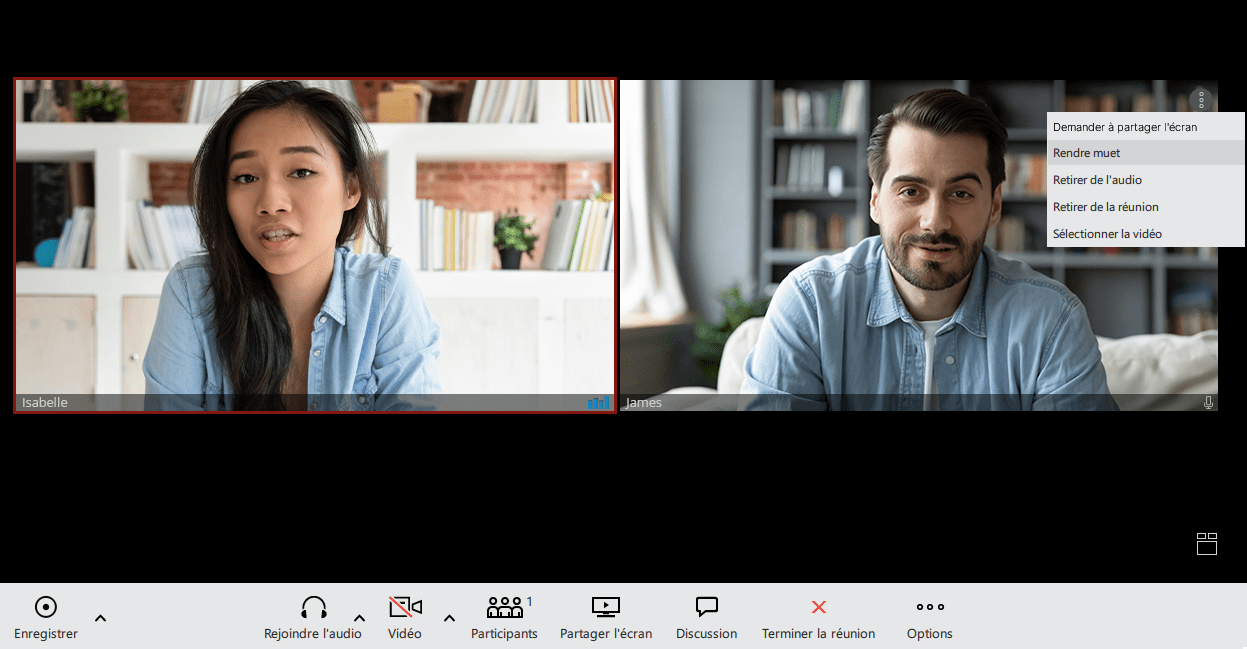
If you click the More options button of a user, the following options will be granted to you:
- Ask to share the screen (prompts the participant to share their screen so the meeting can see it, helping the participant achieve this faster).
- Mute (removes the ability to hear this person, useful if they have a poor microphone).
- Remove from the meeting (removes a participant, ideal if they no longer need to be in the meeting).
- Pin the video (makes their video the main video displayed for you).
The meeting grid view will automatically change the number of video streams based on the number of meeting participants.
- Up to 45 participants = grid size 12 (user + 11)
- 46 – 50 participants = grid size 9 (user + 8)
- More than 60 participants = grid size 6 (user + 5)
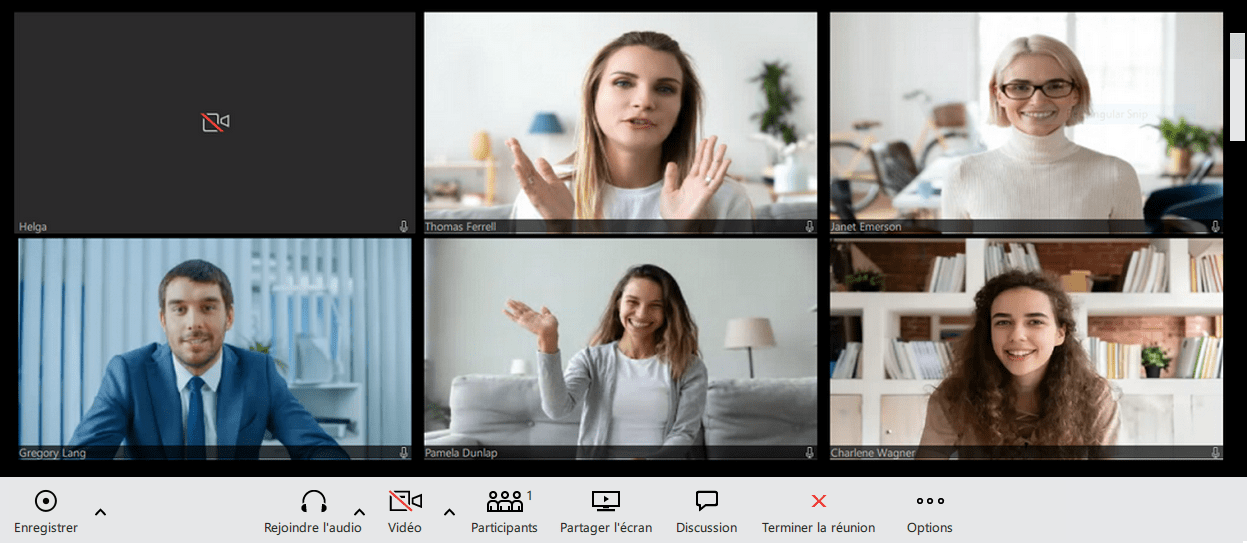
Participants will be sorted so that those who spoke last are among the first video streams.
The meeting is able to run 100 active video participants in a single meeting.
Audio input and output selection
When the user clicks on the arrow next to the Mute button, the following options are offered:
- Select your microphone
- Select your speaker
- Switch phone (the ability to switch your audio device to a desk phone or the mobile app, for example)
- Leave audio (option to leave the audio channel to see only the video)
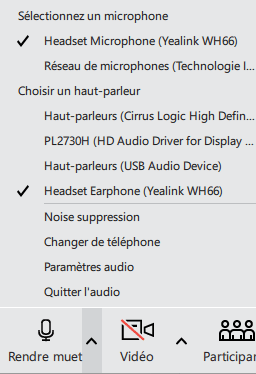
In addition to this, the user can mute themselves (press the icon Mute) so that no one else can hear it. If the user is currently in mute mode and tries to speak, a prompt will appear to inform the user that they are in mute mode.
You are muted; a notification will appear when a user tries to speak while muted.
Video device selection
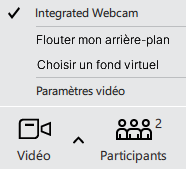
Once you have clicked the arrow next to the Video icon , you will have the option to select the device on which you want to capture the video.
All the devices you have connected and ready to use should be displayed. You also have the option to click the Video icon to remove the video you are displaying.
You can also:
- Blur your video background
- Change your background with the pre-existing images or import your own background
Screen sharing
If you want to share your screen during the meeting, simply click the Share Screen button or ask someone to offer you one. Then, your screen should look like this.
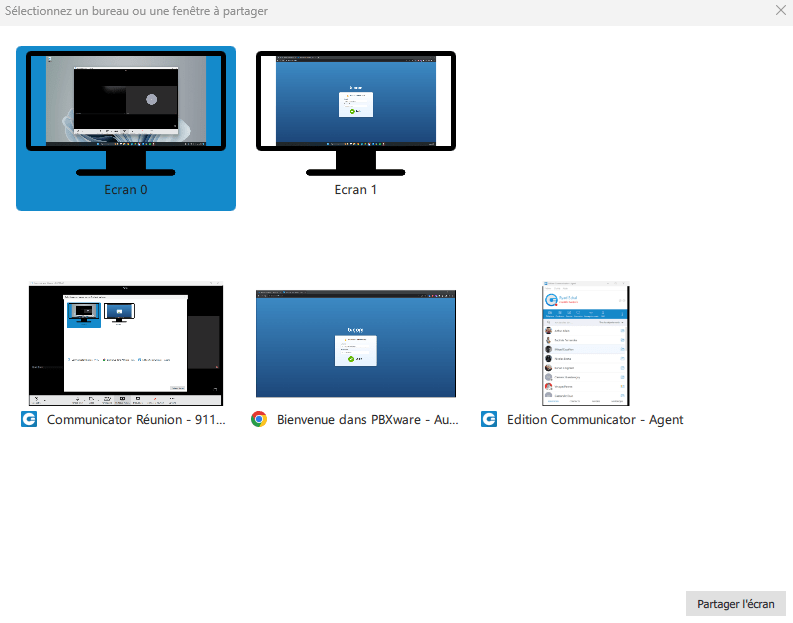
Several options are available to you when you want to share your screen with other participants:
- Full screen (share everything on your screen),
- A selection window (a single application you have open, for example Google Chrome) or a share
- A region of your screen (An area of your screen whose zones you can choose, for example the top left).
Once you have selected one of the sharing options, click share screen and your screen will be broadcast to the meeting.
Once you have started sharing your screen, you can access the icons at the top of your screen.

Here, you have all the previous options, plus you have control over:
- Pause sharing
- Stop sharing
- Remote control to give one of the users remote access to your computer
The Options button offers you the following features:
- Original size (resize the meeting application to its original size)
- Fit to window (resize the meeting application to the window size)
- Hide the video panel (Hide the meeting panel options at the top of the screen)
- Disable incoming video (prevent video from other participants from reaching you)
- Copy the meeting number
Outlook integration
Outlook integration allows the user to manage Communicator meetings from Outlook. This includes the following:
- Schedule a meeting
- Start the instant meeting
- Start a meeting with multiple contacts
- Cancel a meeting
- Convert an existing event into a Communicator Meeting
Schedule a meeting
The user can schedule a Communicator meeting from the Outlook top banner:
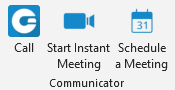
After clicking on Schedule a meeting (Schedule a Meeting), an Outlook appointment window opens with a scheduling settings dialog box where it is possible to set the meeting as private or public.
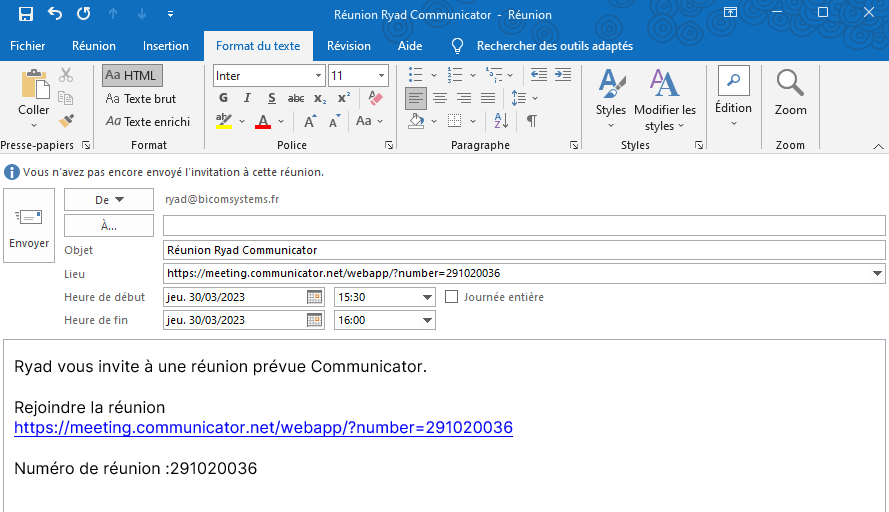
In this window, you have the ability to modify this invitation - to change the subject, the body; set the date and time, add participants, etc.
When sent, the meeting will then be added to the Communicator meeting list.
Starting an instant meeting with one or more contacts
Another option is to start an instant meeting with one or more contacts, by selecting them from the contact list in Outlook. The selected contacts will receive a meeting invitation.
Cancel a meeting
To cancel a scheduled meeting, open this meeting from the Outlook calendar list and choose the option Cancel the meeting.
After that, tap the icon tap the icon Send the update to notify all guests of the cancellation.
The meeting will then be removed from the Communicator meeting list.
This option will only remove the Communicator meeting from the application. The Outlook appointment will not be deleted.
Convert an existing event into a meeting
To convert an Outlook appointment into a Communicator meeting, follow the steps below:
1. Look for an existing event in the Outlook calendar and open it
2. Click the Schedule a meeting icon
3. Edit your meeting if necessary
4. Click Send the update to participants
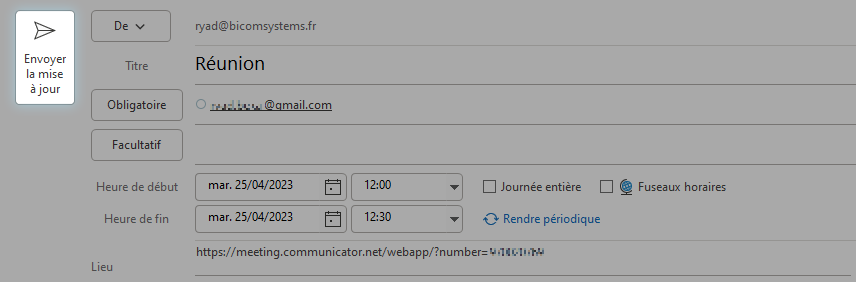
The meeting is now added to the list of scheduled Communicator meetings.
Meeting Licenses (6.7)
The limitations of the Meeting plans are as follows:
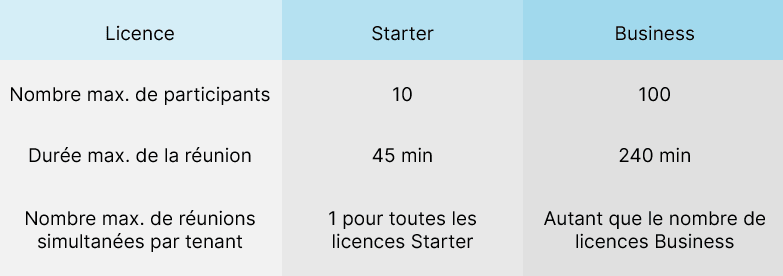
The starter package is the default one. This means it will be automatically assigned to all Communicator Meeting users.
