Use Communicator
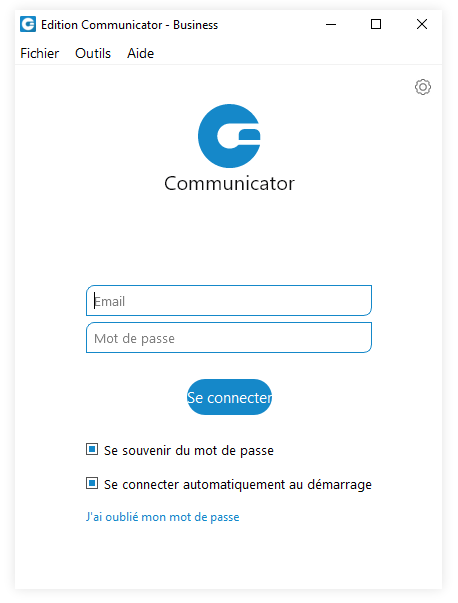
Login
- Email : Indicate the email address assigned to your extension.
- Password : Enter the password you created when configuring Communicator.
- Remember the password : Check this box if you want Communicator to save your password
- Automatically log in at startup : you will automatically log in each time the application starts.
- I forgot my password : If a user has forgotten their password, they can recover it by clicking the Forgot my password link. The user will receive a password recovery link by email.
Connection options for the Agent/Supervisor edition
- Agent number : Enter the agent number received from your PBXware administrator.
- Agent PIN : Enter the agent PIN received from your PBXware administrator.
: Enable/disable the agent's login details (only for the Supervisor edition). The agent panel will not be available and calls will be displayed as in the Business edition.
The PBXware administrator defines the agent number and PIN through PBXware.
Quick list
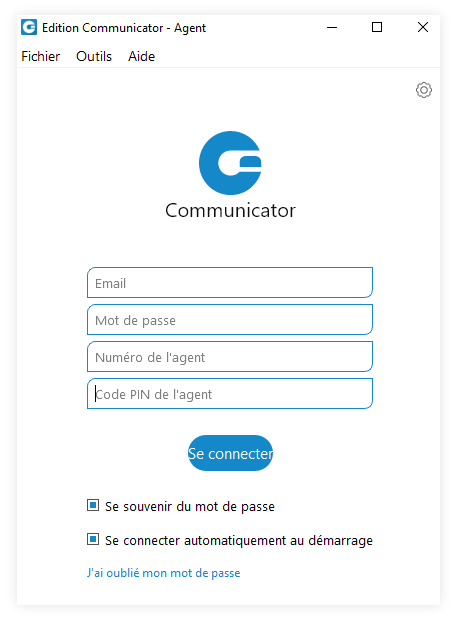
The quick list tabs located at the bottom of the application window provide a quick overview of the Directory, Contacts, Favorites, and History tabs.

- Directory : Displays the list of all gloCOM contacts.
- Contacts : Displays a list of all saved and imported contacts.
- Favorites : Displays all the contacts that you have marked as favorites.
- History : Displays the log of all recent missed, received, and dialed calls.
Toolbar
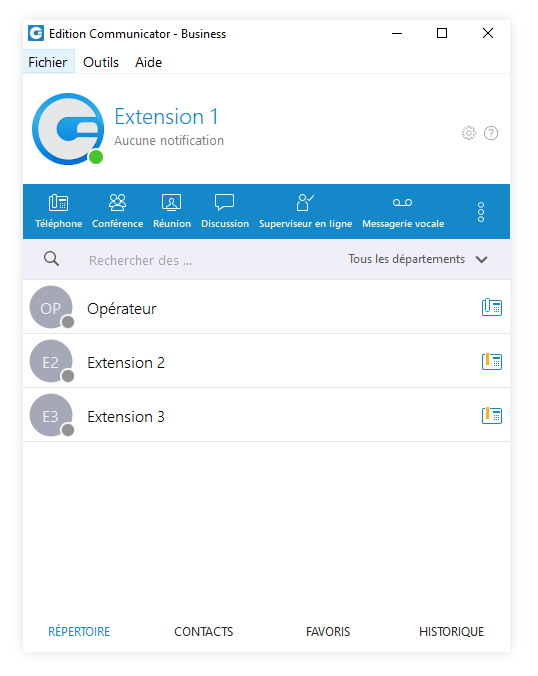
- User image : Represents the user’s profile picture, which can be changed at any time.
- Username : Represents the username displayed in the application.
- Notifications : Displays all notifications (unread messages, missed calls..)
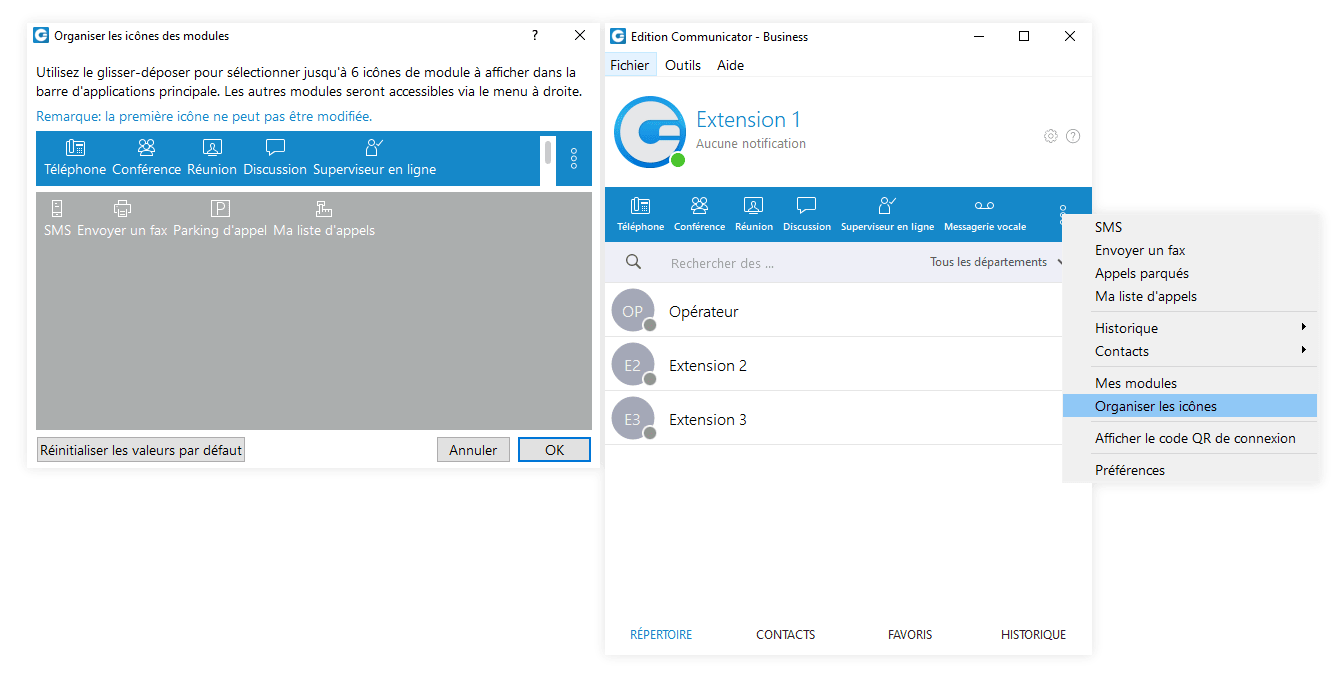
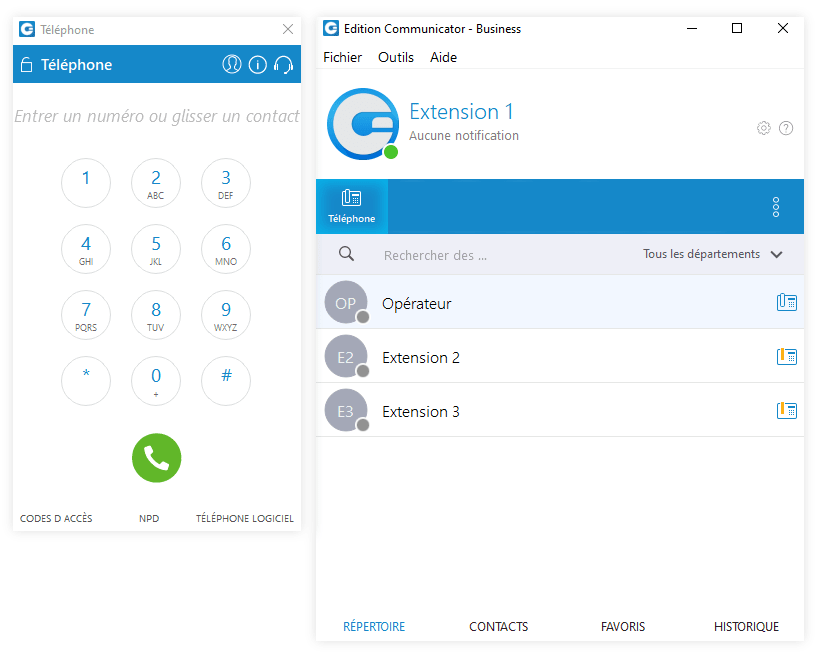
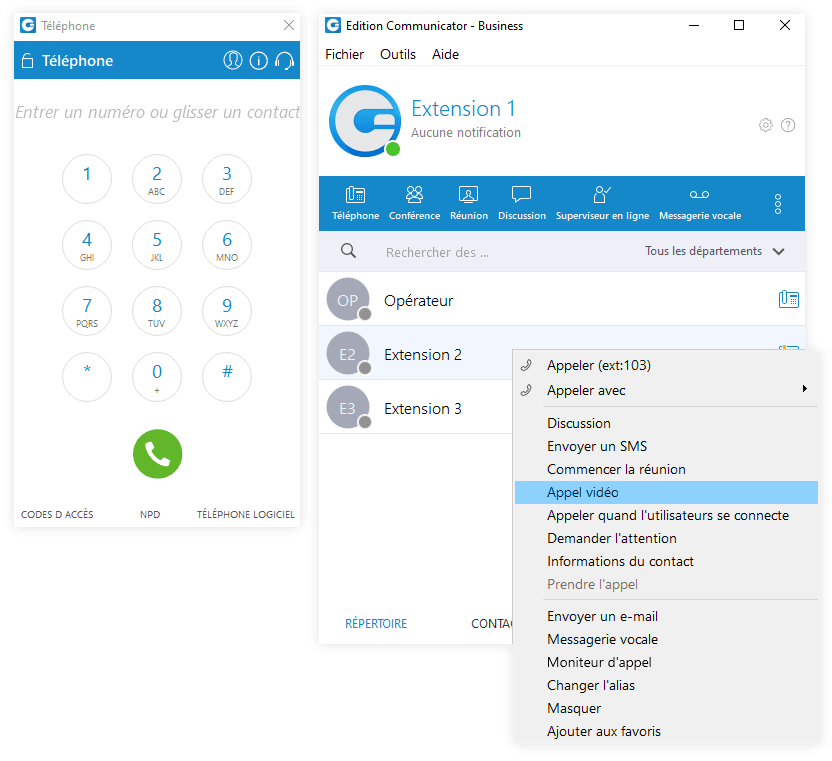
- Phone : Opens a softphone window next to the main Communicator window.
- Conference : Opens a voice conference window next to the main Communicator window.
- Chat : Opens a chat window with all of the users’ conversations.
- Voicemail : Opens a voicemail window next to the main Communicator window
- SMS : Opens an SMS window with all of the user’s conversations.
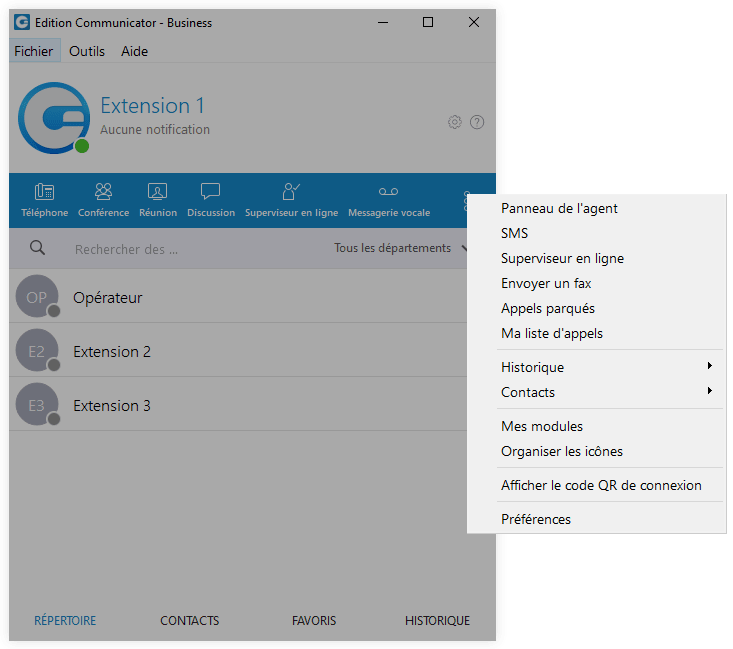
- Fax : offers the choice to send a fax or view received faxes.
- My call list : the call list allows users to load a CSV file into Communicator and dial the numbers in that file one after another.
- Surveillance camera : Opens a surveillance camera preview window. This option will only work if the user has configured their surveillance camera in Tools > Preferences > Video > Surveillance Camera.
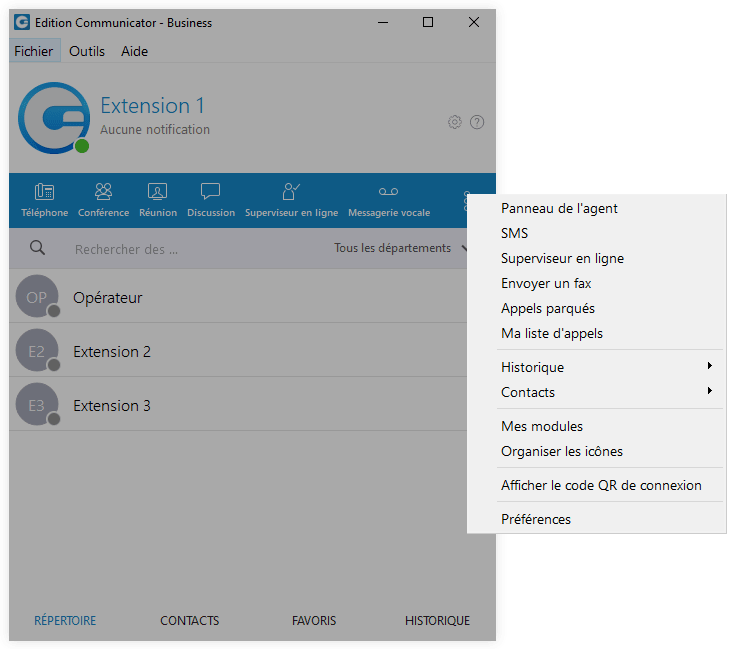
It is possible to display all the options and reorganize them by clicking Organize icons
- Supervisor online : opens the online supervisor.
See: TUTORIAL: Online supervisor
- Parked calls : Once a call is parked, it can be picked up by anyone, at any location, by dialing the number of the parked extension. In PBXware, a default parking lot is defined in the access codes. When a user presses the Park button in the call window, a drop-down list is displayed to allow them to choose the lot to park in.
- Show the login QR code : This option makes it easier for users to log in to their mobile app by scanning the QR Code generated by the desktop app.
- Preferences : Opens a preferences window.
- Help : Redirects to our official website.
If the SMS feature is not included in the license, you will not see the SMS module in the toolbar.
Call list
The call list allows users to load a CSV file into Communicator and dial the numbers in that file one after another. This is useful for people who dial the same list of numbers every day, so they don't have to copy and paste each number. When you open the personal dialer module, the following window is displayed:
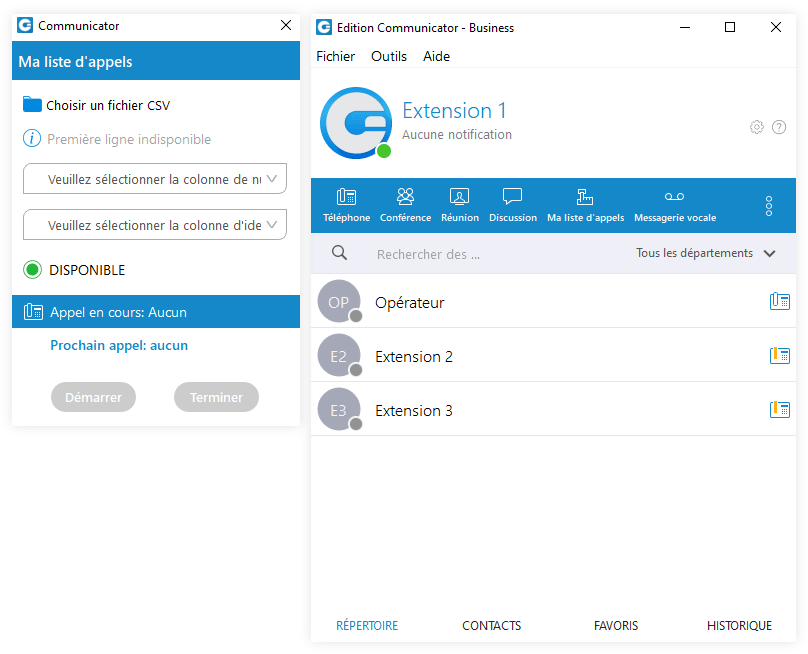
After loading a file, the first line of the file is displayed in the info section, so that the user can get an overview of the file structure. Then, they must select the phone number column, so that gloCOM knows what to dial. Optionally, the user can choose an identifier column that is useful for labeling numbers with a name.
For example in the file:
- 101, Philippe Durand, rue A Paris
- 102, Pierre Boulanger, rue B Lille
The first column is a number and the second an identifier (person's name, company name, etc.). This identifier is used in the “Current Call” and “Next Call” labels so that the user can have an idea of the person they are going to call next.
After pressing the Start button, Communicator calls the first number in the list if there are no other calls at that moment. The numbers are dialed one after another, but the user can interrupt the dialer at any time if they wish. Dialing is finished when the end of the list is reached or when the user has finished dialing the number.
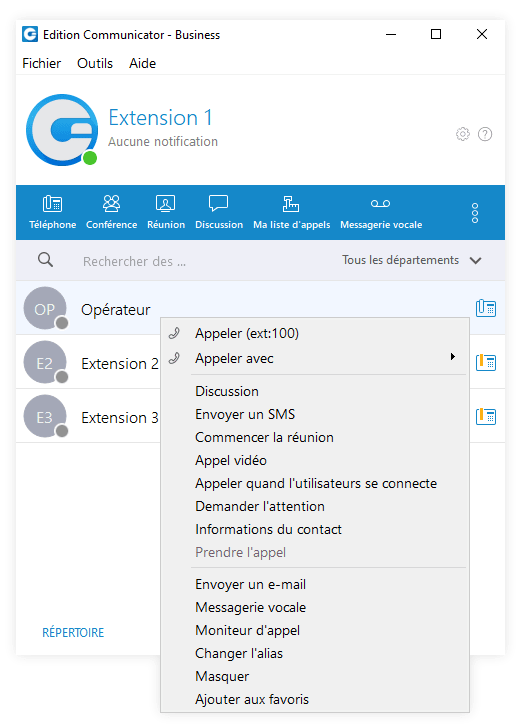
Directory actions
You can place a call to any destination in the system, for example: extensions, queues, conferences, voicemail, system calls or parking.
Calls can be placed by dragging and dropping from one extension to another, or directly from the phone screen to the extension, for example. By right-clicking on a contact's name, you can perform other actions regarding the selected extension.
In this way, the user can:
- Make a call
- Chat with the selected contact
- Start a meeting with the selected contact
- Make a video call
- Request attention
- See more information about the contact
- Retrieve the call
- Send an email to a contact
- Leave a voicemail
- Monitor calls
- Edit the contact alias
- Hide contact
- Add the selected contact to favorites

Make a call
Standard call
- Open the call window by clicking the Phone button on the toolbar
- Dial the phone number
Use the phone module's keypad or the keys on your keyboard to enter the phone number you want to dial.
Click the call button to place a call.

Drag-and-drop call
With your mouse, click on any contact in the contact list and hold it down, then drag the selected contact from the list to the phone module area, and release the contact.
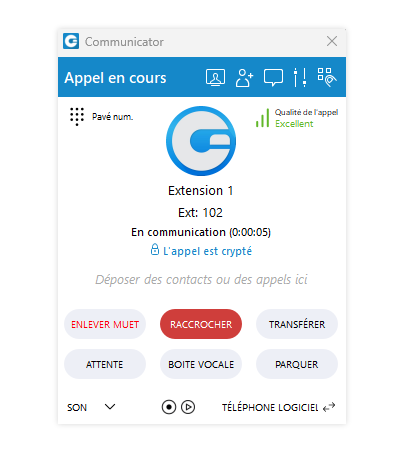
Call in progress
Transfer options:
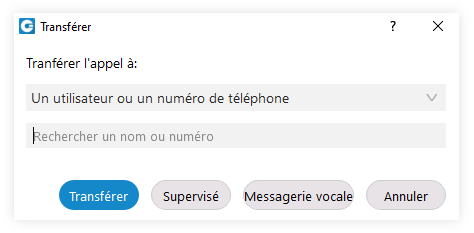
- Blind transfer: Type a number (for example, a mobile phone) and transfer the call to that number.
- Transfer to another call in progress : If a user has two or more active calls, they can transfer the calls from one to another.
- Drag-and-drop transfer: During an ongoing call, the user can transfer the call by dropping it onto the desired contact in the contact list.
During the drag, a transfer indicator is displayed. Both types of transfer, blind and supervised, can be used.
The user can select the one they wish to use when hovering over the contact. Drag-and-drop transfer does not apply to conference calls.


Call encryption
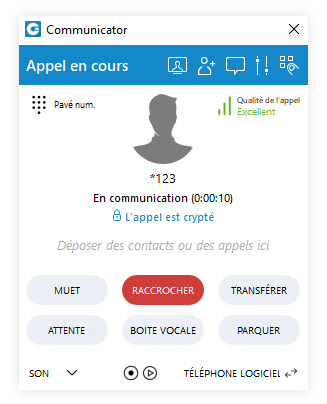
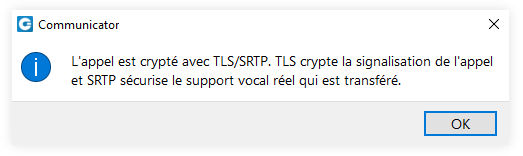
During an ongoing call, an indicator shows the call encryption if the call is encrypted. Call encryption settings are configured by default on the server, but the user can change them in the Communicator application by going to Preferences > Phone > Advanced.
A checkbox indicates the use of the default encryption defined by PBXware. By unchecking it, the user can change the options between TCP, UDP, and TLS. The user must log out and log back in after changing these options.
The indicator should only be present when TLS encryption is enabled and the softphone is in use (in all other cases, the indicator is not displayed). Clicking it will display a pop-up message explaining the encryption.
Echo cancellation
Echo cancellation, which is part of the gloCOM Desktop application, is a method used to improve voice quality by preventing an echo from being created or by eliminating it when it is already present.
The time needed for echo cancellation to begin removing echo can be up to 10 seconds. It is important to note that echo cancellation only works for softphones.
Switch phone during a call
During a live call, you can use the Phone ⥄ located at the bottom right of the call window to trigger ringing on all registered devices or on a specific device (softphone, desk phone, and mobile app), so that the user can continue the call on another device.
One example would be switching from your desk phone to your mobile phone when you have to leave your office but want to continue your call. The same applies to conference calls.
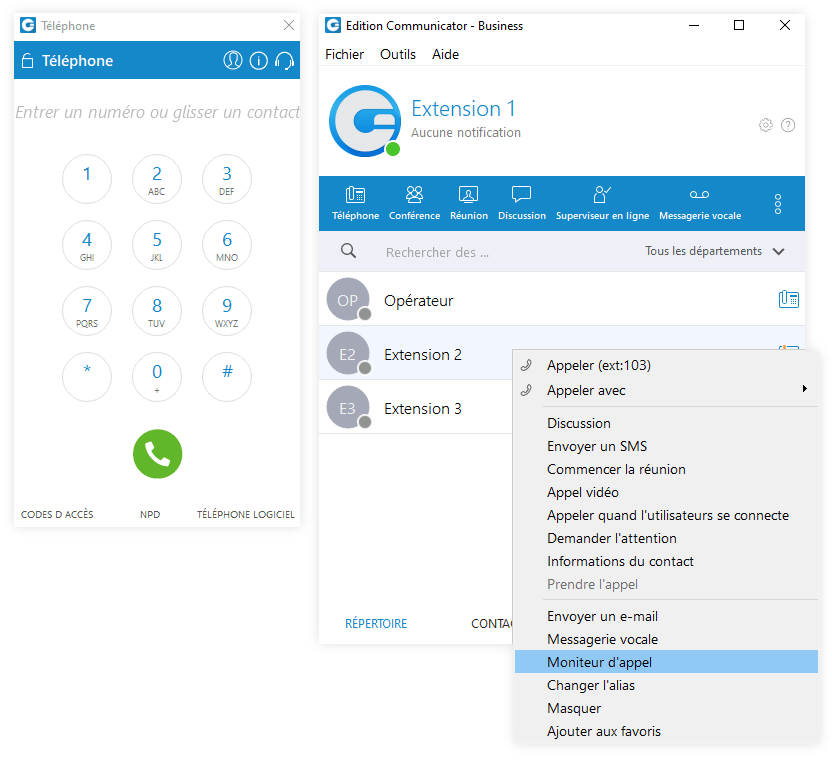
Monitor a call
If your administrator enables the call monitoring feature on your extension in the enhanced services, you will be able to listen to any call in real time.
When a call is placed, right-click on the user who is on the call and choose Call Monitoring. You can switch from silent listening to barging in and talking with all parties.

Communicator makes it possible to unify call history across desktop, web, and mobile applications. Call history is stored for one month on the server and synchronized across all user devices. This means the user will always be aware of their latest calls. The application ensures that the user's call history is synchronized on each login and that they have their recent calls on their device.
Phone
The area of the phone module where information about any missed calls is displayed.
- From the phone module, you can configure a desk phone and a mobile phone by clicking the settings icon next to the missed calls information.
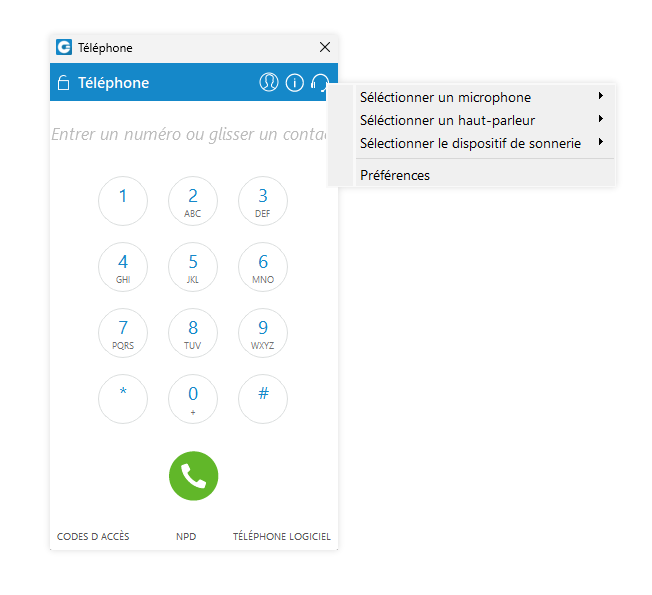
- Select your audio device by clicking the Headset icon. The drop-down menu containing the following options is displayed:
- Select a microphone : Allows you to select the device you wish to use as the input device.
- Select a speaker : Allows you to select the device to use as the output device.
- Select the ringing device : Allows you to select the device you wish to use as the ringing device.
- Preferences : points to the Preferences > Phone > Audio Devices section where you can also select the input, output, and ringing device you want to use or test your audio devices.
- At the bottom right of the phone module, you can see which phone mode is set by default. Click the drop-down menu and choose between Softphone, Desk phone & mobile app. Next to this drop-down menu, a DND icon allows you to set your status to Do Not Disturb.
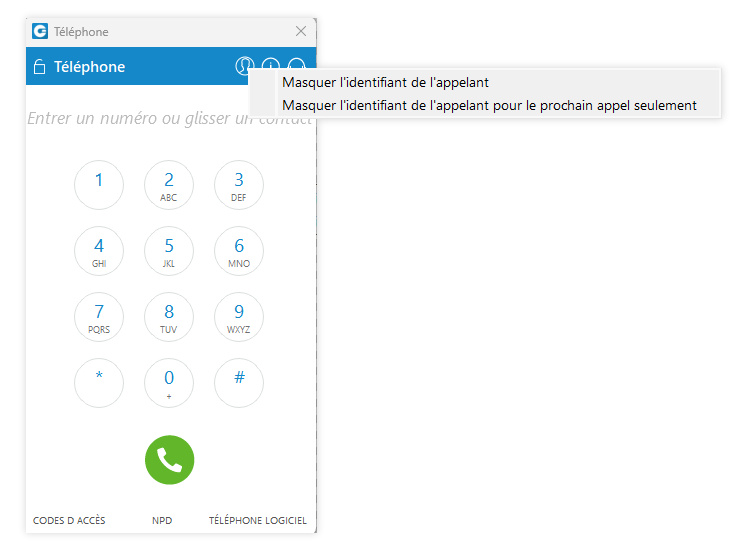
- Users can block the caller ID directly from Communicator. Two options are available: Hide caller ID and Hide caller ID for the next call only.
When a user presses and holds any key inside the phone dialer except 0, it displays the number or sign pressed. However, when the user presses and holds the 0 key, the + (plus) sign is displayed.
Call quality metrics
Call quality metrics provide the user with details about the call and network quality during a call.
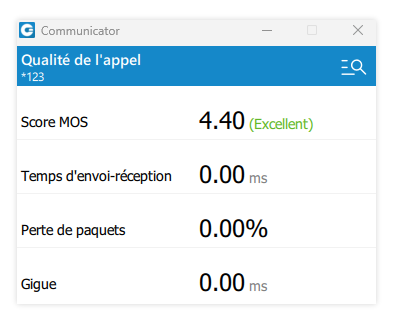
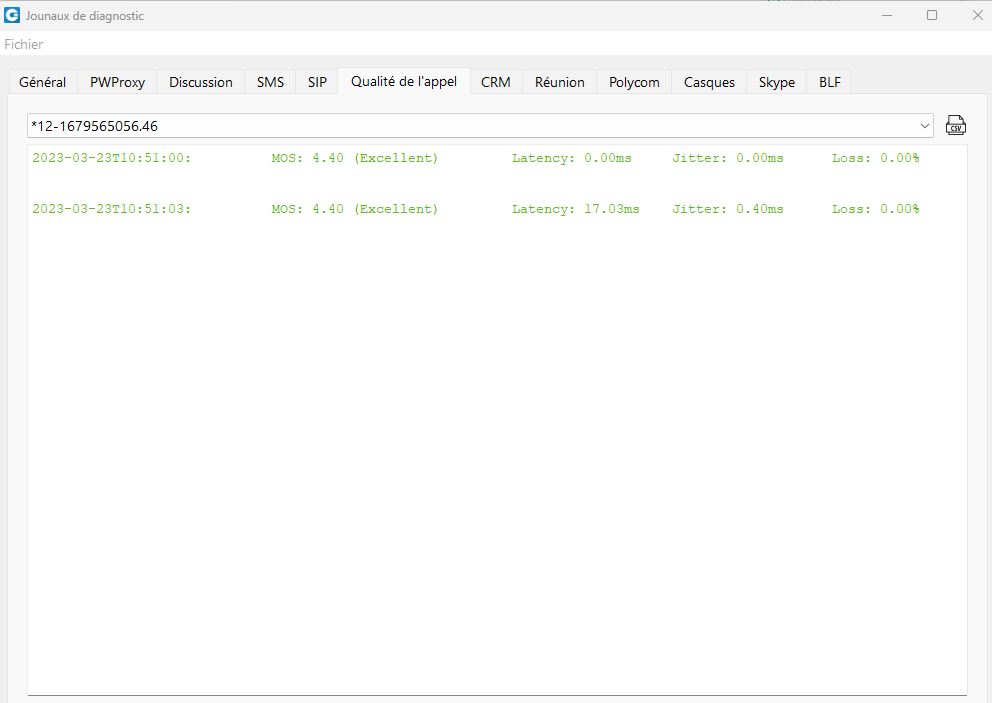
During a call, a call quality indicator will appear in the upper right corner of the call window, giving approximate information about the call and network quality. The Call Quality window will appear when you click on it, providing more detailed information about the MOS score , the send-receive time, packet loss and jitter.
For example, if the quality of a call is Excellent , there is no connection problem, there is little latency and there is no packet loss. Otherwise, there are connection, latency and packet loss problems.

To export this information, click Open call quality diagnostic logs. By default, this option is disabled, and to enable it, go to Preferences > Phone > Advanced and check the Enable Call Quality Metrics Recording box.
After enabling call quality metrics, the user can click the magnifying glass icon located at the top right of the call quality window and will see the detailed call quality information for the last 50 calls.
To export call quality information, the user must first select the call from the drop-down menu for which they want to create a report and click the Export call quality report button.

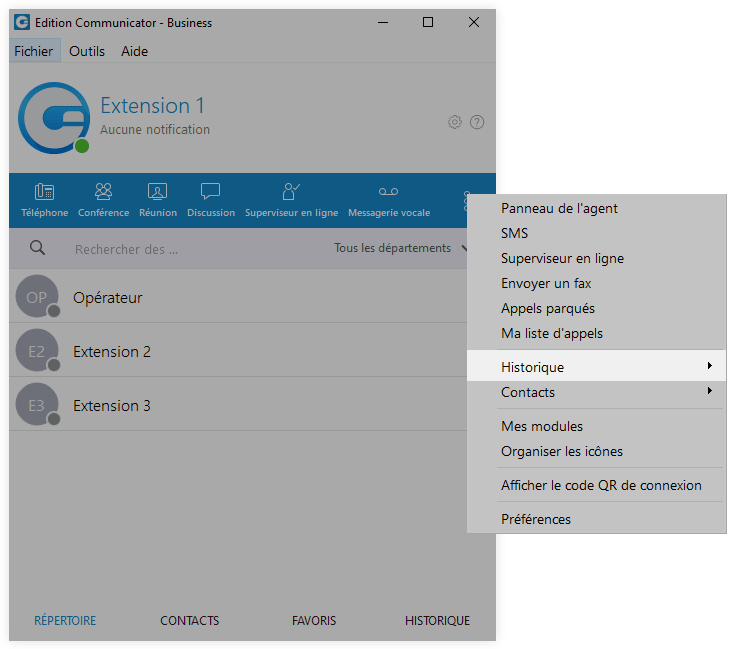
History submenu
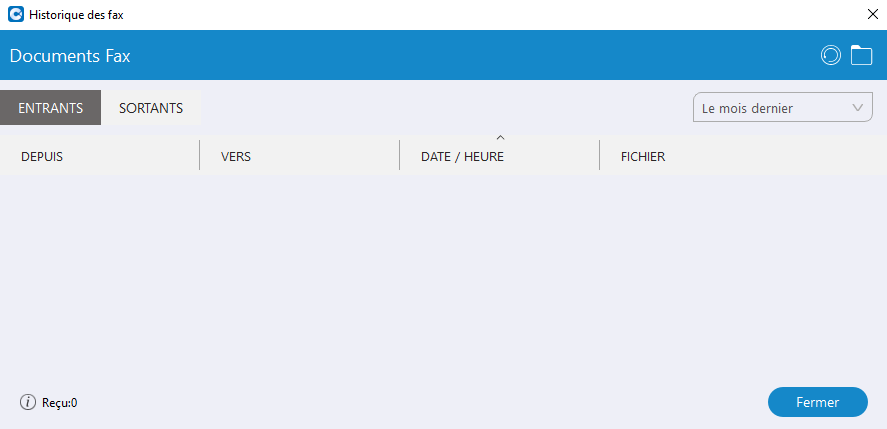
– The Fax option is used to open the window History faxes that lets you view all sent and received faxes.
– The option Clear the call history is used to clear all your missed, received and dialed calls from the History.

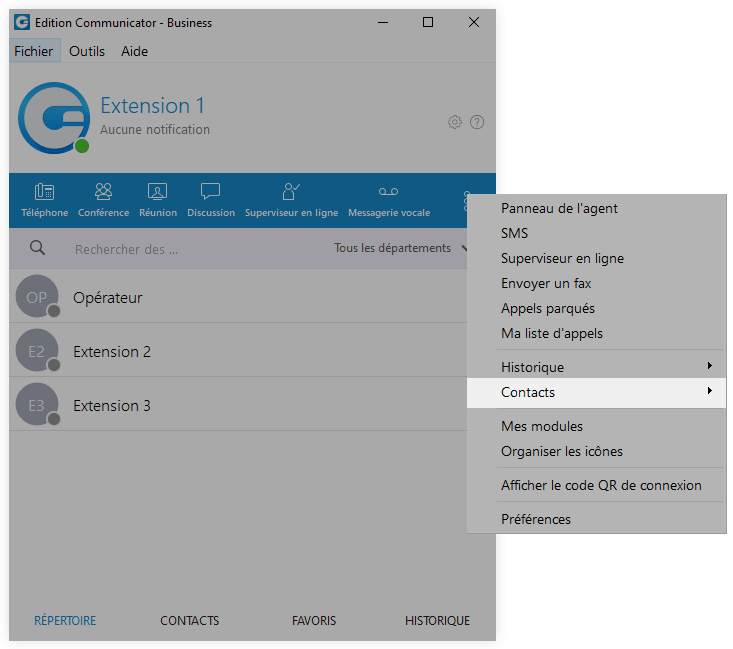
Contacts submenu
– The Fax option is used to open the window History faxes that lets you view all sent and received faxes.
– The option Clear the call history is used to clear all your missed, received and dialed calls from the History.

Make video calls
To make a video call, right-click on a Communicator contact and select Video call in the drop-down menu.

Send a fax
- Outgoing faxes
– Click the Fax module icon, then select Send a fax to open the Fax module.
– Read the information message and click the OK button.
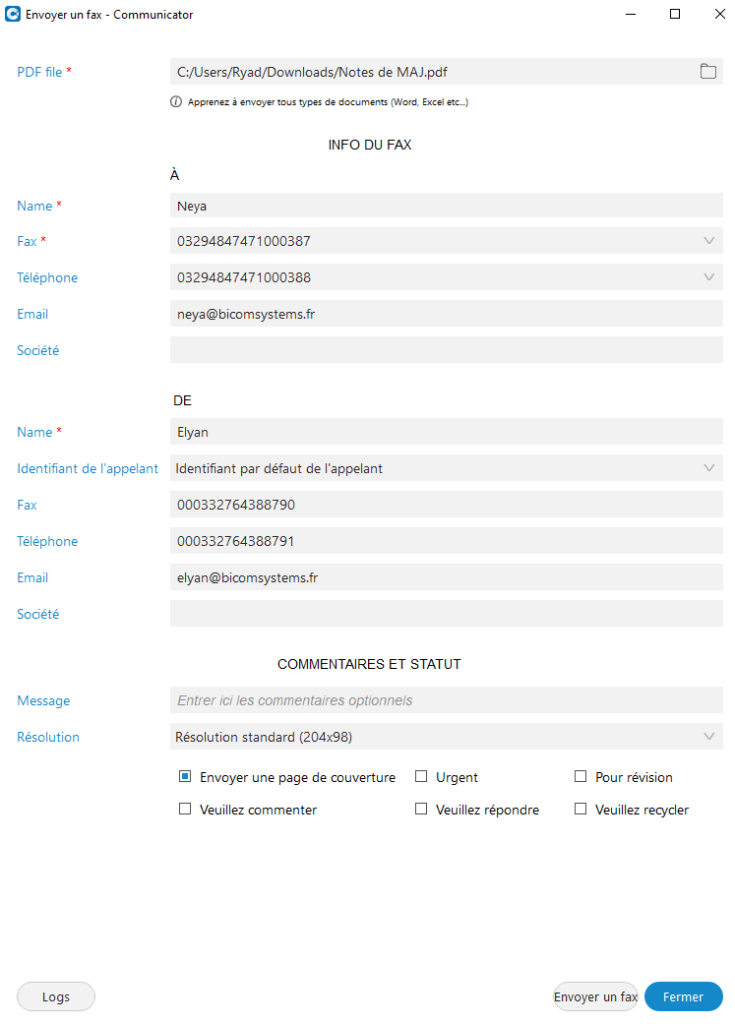
PDF file:
- Enter the path or browse for a PDF file you want to send using the icon.
The information you enter in the Send a fax wizard will be displayed on the fax cover page if you choose to send a cover page. In the Send a fax window, you can see two sections, To and From.

” A “ section
- Name: enter the recipient's name. For example, Tim Barr.
- Fax: enter the phone number to which you want to send your fax, for example 02033998800.
- Phone: enter the recipient's phone number.
- Email: enter the recipient's email.
- Company: enter the recipient's company name.
” From “ section
- Name: This field will be automatically filled in with your gloCOM username.
- Caller identification: caller ID is a drop-down menu with the list of caller IDs allowed for an extension. Caller IDs are added from the PBXware GUI.
- Fax: enter your fax number.
- Phone: enter your phone number.
- Email: enter your email.
- Company: Enter your company name.
Additional information such as comments and status can also be entered. When sending a fax, the user is presented with X of Y pages sent so that the progress of the fax sending is more detailed.
- Incoming fax
– To display the list of all received and pending fax documents, click the three dots and then History > Fax