Configure a replication cycle
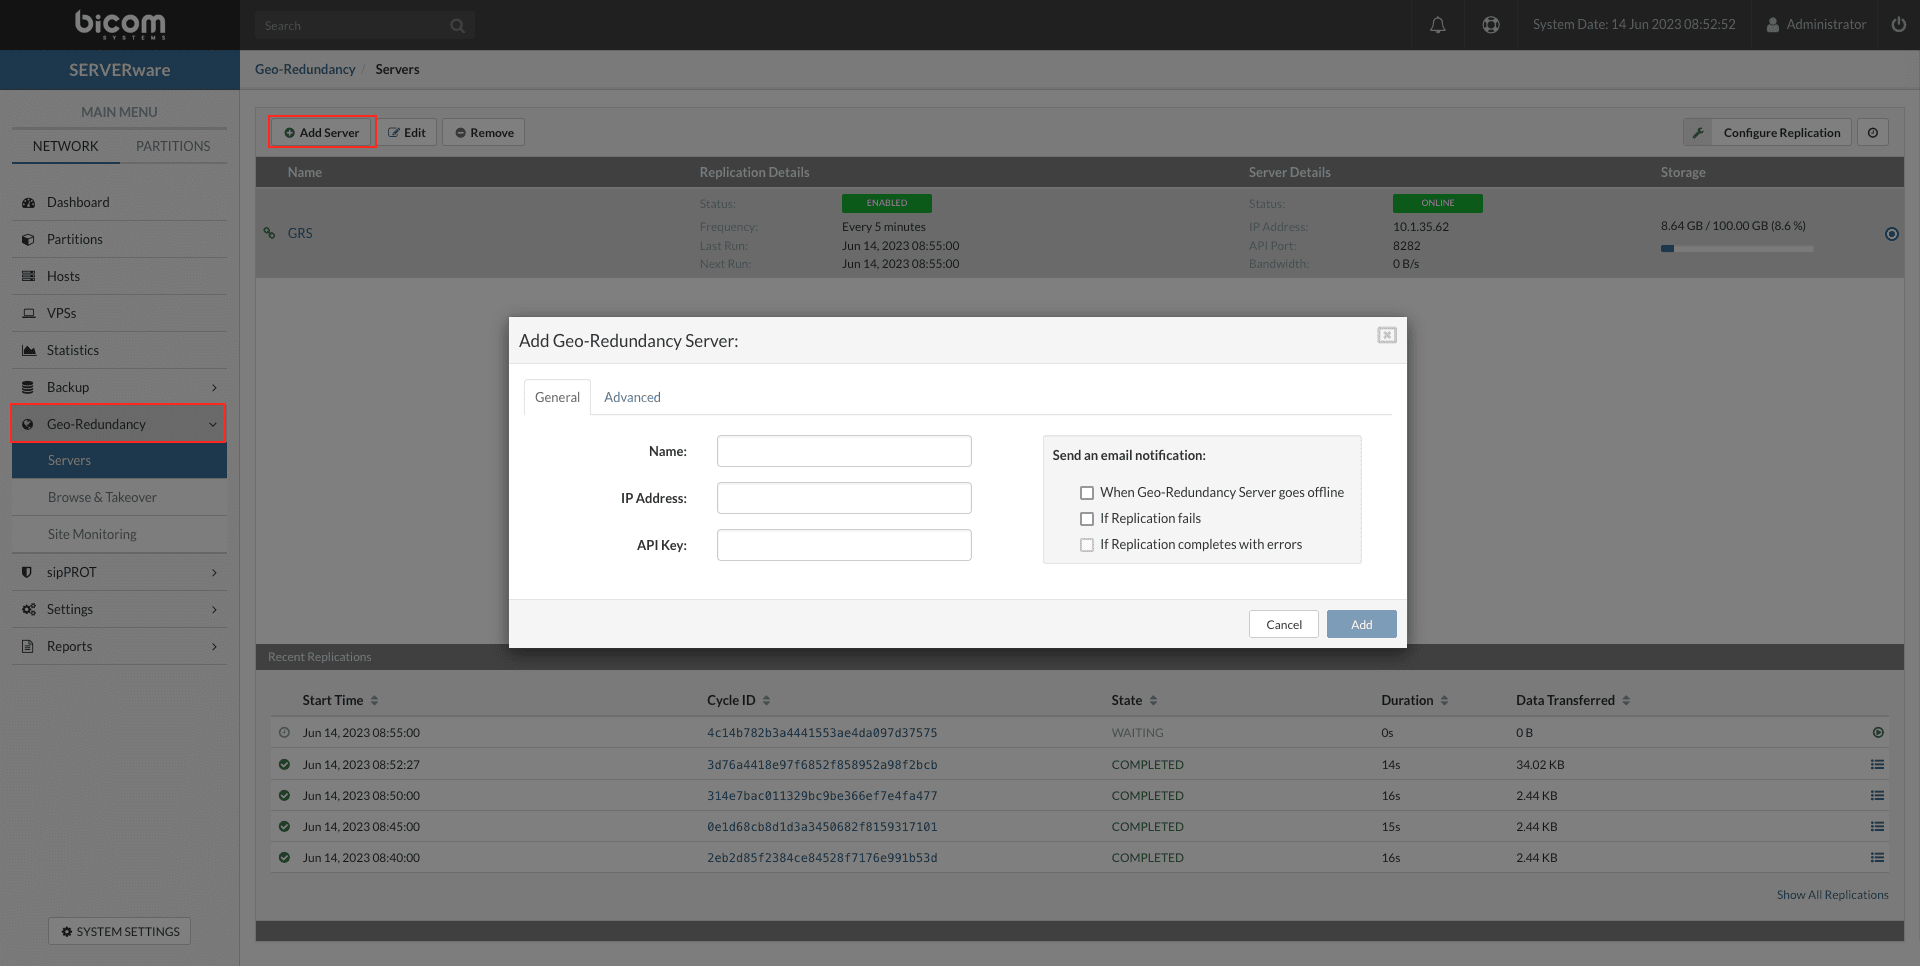
In the left menu, select Geo-redundancy and from the drop-down list, select The servers. The Geo-Redundancy preview window will open. To add the Geo-Redundancy Server, press the button Add a server in the top left corner, and a pop-up window will open. Enter the new GRS details if necessary.
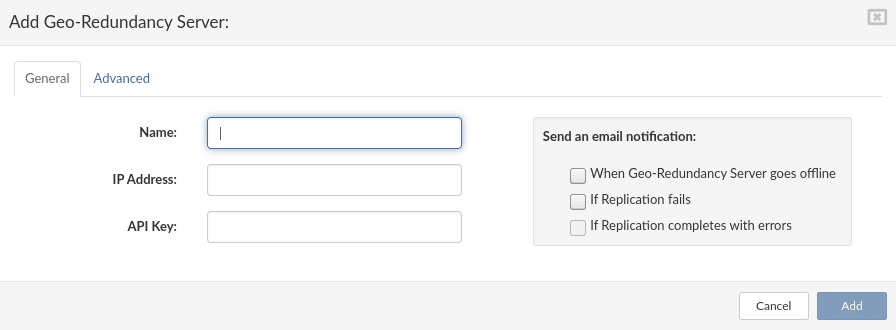
General:
- Name : The name of the geo-redundancy server.
- IP address : Enter the IP address of the geo-redundancy server (if the geo-redundancy server dataset is created on NETSTOR in the mirror or cluster edition of SERVERware, a floating IP address must be used).
- API key : Enter the API key of the Geo-Redundancy Server site.
- Send an email notification : Select the notifications you wish to receive by email from the administrator.
- When the geo-redundancy server is offline – This notification will be triggered when the Geo-Redundancy Server is offline (network issue, hardware issue, etc.).
- If replication fails – This notification will be triggered if the replication process is interrupted.
- If replication completes with errors – The replication process is completed with errors, for example when the Geo-Redundancy Server site quota is reached or when the IP address is missing.
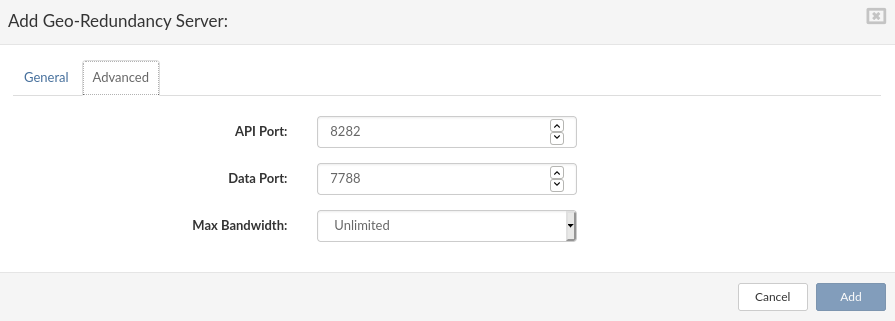
Advanced:
- API Port : Enter the API port of the remote site if necessary (8282 by default).
- Data port : Enter the port for data transfer if needed (7788 by default).
- Maximum bandwidth : Limit the geo-redundancy transfer rate according to your network preferences and infrastructure.
Drop-down values
- 1 MB/s
- 5 MB/s
- 10 MB/s
- 20 MB/s
- 30 MB/s
- 40 MB/s
- 50 MB/s
- 75 MB/s
- Unlimited
To complete the addition, please fill in all the required fields and press the button Add.

We have finished adding a new replication site. You can now manage the replication details by following these steps:
- Select the site you want to manage.
- Press Configure replication in the top right corner.
The replication details include the following information:
- Name : Replication site name.
- Status : Replication enabled or disabled.
- Frequency : Frequency at which the replication cycle occurs (this is set in the replication configuration).
- Last run : Time at which the last run of the replication cycle occurred.
- Next executionn: Time at which the next replication cycle run is scheduled.
Server details:
- Status : The replication server status can be online or offline.
- IP address : IP address of the geo-redundancy server.
- API Port : API port used to connect to the Geo-Redundancy server.
- Bandwidth : Bandwidth usage by the Geo-Redundancy Server.
- Storage usage : Storage usage and quota of the Geo-Redundancy Server.
Replication configuration:
- Replication : Enable or disable replication.
- Replication cycle : Select the desired value in minutes from the predefined drop-down list (the replication cycle is the delay between replications).
- Recovery points to keep : Enter the number of recovery points to keep (the higher the number of recovery points, the more space will be used on the geo-redundancy server).
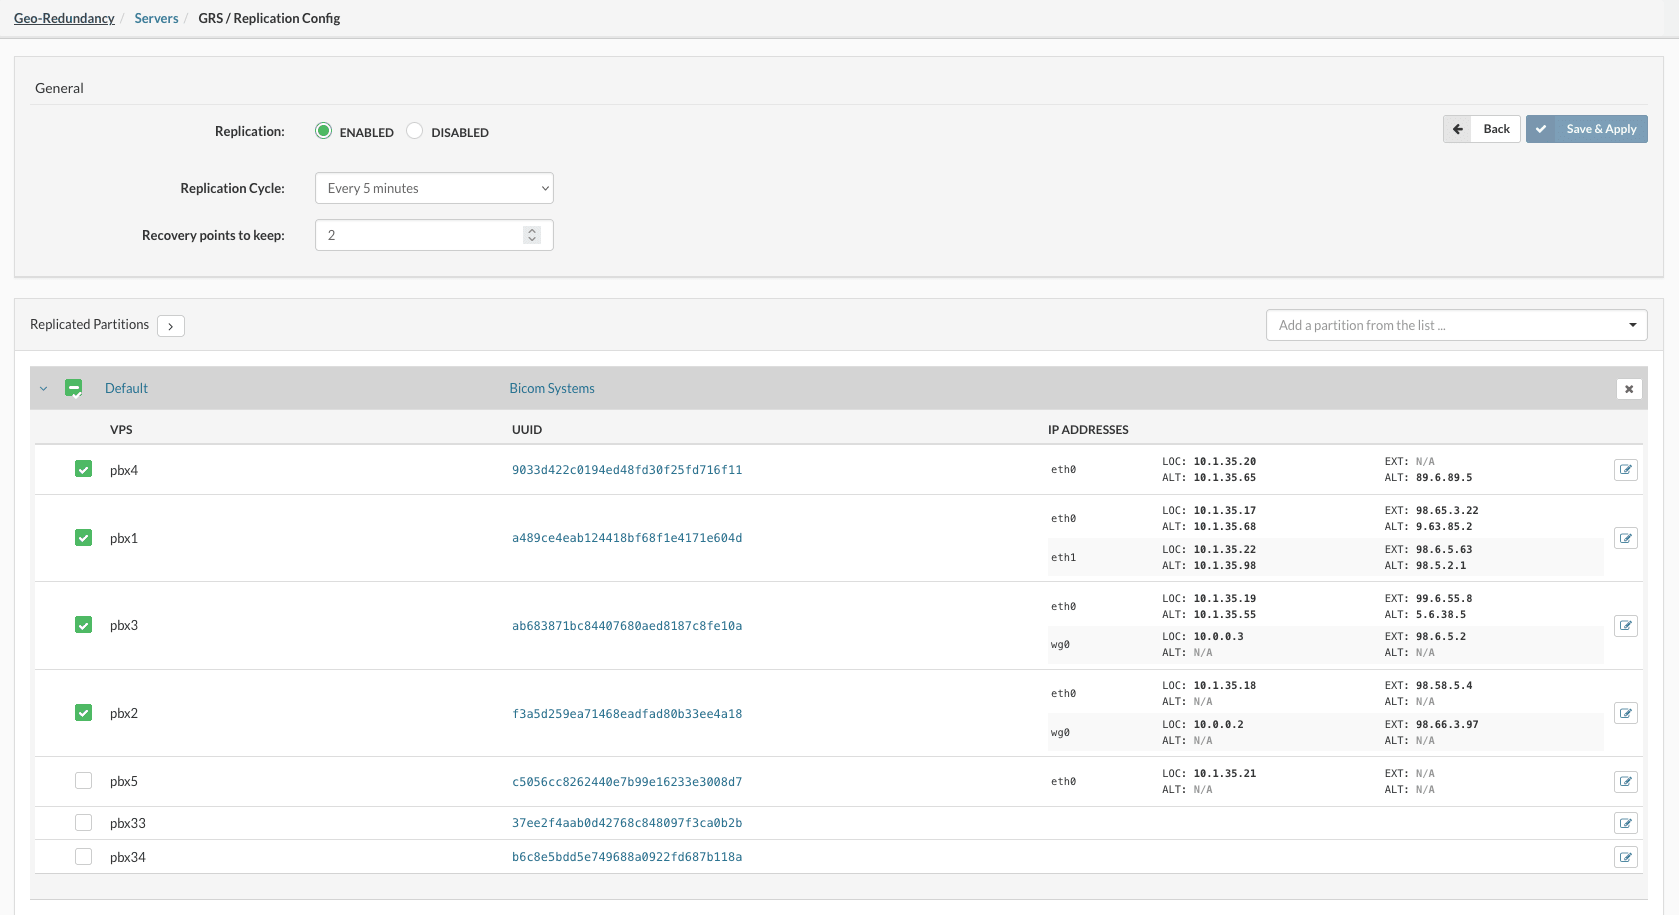
Replicated partitions:
- In the drop-down list, select the partition you want to replicate to another location.
- Once selected, a list of VPS from the selected partitions will be displayed.
- Check the boxes next to the VPS you want to replicate or check the box next to the partition name to select/deselect all.
- Alternative IP address : Set an alternative IP address that the VPS will use after the takeover. (The address used must be available in the remote SERVERware IP address pool. If the PBXware service is used, it must have a secondary IP address set).
- Alternative external IP addresse: Set an alternative external IP address that the VPS will use after the takeover. (The address used must be available in the IP address pool of the remote SERVERware. External IP addresses allow the VPS to be available from a public network when NAT is used to forward its private IP address to a public IP address).
- Press Save and apply to complete the replication configuration.
The first replication will start based on the delay defined in the configuration, and this will be the Full replication cycle for each selected VPS.
Recent replications:
- The recent replications window displays the progress and status of the replication cycles.

On the right side of each cycle, there is a detailed display button.
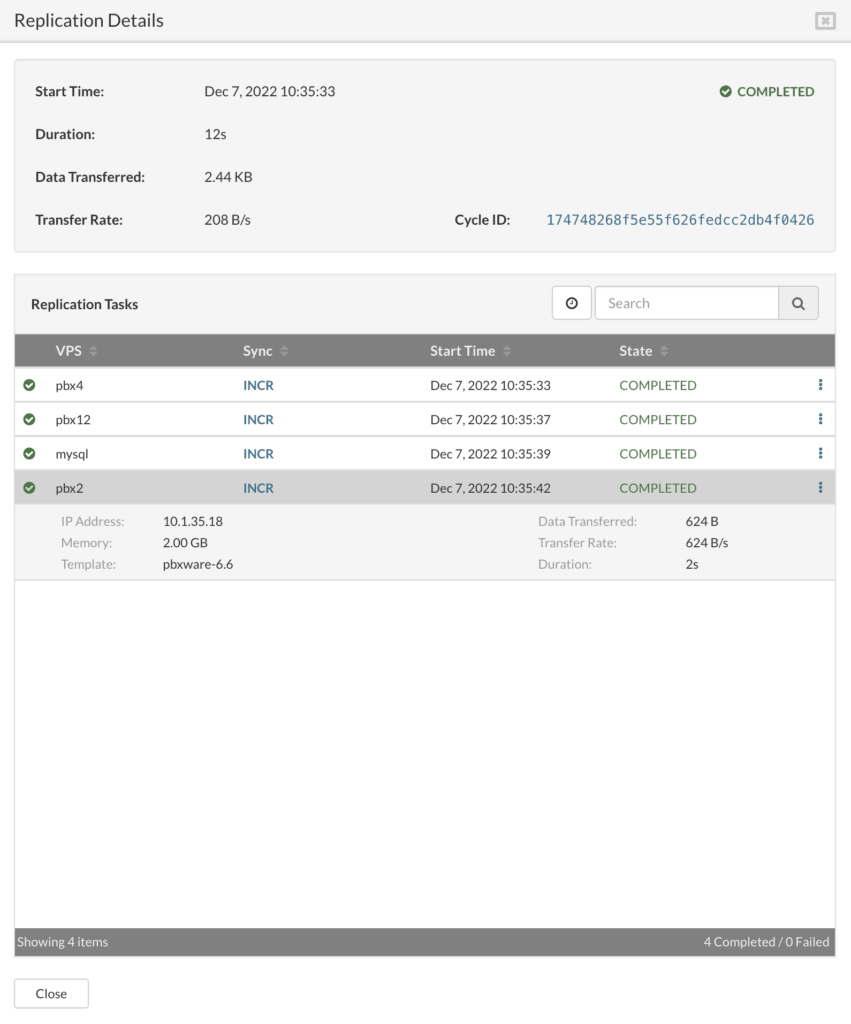
Once opened, the replication details will be displayed.