9. Virtual private servers (VPS)
Create a VPS
In order to provide a simple and quick way to create a new virtual server instance, SERVERware offers virtual server templates. A template is a base virtual server defined with a unique configuration and settings. A virtual server based on a particular template acquires the configurations and settings of the template.
Thus, templates are used to conveniently and efficiently create a set of identical virtual servers. By default, virtual servers created from templates use dynamic provisioning.
In the context of templates, dynamic provisioning means that all virtual machines based on a given template share the same base image as the template.
There are three types of templates in SERVERware:
- SERVICE
- SYSTEM
- OCI
Furthermore, all VPS are supported by two engines:
- LXC
- KVM (supported from SERVERware version 4.5.0 and above)
KVM stands for Kernel-based Virtual Machine and is based on Firecracker, an open source virtualization technology specifically designed for the creation and management of secure multi-tenant container services.
With KVM, each VPS has a fully emulated or virtualized machine to run its copy of the Linux kernel, offering better isolation at the cost of some additional performance. From a security standpoint, this is a much better approach for distributing resources across multiple services and their users.
SERVERware's KVM implementation can run unmodified Linux containers as VPSs, which can be either PBXware containers or Docker containers pulled as OCI images from Docker Hub and similar sources.
Furthermore, it is possible to package and distribute service software using open standards and tools.
Follow this procedure to create a new virtual server:
- In the Virtual Private Servers view, click the button Create VPS.
The dialog box Create VPS appears.
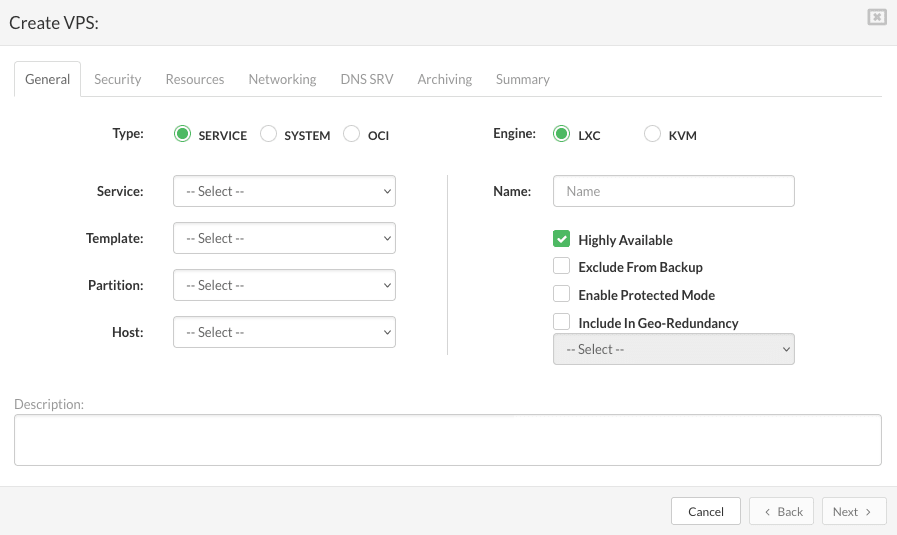
In the tab General, enter the information in the following fields:
- Type: the type of virtual server you want to create.
- Service: the service the VPS must provide. This field appears if you have chosen a VPS type that supports a particular service. Select the name of the service from the list.
- Template: the base version of the virtual server for the selected VPS type. Choose a template from the list.
- Partition: the partition to which the VPS belongs.
- Name: a descriptive name for the VPS.
- High availability: enable this option to allow the VPS to fail over to a storage host in the event of a failure.
- Exclude from backup: if this option is selected, the VPS will be excluded from backup operations.
- Enable protected mode: if this option is selected, only administrators will be able to manage the VPS (start, stop, restart).
- Include in Geo-redundancy: if this option is selected, a drop-down list of available replications will appear. You can select the replication from the drop-down list to add the created VPS to the replication cycle.
- Description: You can add a description to the VPS if needed.
Click the button Nextto access the tab Security/Security.
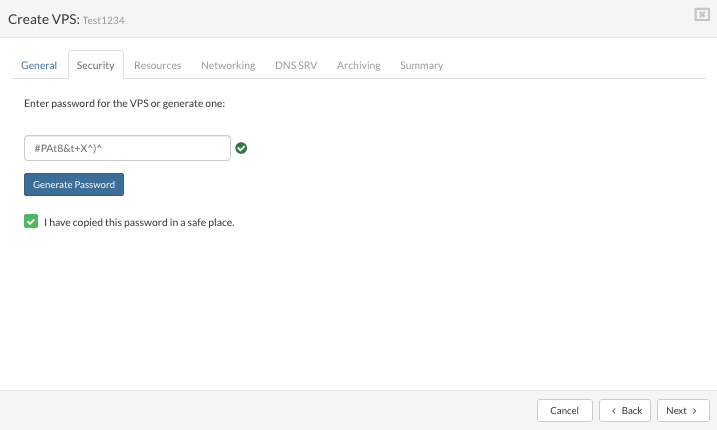
- Password: Manually enter the password (the existing password will not be displayed here).
- Generate a password: The server will automatically generate a new password.
- Security box: Check this box to confirm that the password has been copied to a safe place.
Click the button Nextto access the VPS resource configuration in the tab Resources.
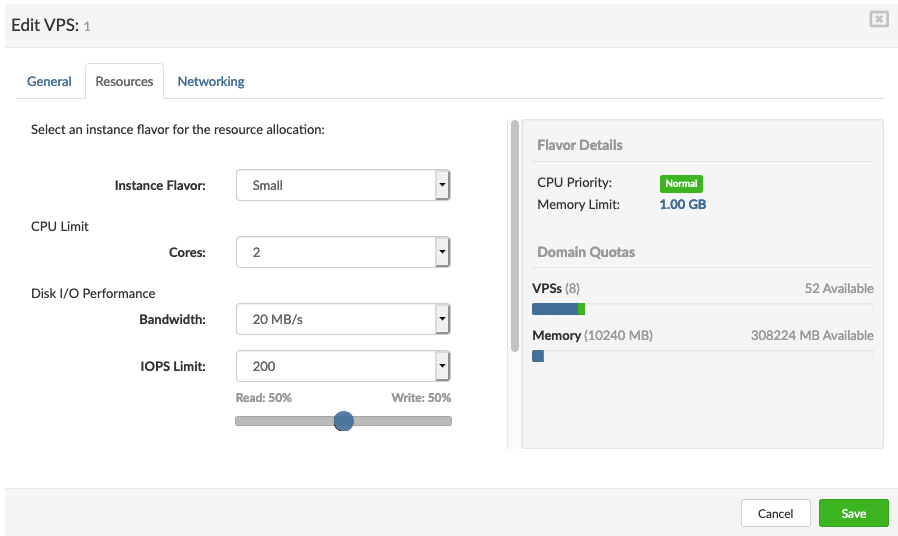
In the tab Resources, enter the details in the following fields:
- Instance flavor: Choose a resource configuration suited to the needs of your VPS from the versions available in the list. Each version offers a specific resource ratio.
- CPU: Limit the number of CPU cores allocated per VPS. You can choose from the following values: • 1 • 2 • 4 • 6 • 8 • 10 • 12 • 14 • 16 • 18 • 20 • 24 • 28 • 32 • Unlimited
The default values for the CPU limits are inherited from the selected resource version.
- Bandwidth: Limit the disk read/write bandwidth in MB/s.
- IOPS limit: Limit the number of IOPS (input/output operations per second) per VPS. The default value is 150, but you can choose from the following options: • 50 • 100 • 150 • 500 • 1,000 • Unlimited
The default values for the read/write IOPS limits are also inherited from the selected resource version.
- AstDB RAM Disk: Enter the size of the RAM disk for storing the Asterisk database. This option only concerns PBXware-based VPS and should only be configured if you encounter performance problems.
- RAM disk for call recordings: Enter the size of the RAM disk for storing call recordings. This feature is specific to PBXware.
Mount points:
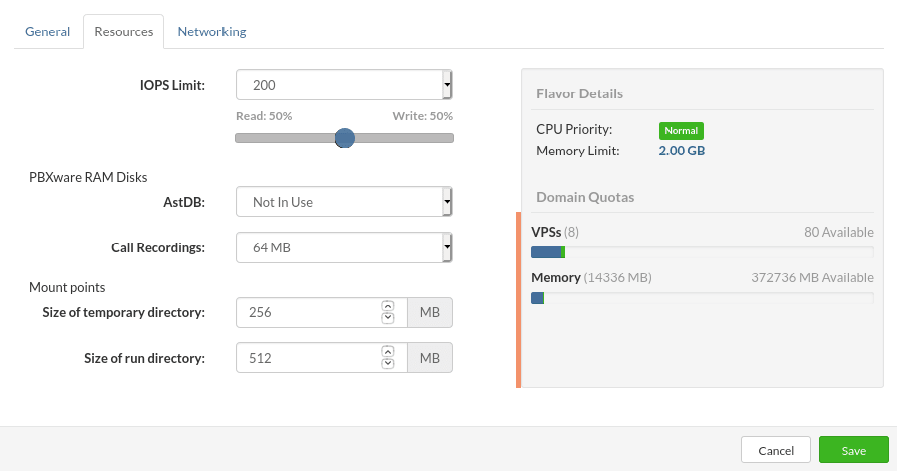
Allocation of the size of the folder mounted on /tmp for the VPS:
- Temporary directory size:
The default value for all VPSs is 256 MB.
The minimum value is 64 MB.
It is not recommended to allocate a temporary directory size greater than 50% of the RAM assigned to the VPS.
Allocation of the size of the folder mounted on /run for the VPS:
- Runtime directory size:
The default value for all VPSs is 128 MB.
The minimum value is 64 MB.
It is not recommended to allocate a run directory size greater than 25% of the RAM assigned to the VPS.
Click the button Next to configure the VPS network in the tab Networking.
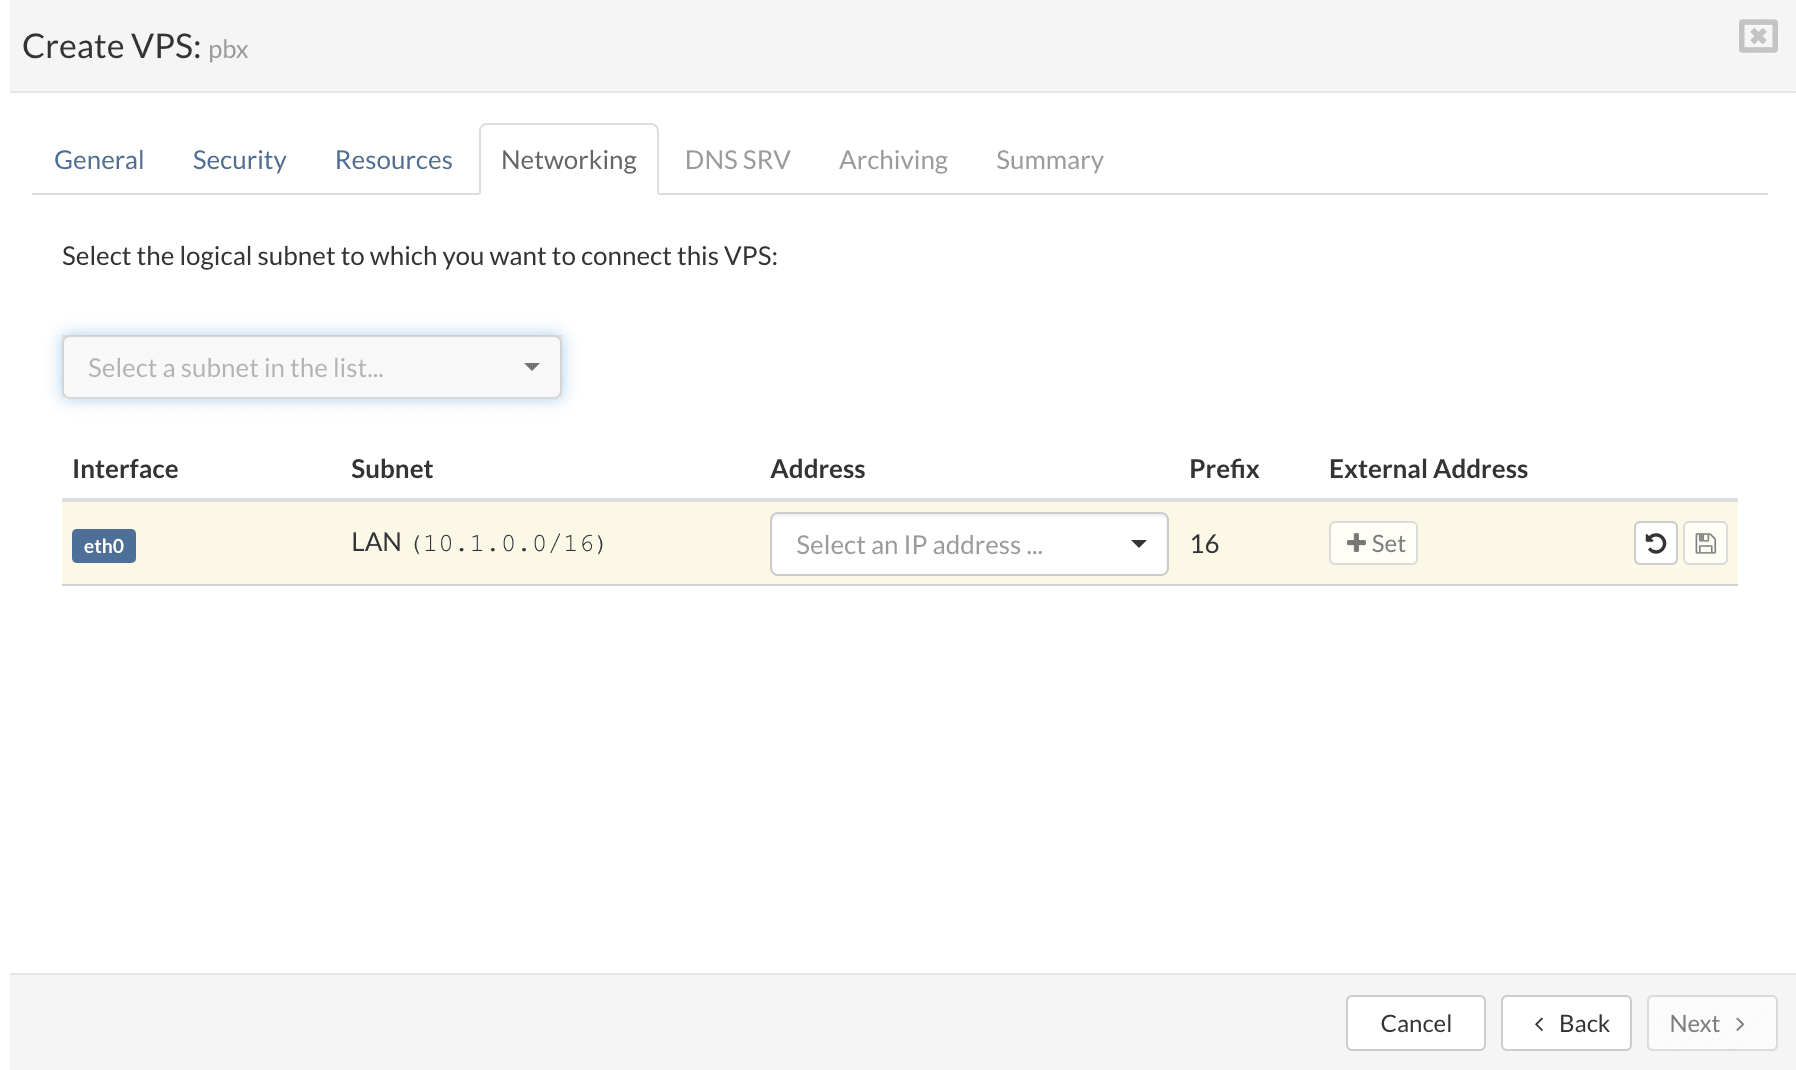
On the tab Networking, select the logical subnet to which you wish to connect the VPS.
Enter an IP address belonging to the selected logical subnet.
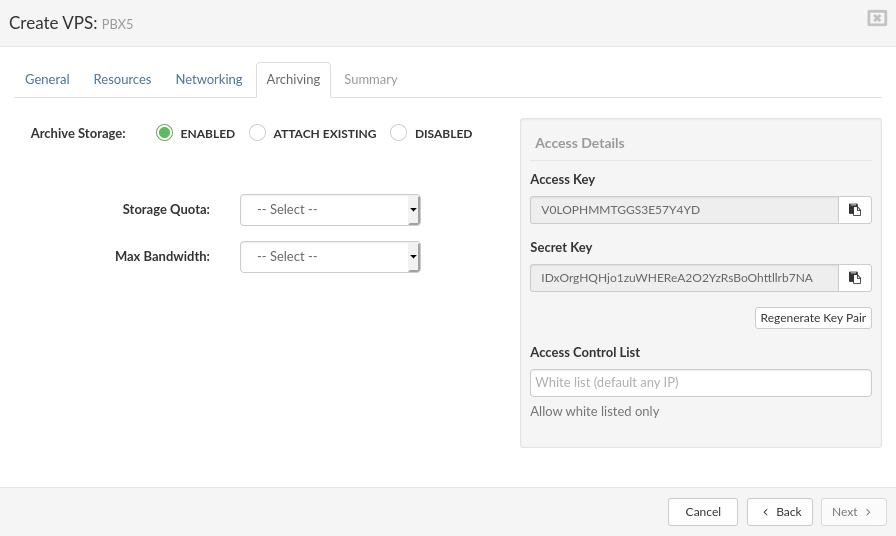
Click the button Next to display the tab Archiving (which will only be displayed if the archiving service is enabled on the partition).
Click the button Next to configure the DNS SRV + NAPTR records if this is configured.
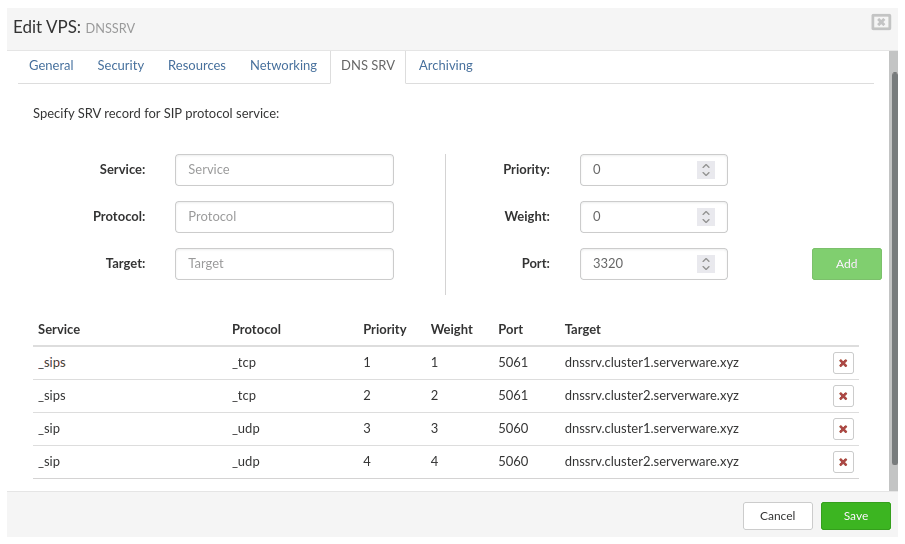
The DNS lookup routine begins by searching for SRV records. Proper use of SRV records allows the administrator to distribute a service across multiple hosts within a partition, to move the service from one host to another without interruption, and to designate certain hosts as primary and others as backup.
To configure the DNS SRV record on the PBXware VPS:
Fill in the fields with the required data and press Save.
- Service :
Symbolic name of the service. The service name is what the client accepts as a service (for the IP telephony service used, it is “_sip” or for TLS “_sips”). - Protocol :
Protocol used to access the service. SIP clients accept either “_tcp” or “_udp” depending on the client configuration. TLS will only work with “_tcp”. - Target :
Name of the partition associated with the resource record. In the partition name, we will enter the full path of our PBXware VPS, including the VPS name “vpsname.cluster1.serverware.xyz”. - Priority :
Service priority. Servers are ranked by priority, with lower priority numbers ranked before higher priority numbers. Set the priority to 0 if no priority ordering is desired. - Size :
Load balancing within the same priority. A higher weight number indicates that the server can handle more requests than a lower weight number. The probability of a server being ordered at the top of the list increases as the weight increases. Set the weight to 0 if load balancing is not desired. Otherwise, use non-zero values for all weights having the same priority. (An SRV record with a weight of 0 has a low probability of being ranked before an SRV record with a non-zero weight). - Port :
The port number assigned to the SIP service. This value would be “5060” or “5061” for TLS. Although it is preferable to use a single SRV record for each SIP server, some implementations may require multiple SRV records with a single service record for each resource name, because there are clients on “TCP” and others on “UDP” on the same service.
You can now save the configuration and start the VPS.
Create an OCI VPS
An OCI image makes it possible to deploy a container quickly. OCI is an open standard for containers, which was developed to ensure the portability of containerized applications. OCI images are a specification format for containers, which ensures that containers created according to this specification can run consistently on different OCI-compatible platforms, such as Docker and other containerization tools.
When creating a VPS from the OCI image, start by downloading the OCI image from the repository and adding it to the SERVERware templates.
- Go to the menu VPS and select Create VPS in the top menu.
- Create a new VPS, a pop-up window will appear. In the tab General select the radio button OCI to use OCI templates for the VPS.
- Select the OCI template from the drop-down list and continue creating the VPS like any other.
- Select the VPS engine (LXC or KVM) and continue creating the VPS in the same way as any other.
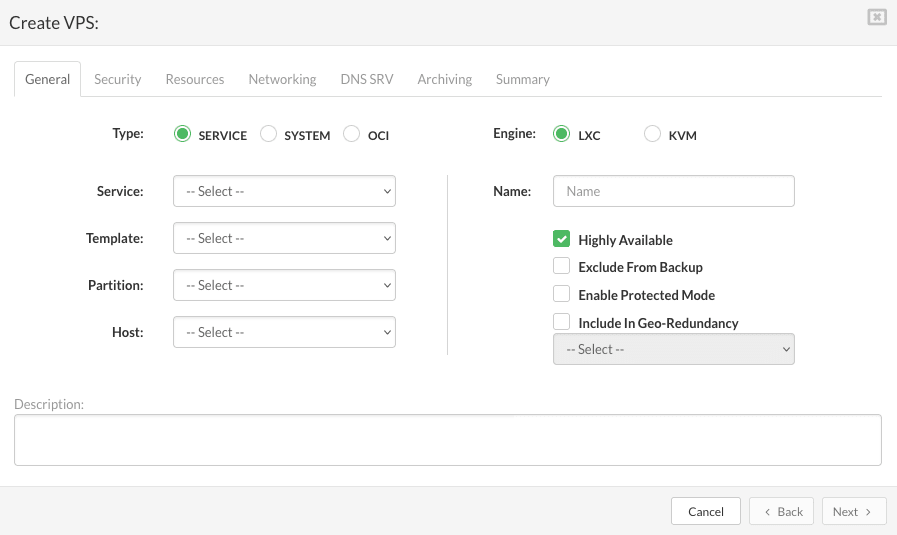
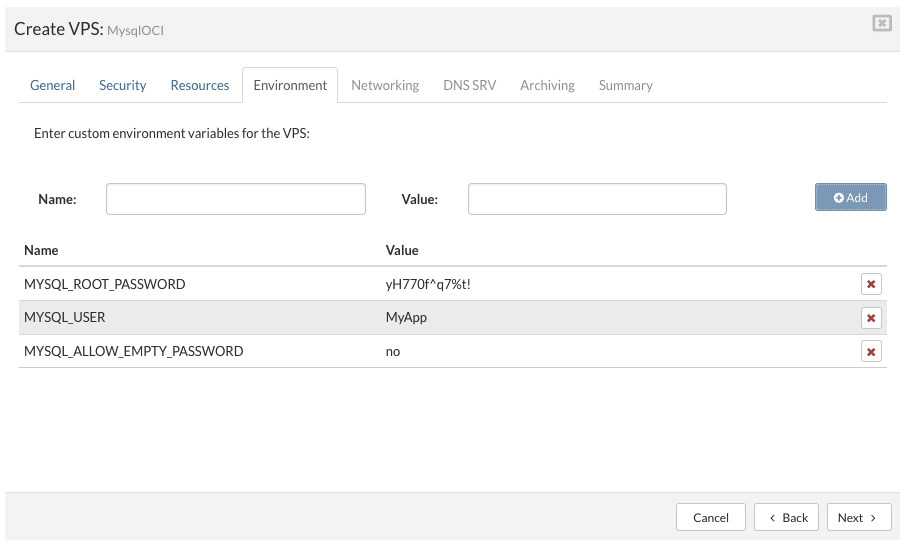
You will notice that a new tab Environment appears when OCI is selected as the source, for example for MySQL.
Start, stop, restart
Management actions such as starting, stopping, and restarting the VPS are performed directly on the virtual server using the dedicated buttons located at the top of the virtual server list.

Follow this procedure to trigger a VPS management action:
- In the "Virtual private servers“, select the VPS you wish to manage.
- If the VPS you want to manage is not visible in the list, perform a search.
- Depending on the action you want to perform, click on the “ buttonStart“, “Stop” or “Restart“.
- Monitor the VPS state change in the VPS view.
Owner
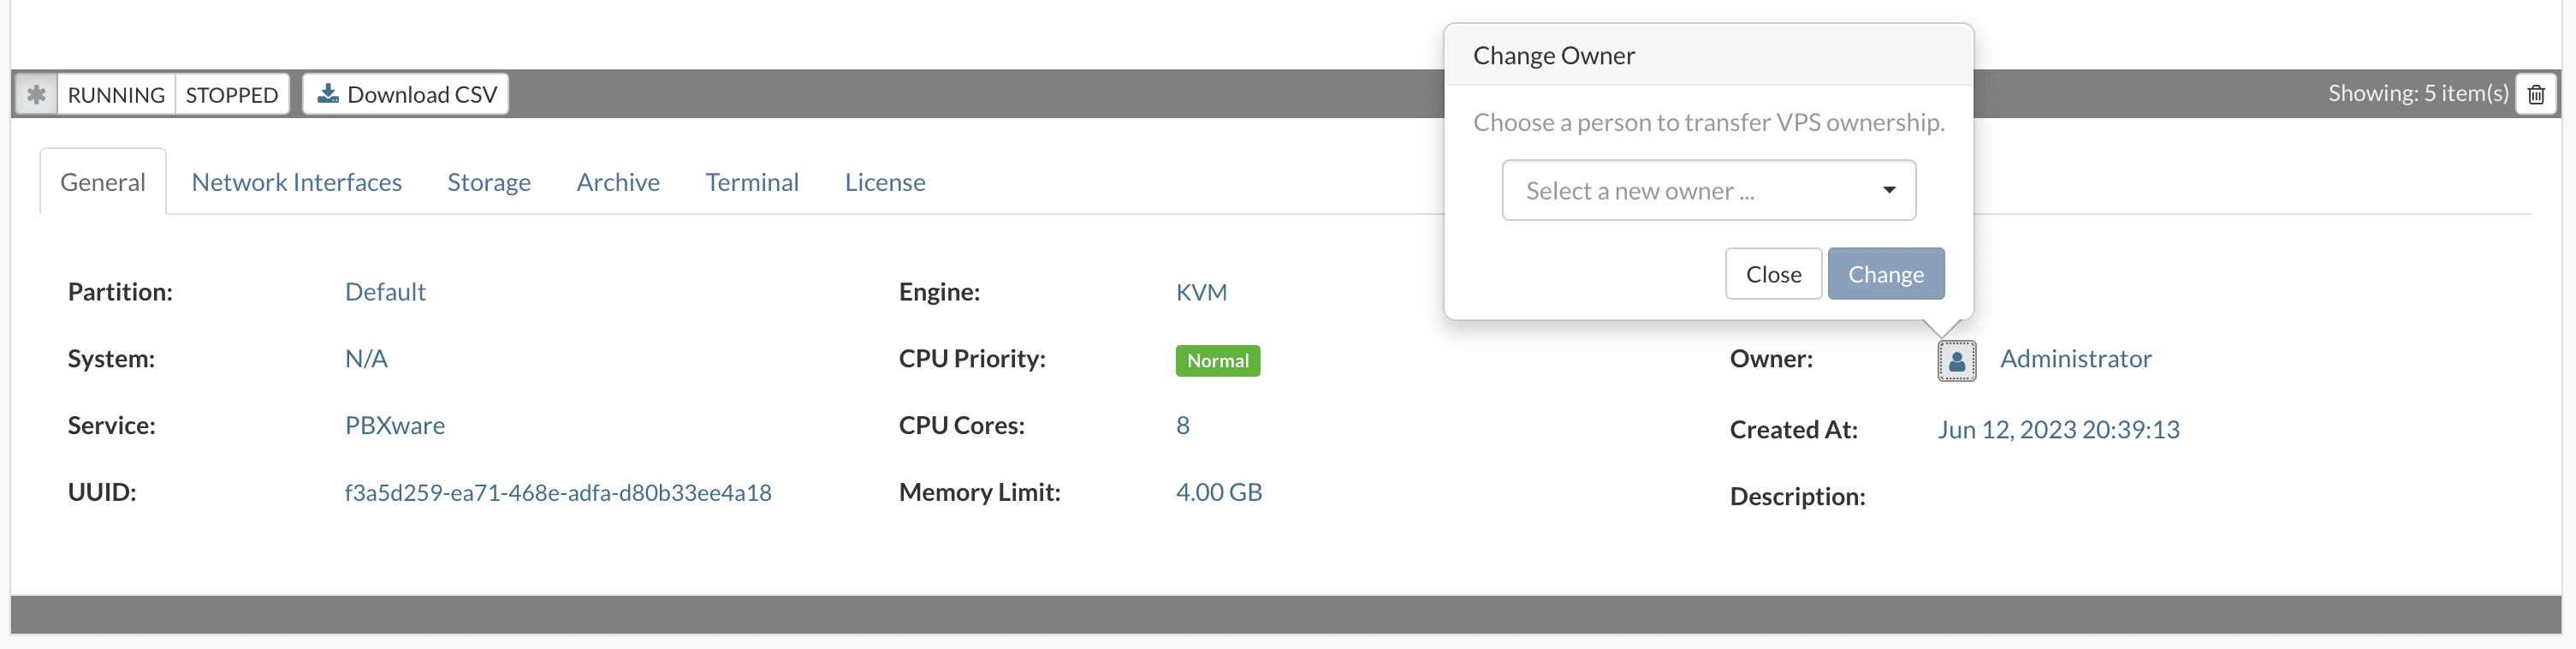
Follow this procedure to change the owner of a VPS:
- In the "Virtual private servers“, select the VPS for which you need to change the owner.
- If the VPS you want to modify is not visible in the list, perform a search.
- Click the button “Change owner“.
- The "Owner change” appears.
Select a new owner from the list and click the “Changer" to change the owner of the VPS.
Storage increase
Follow this procedure to increase VPS storage space:
- In the "Virtual private servers“, select the VPS for which you need to increase the storage space.
- If the VPS you want to modify is not visible in the list, perform a search.
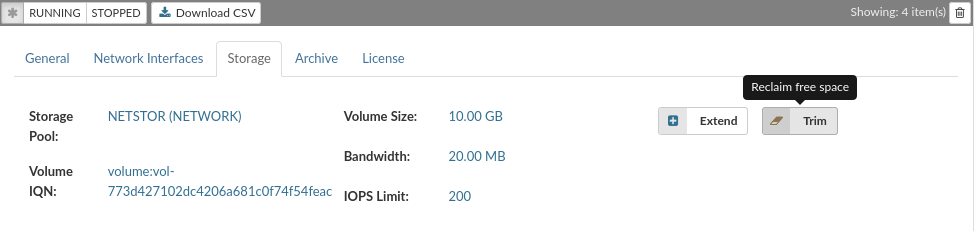
Select “Storage” and click the “Expand the volume“
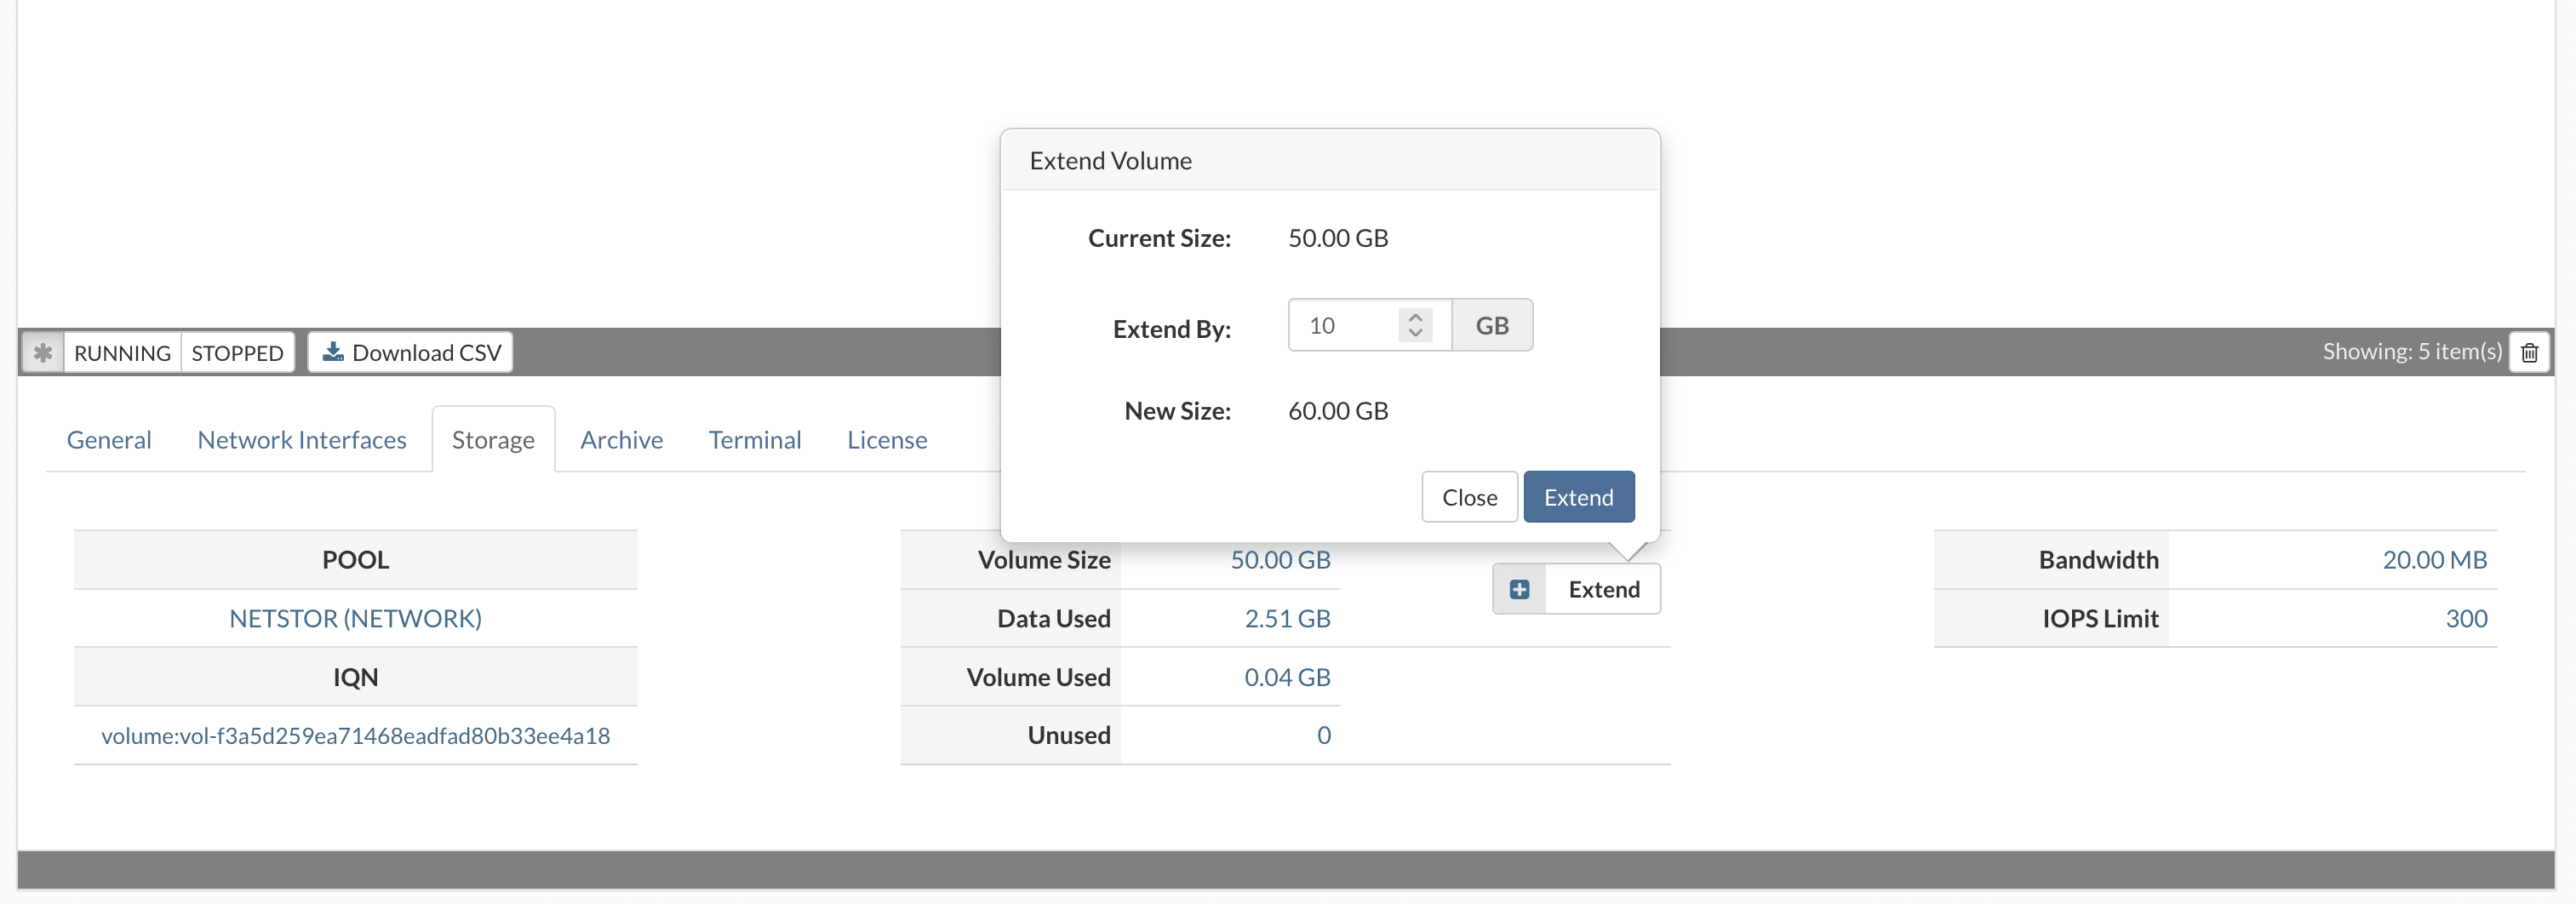
The "Expand the volume” appears. Select the desired storage space increase amount and click the “Expand” to increase the storage.
Opening the terminal
TTY is a passwordless VPS CLI access from the SERVERware graphical interface. In case of incorrect SSH configuration, custom templates without an SSH client, or for any other reason, SSH may be unreachable. The TTY session will provide easy access for troubleshooting. It is SERVERware's internal service, so it does not depend on the state of the services in the VPS.
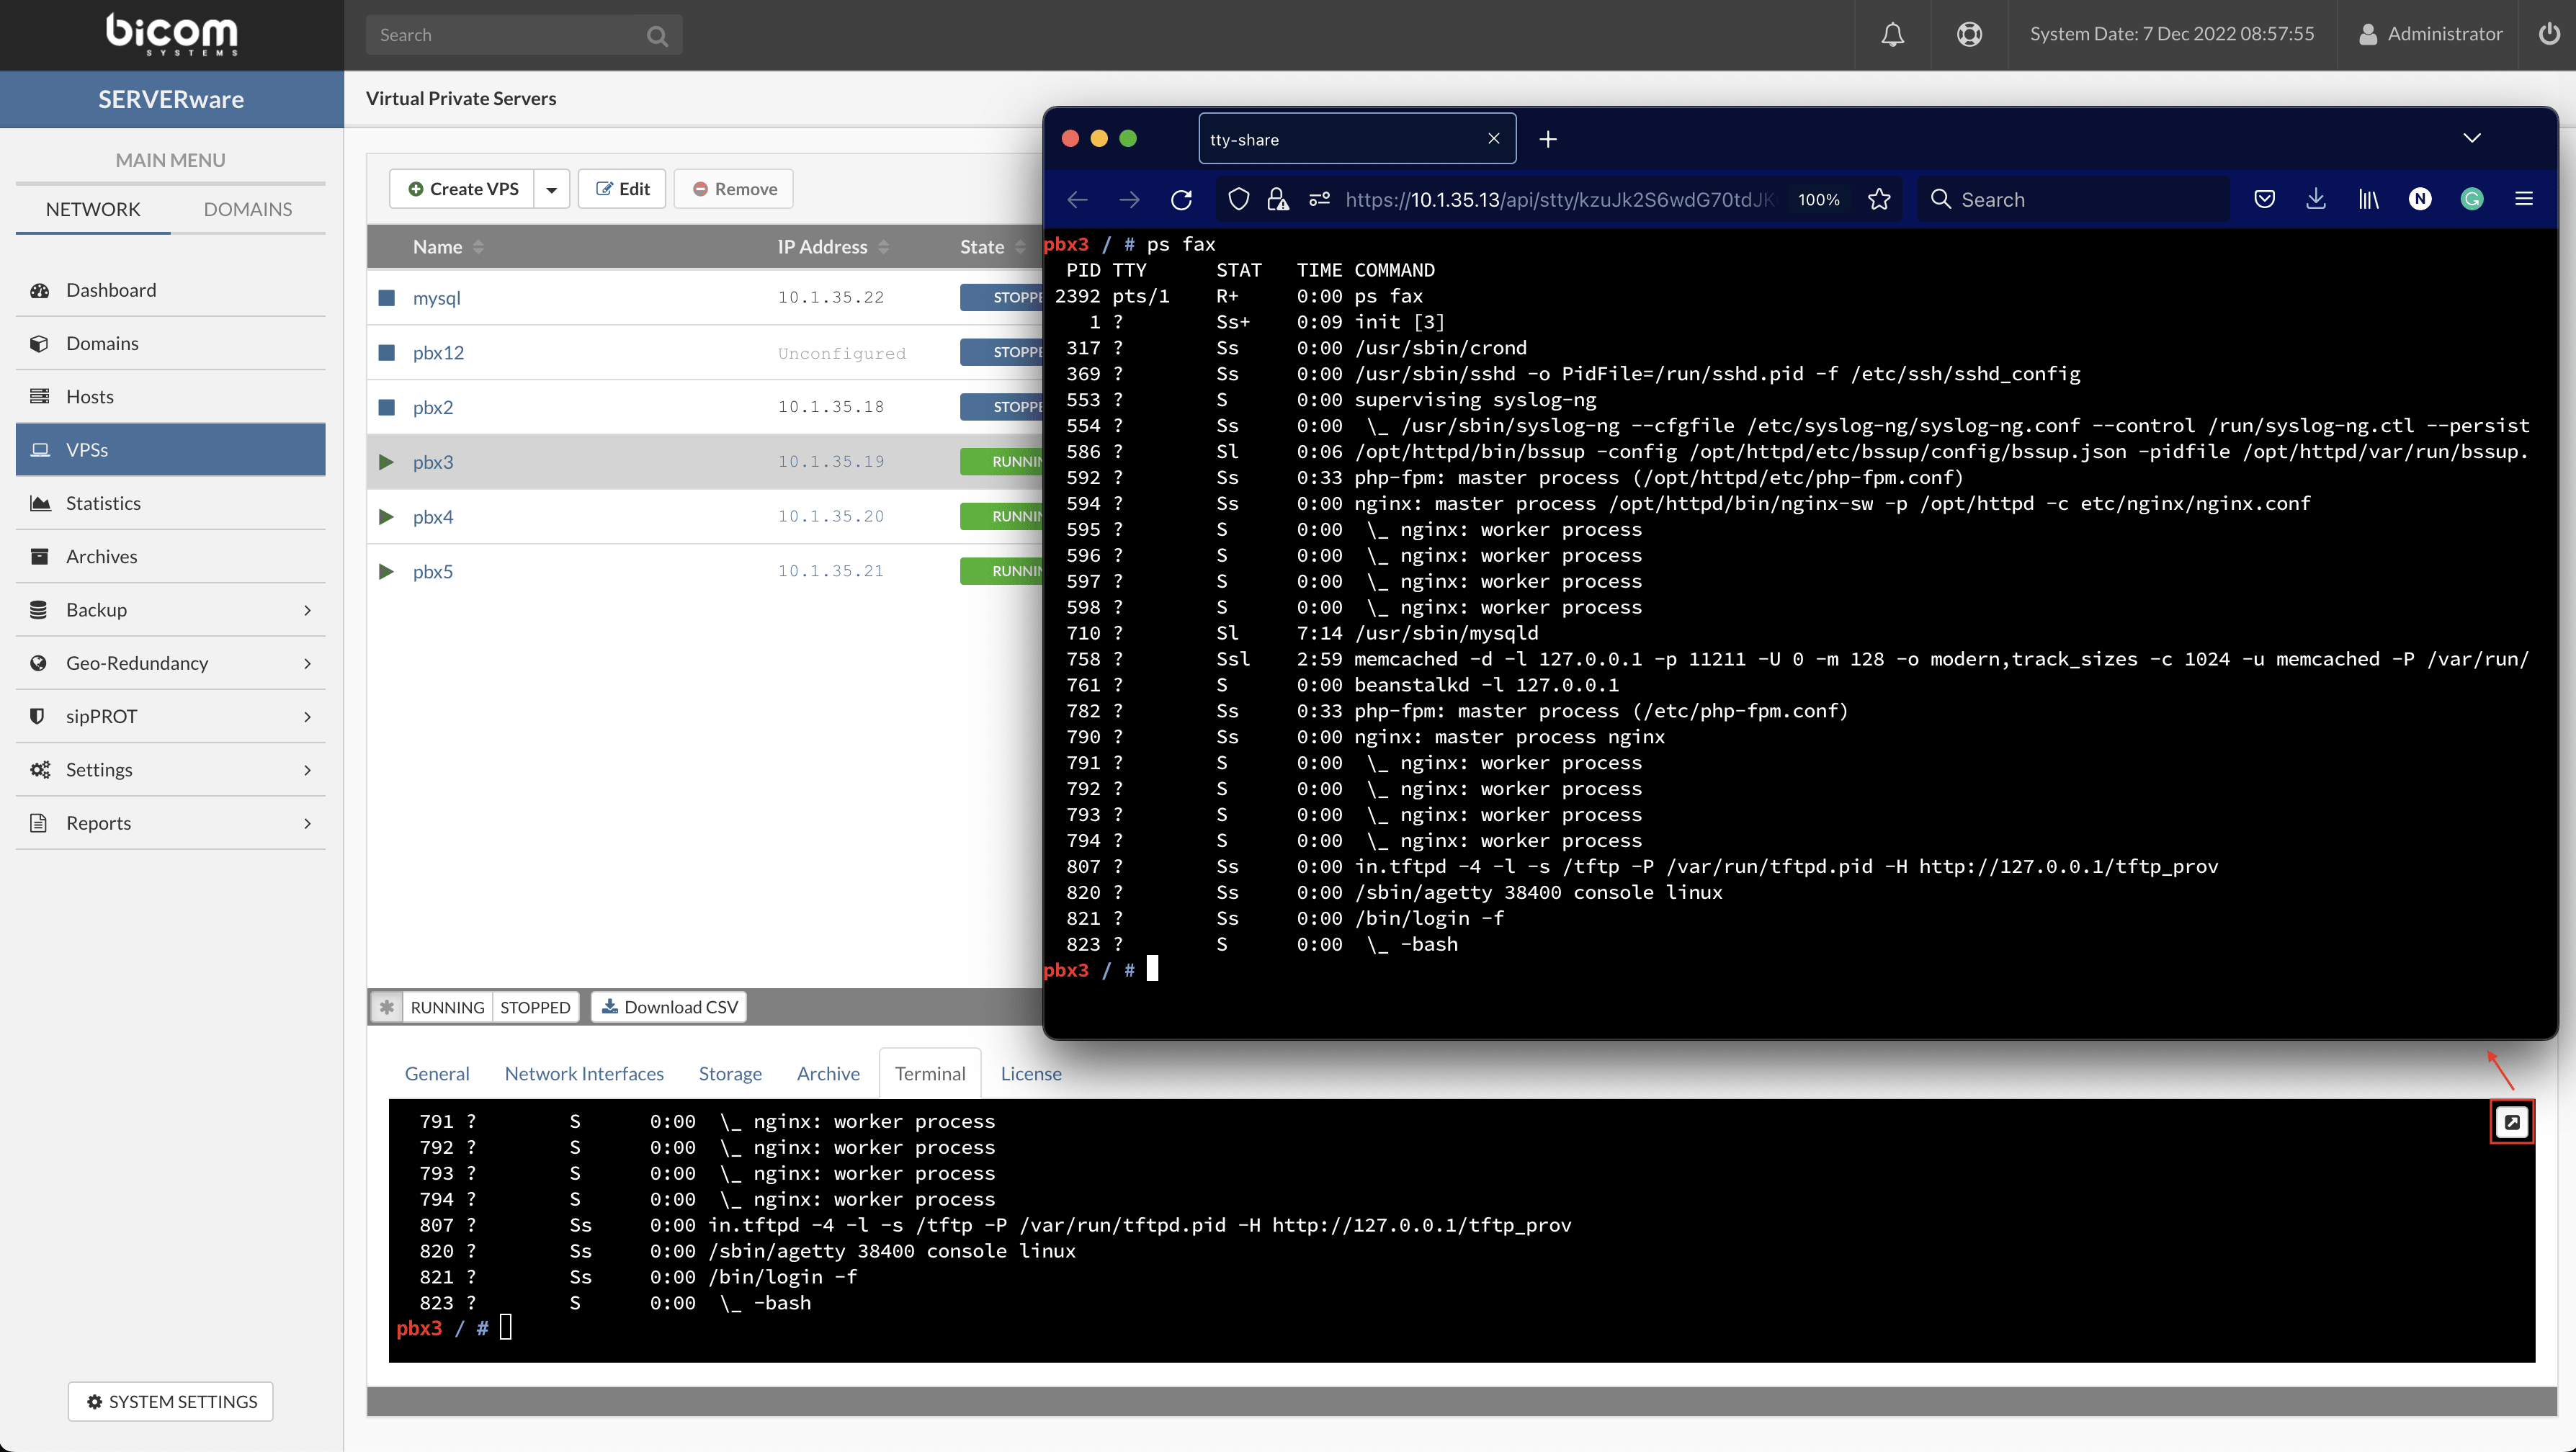
You can open several TTY sessions on a single VPS and one TTY session for any VPS from the SERVERware graphical interface.
Closing the browser tab will not end a session. This feature is enabled only for SERVERware administrators, not for partition administrators or VPS owners. The links (URLs) to the sessions are not shareable.
The TTY session will work even if the VPS network interface is not set. Shutting down the VPS will close all of the VPS's TTY sessions. The TTY session timeout is 30 minutes of inactivity.
Moving VPSs
A stopped VPS can be moved to any processing host within the SERVERware network. This is especially useful if the load on a particular host is too high and is essential before shutting down a server for maintenance. Live VPS migration is not yet supported. Additionally, when the VPS is stopped, it is possible to move a VPS to another partition.
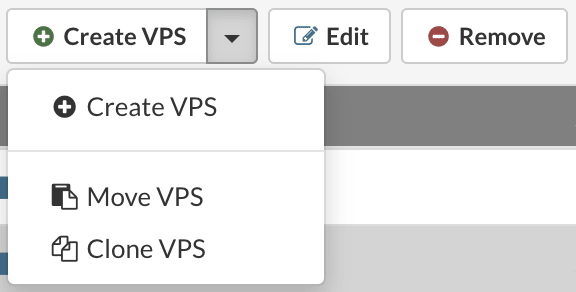
Follow this procedure to move a VPS to another host:
- In the "Virtual private servers“, select the VPS you wish to move.
- If the VPS you want to move is not visible in the list, perform a search.
- Click the button “Move a VPS“.
- The "Move a VPS” appears.
- Select “Host change” as the move type.
- Select a destination host from the list and click the “Move” to start the move operation.
Monitor the progress of tasks in the VPS view. The "Host” must display a new hostname for the moved VPS.
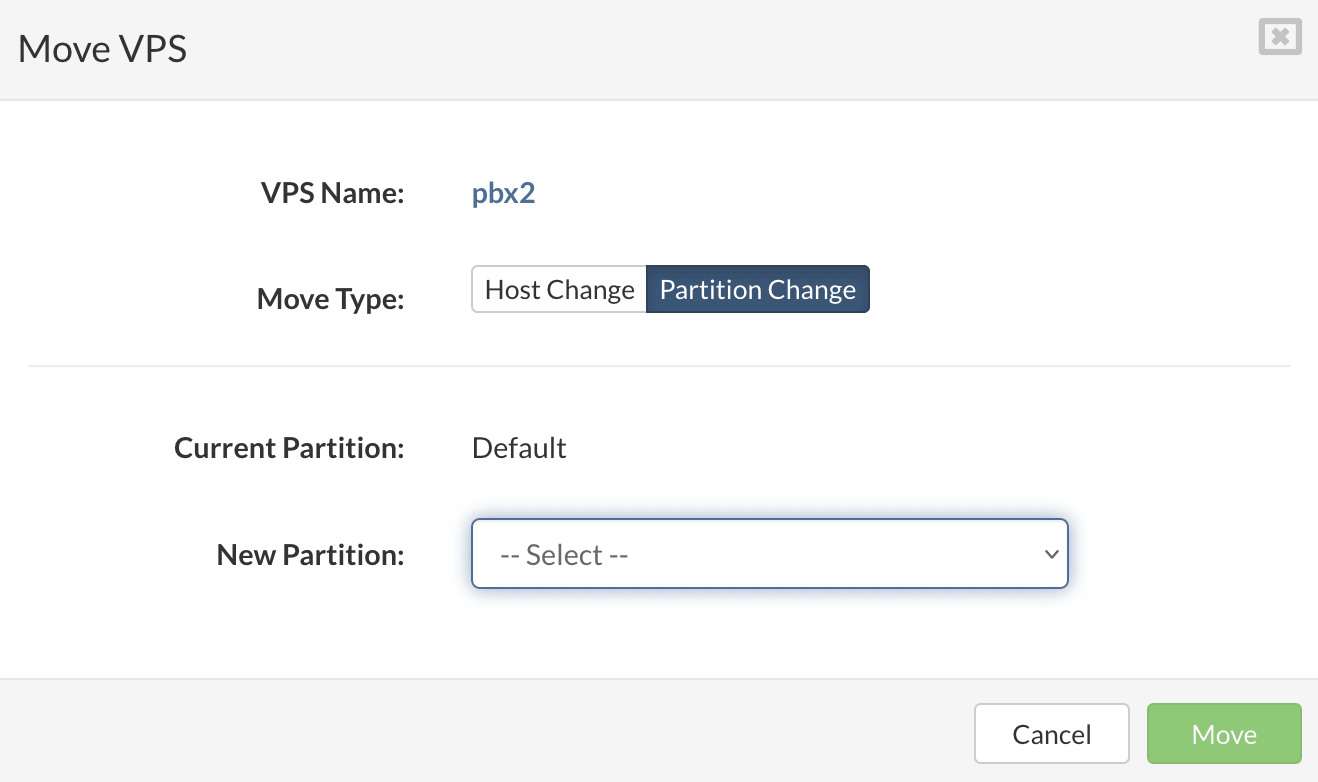
Follow this procedure to move a VPS to another partition:
- In the "Virtual private servers“, select the VPS you wish to move.
- If the VPS you want to move is not visible in the list, perform a search.
- Click the button “Move a VPS“.
- The "Move a VPS” appears.
- Select “Partition change” as the move type.
- Select a new partition from the list and click the “Move” to start the move operation.
Monitor the progress of tasks in the VPS view. The partition should display a new name for the moved VPS.
Cloning
In SERVERware, a VPS can be cloned, whether the VPS is stopped or still running. This is particularly useful for creating multiple instances of already configured and running VPS.
In SERVERware, a VPS can be cloned, whether it is stopped or running. This is particularly useful for creating multiple instances of already configured and running VPS.
Follow this procedure to clone a VPS:
- In the "Virtual private servers“, select the VPS you wish to clone.
- If the VPS you want to clone is not visible in the list, perform a search.
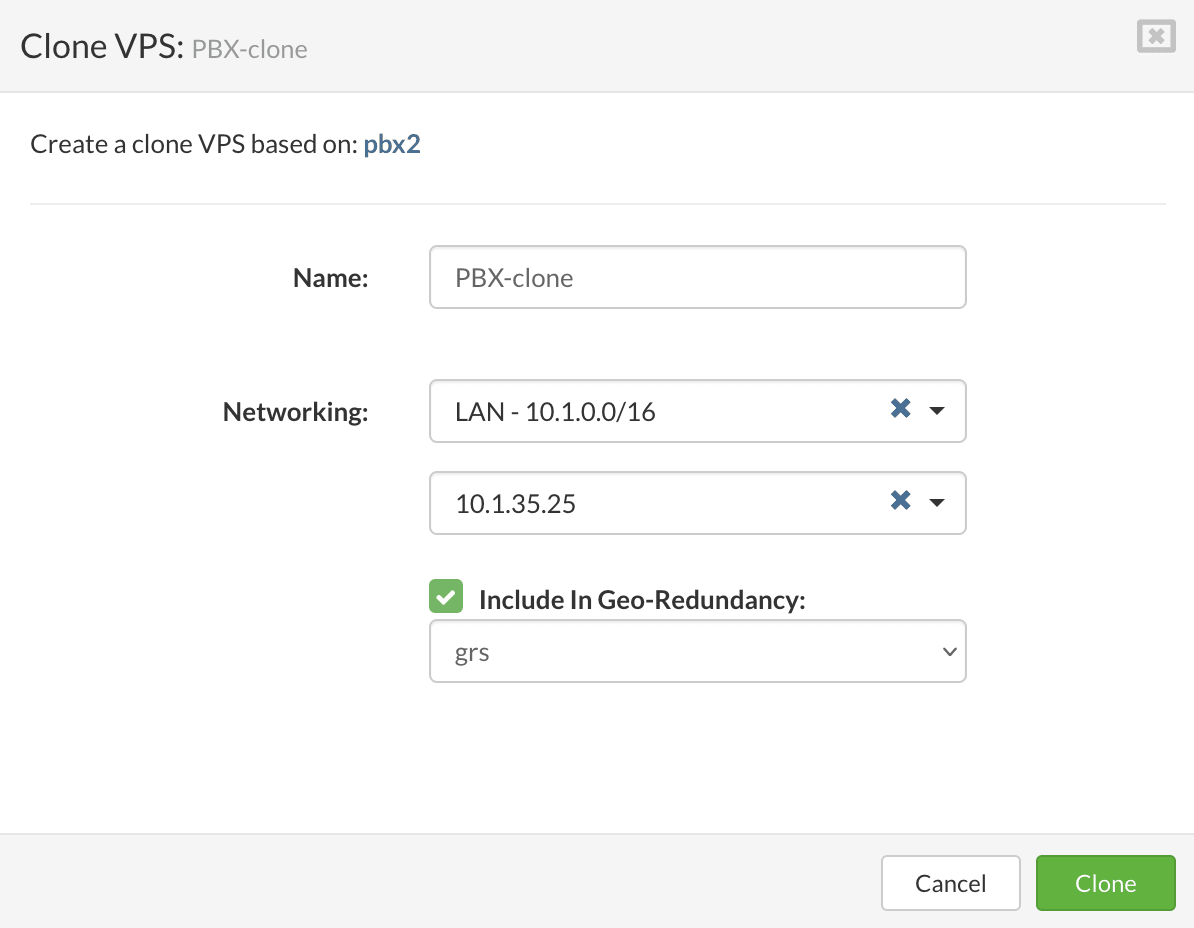
- Click the button “Clone a VPS“. A “Clone a VPS” appears.