Communicator Desktop

Nowadays, as VoIP technology is developing more than ever to obtain the best possible quality of long-distance communication and reduce the costs of telecommunication services, it is necessary to create simpler and more user-friendly communication tools, especially on mobile
Communicator Web represents one of the solutions to these needs.
Introduction
Communicator is a unified communications solution that integrates multiple communication tools into a single, user-friendly interface. With Communicator, you can manage your calls, instant messages, online meetings, and much more, all from a single place.
Main features
- Voice calls : Make and receive voice calls directly from the Communicator app. You can also transfer calls, put calls on hold, and access your call history.
- Instant messaging : Communicate with your colleagues through real-time instant messages. Communicator supports one-on-one and group conversations, allowing you to collaborate efficiently.
- Video conferencing : Host virtual meetings using Communicator’s video conferencing feature. Invite participants, share screens, and collaborate in real time, wherever you are.
- Address book integration : Easily access your business contacts thanks to the address book integration in Communicator. You can search for and call contacts directly from the application.
- Presence status : Indicate your availability to other users through Communicator's presence status. You can set statuses such as “Available”, “Busy” or “Away” to inform your colleagues of your availability.
Installation
Go to the Communicator downloads page and download the latest version of the software from this link
Once the download is complete, click the downloaded file to start the installer.
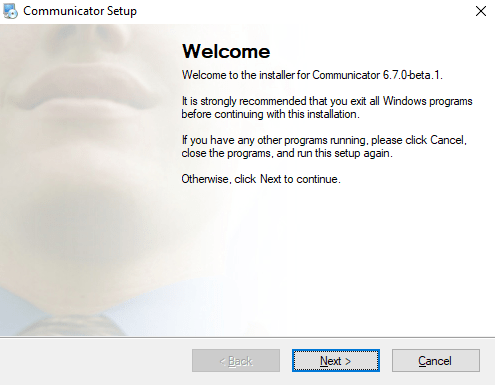
The welcome window starts the installation procedure. Click the button Next to continue.
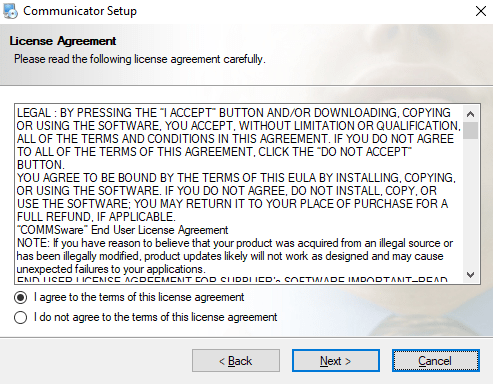
Read the license agreement and select the first checkbox I agree to the terms of this licence agreement if you accept the license agreement. Click the button Next to continue the installation.
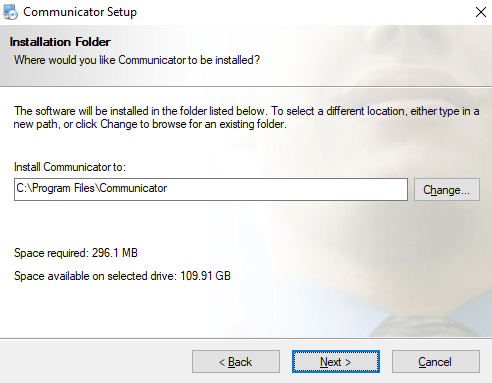
The window Installation folder defines the default installation location of Communicator.
By default, C:\Program Files\Communicator is set. To select another location, click the button Change.
When you are finished, click the Next button to continue the installation or click the Cancel button to exit the installation wizard.
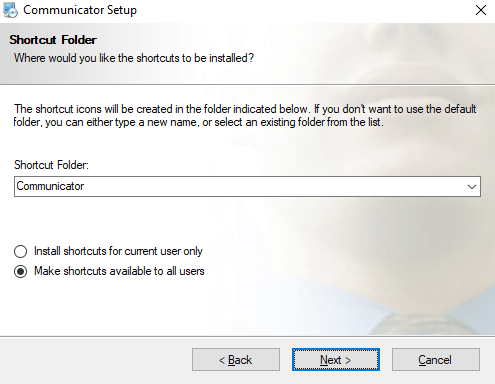
The Shortcut Folder window defines how the Communicator shortcut will be displayed in the Windows Start menu.
Select the desired shortcut in the selection box and click the Next button to continue the installation, or click the Cancel button to exit the installation wizard.
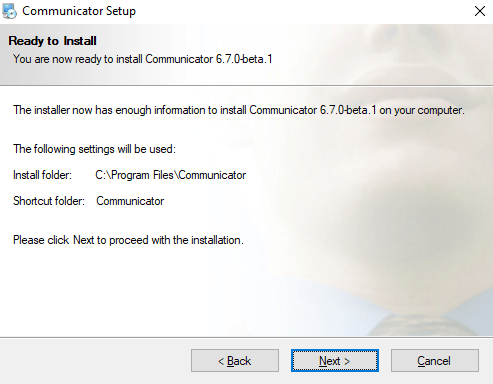
The Ready to Install window summarizes the steps of the installation wizard and displays all the selected options. If you agree with these options, click the Next button to continue the installation or click the Cancel button to exit the installation wizard.
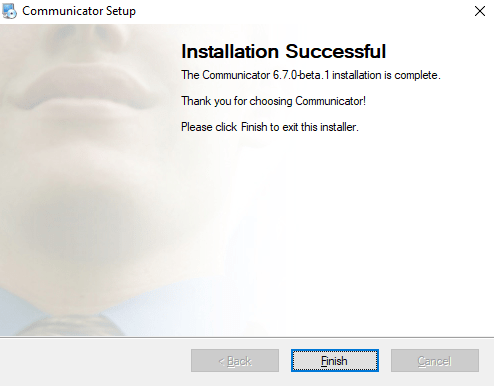
After this step, the Installation successful window is displayed. Click the Finish button to close the window and complete the installation.
Installation as an MSI package
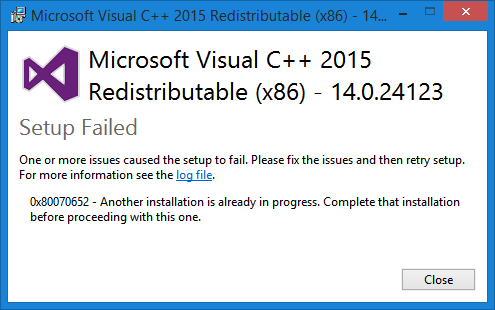
In order to install Communicator from an MSI package, the following prerequisites must be installed before the MSI package:
▸ Microsoft Visual C++ 2015 Redistributable (X86)
▸ Microsoft .NET Framework 4 (or newer)
In addition, if Visual C++ is not installed, users may get installation errors.
Configure Communicator
Once the installation is complete, you will need to configure Communicator.
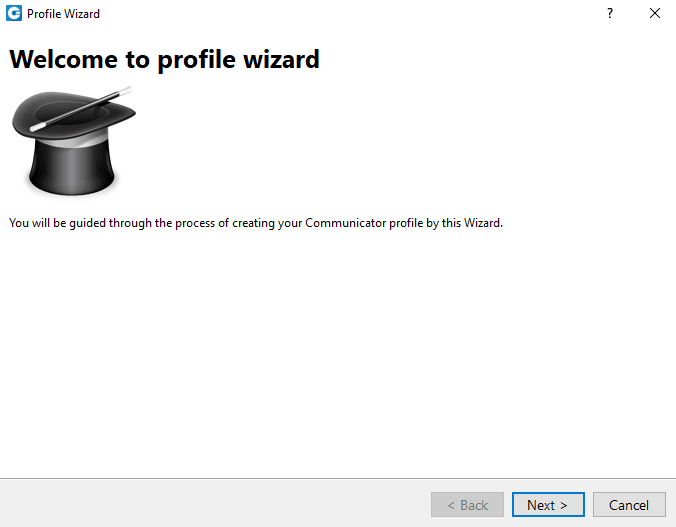
Click the Communicator icon to open the application and the profile wizard will appear. To continue the configuration, click the button Next.
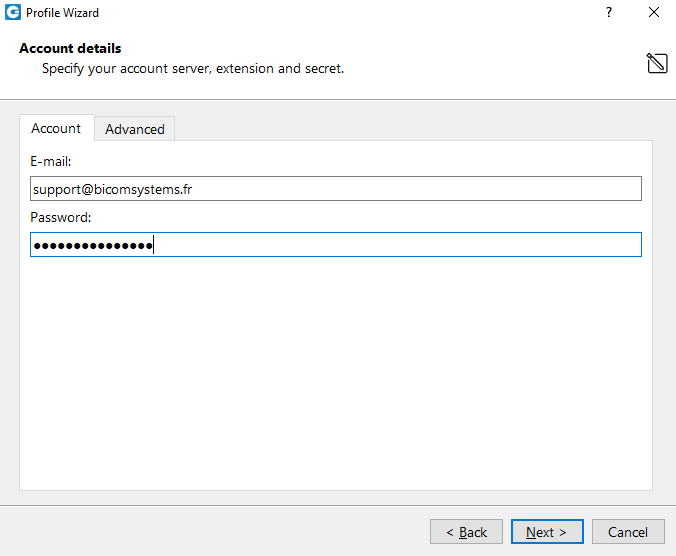
Account details
Make sure you have received your account details from your system administrator or your account manager, which are:
- User password
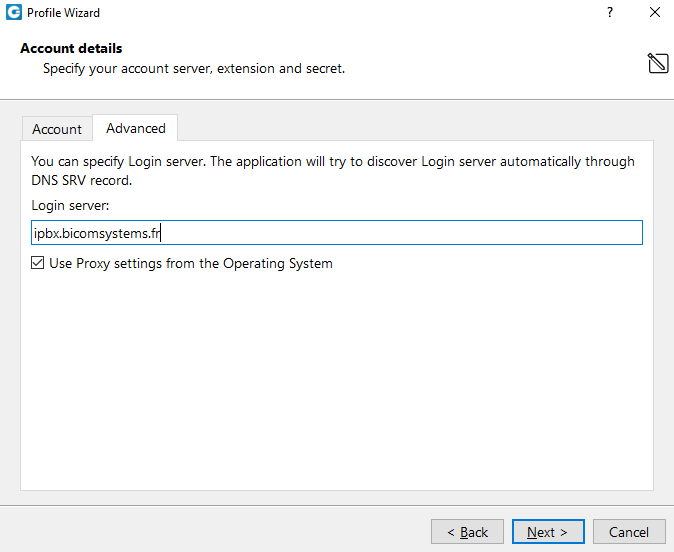
Advanced
In the case of the DNS domain, the application will perform a DNS SRV lookup and try to connect to each server obtained by the application according to their priorities. In the case of the server address, the application will try to connect directly to the given address.
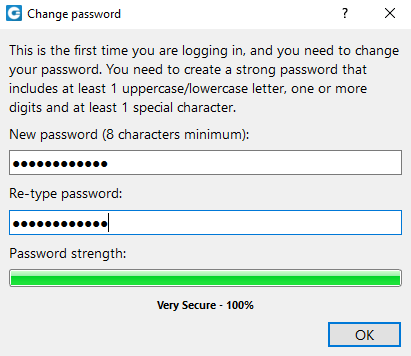
After clicking on Next, Communicator will try to connect to the specified server with the user's account details. If the account details are incorrect, a red warning will appear.
Otherwise, a password change window will be displayed asking you to change your password since it is the first time you are logging in.
Your password must be at least 8 characters long. On your first login, you will need to change this password, and once changed, it will be encrypted and unknown to all system administrators.
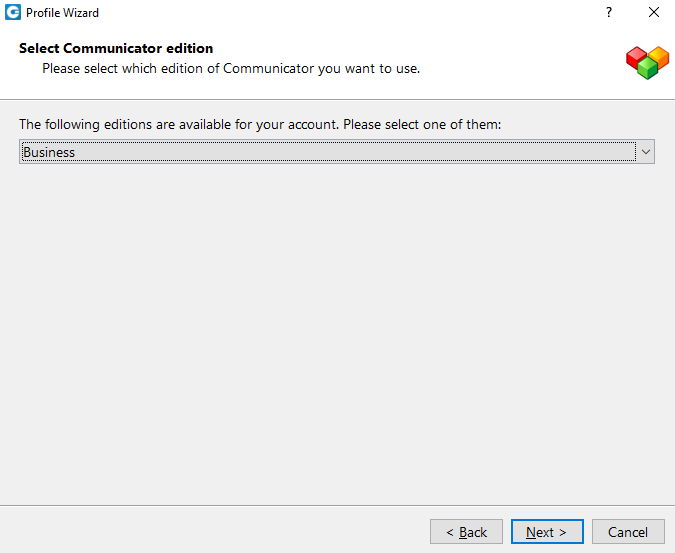
Choice of edition
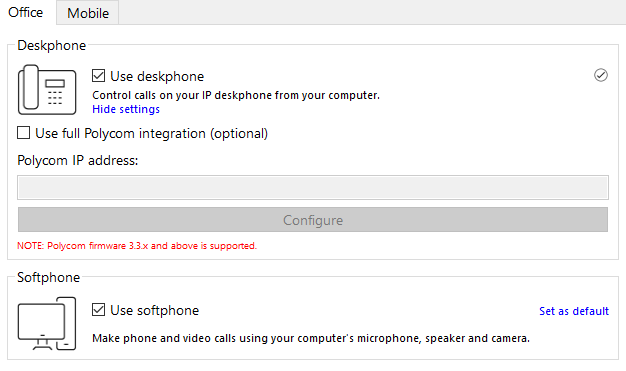
Phone/softphone configuration
- If you choose the softphone, you will be able to make and receive calls from your computer.
- If you choose the desk phone, you will be able to control calls on your IP desk phone from your computer.
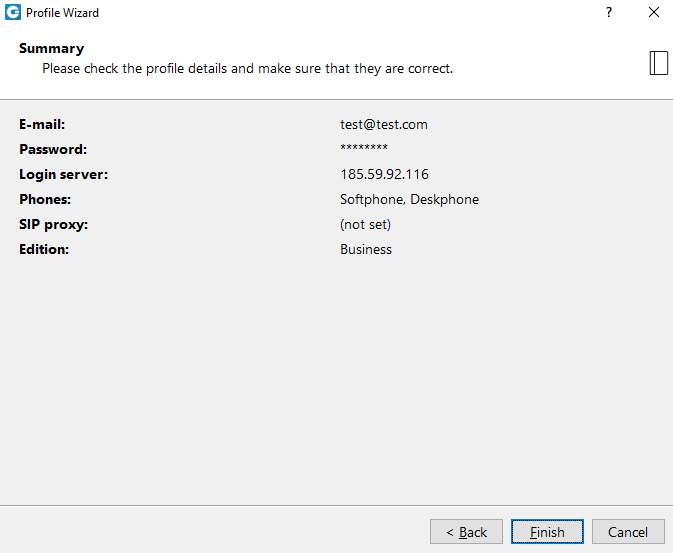
Click on Nextand a configuration summary window is displayed. Please check the profile details and make sure they are correct.
Click on Finishand you will be automatically logged in with your account.
You are now ready to use Communicator with all its features.
Phone
Standard call
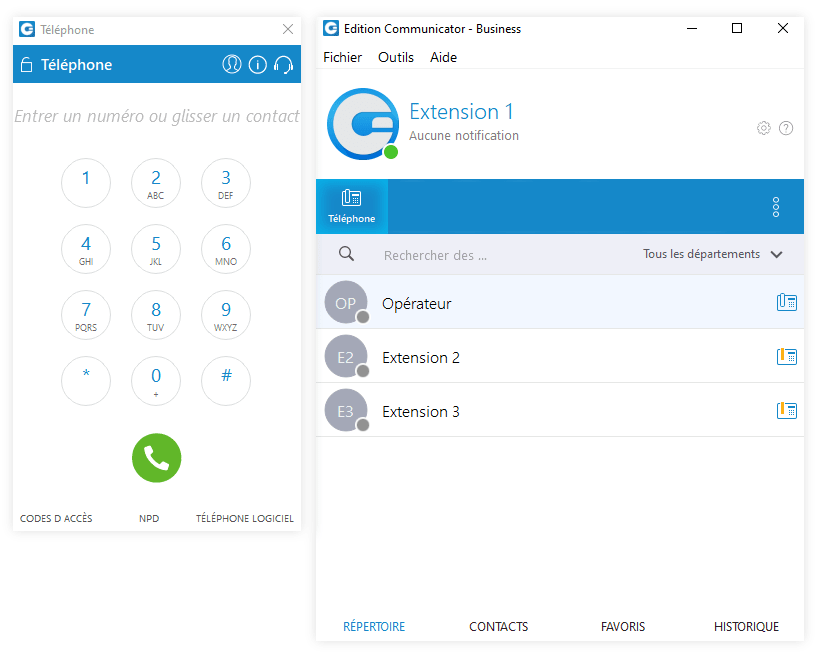
- Open the call window by clicking the button Phoneof the toolbar
- Dial the phone number
Use the phone module's keypad or the keys on your keyboard to enter the phone number you want to dial.
Click the call button to place a call.
Drag-and-drop call
With your mouse, click on any contact in the contact list and hold it down, then drag the selected contact from the list to the phone module area, and release the contact.
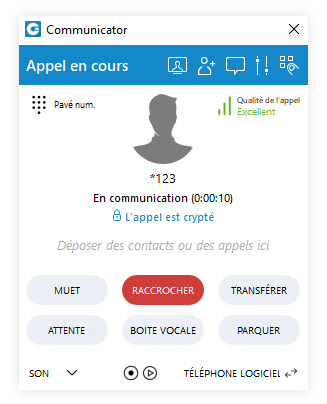
Call in progress
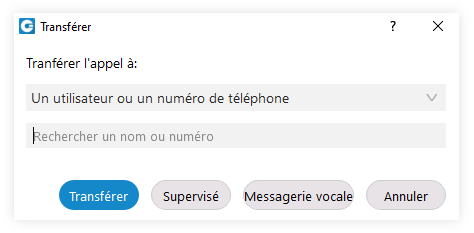
Transfer options:
- Blind transfer: Type a number (for example, a mobile phone) and transfer the call to that number.
- Transfer to another call in progress : If a user has two or more active calls, they can transfer the calls from one to another.
- Drag-and-drop transfer: During an ongoing call, the user can transfer the call by dropping it onto the desired contact in the contact list.
Conference
- The plus sign allows you to invite a contact using their landline or mobile phone number.
- Select a box to choose a conference room.
- The area of the Voice Conference module where the contact is displayed after a drag and drop.
- To remove a contact from a list, click the cross.
- Click the Start button to launch the voice conference.
- Click Close to close the voice conference.
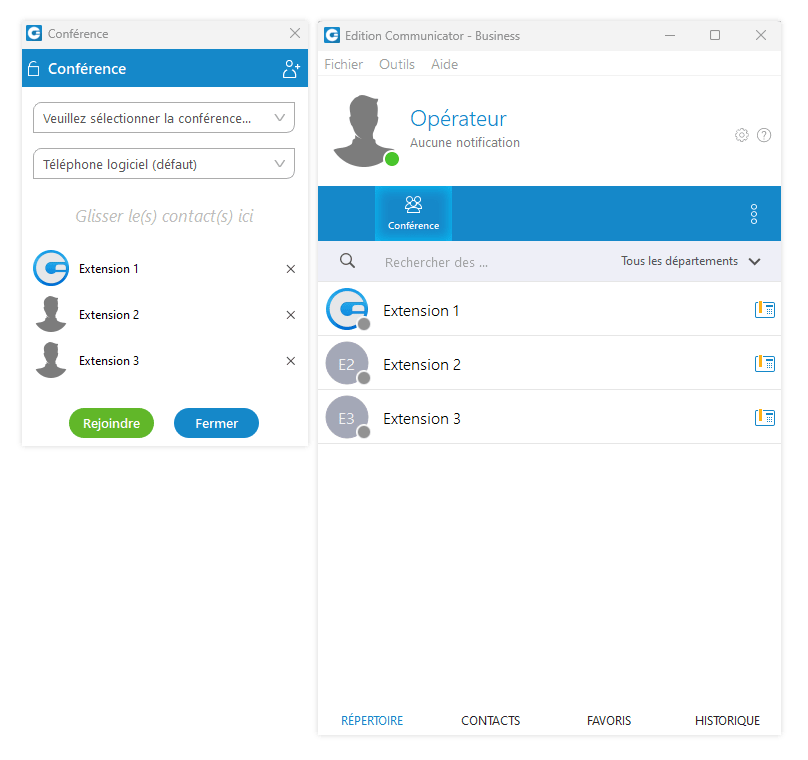
A conference can be created from the drop-down list and instant and predefined conferences can be selected.
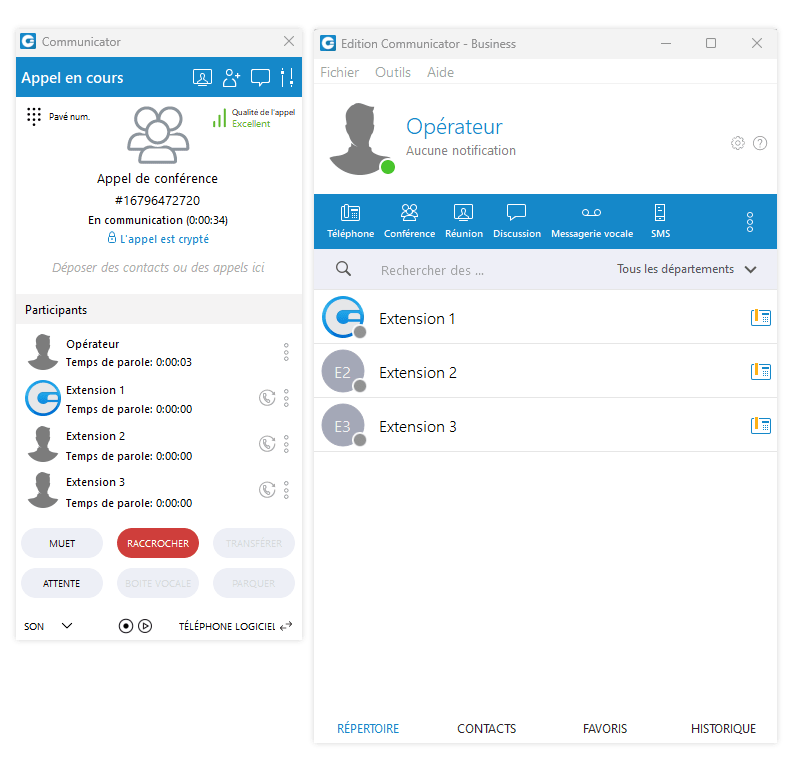
- Instant conferences: the user can create a conference by adding one or more people to an ongoing call. With this option, you can add extensions or any number available in your contact list. If you missed the conference call, you can still join the conference from the Call History tab provided a conference still exists.
There are two ways to proceed: double-click the conference number, or right-click the conference number and then choose call or call with.
- Predefined conferences: users can join predefined conference rooms and add other participants.
Meetings
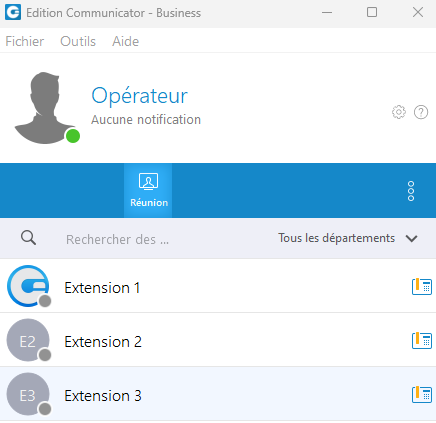
“Meetings” is a Communicator module that allows you to start video meetings without having to switch applications and to keep all your Communicator contacts.
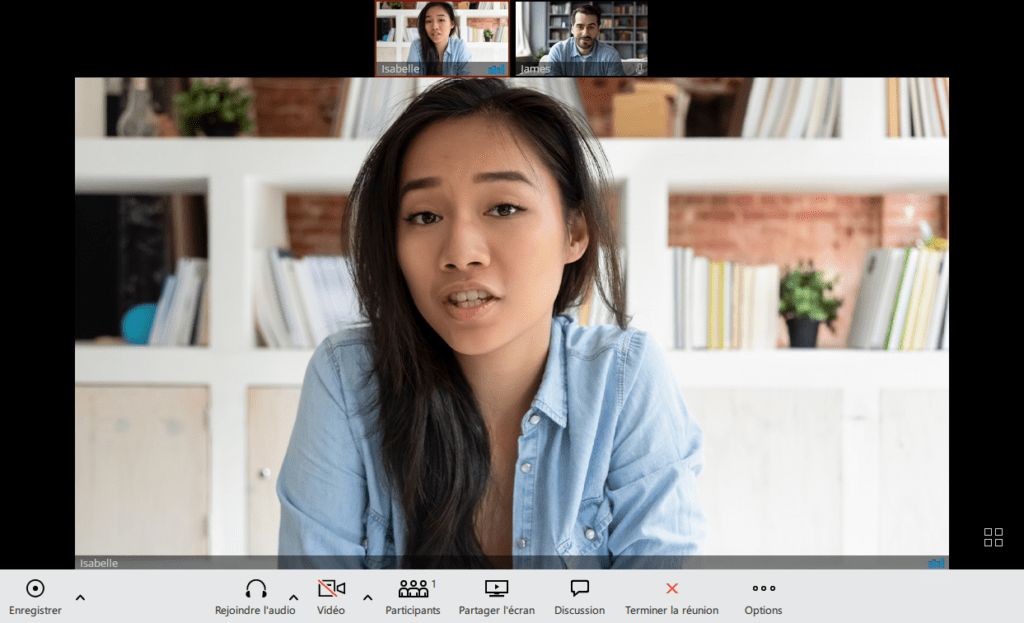
The softphone enables meetings with multiple users simultaneously with key features such as: video conferencing, audio conferencing, chat, screen sharing, and local recording.
Communicator meetings can be private (invitation only) or public (anyone with the number or link can join).
Communicator needs permission to:
- The camera for video communication.
- The microphone for audio communication.
- Screen recording for screen sharing and remote control.
If the necessary permissions for the camera and/or microphone have not been granted, the user will see a dialog box asking them to grant the permissions. There will also be a red exclamation mark next to the icons in the options bar.
Start a meeting
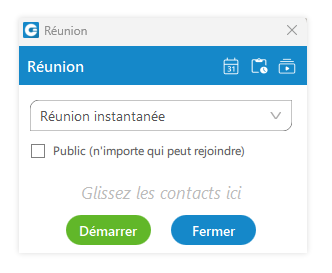
To start the meeting, you must first open Communicator, then simply click the icon labeled Meeting, this will open a small window that will allow you to drag and drop contacts. Once the contacts are filled in, you can start the meeting instantly. If you want anyone to access this meeting, check the Public box.
Communicator meetings can be private (invitation only) or public (anyone with the number or link can join).
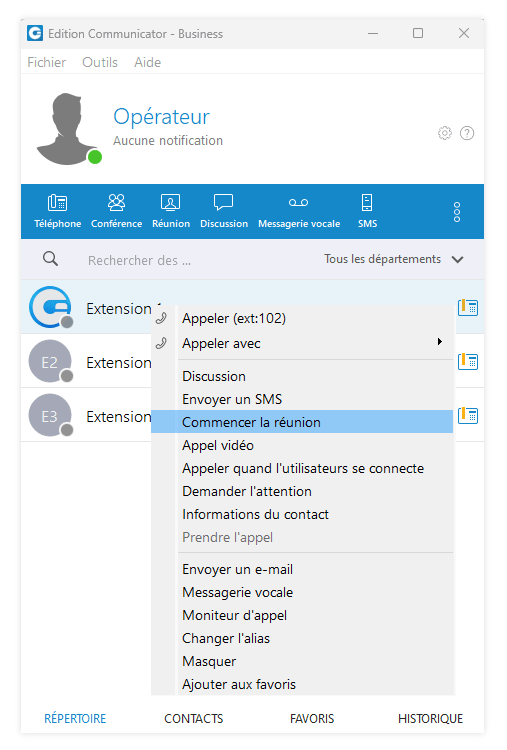
There are also a few alternative methods to start a meeting.
The user can find a contact in their directory and right-click on their name, which will provide the option to start a meeting instantly. This option can be useful to avoid having to navigate through the meeting menu and to start one-on-one meetings more quickly.
Communicator meetings can be private (invitation only) or public (anyone with the number or link can join).
When the meeting is started from the chat, the invitation link will be automatically sent to the chat.
Using this link, the user can easily join the meeting via a web or mobile application.
Meeting list
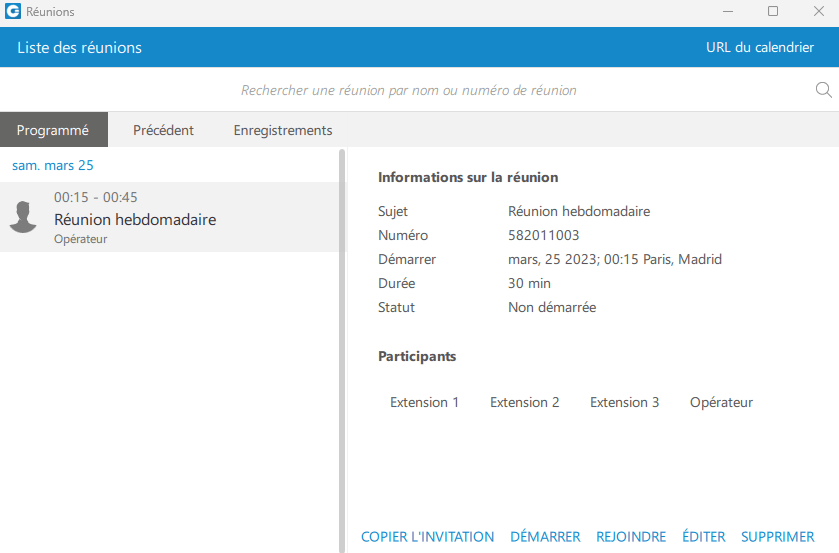
If the user wants to view any of the ongoing, scheduled, or previous meetings, they can open the meeting list. To do this, open the Meeting window and click the Meeting list icon at the top right. There will be a busy indicator in the meeting details until all data is available.
The meeting list will give you the following information:
- Start time and end time (the time of day at which it will occur)
- Date (what day you will have the meeting)
- Name/subject (What is the given subject for the meeting)
- Identification number (The randomly assigned number to distinguish meetings)
- Duration (How long the meeting will last)
- Status (The status of the meeting, for example completed or upcoming)
- Participants (Who is supposed to attend the meeting)
Communicator meetings can be private (invitation only) or public (anyone with the number or link can join).
Previous meetings
Under this tab, you can find all the meetings that have ended.
Schedule a meeting
You can also schedule a meeting in advance. To be able to schedule a meeting, click the icon symbolized by a calendar (first button at the top right).
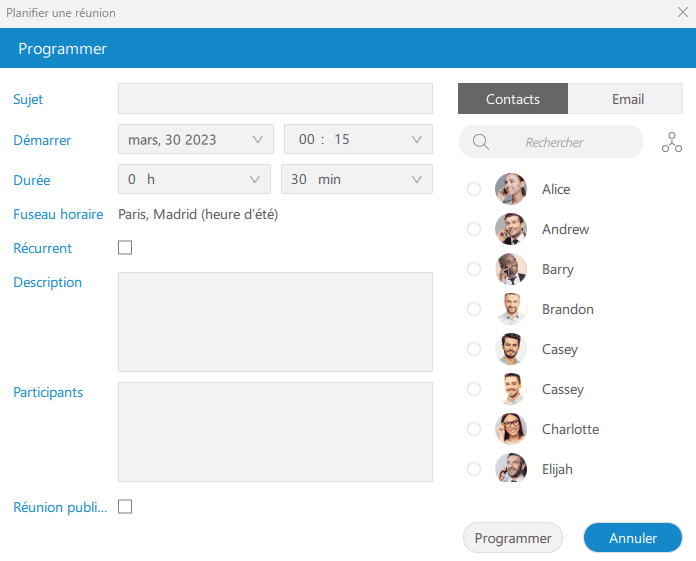
Meeting interface
Chat
The chat icon offers you a unified chat between the desktop, Web, and mobile applications. The emphasis is on the complete synchronization of chat history, stored on the server and accessible from all your connected devices.
Thus, you can continue your conversations seamlessly, even when switching from one device to another. In the event of a chat server failure, you are notified and can neither send nor receive messages until the server is restored.
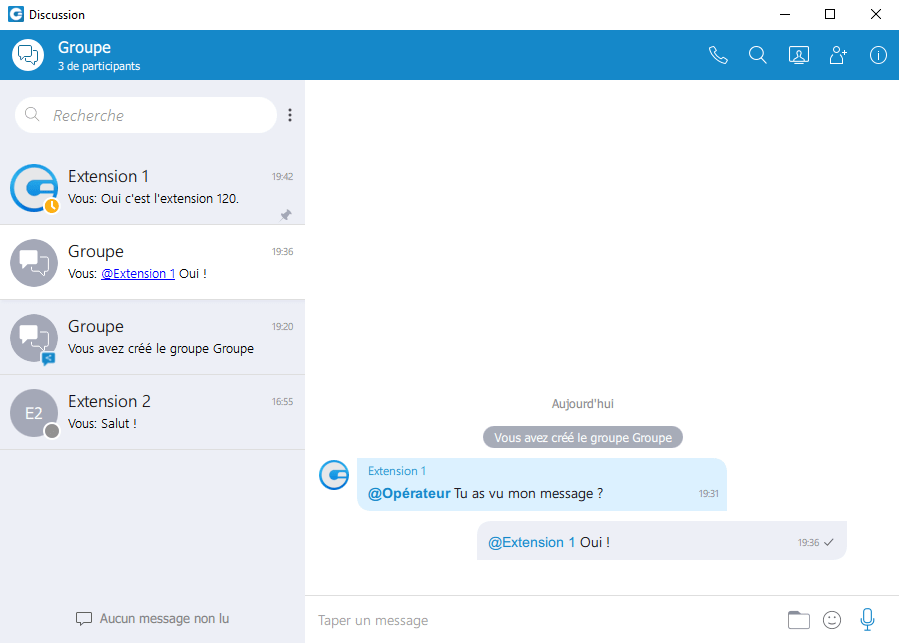
To start a conversation, you have several options, such as clicking the chat icon when hovering over a user, right-clicking a user to choose the chat option, or double-clicking a user in the main window.
Conversations can also be created with multiple users by selecting a group in the main window.
A top blue bar provides information about the current conversation and gives access to various actions, such as calling the selected user, searching messages, or creating a meeting with all chat participants.
Departments
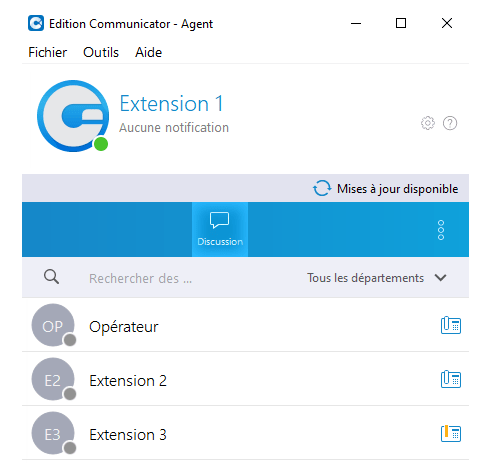
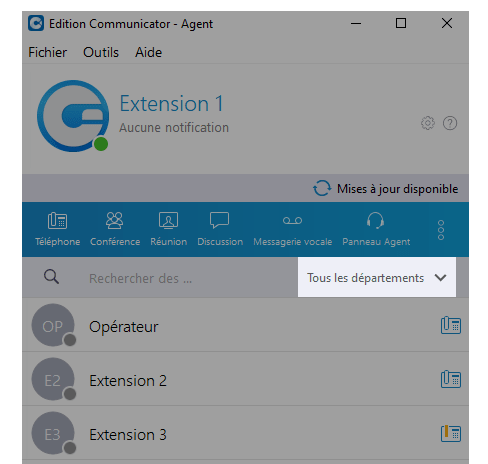
The departments feature allows you to display only the extensions of existing departments (example: Sales, Technical, Marketing, etc.).
Departments are used by Communicator to sort extensions according to the department they belong to.
NOTE:
Only system administrators can create and delete departments
Directory/quick actions
You can place a call to any destination in the system, for example: extensions, queues, conferences, voicemail, system calls or parking.
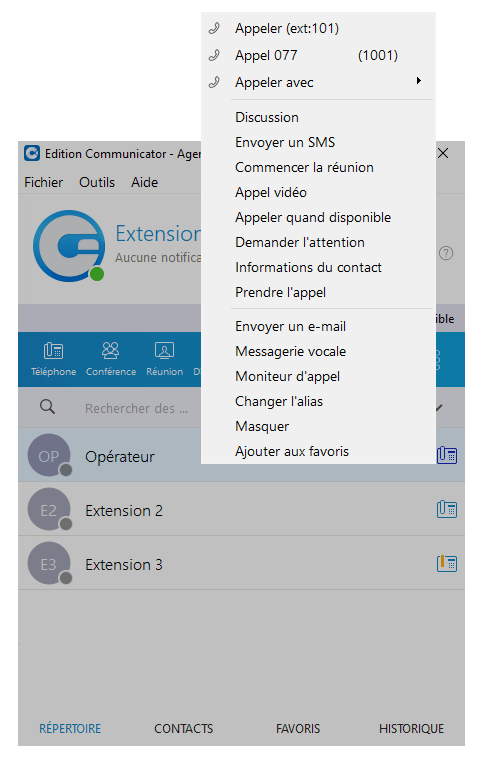
Calls can be placed by dragging and dropping from one extension to another, or directly from the phone screen to the extension, for example. By right-clicking on a contact's name, you can perform other actions regarding the selected extension.
By right-clicking on an extension in your directory, you will have access to a list of quick actions such as:
- Make a call
- Open a chat
- Start a meeting
- Send an email
- Leave a voicemail
- Monitor the call
Contacts
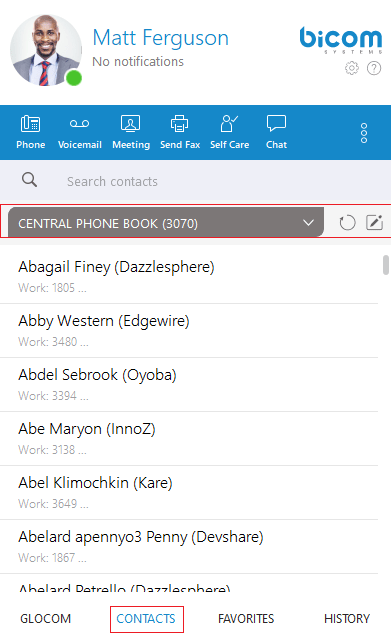
The phone book is a centralized list of contacts managed by the PBXware administrator. It is shared among all Communicator users and synchronized with the rest of your contacts (Google, CRM, Outlook, etc.).
To access the contacts in your central phone directory, go to the Contacts tab and select Company directory from the drop-down list.
You can use the Search contacts field to search for a contact by their name. Double-click a contact to launch a phone call.
Right-click on a contact to open a context menu with additional options.
In addition to the contacts managed by the administrator, each user can manage their own personal contact list. This personal list is private and visible only to you.
Favorites
The favorites tab allows you to group contacts, whether from your organization or your directory, into a single list.
This feature therefore allows you to find the people you contact often more quickly.
History
The history tab allows you to find missed, received and outgoing calls.
You can thus call back or add the contact to your directory.
Presence
Communicator brings a unified presence synchronized across all your devices (desktop, mobile, and Web).
For a user currently online, you can see whether they are connected via Desktop, via Mobile, via Web, or even all three.
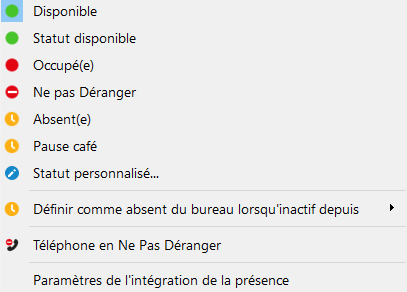
You can choose your own status by clicking the status icon at the bottom right of your avatar in the main window, or by clicking the status bar icon.
A menu will appear and you can choose between:
– Available
– Busy
– Do not disturb
– Away
– Status set by the administrator
– Custom status
Profile
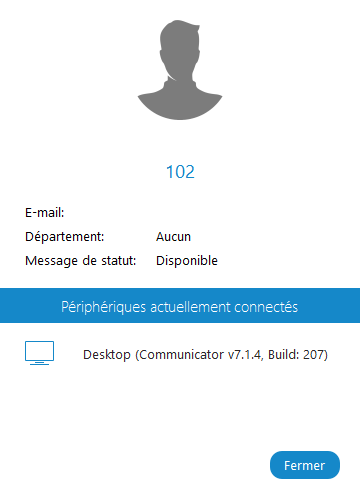
Click your profile to see your information such as your Last name, First name, Extension number, email address…
By clicking on the gray avatar, you will be able to change your profile picture from your file explorer.
You will also see the devices connected on your extension.