Search and recovery
The Geo-redundancy feature allows you to use multiple sites for replication purposes. The same data can be transferred to multiple locations to ensure data loss prevention. The replication configuration panel displays the list of remote sites (geo-redundancy servers) and allows you to configure scheduled replication for each of them.
The number of geo-redundancy servers is limited by license, and therefore implicitly by the number of failover sites. Adding additional sites will require a license update. The procedure for adding the GR site to the failover location is identical to that of adding the GR site to the main site location.
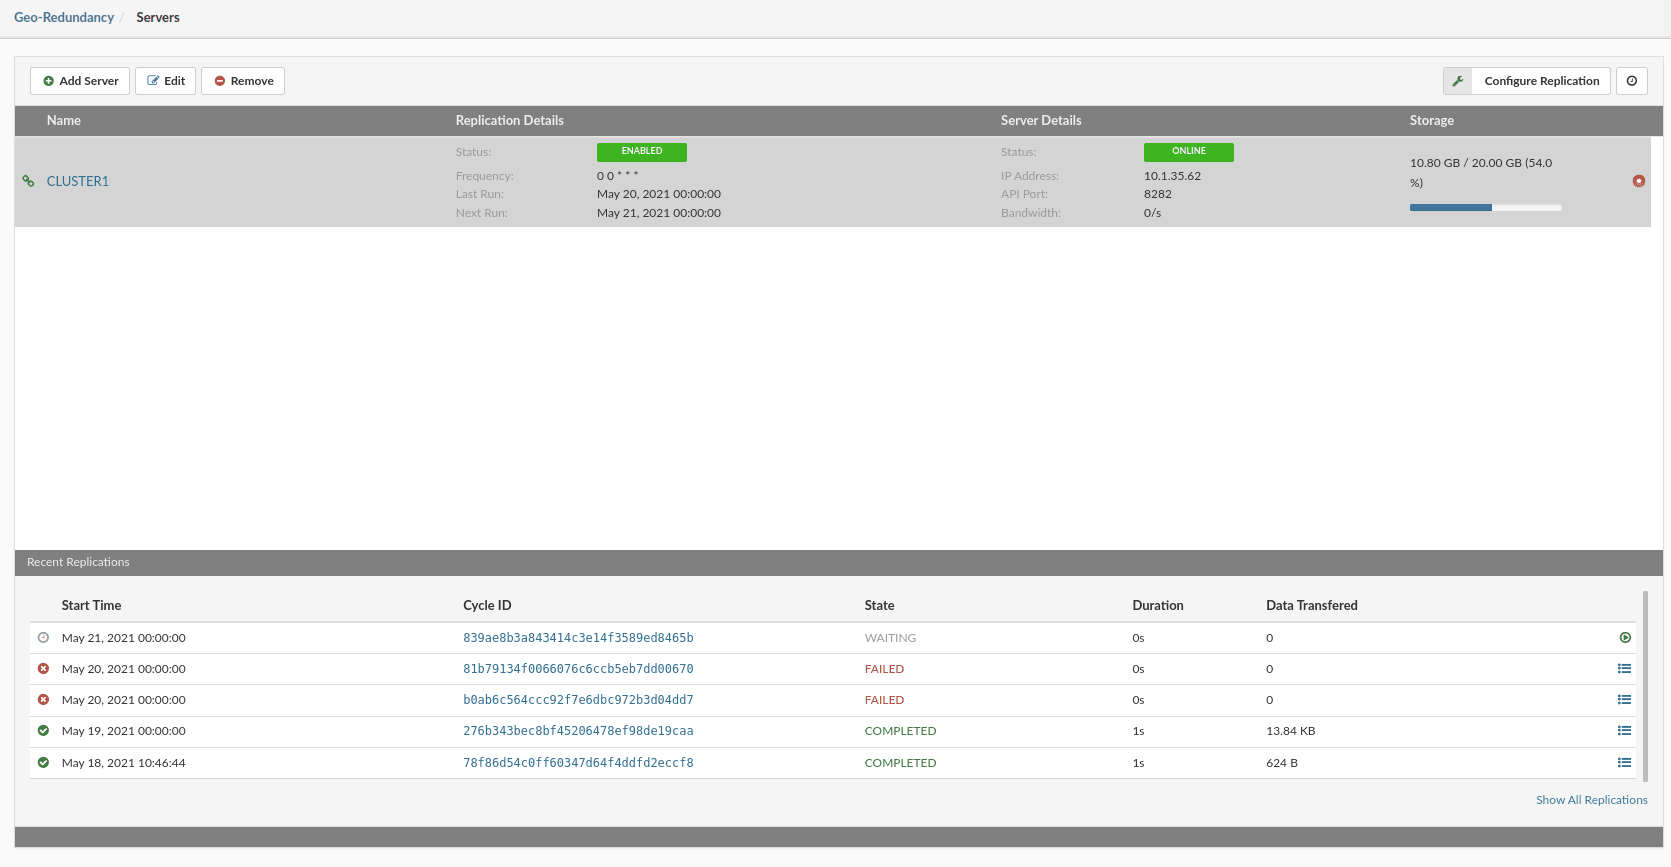
To add a geo-redundancy server, follow these steps:
- In the left menu, select Geo-redundancy and from the drop-down list, choose Servers.
- The geo-redundancy server overview will open.
- To add the geo-redundancy server, press the button Add a server in the top left corner, and a popup window will open.
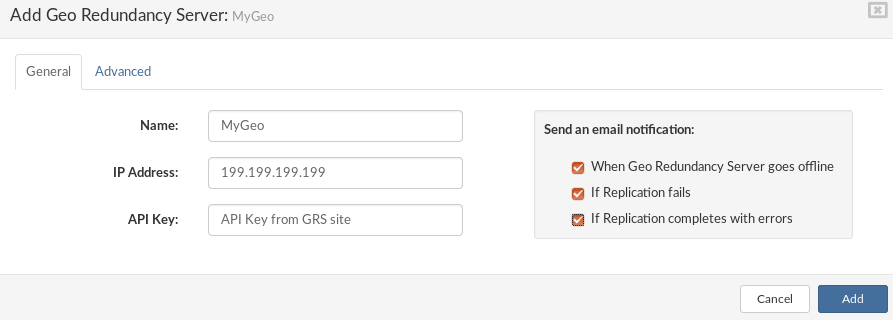
- Enter the new geo-redundancy server details if necessary.
General tab:
- Name : The name of the geo-redundancy server.
- IP address : Enter the IP address of the geo-redundancy server (if the geo-redundancy storage is located on NETSTOR in the mirror or cluster edition of SERVERware, a floating IP address must be used).
- API key : Enter the API key of the Geo-Redundancy Server site.
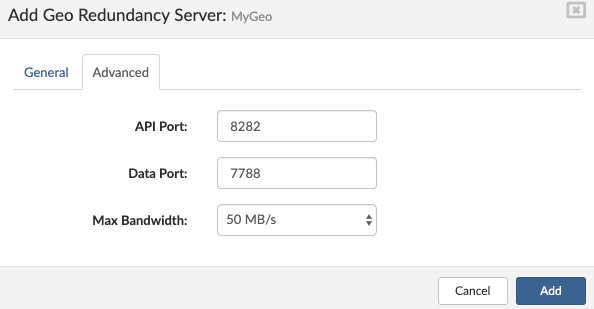
Advanced tab:
- API Port : Enter the API port of the remote site if necessary (8282 by default).
- Data port : Enter the port for data transfer if needed (7788 by default).
- Maximum bandwidth : Limit the replication transfer rate according to your network preferences and infrastructure (other server-side limits may apply).
Drop-down values
- 1 MB/s
- 5 MB/s
- 10 MB/s
- 20 MB/s
- 30 MB/s
- 40 MB/s
- 50 MB/s
- 75 MB/s
- Unlimited
Fill in all the required fields and press Add.

Once the geo-redundancy server is added, you can browse the replications.
To do this, select Search and recovery in the menu.
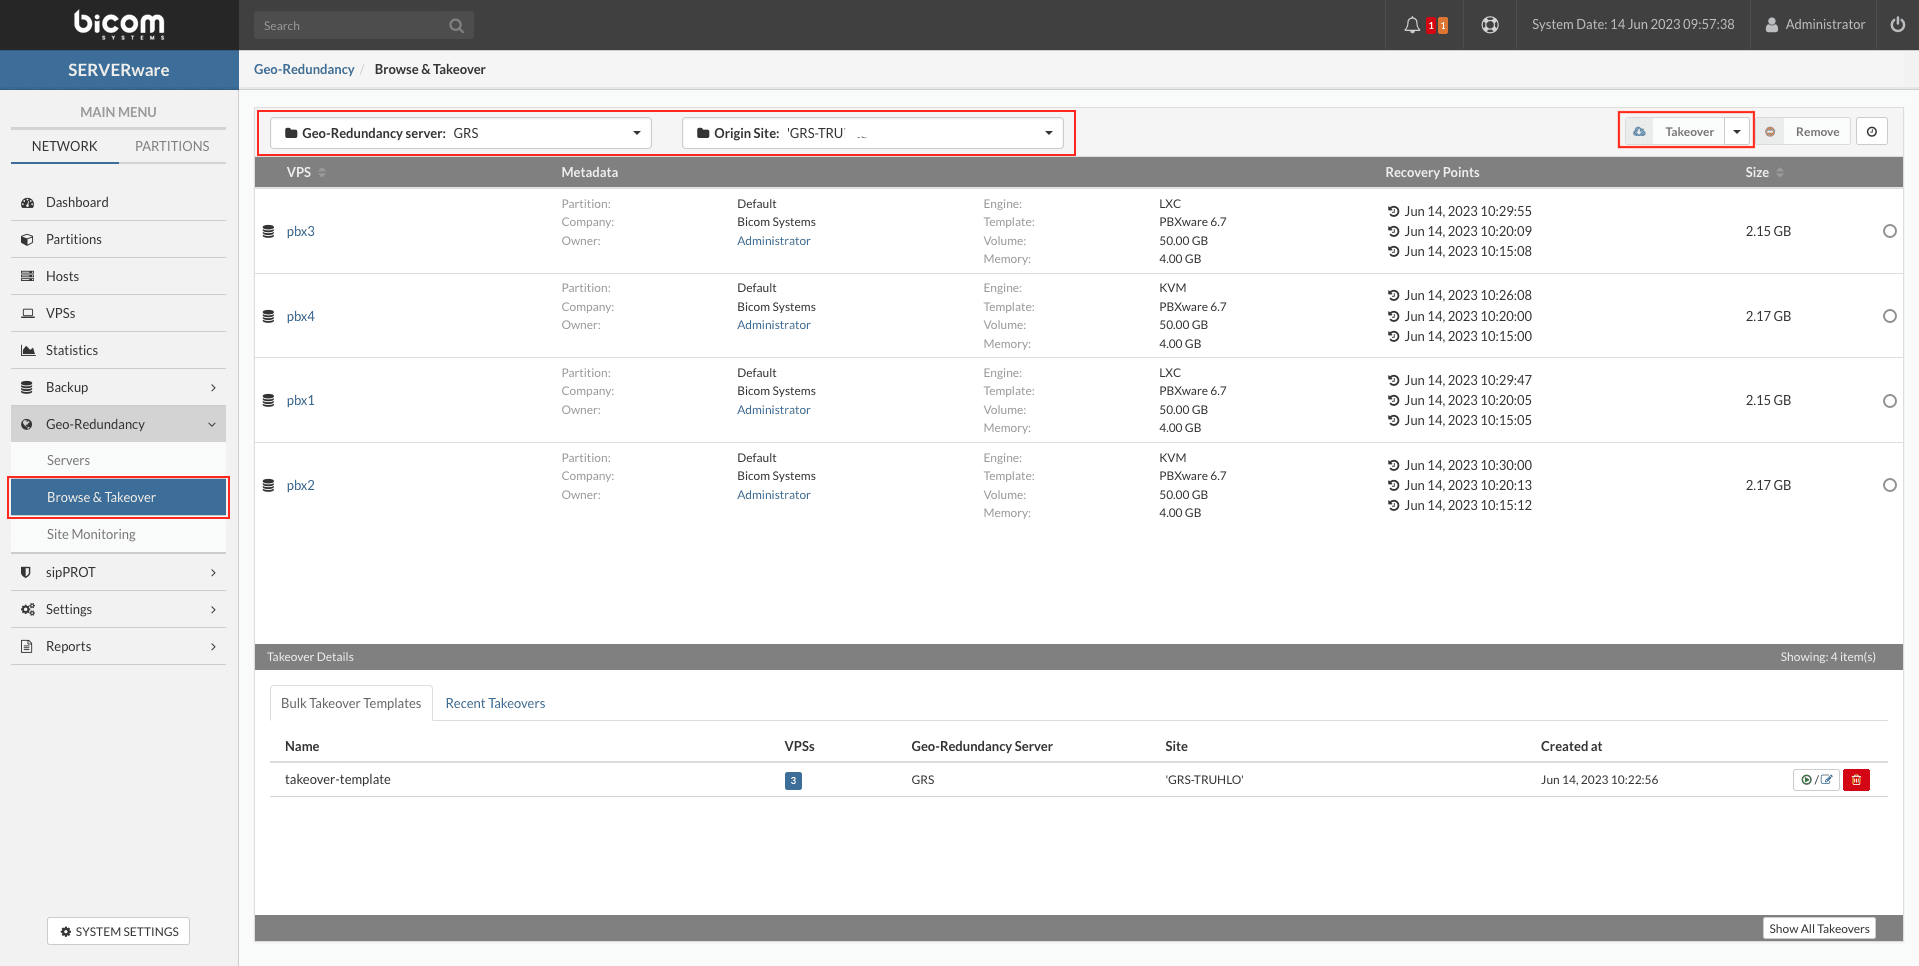
In this window, you can choose the geo-redundancy and the origin site. After making these choices, the list of available replications will be displayed below.
You can browse the replications, search and select those you need to take over. Then, press the button Resume in the top right corner to perform an individual VPS takeover or use Bulk recovery to take control of several VPSs at the same time.
The bulk recovery can also be saved as template for quick use in the event of a main site failure. The templates can be modified or updated later.
Recovery of a single VPS
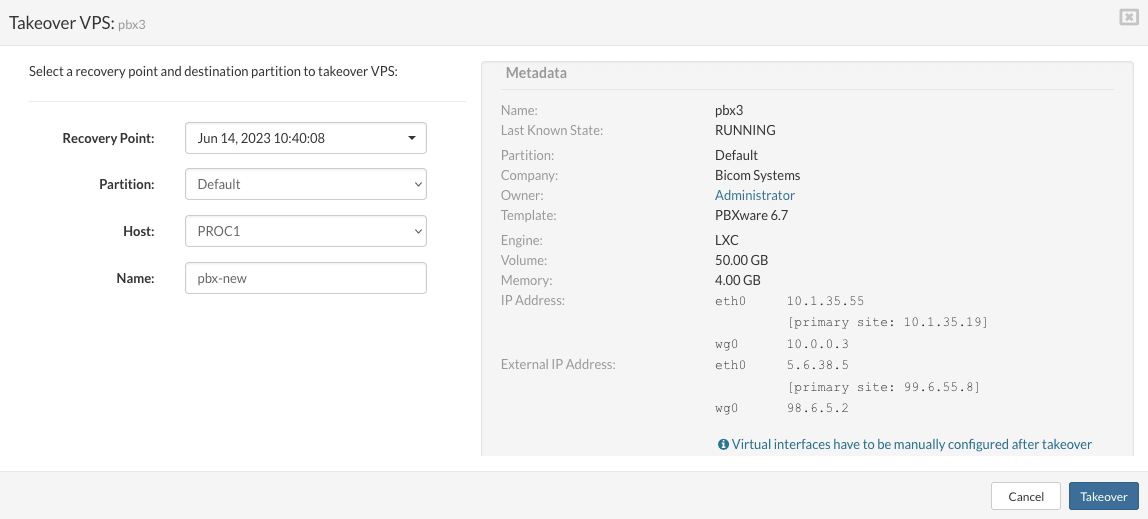
- Recovery point : In the drop-down list, select the desired recovery point.
- Partition : Select the partition for the restored VPS.
- Host : Select the host where the restored VPS will be placed.
- Name : Enter the name of the restored VPS.
On the right side of the window, the VPS metadata is displayed for informational purposes.
Once the fields are filled in, press the button Recover in the bottom right corner.
The takeover process will begin, and its duration will depend on the amount of storage used by the selected VPS.
Bulk recovery:
- To start a bulk recovery action, first select the geo-redundancy server and the replication site in the upper left corner.
- Then, select the drop-down menu at the top right and choose Bulk recovery.
- A new window will open with the ability to create a list of bulk actions, start bulk operations, and save an operation as a template.
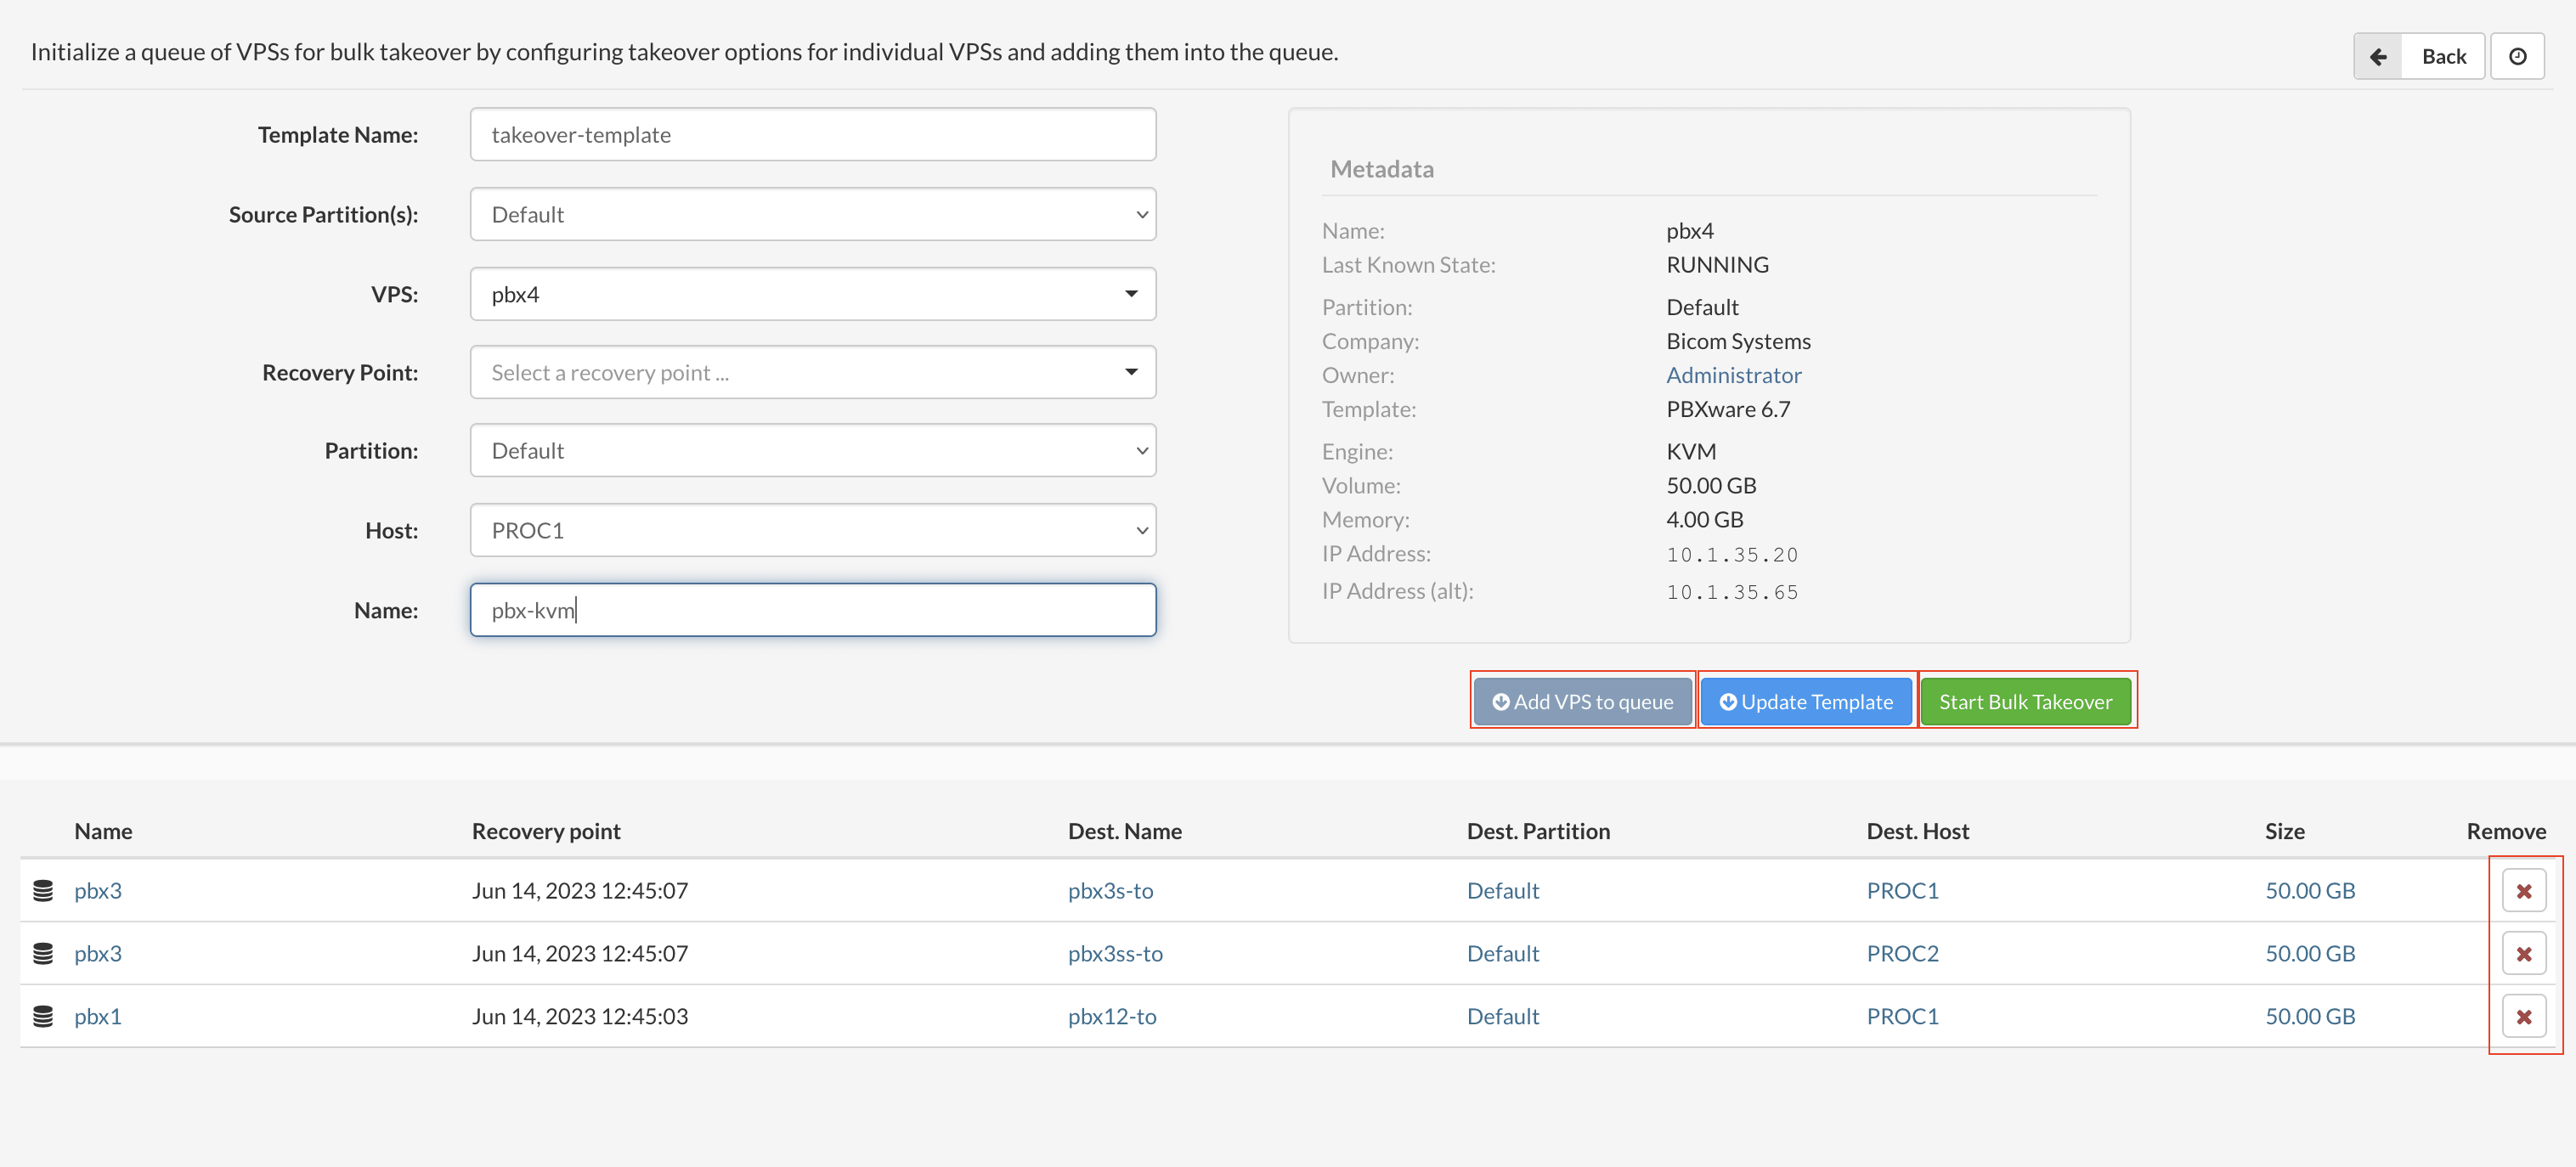
- In this new bulk takeover window, you can add VPS to a takeover action by following the steps indicated. You can name the template, select the source partition of the VPS to recover, choose the VPS from the list, select the recovery point, the destination partition, the host, and the name of the VPS.
Once all fields are filled in, press Add a VPS to the queue to add a VPS to the list below.
When you have finished the list, you have two options:
- Save this list as a template and run it later.
- Instantly start a bulk takeover action.
The saved templates window displays the list of all the templates saved on the server.
You can modify or delete these templates.
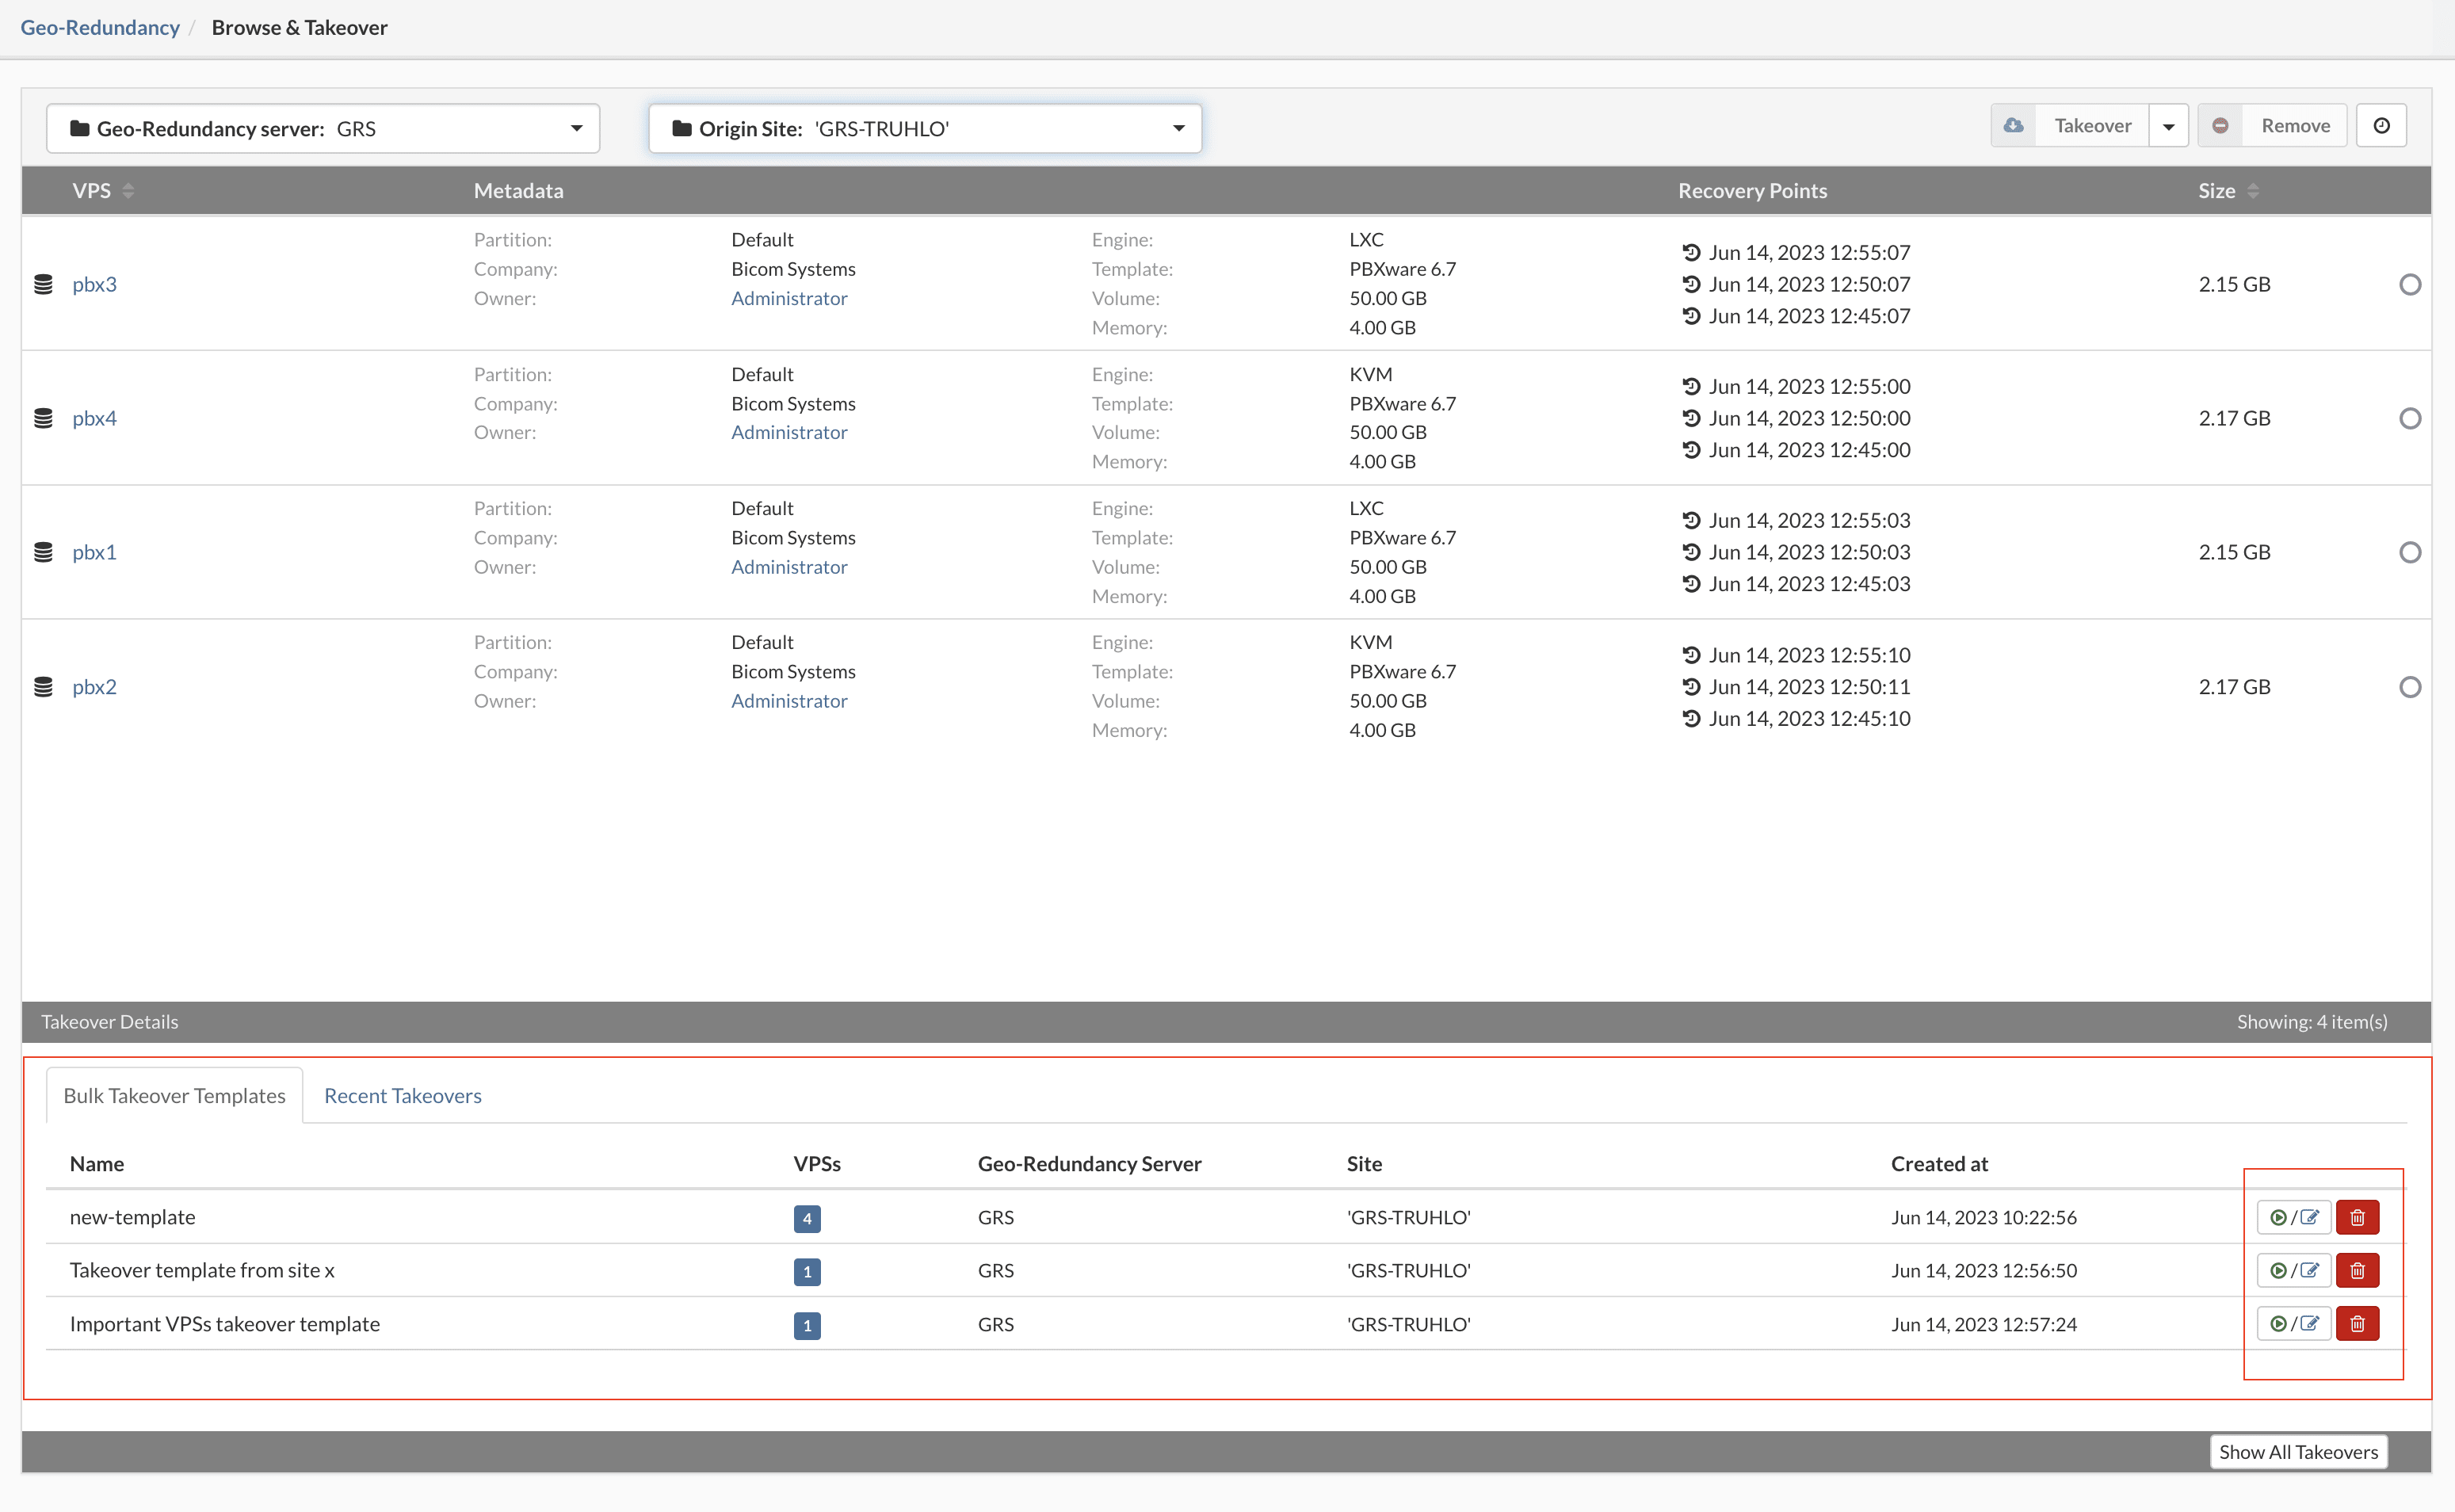
If the recovery process is started, the details of the procedure can be monitored in the window Recent recoveries.
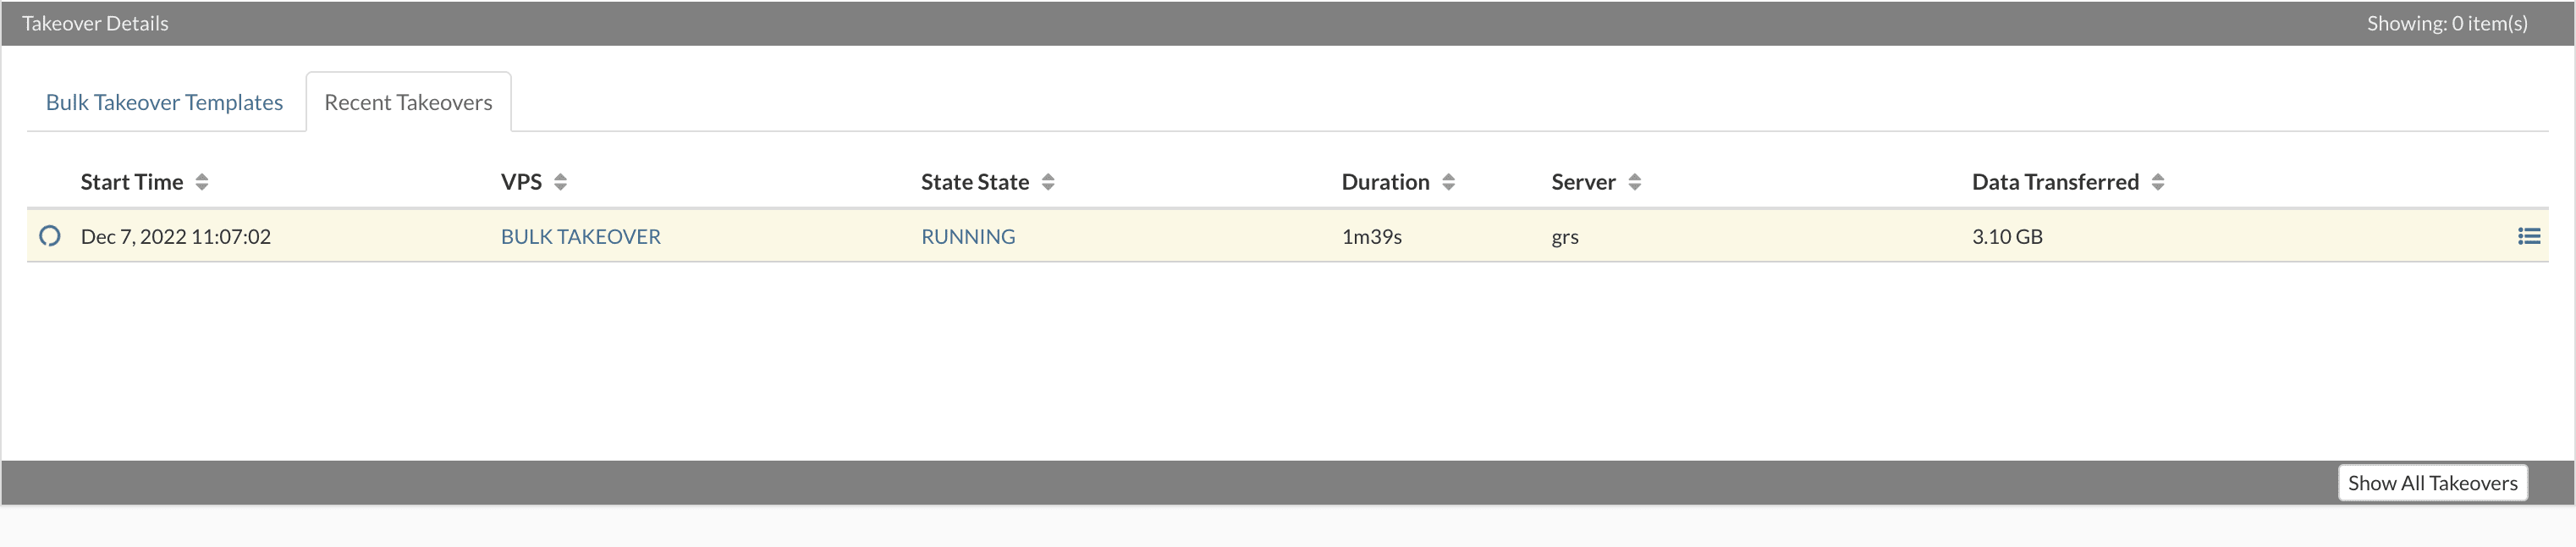
During the recovery takeover process, you can cancel a single or multiple VPS takeover, or cancel all takeovers in a single click.
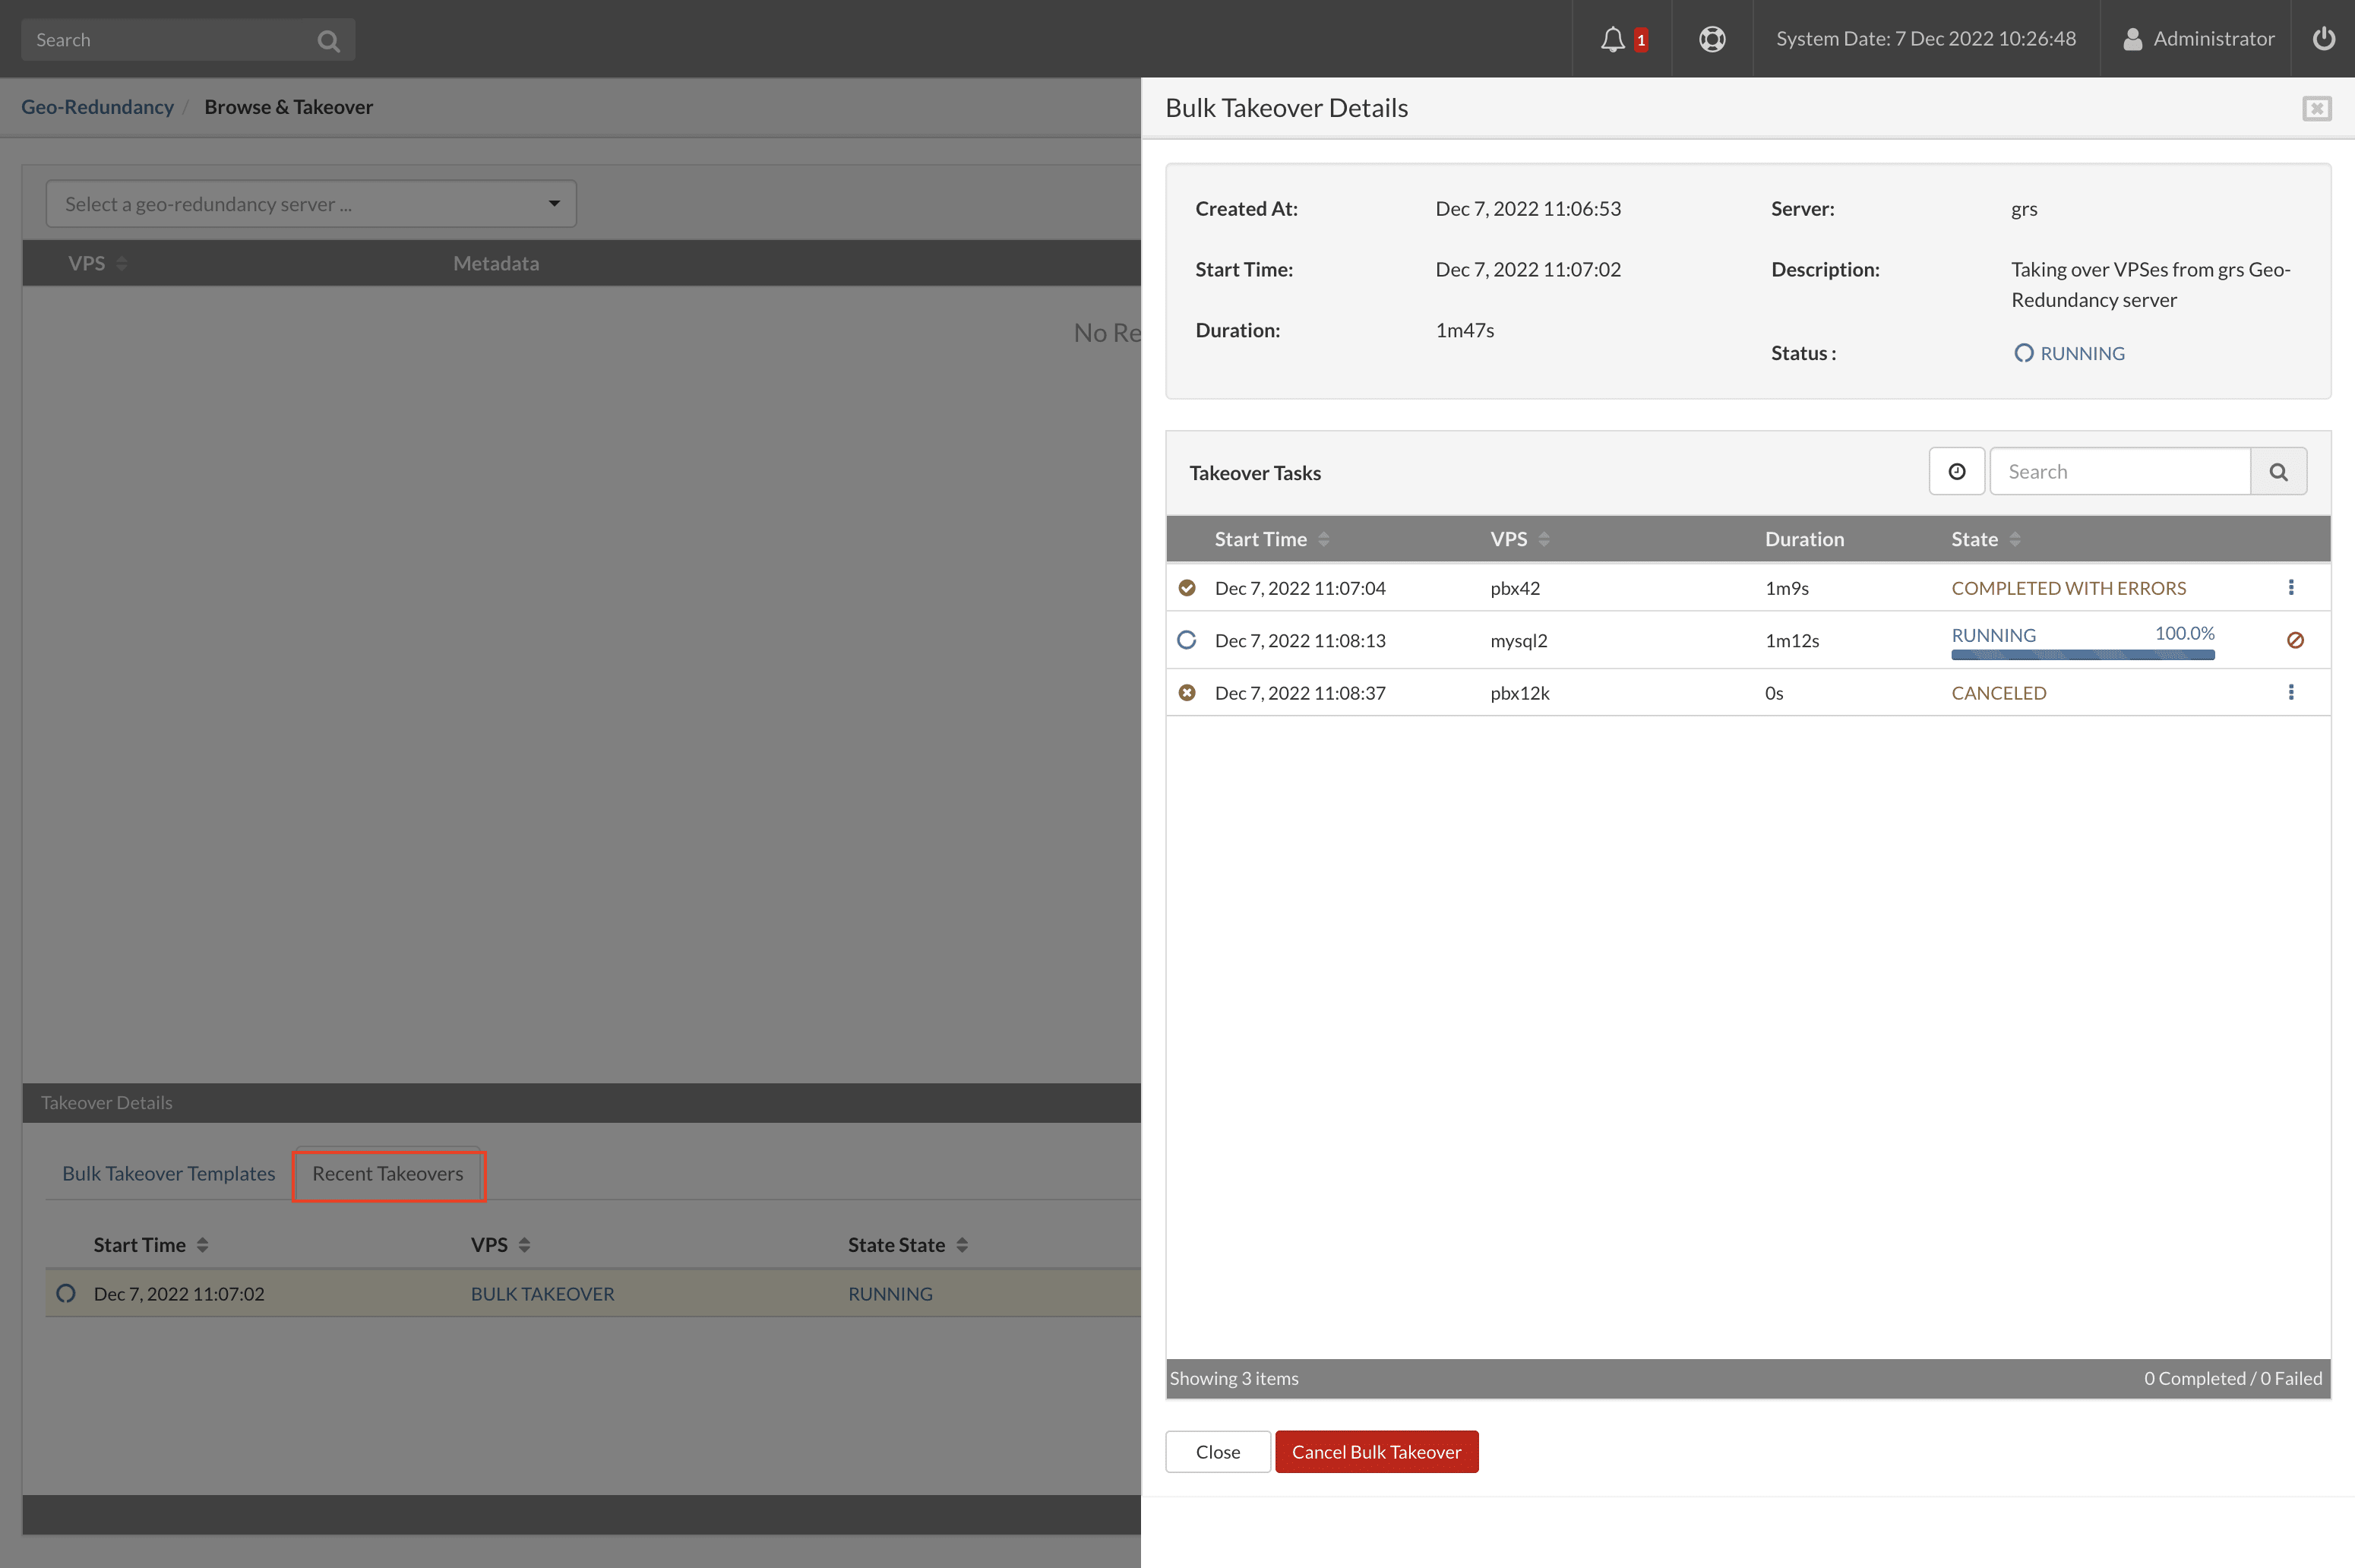
Once the recovery process is complete, you can manage the VPSs from the VPS section of the main menu. This concludes the recovery process.
Delete the replicated VPS
SERVERware administrators have the option to delete old or unnecessary VPS replications from the GR pool by simply selecting the replication they wish to delete, then clicking the delete button.
This will not affect the VPS on the production site in any way, nor will it impact the VPS running on the GR site. Once the VPS is removed from the GR pool, it can easily be fully replicated during the next replication cycle.
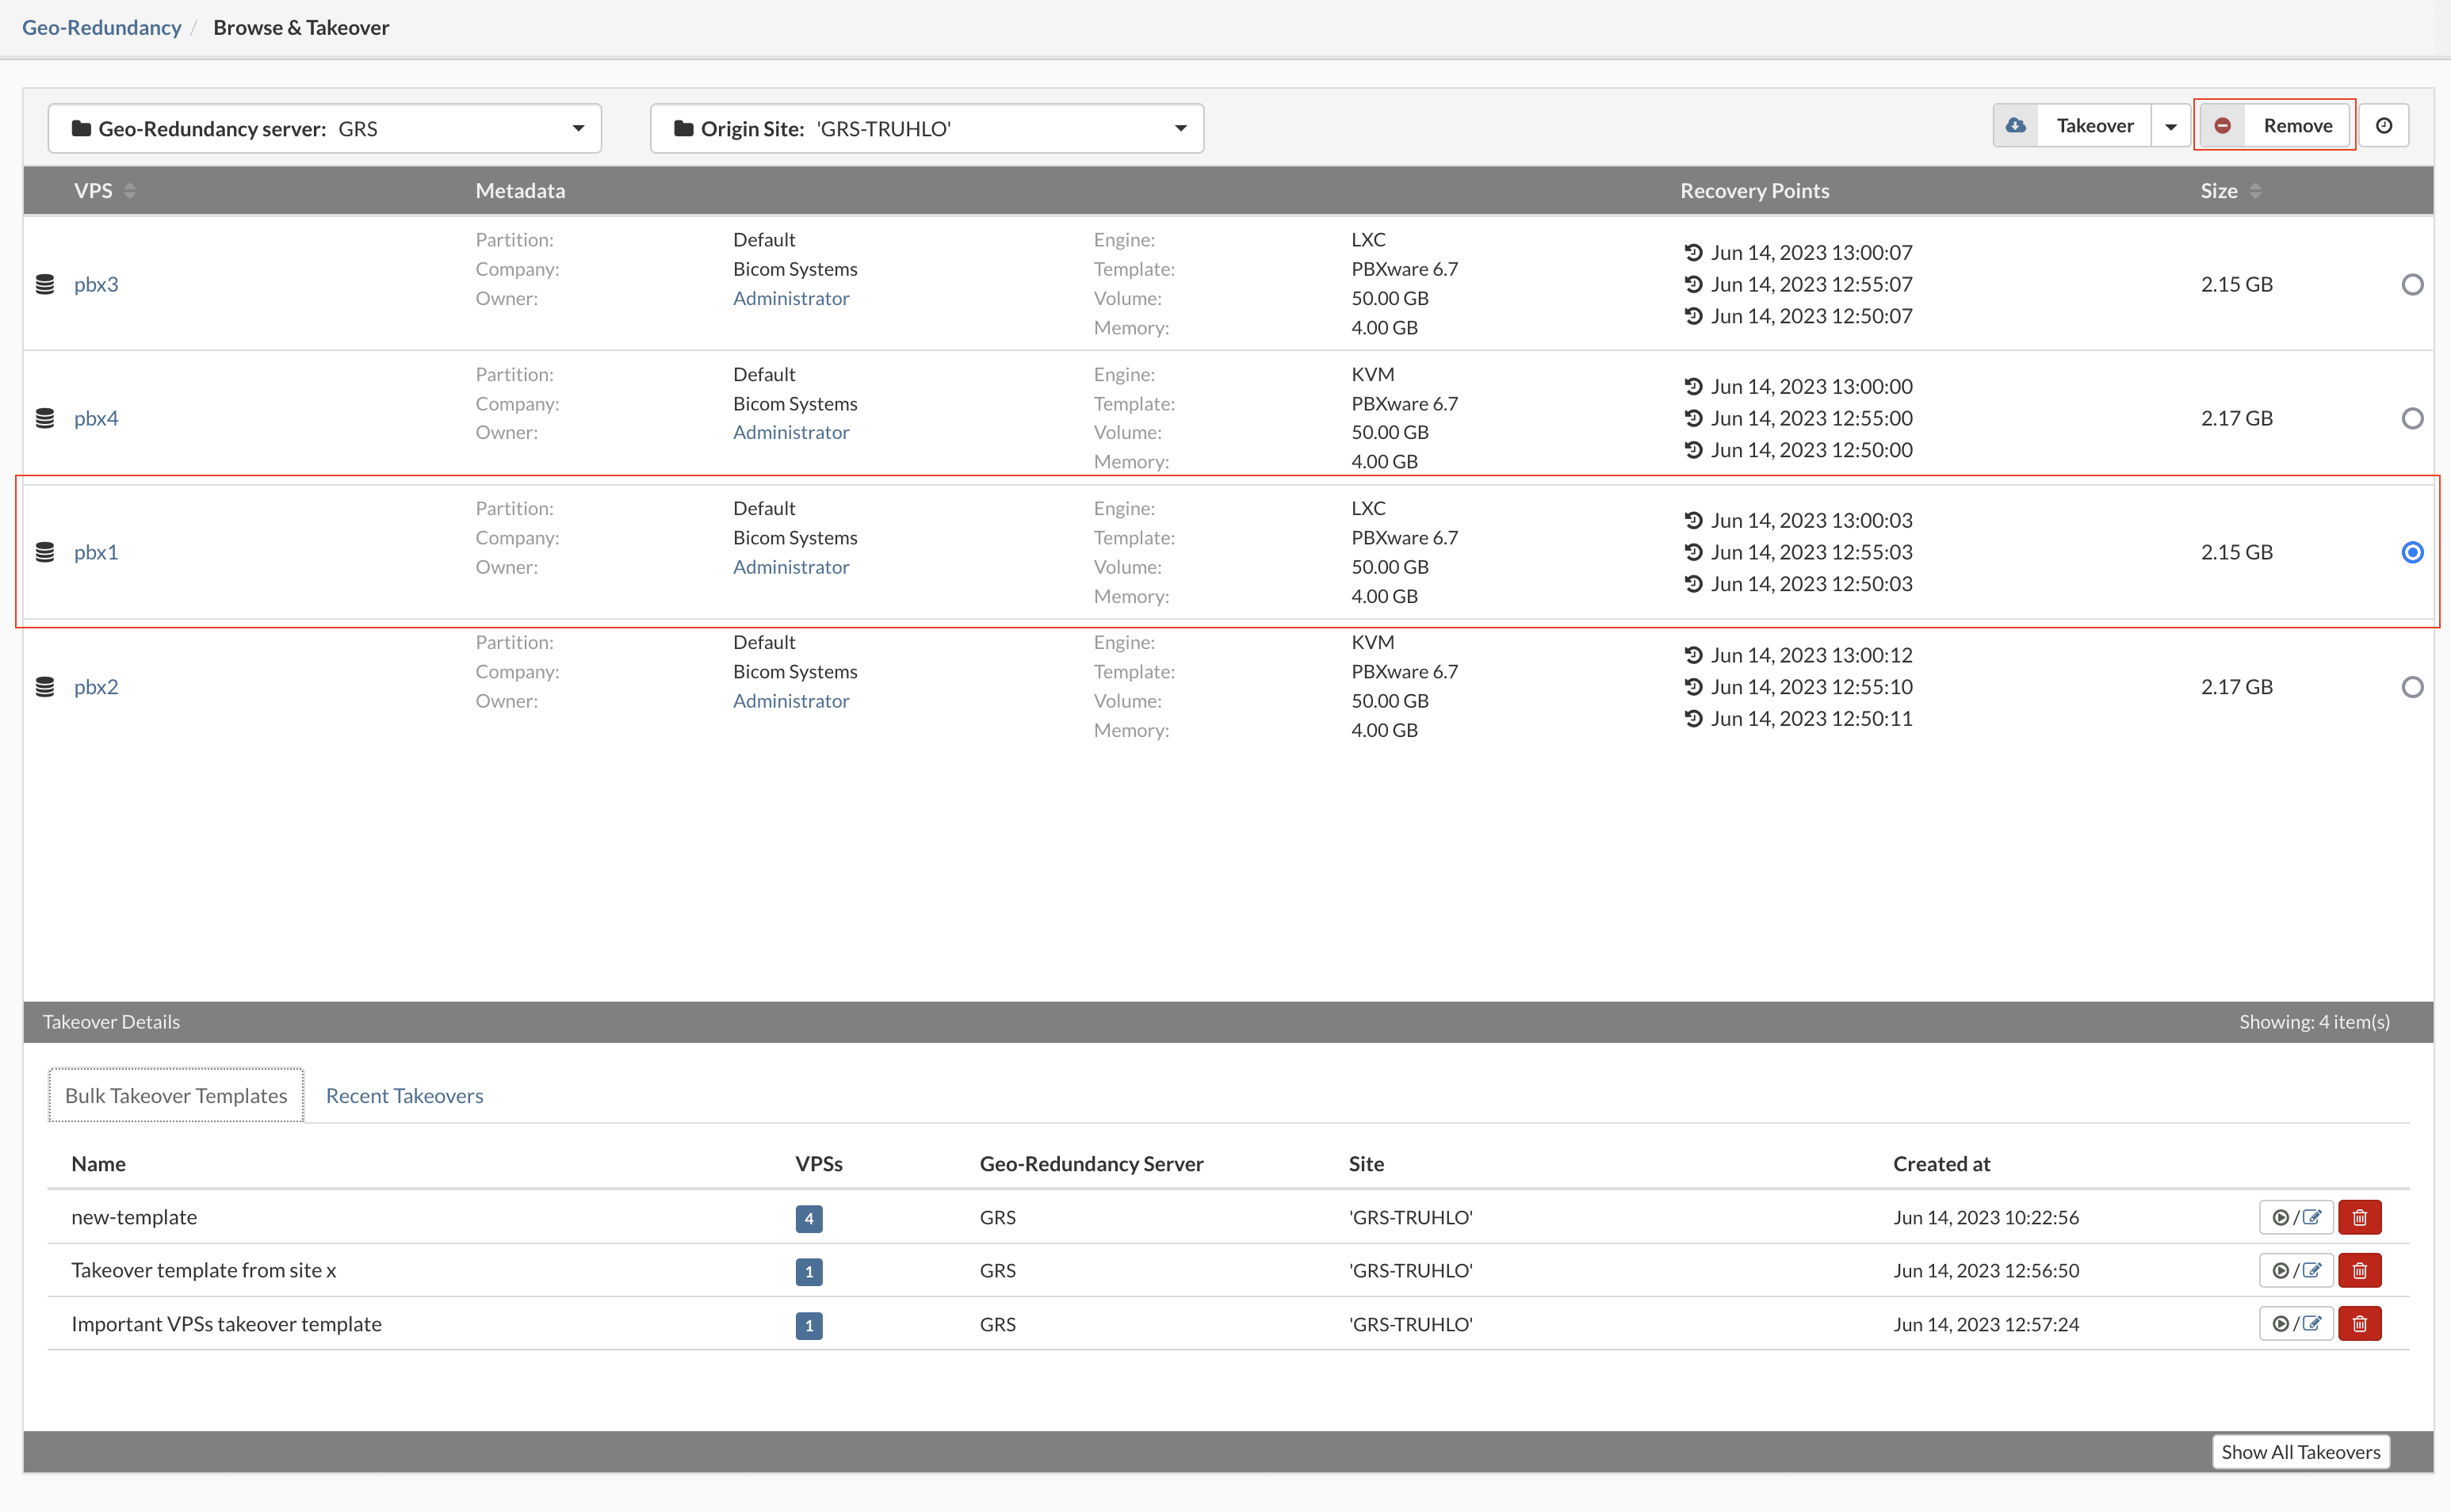
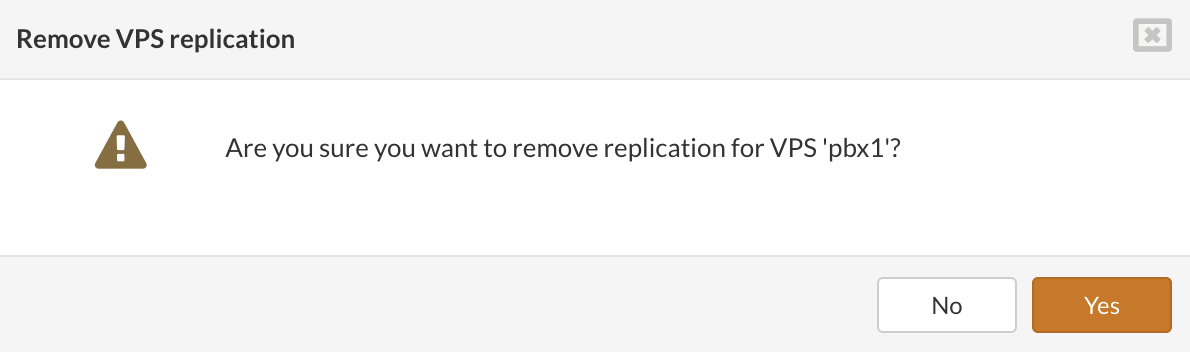
To remove replication from a VPS, select the VPS and click the button Delete.
A pop-up dialog box will appear to confirm the deletion.