



8. Hosts
Host management
The menu item Hosts allows access to a graphical view of all the hosts on the system. The view consists of a host list pane and a host details pane.
You can perform management tasks on an individual host by selecting the host and then clicking the appropriate action button.
If an action is not possible, the button is disabled.
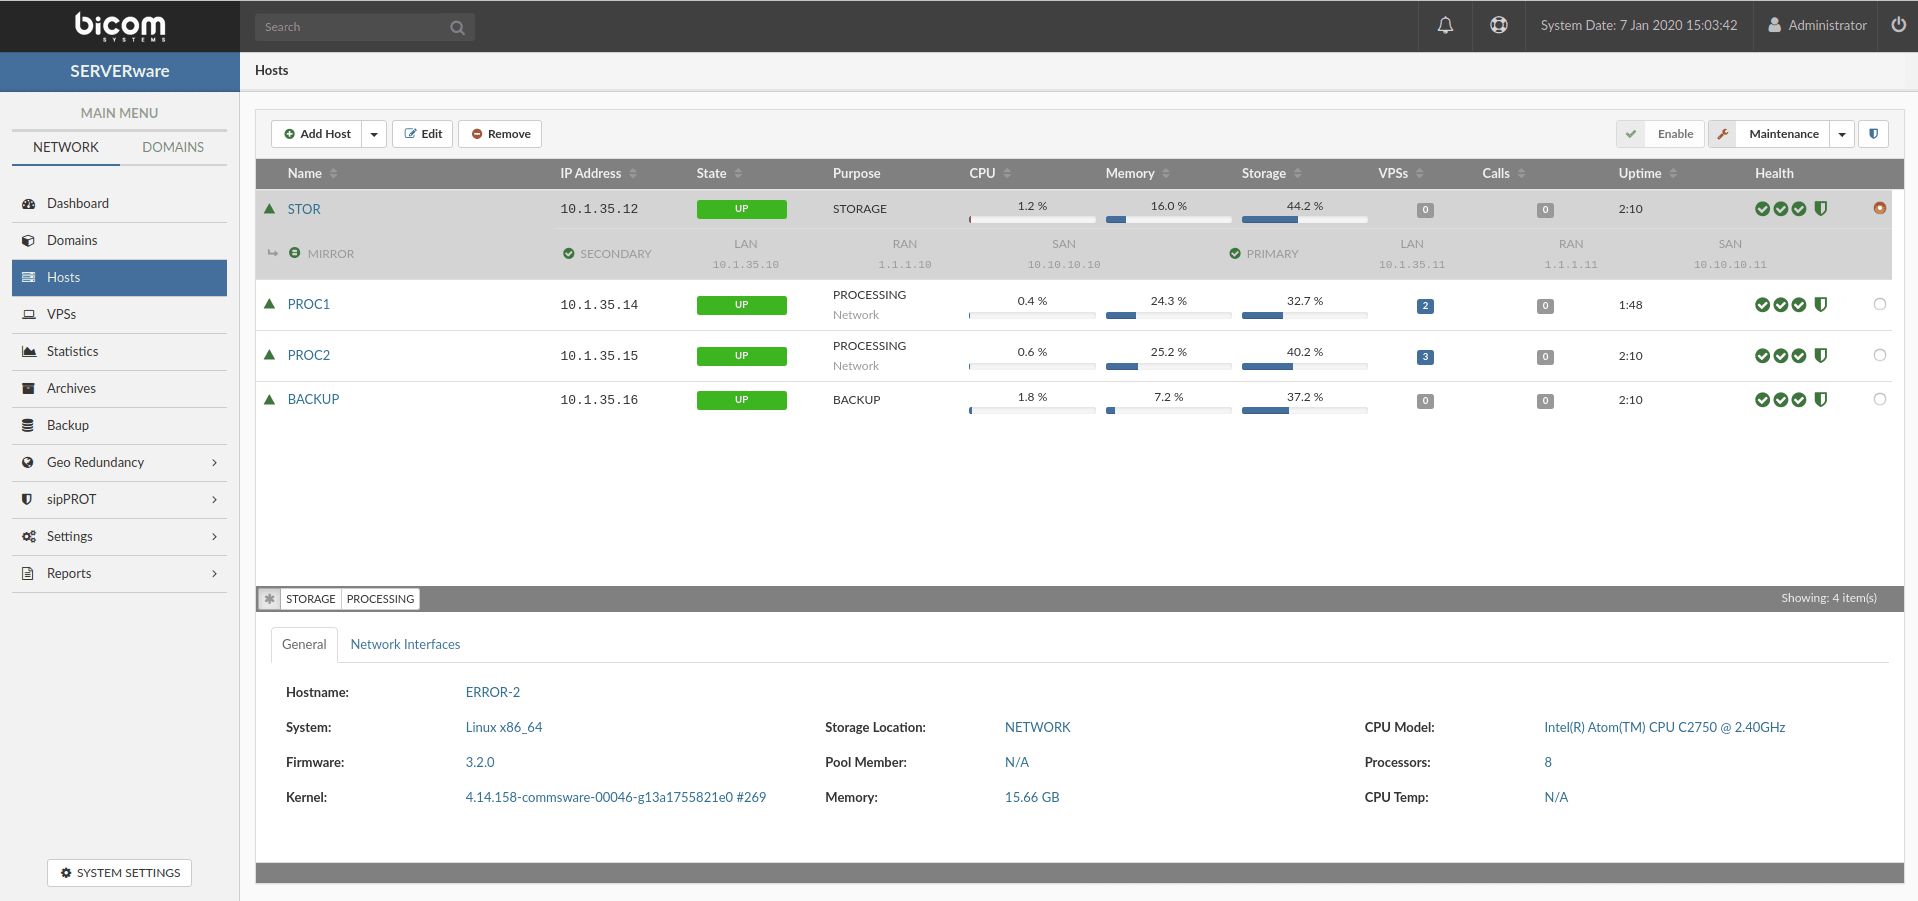
The "General” of the “Details” provides information about an individual host, including hardware and software versions. The “Network interfaces” of the “Details” pane provides information about the host's logical and physical networks, which allows defining the attachment of logical subnets to the host's physical network interface cards.
Add a host
Hosts must be properly installed before they can be added to the SERVERware virtualization platform. Before adding hosts, make sure the IP address has been correctly assigned. There is no need to configure an additional Bridge network, as it is automatically created during installation. The Bridge network allows virtual servers to interact with the network as if they were using physical network cards.
To add a SERVERware host, follow the steps below:
- On the view Hosts, click on the button Add host.
The dialog box Add hostappears.
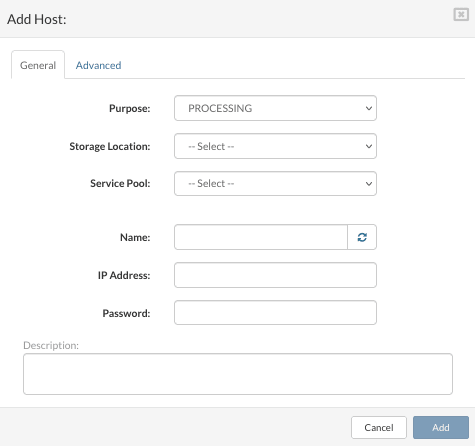
Enter the details in the following fields:
- Purpose/Objective : the purpose of the host.
- Storage location : this field appears only when the purpose of the selected host is processing. Select network storage as the storage location for the VPS volumes.
- Service pools : this field, just like the storage location, is only meaningful for processing hosts. Select the mixed pool.
- Name : a descriptive name for the host. Use a button to generate a random hostname if the name is not crucial.
- IP address : the IP address of the host that was provided during installation.
- Root password : the password of the designated host. If it has not been changed manually on the host, the default password is “serverware“, so you will be prompted to provide a new password as soon as you enter the default password in the field.
On the “ tabAdvanced“, you can modify the “SW connector port” (the default value is 4433) and enable/disable the option Forward the logs to the central Syslog server” by checking/unchecking the box.
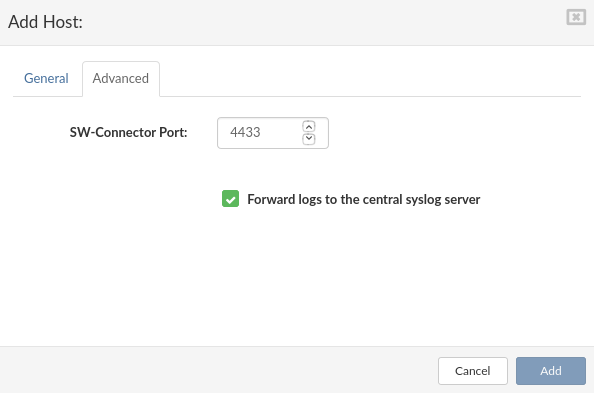
Click the button Add to submit the form.
The new host appears in the host list with a state disabled. The host status indicators for the connection and the SW connector must be green circles. Depending on whether the SAN network interface of the host has been preconfigured or not, the storage connectivity indicator will be a green or red circle.
Network interface management
During installation, SERVERware defines three default logical subnets:
- LAN – Local network used for SERVERware management traffic as well as for VPS services.
- RAN – The replication zone network used for storage mirroring, implemented as a direct connection between two storage hosts, creating a fault-tolerant storage solution.
- SAN – The storage zone network used to store traffic between the storage and processing hosts.
The tab Network interfaces displays the name, the logical subnet name, the IP address, the subnet mask, the MAC address, and the link state for each host interface. Each interface has a button Edit next to it.
The network interface configured during host installation is automatically assigned to the LAN subnet, and it is generally not recommended to change the LAN interface via the administration GUI, as it is used for host management. The RAN interface is used exclusively by the storage servers and is configured automatically by the setup wizard.
The SAN interface is only used in SERVERware Cluster Edition; it is automatically configured on the storage servers by the setup wizard, but must be configured when adding a new processing host.
To manage the network interfaces of a host, follow these steps:
In the "Hosts" view, select the appropriate host.
Click the button Maintenance to put the host into maintenance mode.
Click on Network Interface in the pane Details to display the list of the host's network cards, with their addresses and other specifications.
Click on Edit next to the network card you want to modify. The edit dialog box is displayed.
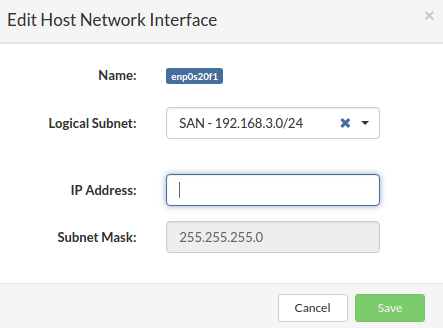
Select a logical subnet from the list to attach the network card to another logical subnet.
Provide an IP address belonging to the selected logical subnet.
Click the button Save to apply the changes.
Click the button Enable to enable the host once the changes are applied.
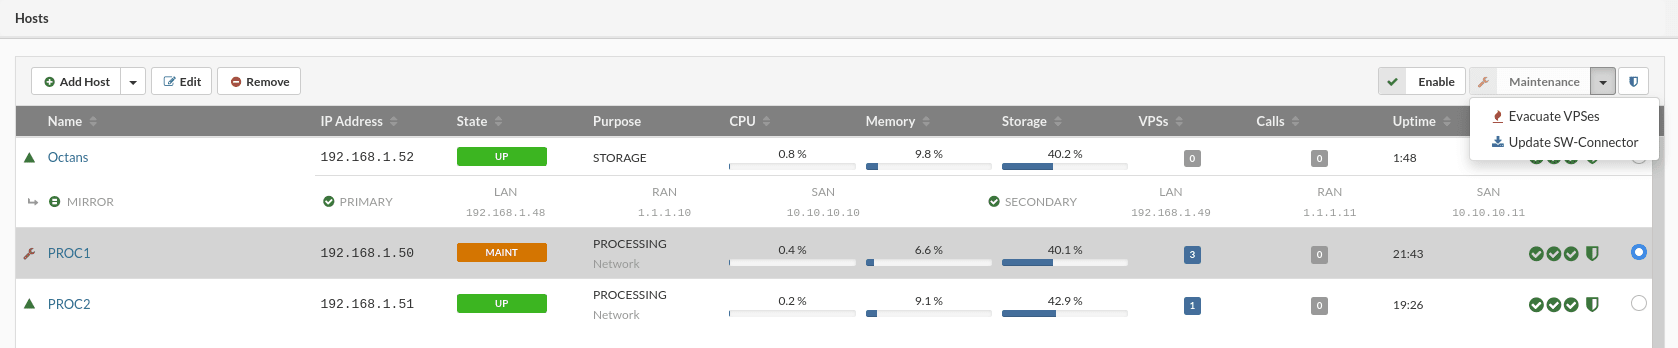
Follow this procedure to evacuate the VPS from a host:
- In the Hosts view, select the host to evacuate.
- Click the button Maintenance. A confirmation dialog appears.
- Click on Yes. The selected host switches to maintenance mode.
In the top right corner, click Evacuate VPSes.
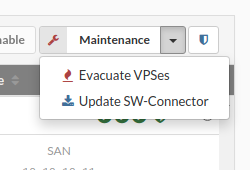
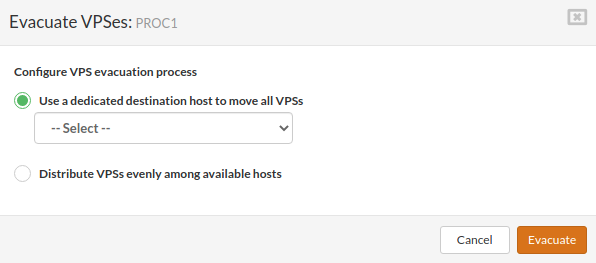
This will open a small dialog box that lets you select a host to which the VPS will be moved, or let the system distribute the VPS evenly across all the cluster's processing hosts.
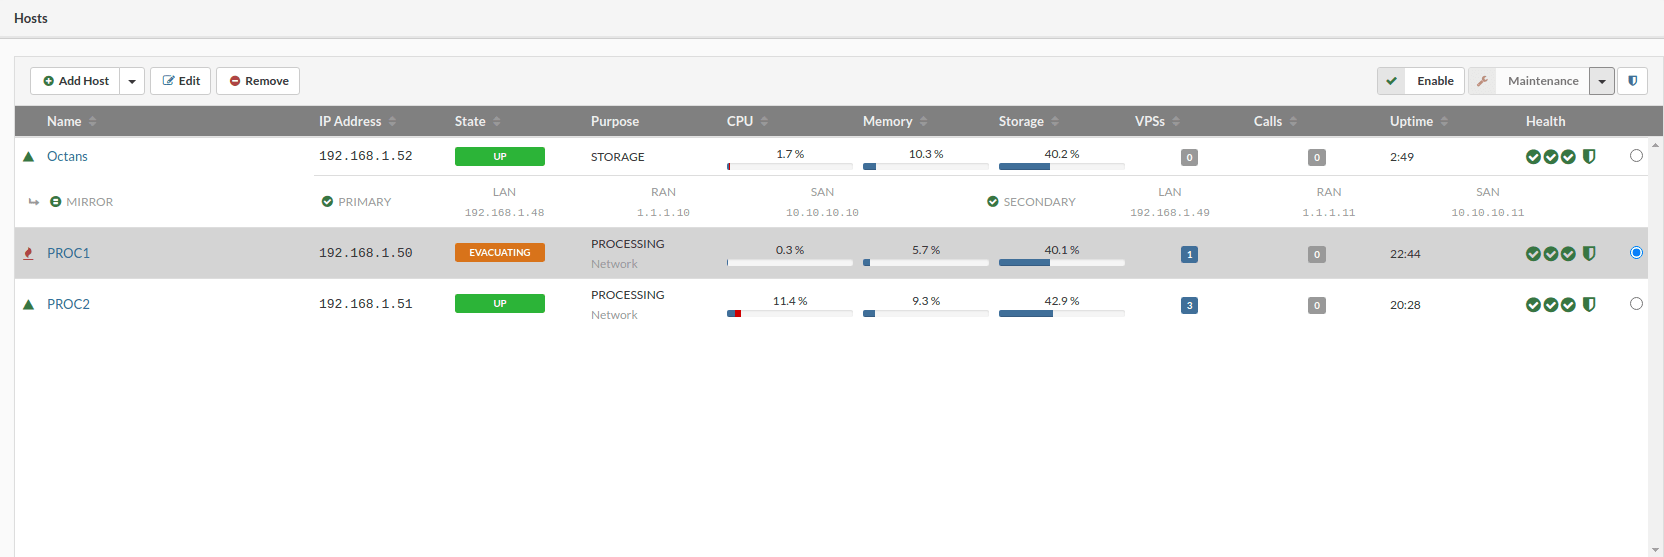
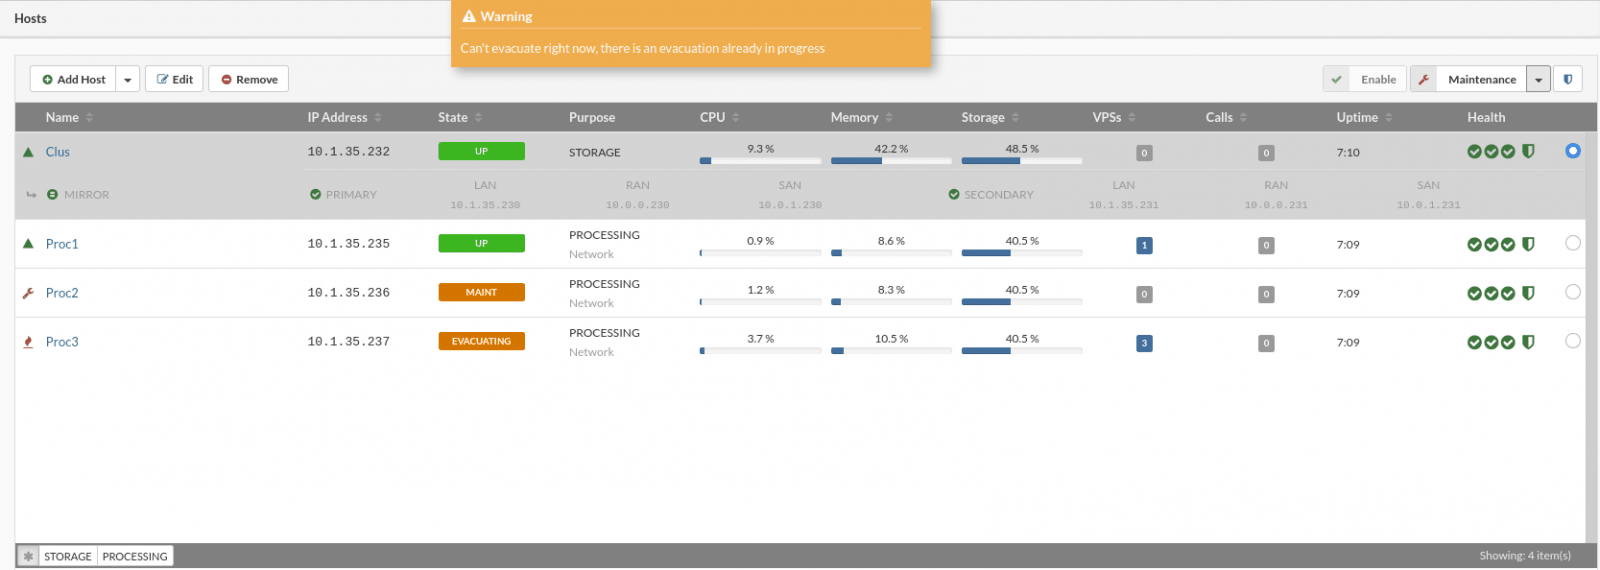
Once the evacuation is started, the host status label MAINTENANCE will be masked, and in its place, the word EVACUATINGwill appear until the evacuation is complete.
Cancel an evacuation
Canceling the evacuation of VPSs will bring the VPSs back to the host in their pre-evacuation state. This action is possible as long as the evacuated VPSs have not been moved further after the evacuation action.
Example: If a processing host requires maintenance and all VPS must be evacuated to another host, the evacuate action will move all VPS. When the maintenance is complete and the host is ready, the cancel evacuation action will bring the VPS back to their initial state.
To cancel the VPS evacuation, follow these steps:
- Select the desired host in the hosts view.
In the drop-down menu in the top right corner, select Undo evacuate.
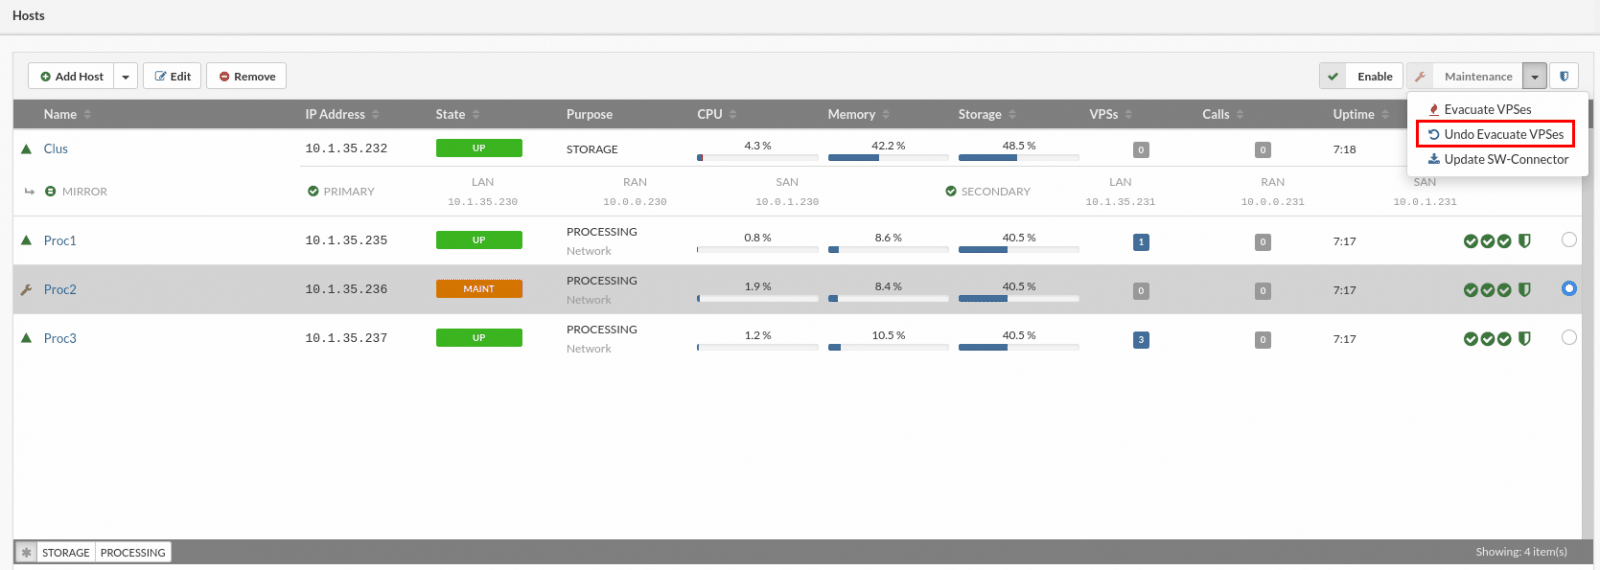
If the option Undo evacuate is available for the selected host, a pop-up window will appear with the list of VPS available for cancellation.
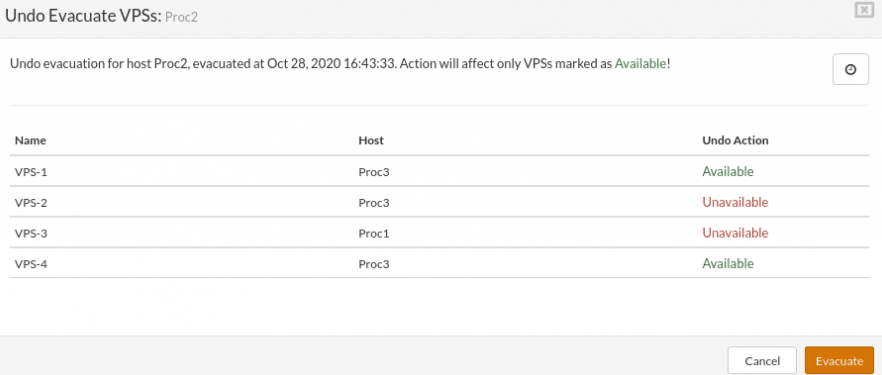
The VPSs marked as Unavailable will not be affected by this action and will have to be moved manually.
A confirmation dialog box is displayed before starting the undo of the evacuation, as this operation will cause some downtime for the VPSs, the duration of which will depend on the hardware and the size of the VPSs.
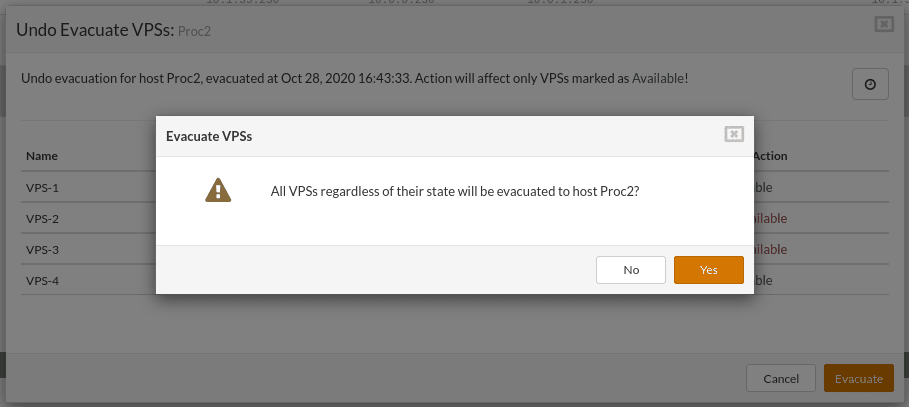
After confirmation, the evacuation process will begin and can only be interrupted once it is complete.
If the evacuation cancellation option is not available for the selected host, or if the evacuation cancellation has already been executed on that host, a warning message will be displayed.
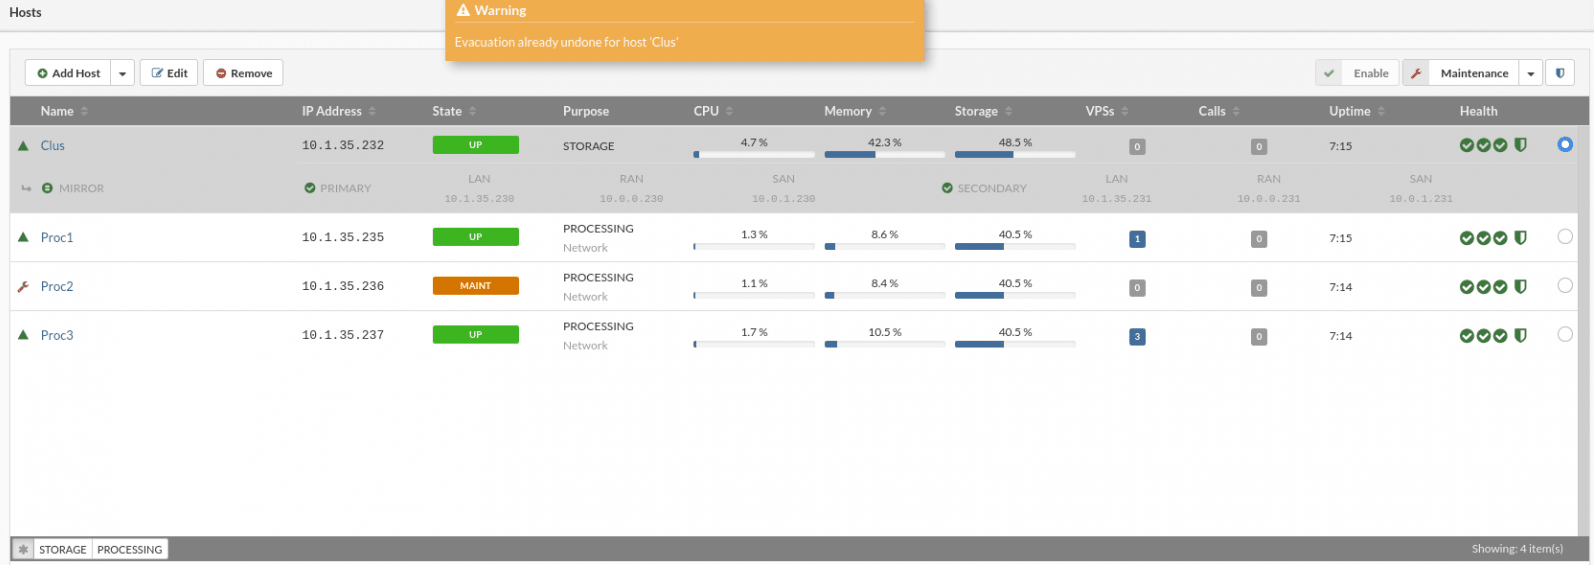
Please note that it is not possible to launch multiple evacuation actions at the same time.
Update the SERVERware connector
The service agent sw-connector running on the hosts is an essential component for the proper functioning of the SERVERware environment. Therefore, it must be updated when there are new features or bug fixes. Before updating the connector sw the host must be placed in maintenance mode.
A small question mark near the host in the HOST image on the right is an indication that a new connector update sw-conn is available.

Follow these steps to update the SW connector:
- In the Hosts, select the host whose connector “sw” must be updated.
- Put the host into maintenance mode.
- Click the button Update SW connector.
- Open the view System logs to track the progress of the update.
- Once the update is complete, click the button Enable to re-enable the host.
