



7. Partitions
Partition management
The menu item "Partition” provides access to a graphical view of all system partitions. The “Partitions” consists of a partition list pane and a partition details pane. You can perform management tasks on an individual partition by selecting the partition and then clicking the appropriate action button.
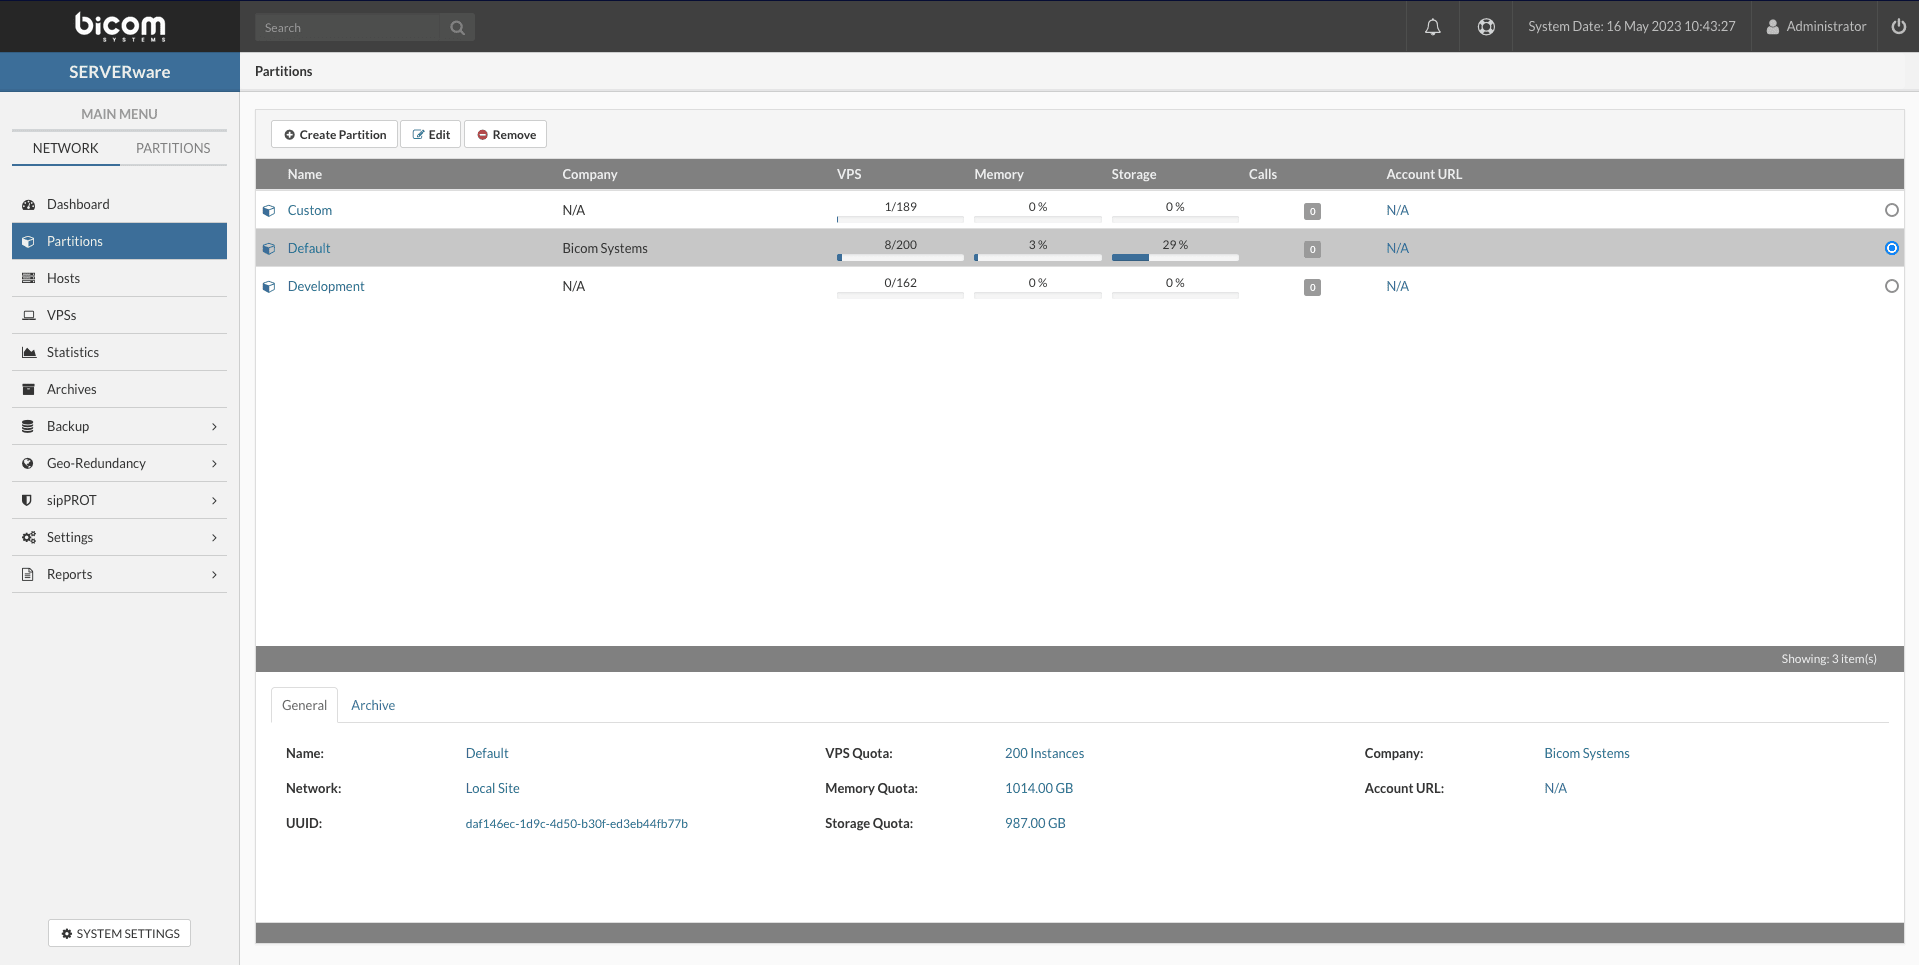
Create a partition
Follow this procedure to create a new partition:
In the Partitions, click on the button Create partition. The dialog box Create partition appears.
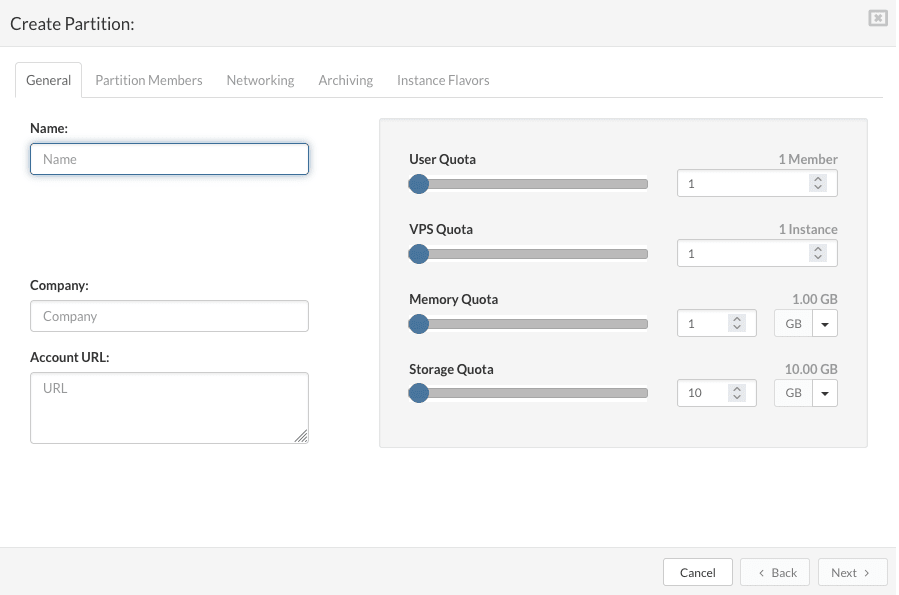
In the tab General, enter the details in the following fields:
- Name : a descriptive name for the partition.
- Company : the name of the company to which the partition belongs.
- Account URL : enter the company URL or leave empty.
- User quota : select the maximum number of members of the partition.
- VPS Quota : select the maximum number of VPS for the partition.
- Memory quota : select the maximum amount of RAM memory for the VPS of the partition.
- Storage quota : select the maximum amount of storage space for the VPS of the partition.
Click the button “Next” to configure the partition members in the “Partition members“.
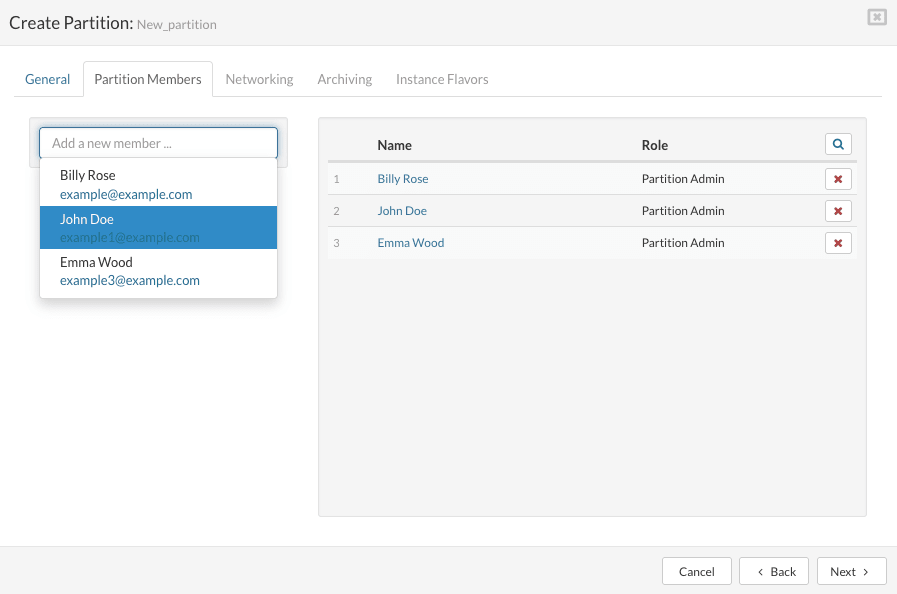
To add a user in the tab Partition members, select or search for an existing user in the drop-down list. The selected user with a pre-assigned role will appear in the partition members list. The next time they log in to the Web interface, the new partition member will be able to log in to the assigned partition and manage the VPS attached to it.
To delete a user, click the ❌ button of the selected user. A confirmation dialog box appears.
Click on Delete. The user disappears from the member list of the partition.
Click the button Next to configure the partition networking in the tab Networking.
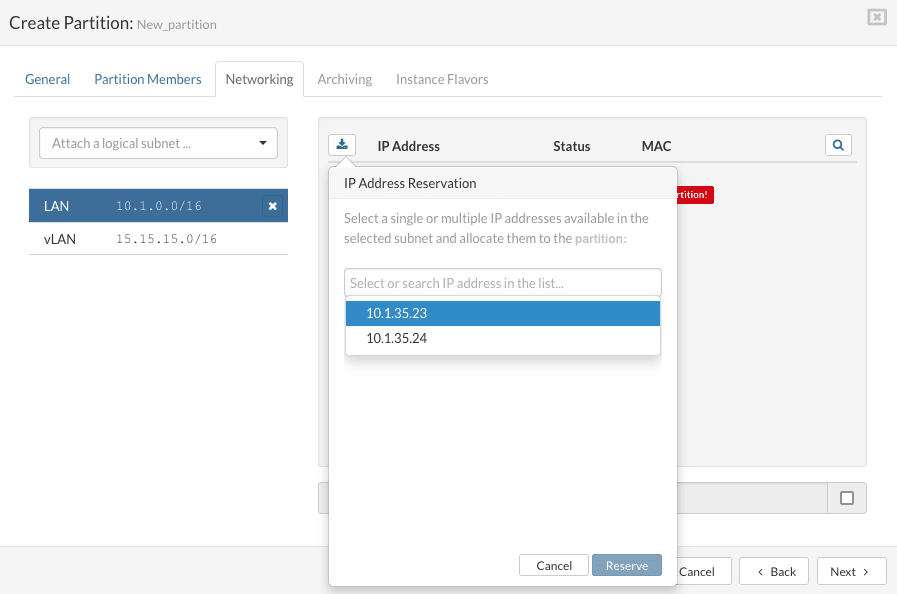
In the tab Networking, select the logical subnet to which you want to connect the partition's VPSs. Click on Reserve to open the dialog box Address Reservation. To add an IP address to the partition, select or search for the IP address in the list and click Reserve. The reserved IP address appears in the list. If there is no IP address to select for the reservation, use the menu Settings/Networking to expand the IP address pool.
To release an IP address from the partition, click the ❌ button for the selected IP address. A confirmation dialog box appears. Click Release. The IP address disappears from the IP pool of the partition.
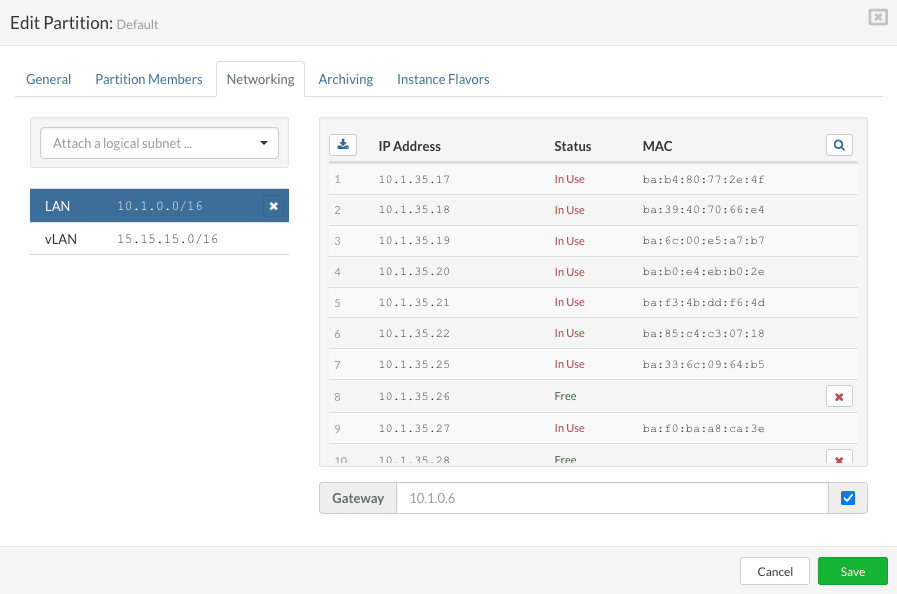
SERVERware administrators have the option to specify a different gateway (instead of using the default one) when attaching a subnet to a partition, allowing them to comply with the specific requirements of their Internet Service Provider (ISP) regarding non-standard network segmentation.
To configure the tab Instance flavors and select the resource types for the partition's VPS, follow these steps:
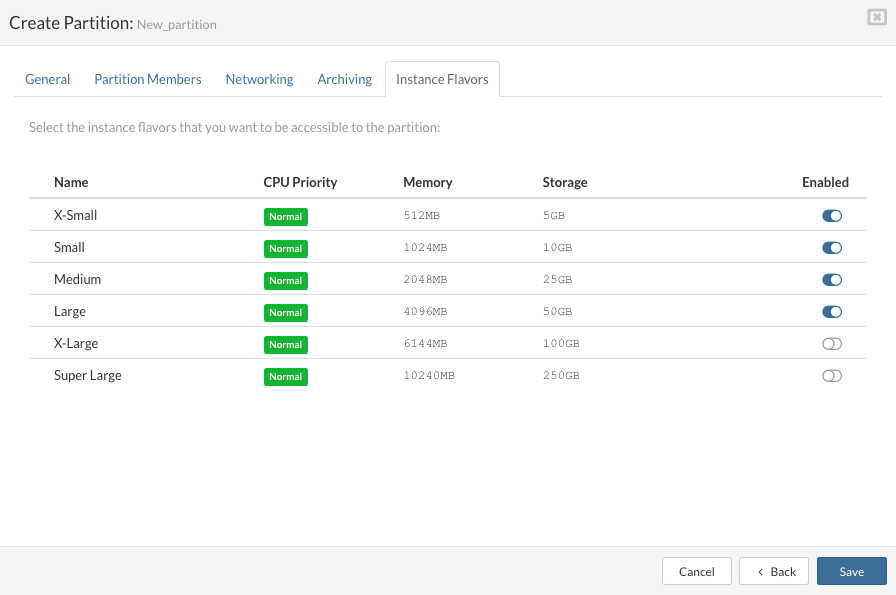
- Enable the resource types you want to make available for the partition.
- Click the button Save to initialize the creation of the partition.
A new entry representing the new partition will appear in the list.
