26. Admin settings
The site settings define options such as site users, user groups, backup, update and upgrade options.
API keys
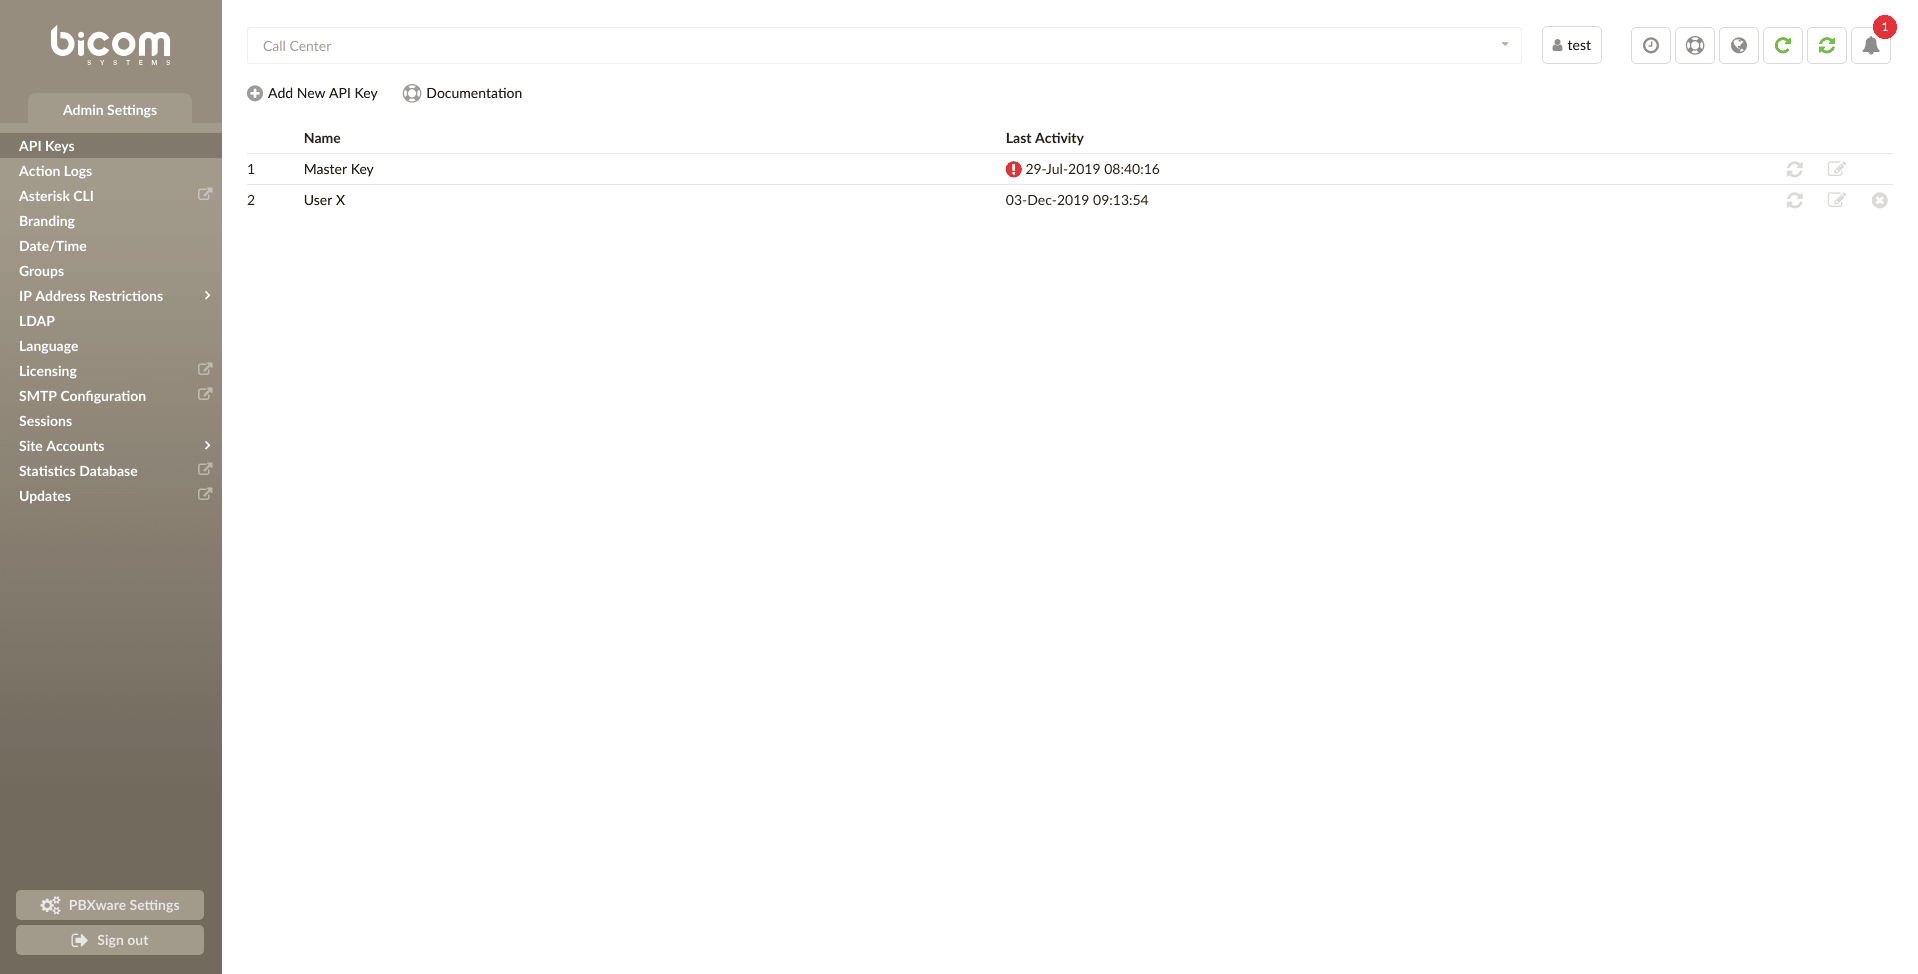
Here, you can generate random keys that are used for authentication with PBXware when using the PBXware API.
The page displays all currently created API keys. Each system has a master key which, by default, has all permissions set and cannot be deleted. The master key can be edited and its permissions can be modified. On new systems, the master key is generated randomly, while on upgraded systems, it will have the value of the previously used key.

- Add a new API key:
By clicking on the Add a new API key icon, you will open a page where you can generate a new API key and set permissions for that key. - Documentation:
By clicking on the Documentation icon, you will open a page containing additional information about the API.
Add/edit the API key
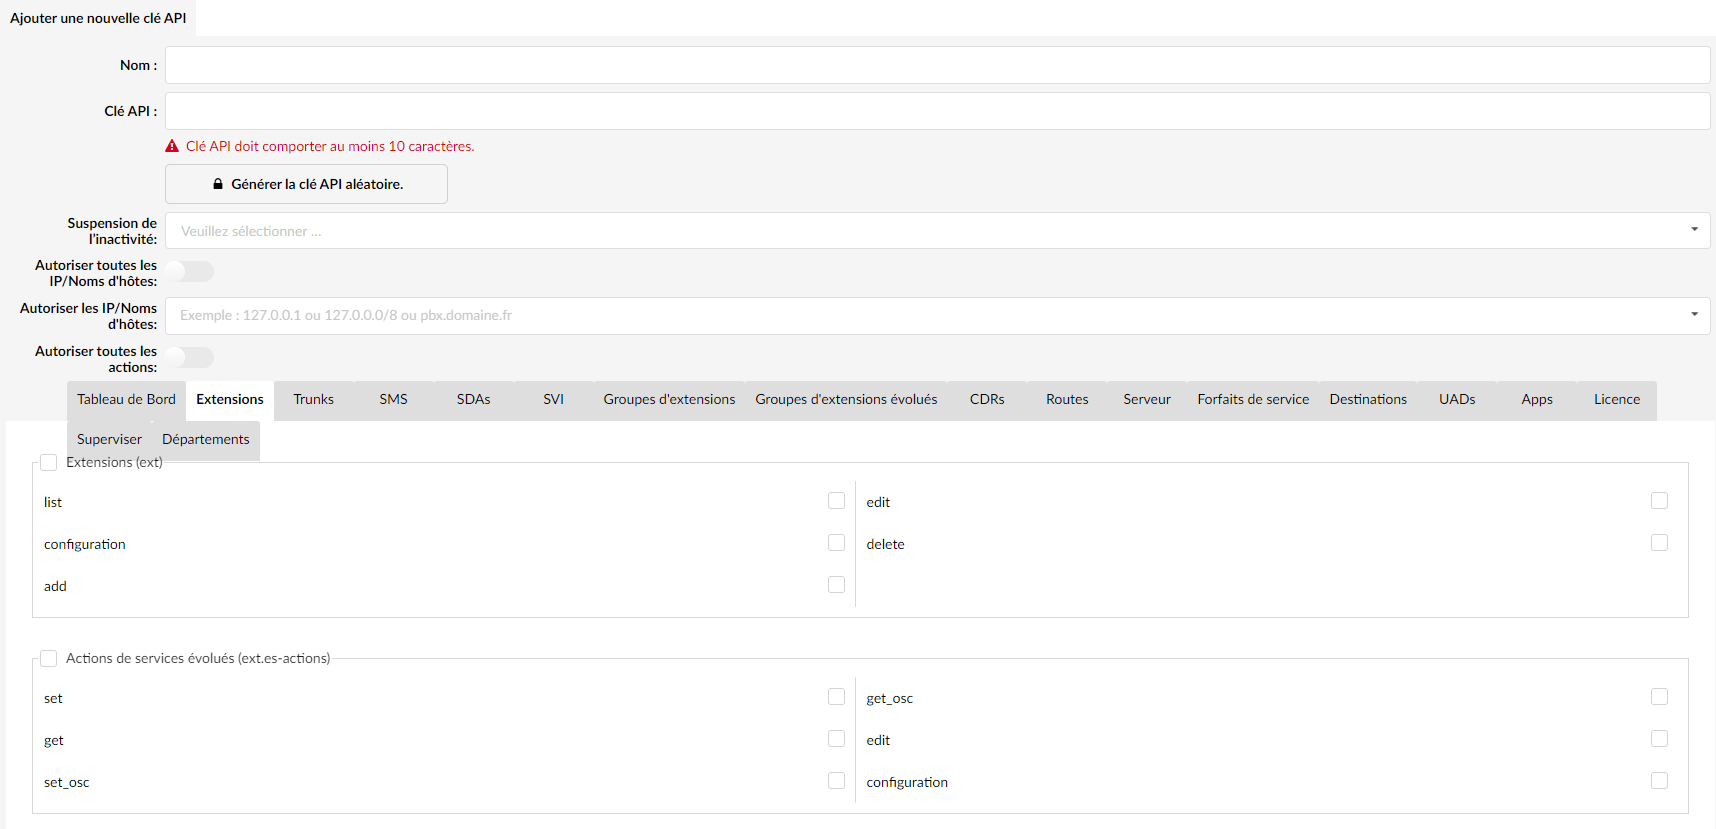
- Name:
A name for the API key. Used for presentation purposes only. - API key:
The generated API key. You can enter a key manually or generate one by clicking the Generate random API key button. - Generate the random API key:
By clicking on this button, a random API key will be generated. - Idle suspension:
If the API key has not been used during the selected period, it will be suspended. If the API key is suspended, you will see a red warning icon next to the Last Activity field on the main API keys page. You can reset the suspension by clicking the reset icon on the API keys page. The reset icon is located next to the edit and delete icons. - Allow all IPs/Hostnames:
If this option is enabled, API requests containing this API key can come from any IP address. If you want to allow only certain IP addresses or IP address ranges to use this API key, disable this option and a field titled Allow IPs/Hostnames will be displayed, in which you can enter a comma-separated list of IP addresses or IP address ranges that can send requests using this API key. - Allow IPs/Hostnames:
Visible only if the Allow all IPs/Hostnames option is disabled. Here you can enter a list of IP addresses or IP address ranges, separated by commas, that will be allowed to send requests using this API key. Any request coming from an IP address that is not in the list will be rejected.
(For example, 127.0.0.1,127.0.0.0/8) - Allow all actions:
If this option is enabled, the user can run any API method using this API key. The API methods are described in the API documentation, which can be found on the main API keys page. If the option is disabled, a field is displayed in which you can set the permission for each action separately.
Action logs
Action logs provide information about the changes made, who made them, and when they were made. It can also help you detect unauthorized access by storing information about the IP addresses used to connect to your PBXware.
Action log filters
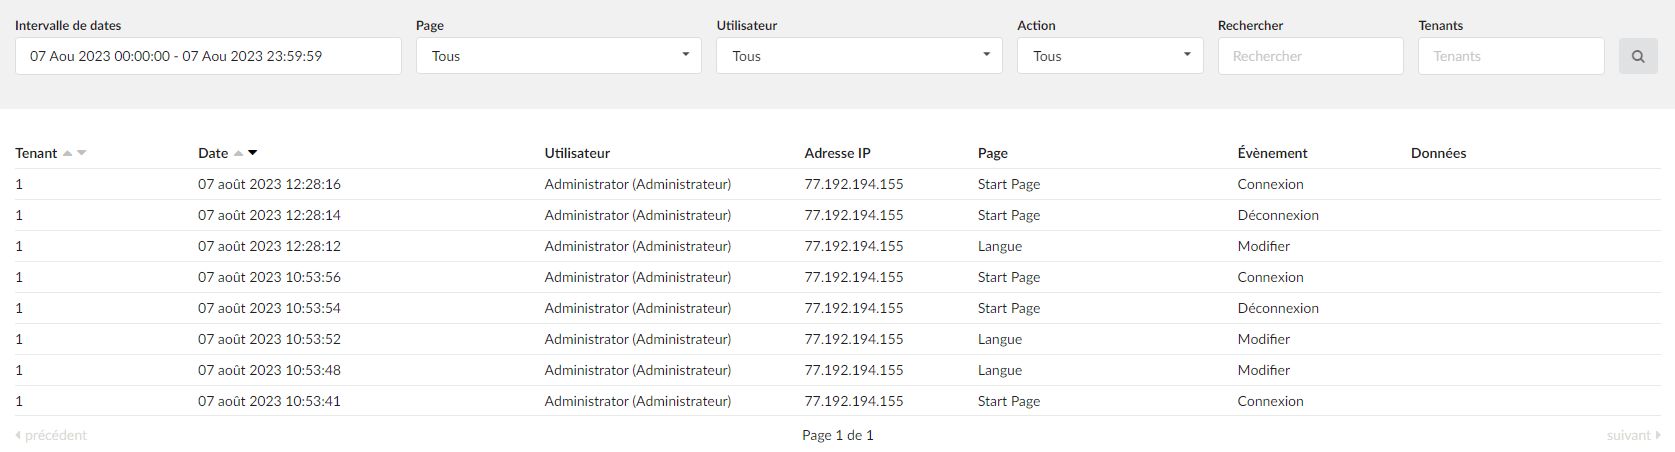
- Date range:
Period for which the user wants to view the action logs. - Page:
Filter the action logs on a specific page. This way, you can see all the changes made on a single page.
(For example, if you want to see all the changes made to the "Extensions" page, select "Extension"). - User:
Filter action logs by a specific user. This way, you can see all the changes a user has made to the system. - Action:
Every change made to the system is presented as an action. This filter allows you to search for a specific action in the action logs.
The action can be one of the following:- All
- Login
- Logout
- Add
- Edit
- Refresh
- Restart
- Reset
- Listen
- Download
- Drop a CSV
- Delete
- Search:
This field allows a more advanced search. The search can be performed from any value in the Data field or from an IP address.
(For example, 127.0.0.1 will display all action logs for actions originating from this IP address).
Action log fields
- Date:
Date on which the action was performed. - User:
Displays the user who performed the action. - IP address :
IP address from which the action request originates. - Page:
Page on which the action occurred. - Event:
The action completed. - Data:
Displays additional data on the completed action. The data varies depending on the action type and the page where it was performed.

Asterisk CLI
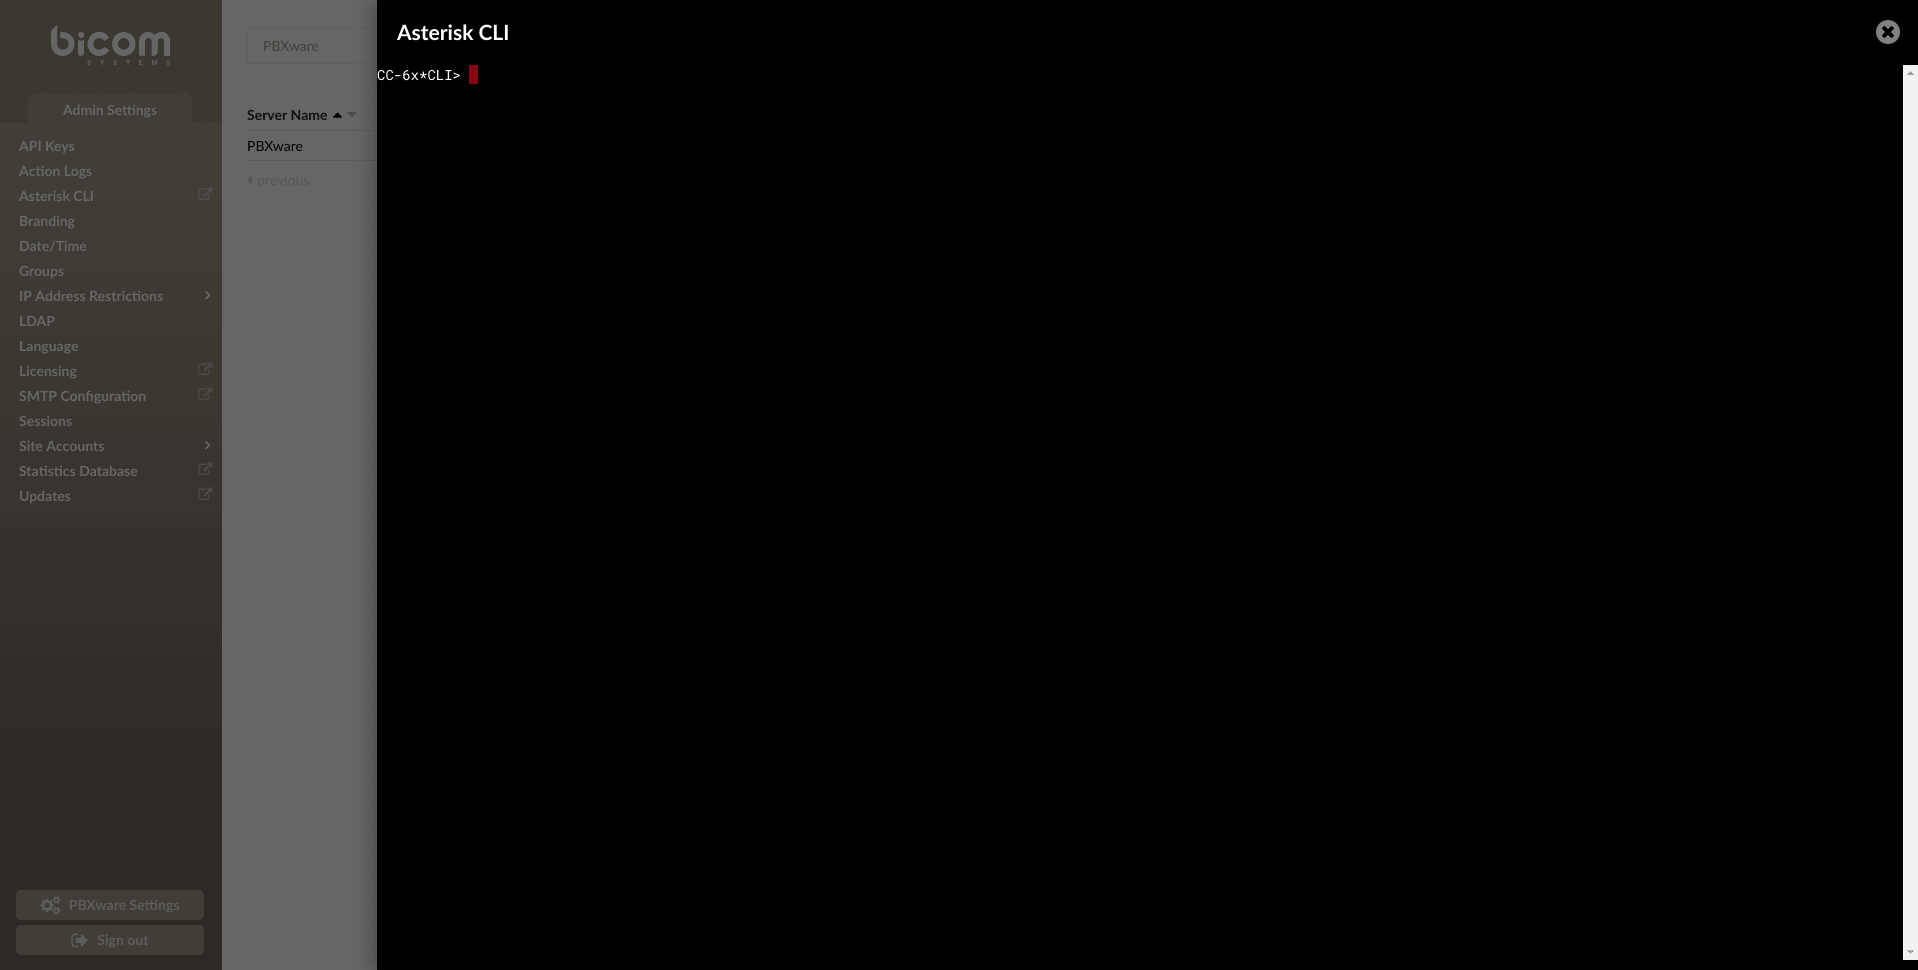
To make things easier for our customers who do not have much experience working in a terminal environment, there is an Asterisk CLI monitor built into its interface. The Asterisk CLI is accessible to the main administrative accounts of PBXware and does not require a root password to access it.
This may seem like a potential security issue, but we have avoided it by only allowing the execution of monitoring commands when using the Asterisk CLI in the browser. Apart from the limited permissions, you will be able to use debugging and other monitoring functions in the same way as if you were connected to the Asterisk CLI.
Customization
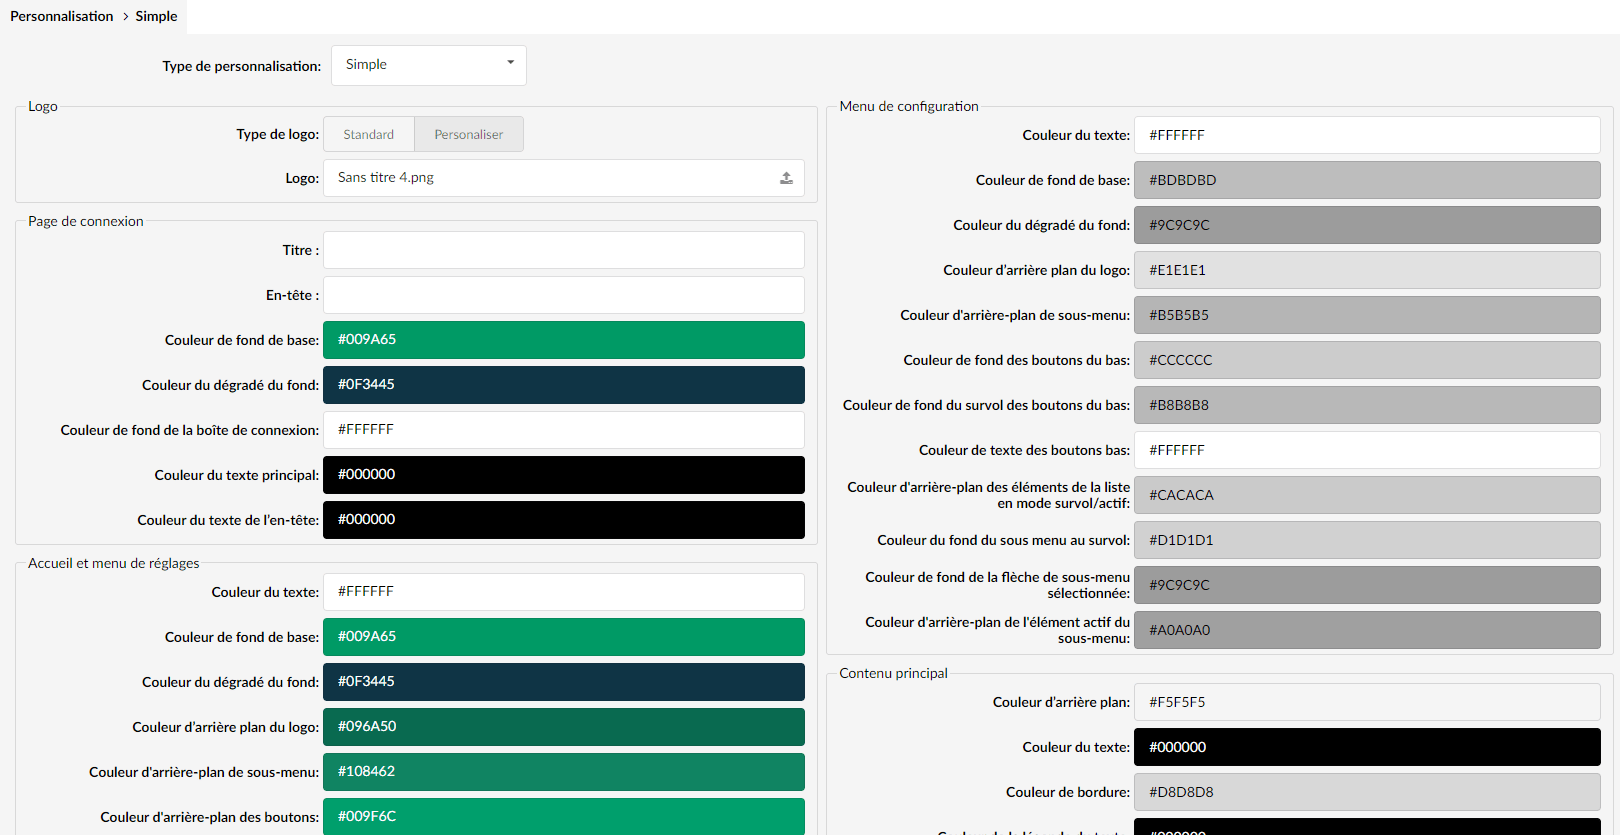
Although we have already made branding much easier to use for customers who have no experience writing CSS, the new interface goes even further, allowing customers to use a color picker to precisely define the color shade they want to use for each of the PBXware GUI elements. You can also change the logo, title, and header of the login page.
Two types of customization are available:
- Simple
- Advanced
By default, the customization type is set to Simple.
Web customization
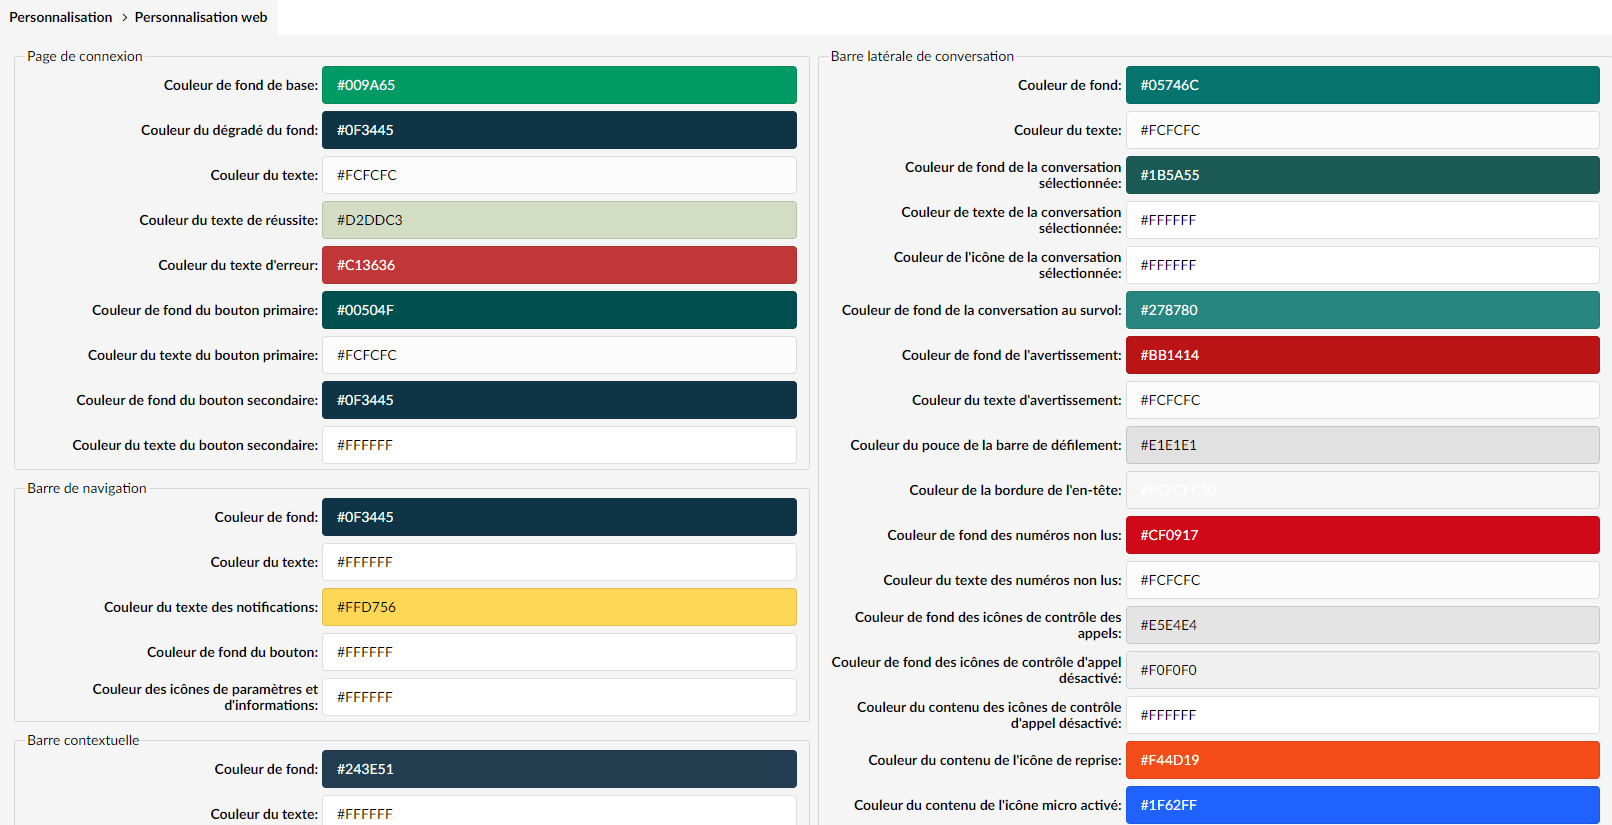
Web customization allows clients to modify the colors of the web application interface according to the colors they want. By choosing a value in a color picker, they can change the color of almost every element of the user interface.
After modifying the colors, the changes will not be applied until the “Save changes” button has been clicked and the application page has been reloaded.
Reset to default settings:
When you use the “Restore defaults” button, all customization colors are returned to the system default colors.
Date/Time
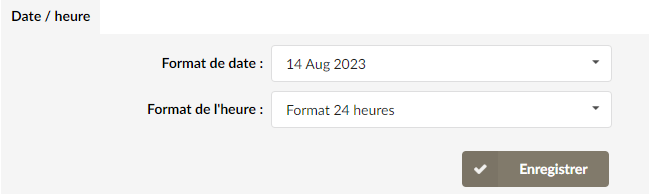
- Date format:
Sets the appropriate date format displayed in the system interface. - Time format:
Sets the time format displayed in the system interface.
Groups
Groups allow a unified permission system, enabling users to access various applications or parts of applications.

Each site can modify existing groups or add new ones according to its needs by clicking the appropriate action buttons. When adding/modifying, the permissions and the group name can be changed.
Add/edit a group
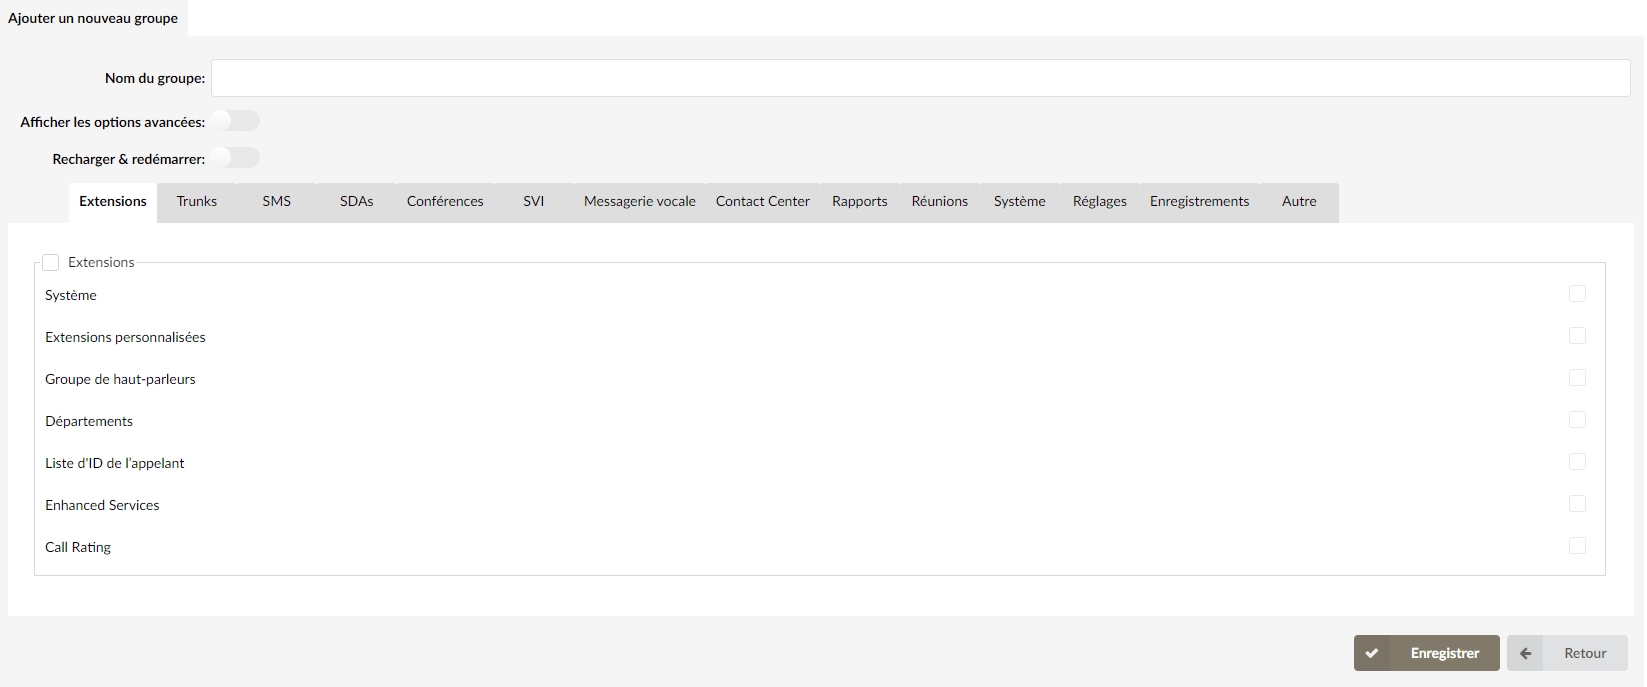
- Group name:
Group name. - Show advanced options:
Enabling this option allows users who are members of this group to view and modify the advanced options of the sections in PBXware. - Reload & restart:
By enabling this option, users who are members of this group will have the ability to reload and restart actions.
The fields under the options mentioned above are there so you can set the permissions for each page of the system. Most options are self-explanatory checkboxes. The option name represents the page, and if the box is checked, users who are members of this group will be able to view and edit the page.
(For example, under Extensions, if the System option is checked, the user will be able to see the Extensions > System page. If the box is not checked, the page will not be visible).
Permissions that are not simple checkboxes or that are not associated with an entire page, but only with part of the page, are explained below:
- Reports > Show call rating cost:
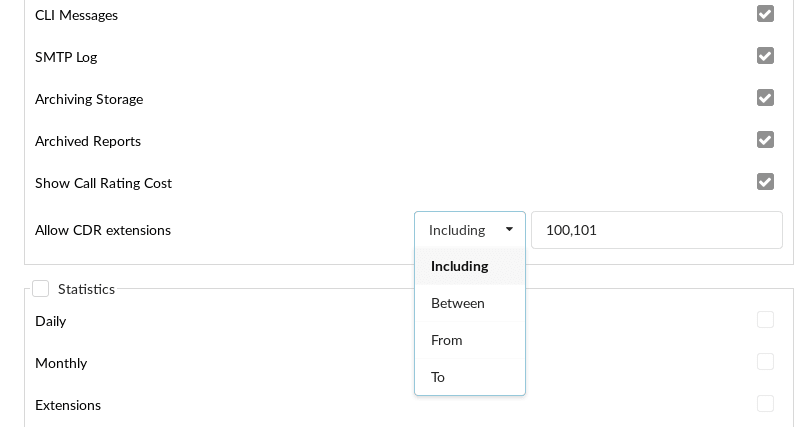
If this permission is enabled, users who are members of this group will be able to see the call assessment cost on the CDR page, the CDR CSV download, and the CDR email. If this permission is disabled, the Call assessment cost field will not be displayed on the aforementioned pages. - Reports > CDR extensions:
This option allows you to limit the extensions that users who are members of this group will be able to see on the CDR page. If this field is not empty and is filled with a comma-separated list of extensions, the CDRs displayed will be limited according to the drop-down list located to the left of the field. You can choose the type of limitation using the options in the drop-down field.- Including: Show only the CDRs where the caller OR the call recipient is one of the extensions in the list.
- Between: Show only CDRs where both the caller AND the call recipient are extensions from the list.
- From: Displays only the CDRs where the caller is one of the extensions in the list.
- To: Display only the CDRs where the call recipient is one of the extensions in the list.
IP address restrictions
The IP Address Restrictions page allows you to define whether certain IP address ranges are accessible or forbidden, depending on the blacklist/whitelist selection in the Settings menu.

Policies
Add/edit IP restriction policies that dictate which IP ranges can/cannot access the PBXware user interface.
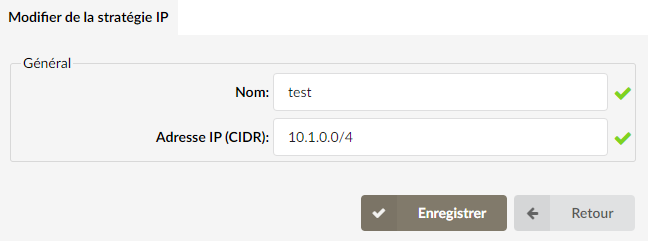
When you add/edit a policy, you must define the name and IP range for the current policy.
General
- Name:
Name describing this policy. - IP address (CIDR) :
IP address from which users will or will not be able to access the PBXware user interface.
Settings
IP restriction settings
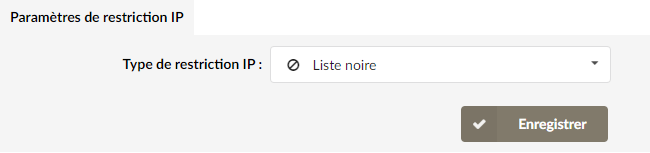
- IP restriction type:
Select whether the defined policies will be whitelisted or blacklisted.- If Whitelist is selected, all defined policies will serve as a whitelist, meaning that users can access the PBXware user interface only from the IP addresses defined in the policies.
- If the Blacklist option is selected, all defined policies will serve as a blacklist, meaning that the IP addresses defined in the policies will be blocked.
LDAP
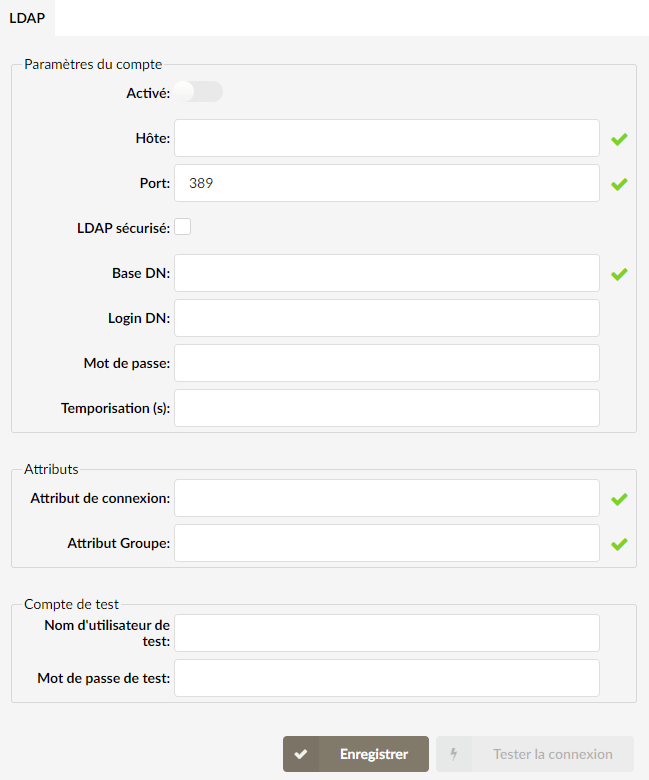
PBXware's LDAP integration allows users with an Active Directory or OpenLDAP account to authenticate to PBXware using their LDAP credentials.
Language
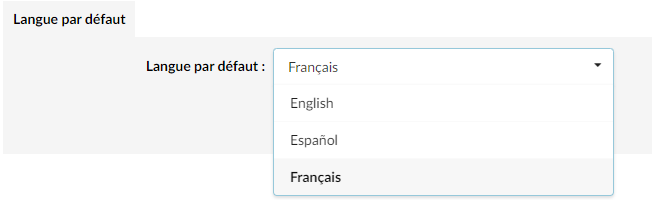
Here you can set the default language of the PBXware user interface.
The available languages are as follows:
- English
- Español
- French
By default, English is selected.
SMTP configuration
The system sends notifications and alerts by email to various users and administrators during its operation. For normal operation, sending emails requires that the user have a remote SMTP server through which the emails will be sent.
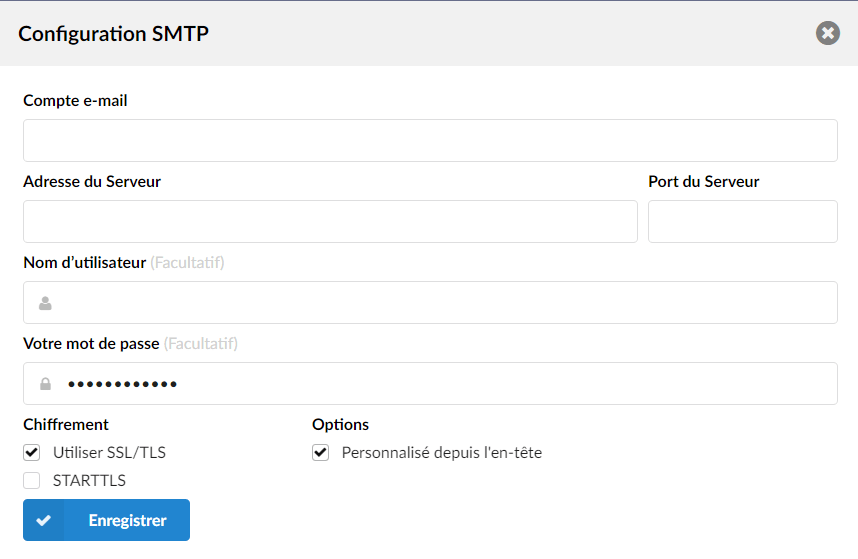
- Email account:
Address to which the email will be sent if a recipient is not specifically defined. - Server Address :
The host to which mail is to be sent, in the form "host | IP_addr". - Server Port:
Port used to send emails to the host. - Username:
Username used for SMTP AUTH. - Your password:
Password used for SMTP AUTH
Encryption
- SSL/TLS:
Indicates whether SMTP uses the SSL/TLS protocols to communicate with the SMTP server
Disabled by default. - STARTTLS:
Specifies whether SMTP performs an EHLO/STARTTLS before starting the SSL negotiation. - Options:
Custom "From" header
When this option is enabled, the “From” email address that will be used is the one defined in the “Email account” section of the SMTP configuration. If this option is unchecked, the email account from which emails will be sent will be presented as root@email.com.
Session
To prevent any unauthorized access to the PBXware web interface, we have created an automatic account suspension feature. By default, accounts will be suspended after 5 unsuccessful login attempts in 1 minute, but users can modify these values to suit their preferences. Once an account is suspended, it must be unlocked by the administrator.
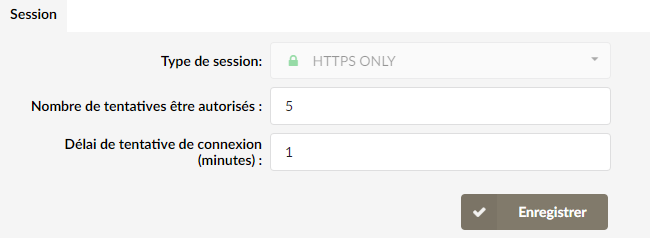
- Session type:
The session type describes the type of connection that will be used to connect to the PBXware user interface.
Available options:
- HTTPS only – The complete data stream between the system and the GUI user is secured using SSL.
- Number of attempts to be allowed:
Maximum number of login attempts during a period defined in the “Login attempts period” field, after which the account will be suspended. - Login attempt delay (minutes):
Period during which the user can make a certain number of errors (defined in the “Number of allowed login attempts” field) while logging in.
If the user reaches this number of login attempts during this period, they will be suspended.
Site accounts
Management page for administrator and user accounts.

Administrators
- Add a new administrator:
Opens a page where you can add a new administrator account. - Search:
Search for accounts by name or by email. - Name:
Displays the administrator's name. - Email:
Displays the administrator's email address. - Last login:
Displays the date and time of the administrator's last login. - Two-step verification:
Indicates whether 2-step verification is configured for the account. For more information on 2-step verification, see the page Account settings > 2-step verification configuration. - Status:
Displays the account status (whether the account can be used or is disabled). - Reset connection status:
This button allows you to reset the login status of the selected account. This will activate the account, refresh its last login time, reset two-step verification and check the “Change password at next login” option for this account.
Use this option if the account is disabled due to inactivity or if you simply want to reset the aforementioned options. - Edit:
 By clicking on this icon, you will open a page where you can modify the account options and preferences.
 - Delete:
 This option allows you to delete the selected administrator account.
Add/edit an administrator
On this page, you can add a new GUI administrator or modify an existing administrator.
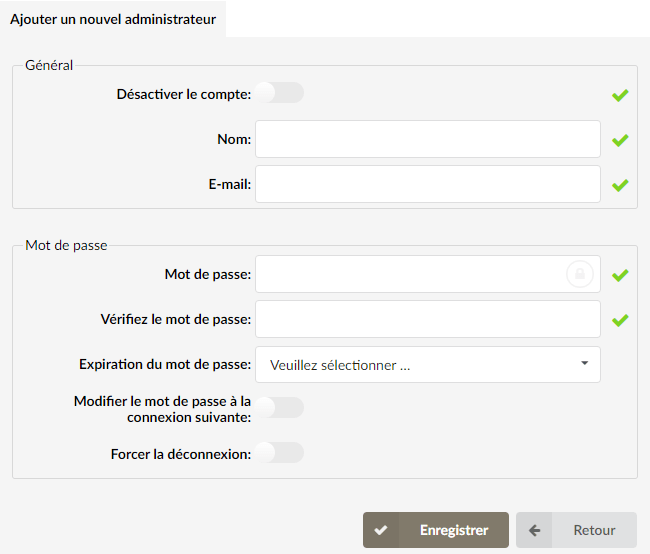
General
- Disable the account:
If this option is enabled, the account will be marked as disabled and the administrator will not be able to log in.
This does not affect accounts that are already logged in. - Name:
Name of the new account. - Email:
Email address used to log in to the account.
Password
- Password:
Password used for login. - Check the password:
Verify the given password. - Password expiration:
A drop-down field in which you can choose a predefined period for password expiration. The administrator will be prompted to change their password after the given period.
(For example, if you select 6 months, if 6 months have passed since the last password change, the administrator will be prompted to change their password on their next login).
This field overrides the field in Site accounts -> Settings -> Password expiration. - Change password at next login:
If this option is enabled, at the next login, the administrator will be prompted to change their password and will not be able to continue until the password has been changed.
- Add a new user:
Opens a page where you can add a new user account. - Search:
Search for accounts by name or by email. - Name:
Displays the user's name. - Email:
Displays the user's email address. - Group:
Displays the group to which the user is assigned. - Last login:
Displays the date and time of the user's last login. - Two-step verification:
Indicates whether 2-step verification is configured for the account. For more information on 2-step verification, see the page Account settings > 2-step verification configuration. - Status:
Displays the user's status (whether the user's account is OK (enabled and in use) or disabled). - Reset connection status:
This button allows you to reset the login status of the selected account. This will activate the account, refresh its last login time, reset two-step verification and check the “Change password at next login” option for this account.
Use this option if the account is disabled due to inactivity or if you simply want to reset the aforementioned options. - Edit: By clicking on this icon, you will open a page where you can modify the account options and preferences.
- Delete: This option allows you to delete the selected user account.
Add/edit users
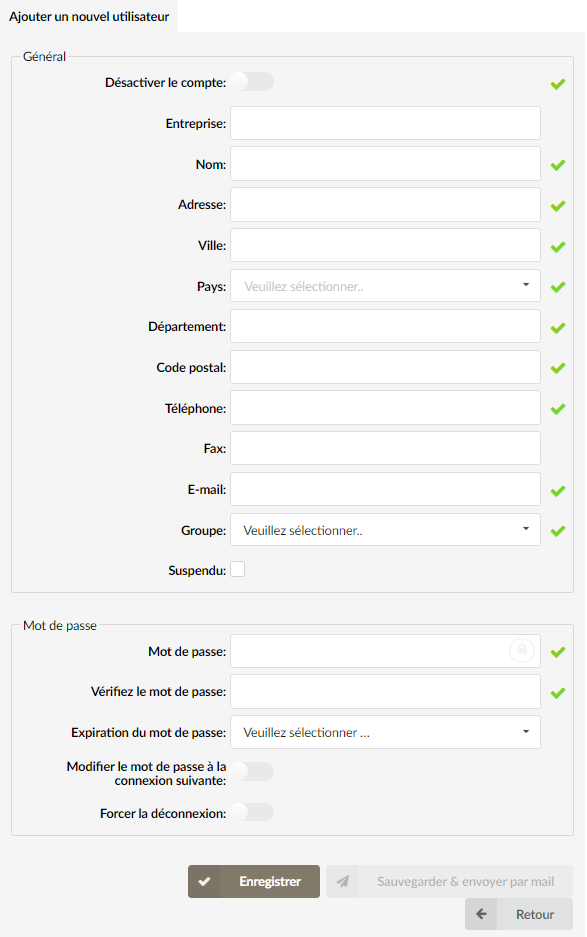
General
- Disable the account:
If this option is enabled, the account will be marked as disabled and the user will not be able to log in.
- Company:
Enter the name of the company where the user is employed. - Name:
Enter the user's name. - Address :
Enter the user's address. - City:
Select a city in which the user works. - Country:
Select the country in which the user works. - Department:
Select a department or State in which the user works. - Postal code:
Enter a postal code. - Phone:
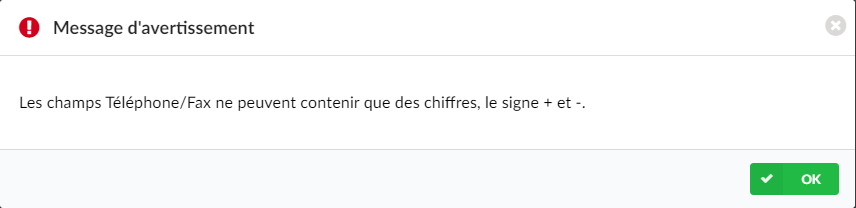
Enter the user's phone number.
Settings
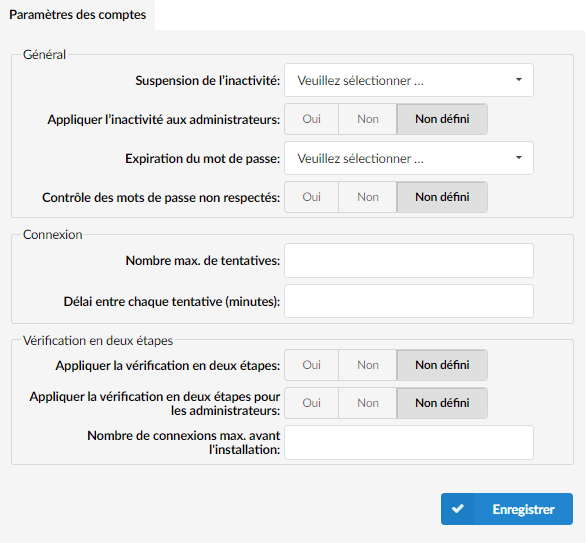
General
- Idle suspension:
Define a period during which accounts may be inactive. If an administrator’s or user’s last login is older than the defined period, the account will be marked as disabled and the administrator or user will not be able to log in.
Another administrator can edit the account to reactivate it.
By default, this option does not apply to administrator accounts. - Apply inactivity to administrators:
If the value is “Yes”, the “Inactivity Suspension” option will also apply to administrator accounts. - Password expiration:
A drop-down field in which you can choose a predefined period for password expiration. Administrators/users will be prompted to change their password after the given period.
(For example, if the 6 months option is selected, if 6 months have passed since the last password change, the administrator/user will be prompted to change their password on their next login). - Failed password control:
If this option is set to Yes, the password will be looked up on the API https://haveibeenpwned.com at the same time as checking the password strength.
https://haveibeenpwned.com is a website that allows Internet users to check whether their personal data has been compromised in data breaches. The service collects and analyzes hundreds of databases and pastes containing information about billions of leaked accounts, and allows users to search for their own information by entering their username or email address. The API also allows the user to check whether a password is in the database and how many times it has been used. This helps ensure that our password is not one of the most commonly used passwords and that the search is completely secure.
It is recommended to set this option to Yes.
Statistics database
For more information on installing ClickHouse, please consult this link.
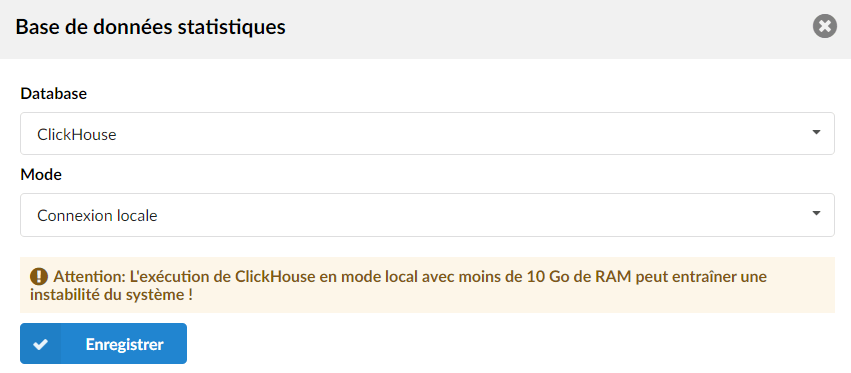
- Database:
Select an appropriate database.
- Mode:
Select an appropriate mode.
If the user chooses “ClickHouse” as the database, the options may vary depending on the chosen mode. Please refer to the following:
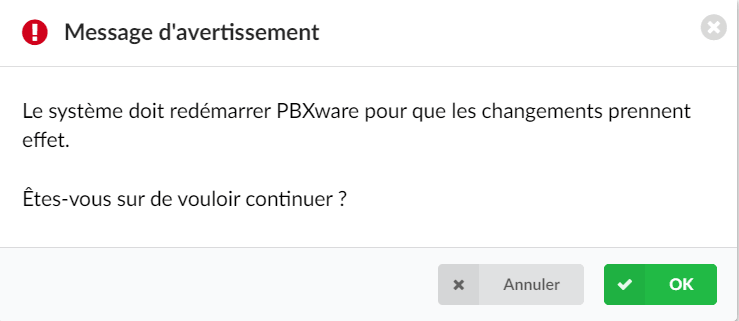
- Mode: Local connection.
- Mode: Remote connection.
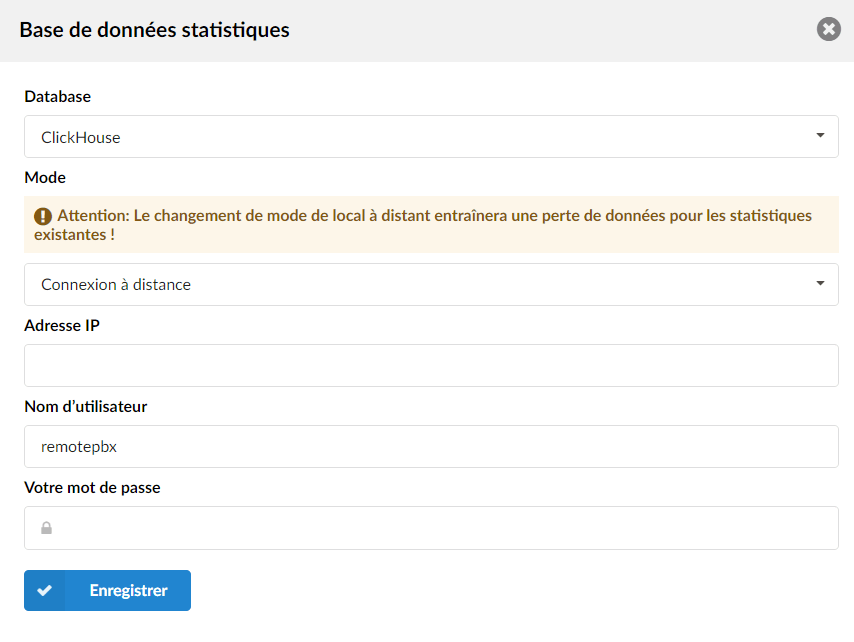
- IP address :
Enter the appropriate IP address. - Username:
Enter the username. - Password:
Enter the password.
- IP address :
Mode: Act as server
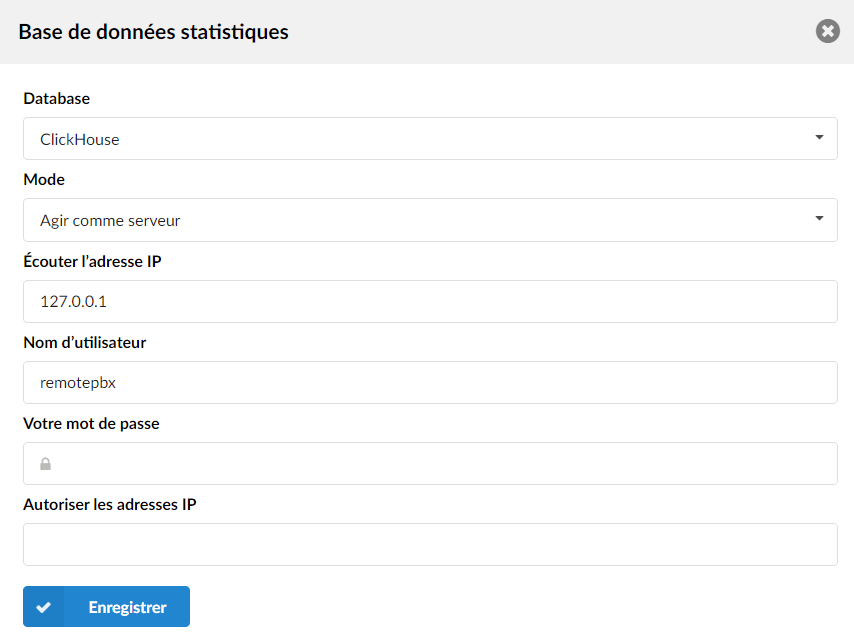
- Listen on IP address:
127.0.0.1 - Username:
Enter the username. - Password:
Enter the password. - Allow IP addresses:
Enter the allowed IP addresses.
Updates
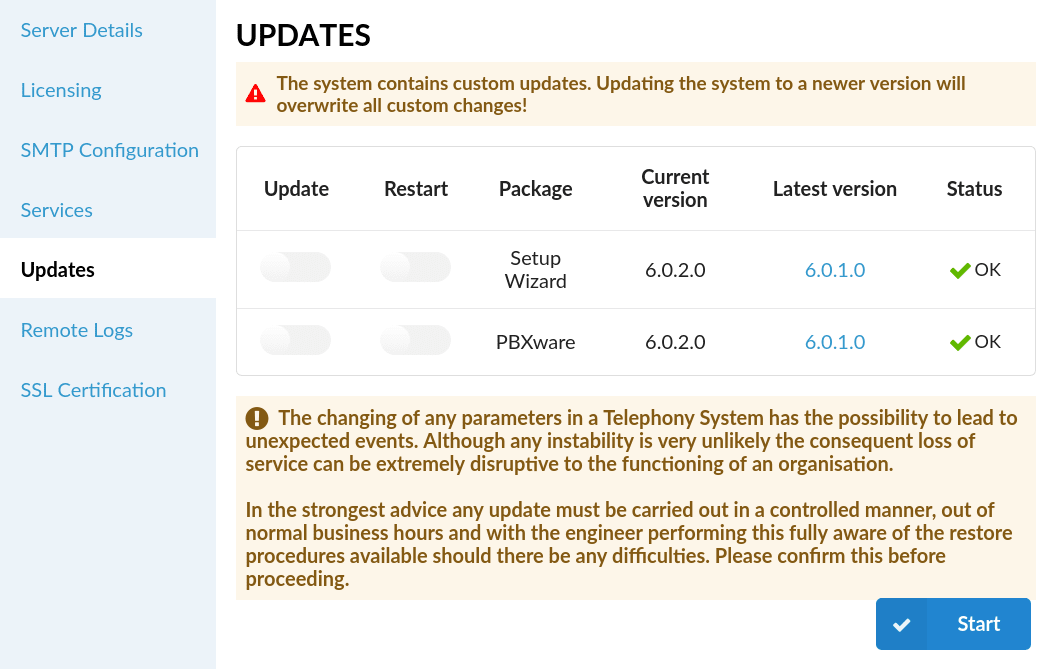
The section Updates allows users to obtain additional information about the package, the current version, the latest version, and the status. Users can also update or restart the system from this section.
Support access
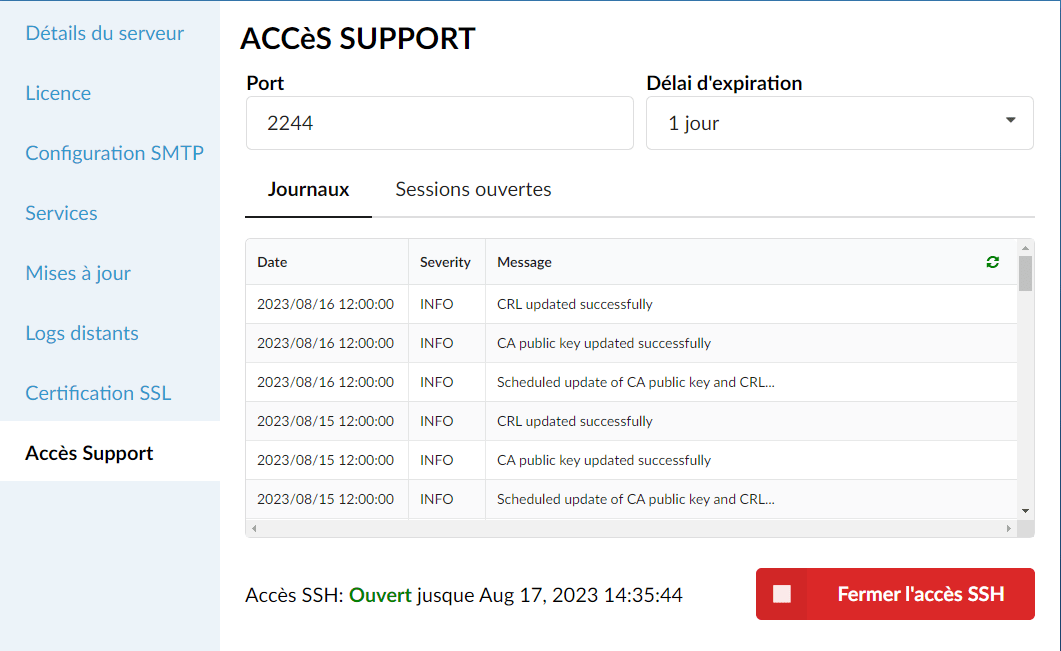
To enable support access, please go to the “Support access” page of theconfiguration wizard.
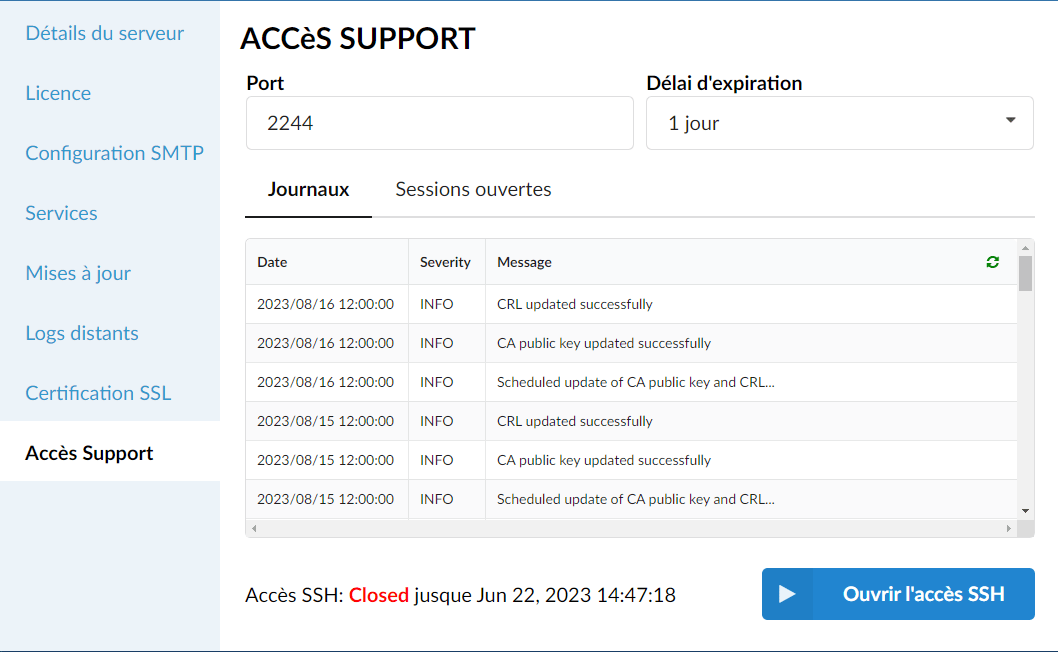
- Port:
Set the port that will be used to open SSH access.
- Logs:
This page displays the 50 most recent messages from the support access log. Here you will find information about opening/closing access, who logged into the system and when, as well as any errors that may have occurred. - Open sessions:
This page displays all currently open SSH sessions. - Open/close SSH access:
The button is used to open/close SSH access. Opening SSH access will enable support access on the entered port for the duration of the timeout.